Create course content using the lesson editor
Last updated: July, 2026
The lesson editor gives you tools to build lessons and control their settings. This guide will walk you through the lesson editor and show you how to add content that your members will love.
Get familiar with the lesson editor
The lesson editor is where you build your course content. You can add text and media to each lesson, and adjust lesson settings from the same view.
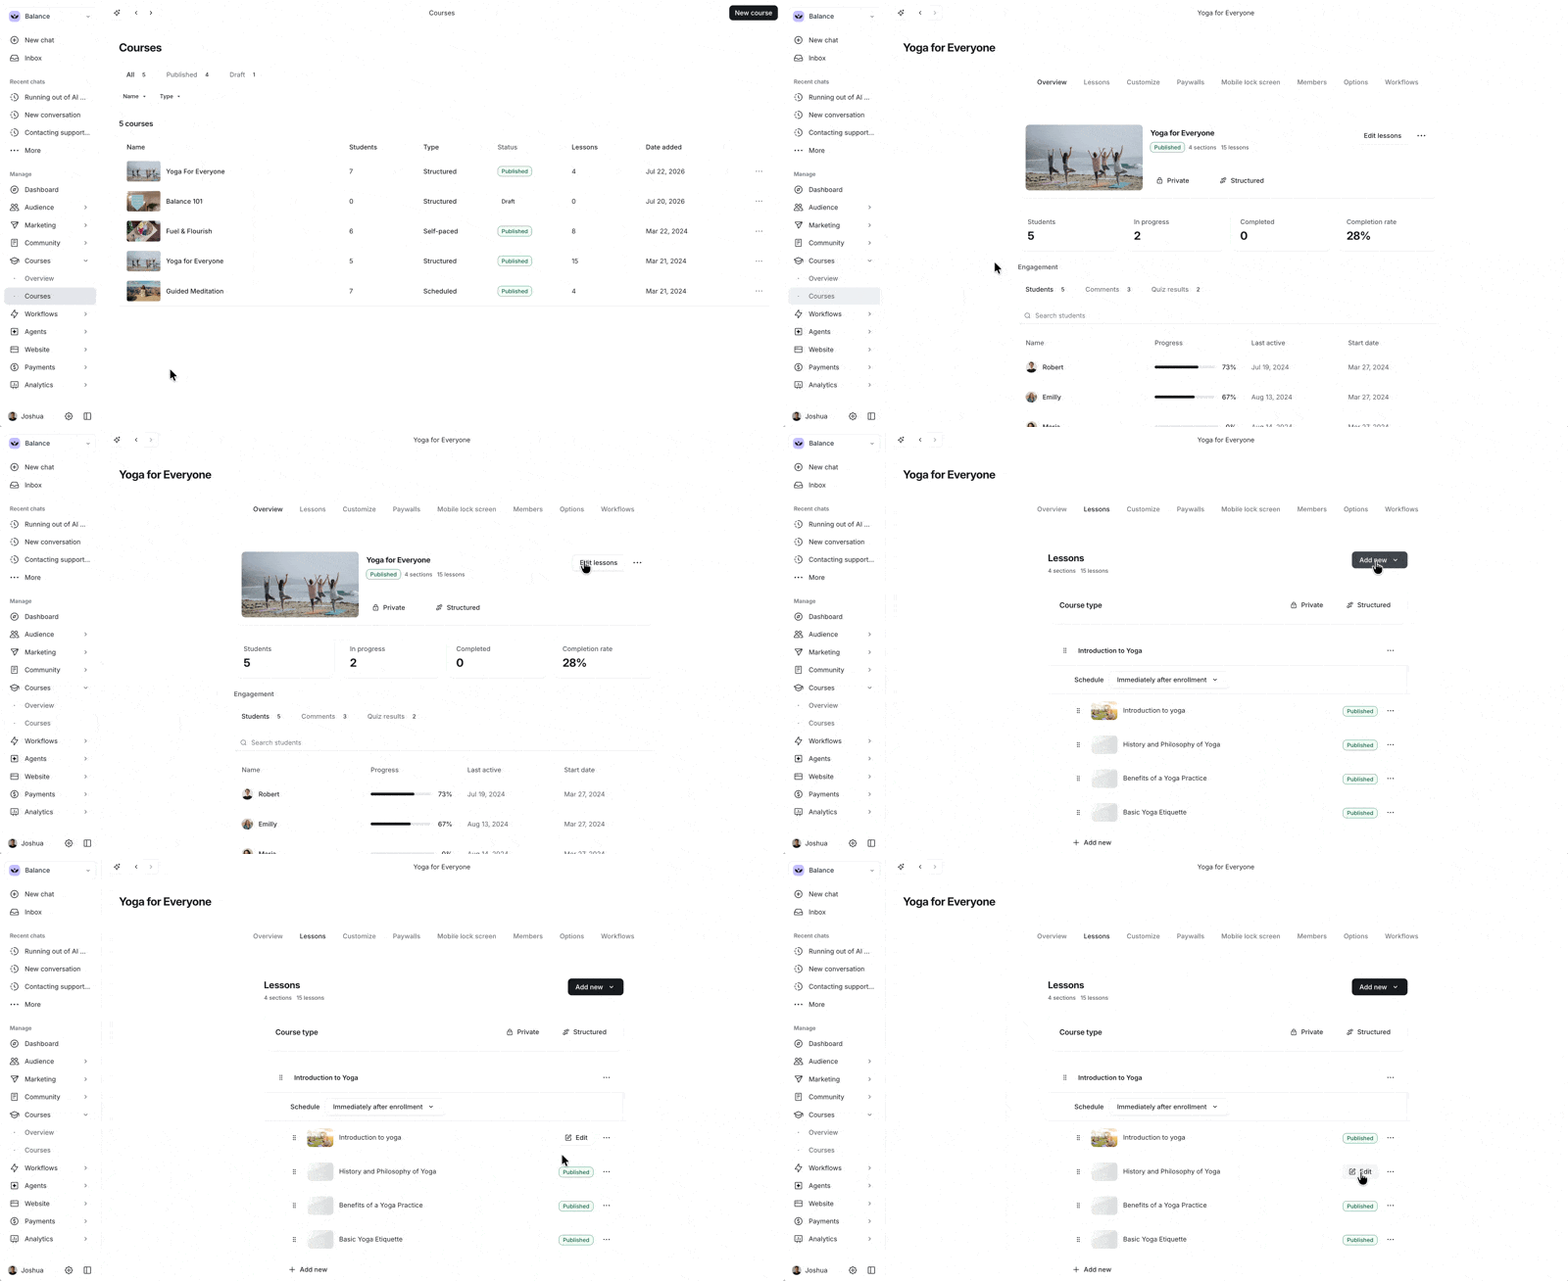
To navigate to the lesson editor:
Go to your course space.
Click the Edit lessons button in the course dashboard.
-
Hover over the lesson and click Edit to open the editor.
💡 Tip: If you haven’t created a lesson yet, see our course curriculum guide for a step-by-step guide.
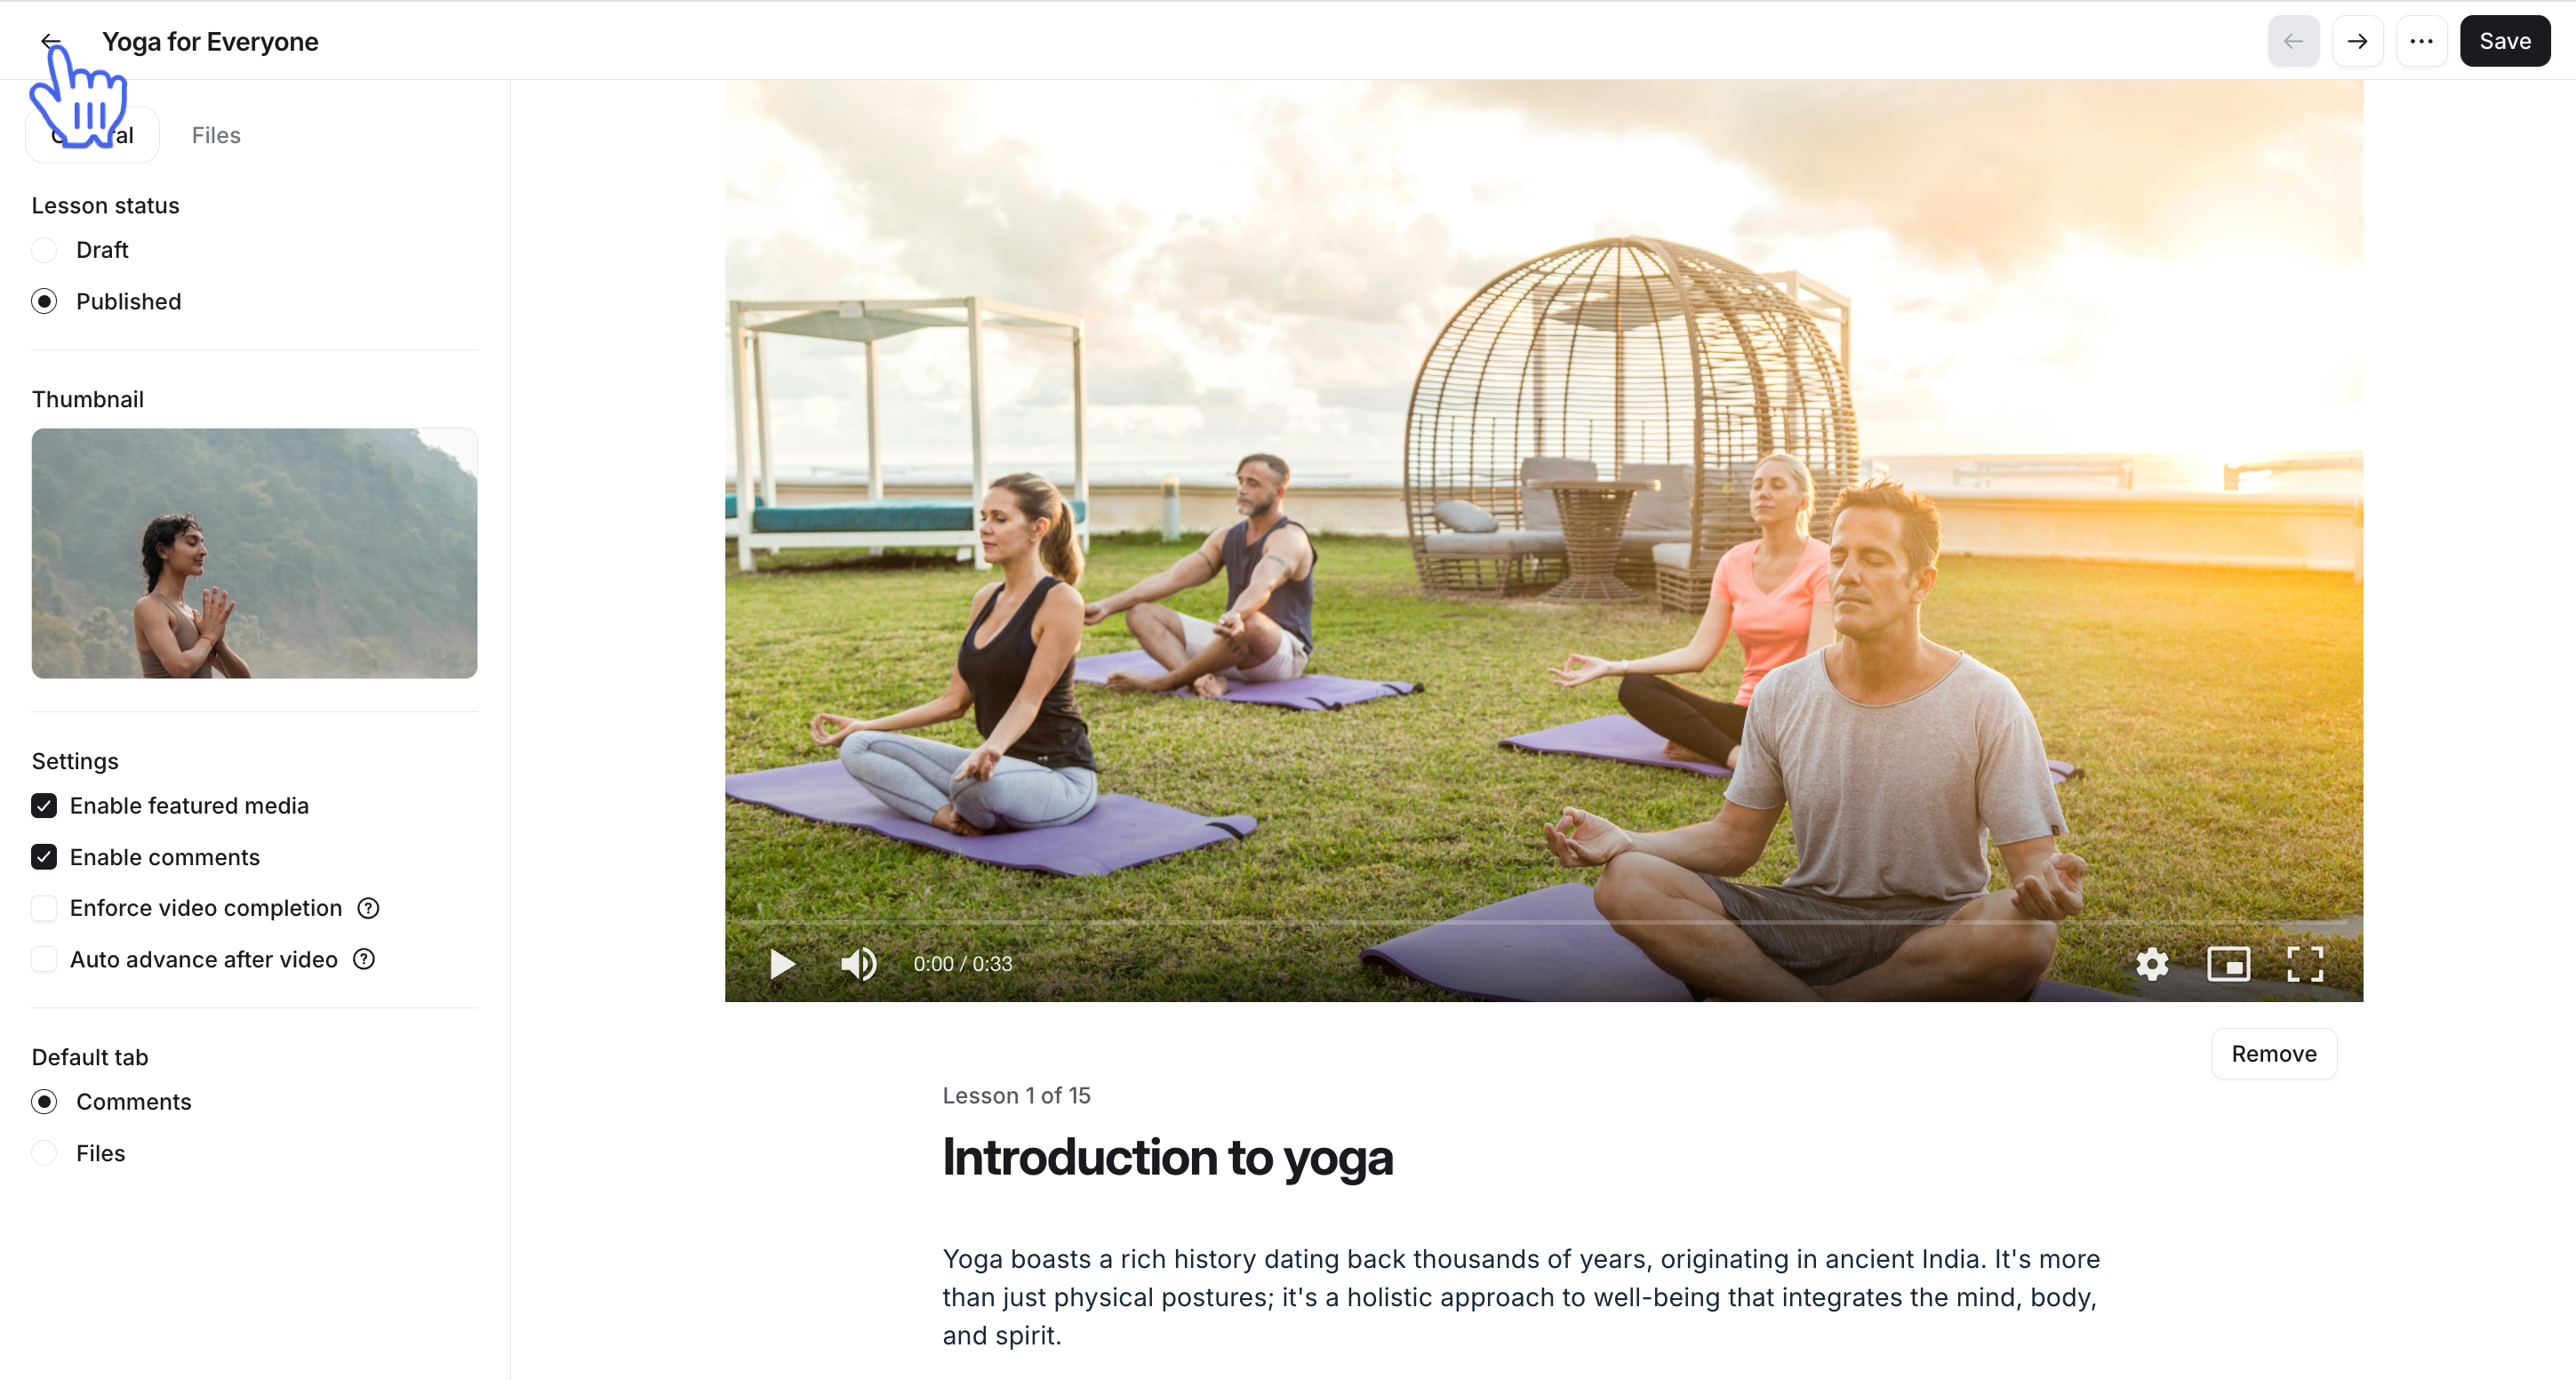
The lesson editor’s interface is divided into three main areas:
Navigation bar: Preview the lesson, save changes, and return to the curriculum.
Lesson settings: Access lesson-specific general settings and file manager.
Lesson body: Add lesson content, upload featured media, and navigate between lessons.
The navigation bar offers the following options when you are using the lesson editor:
-
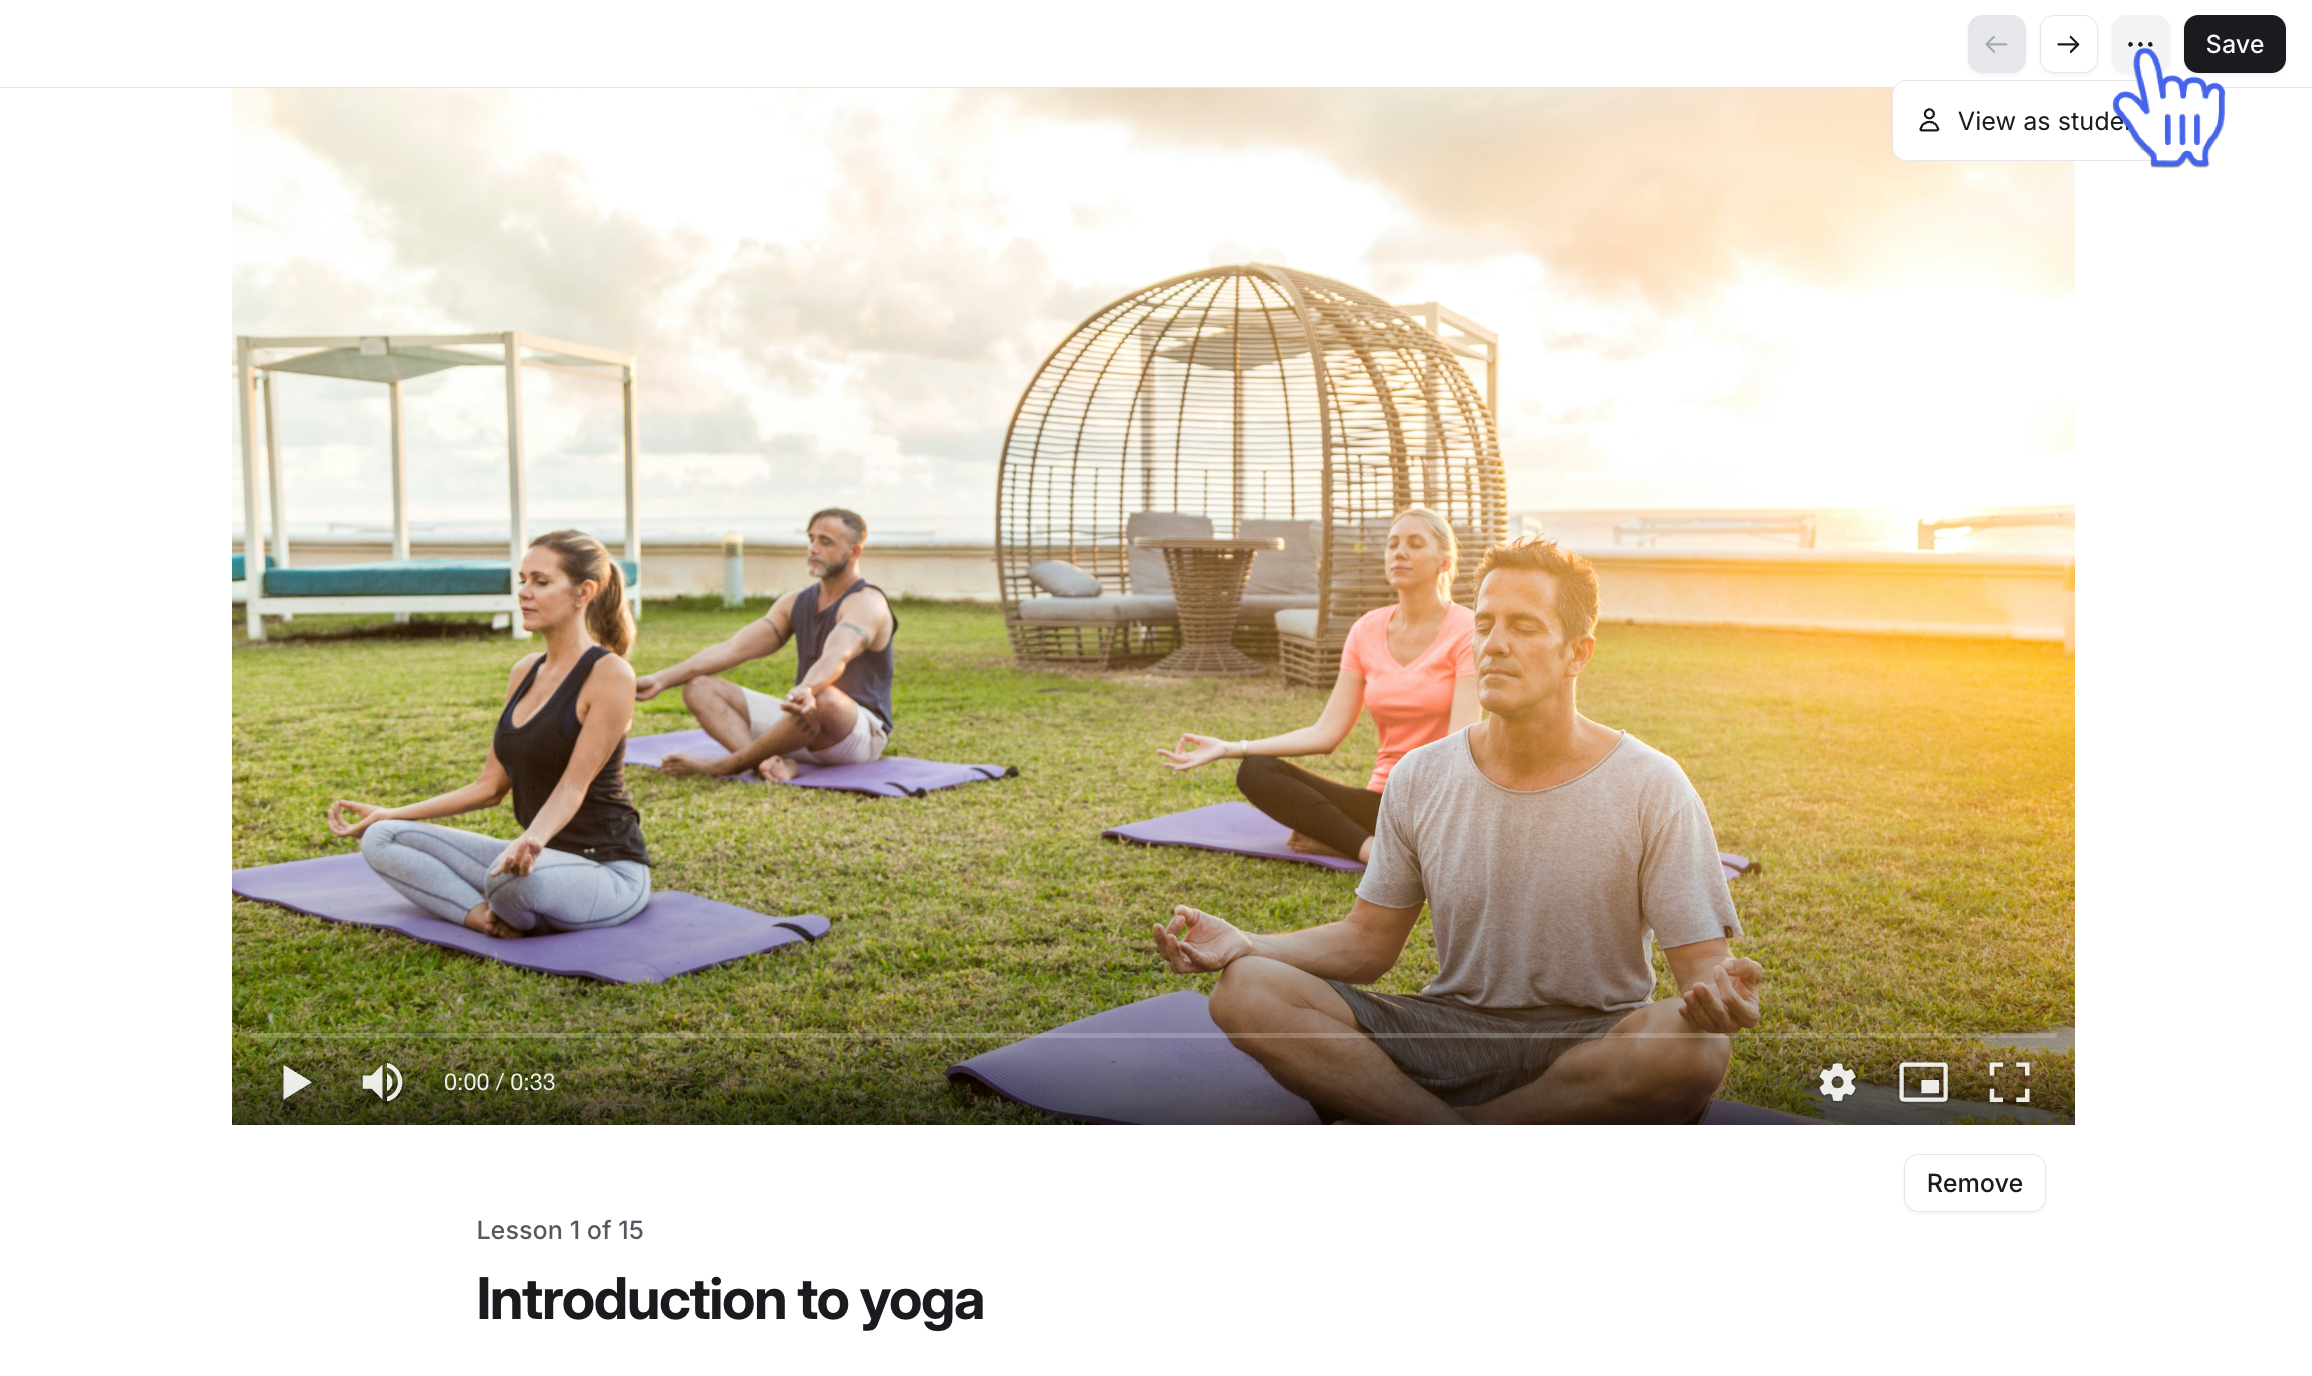
Preview lesson: Review your draft as an enrolled member by clicking the More actions (three dots) icon at the top-right corner and selecting View as student.
-
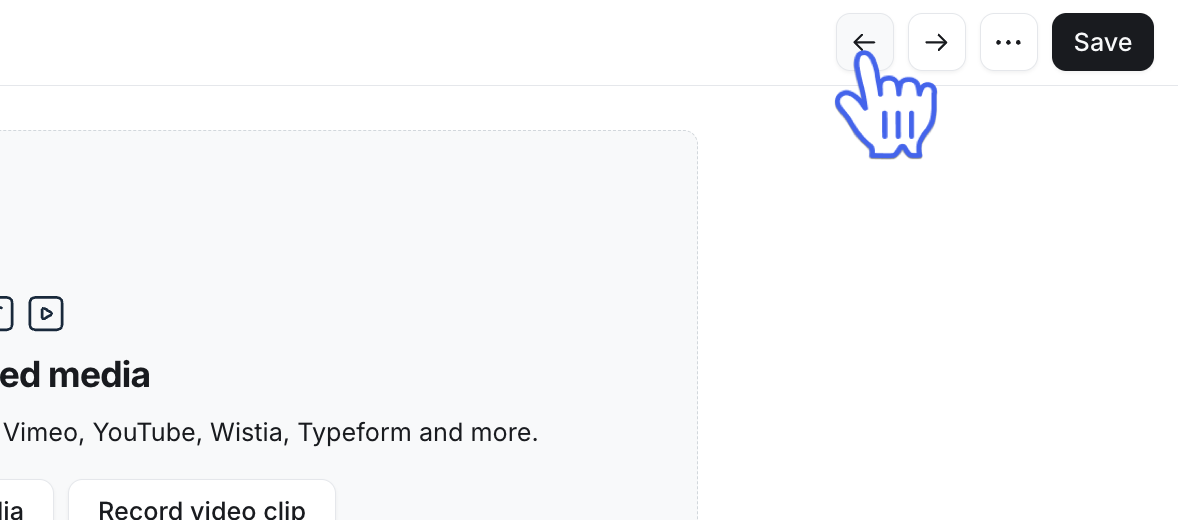
Switch lesson: You can switch to the next or previous lesson in order by clicking the Forward and Back buttons in the top-right corner of the editor.
Save: Save changes to your lesson before you leave by clicking the Save button.
-
Back to lessons: Navigate back to the course curriculum by clicking the Back button in the top-left corner of the editor.
Add lesson content
Great lessons mix text and media to provide students with an engaging and effective learning experience. You can add featured media at the top and rich content in the body.
Add featured media
Use the featured media block at the top of a lesson to upload or embed a primary video or audio.
Upload media:
To upload media, drag and drop the file from your device into the featured media block, or take the following steps:
-
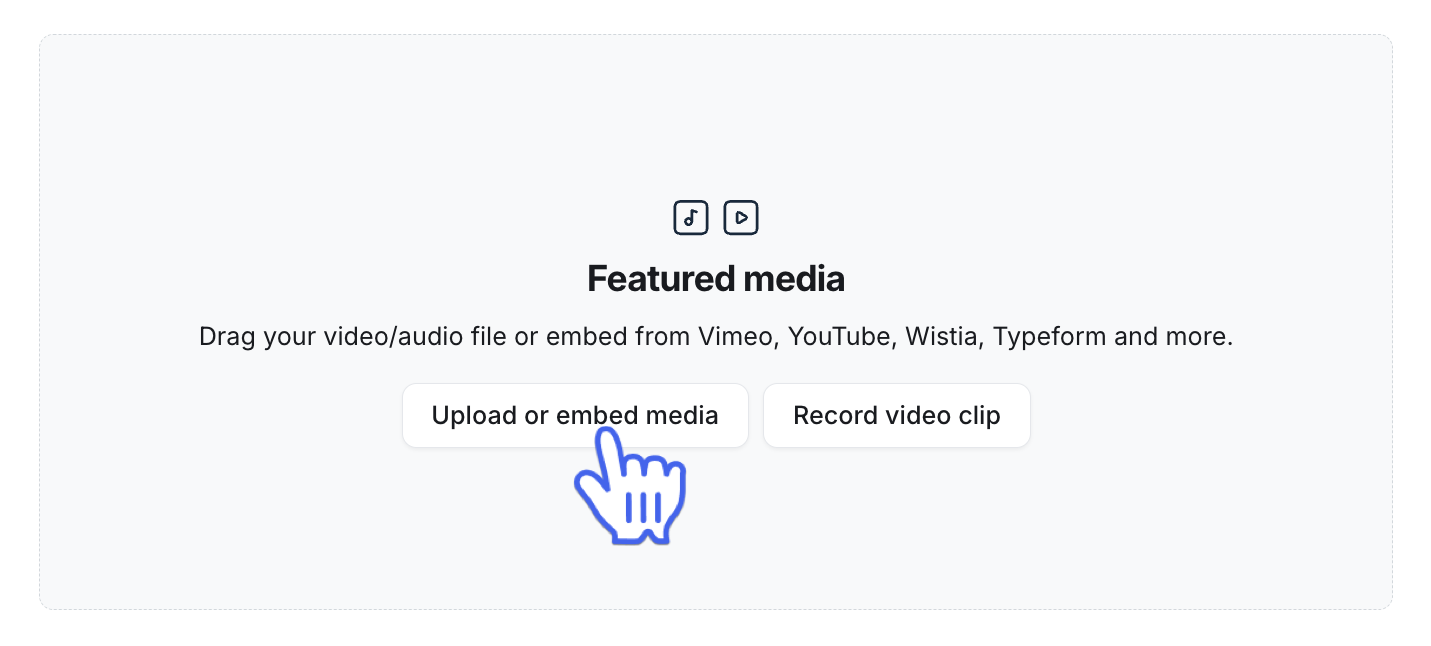
Click Upload or embed media in the Featured media section.
-
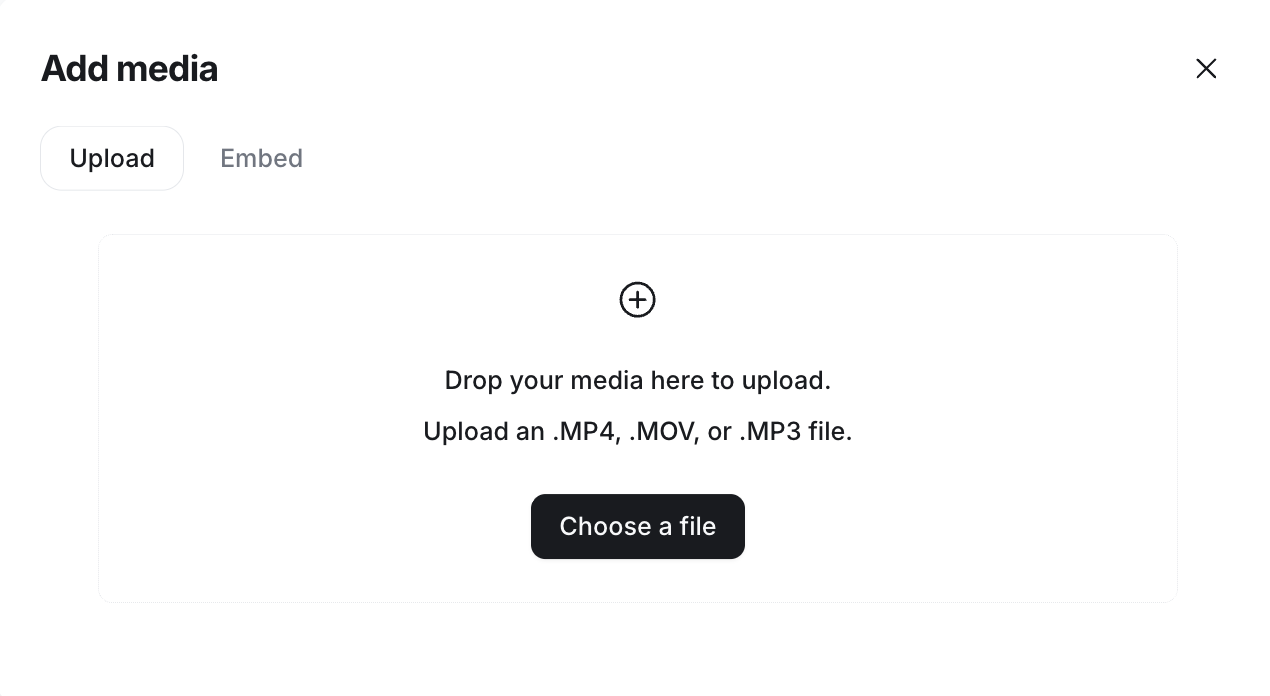
To upload from your device, go to the Upload tab and click Choose a file. For the featured media section, we support MP4, MOV, and MP3 file formats.
-
💡 Tip: To embed media from an external platform, go to the Embed tab and enter the URL. For more information about embedding media into lessons, see Embed media into lessons.
-
Record video clips:
To record a video clip from your device’s camera or create a screen recording:
-
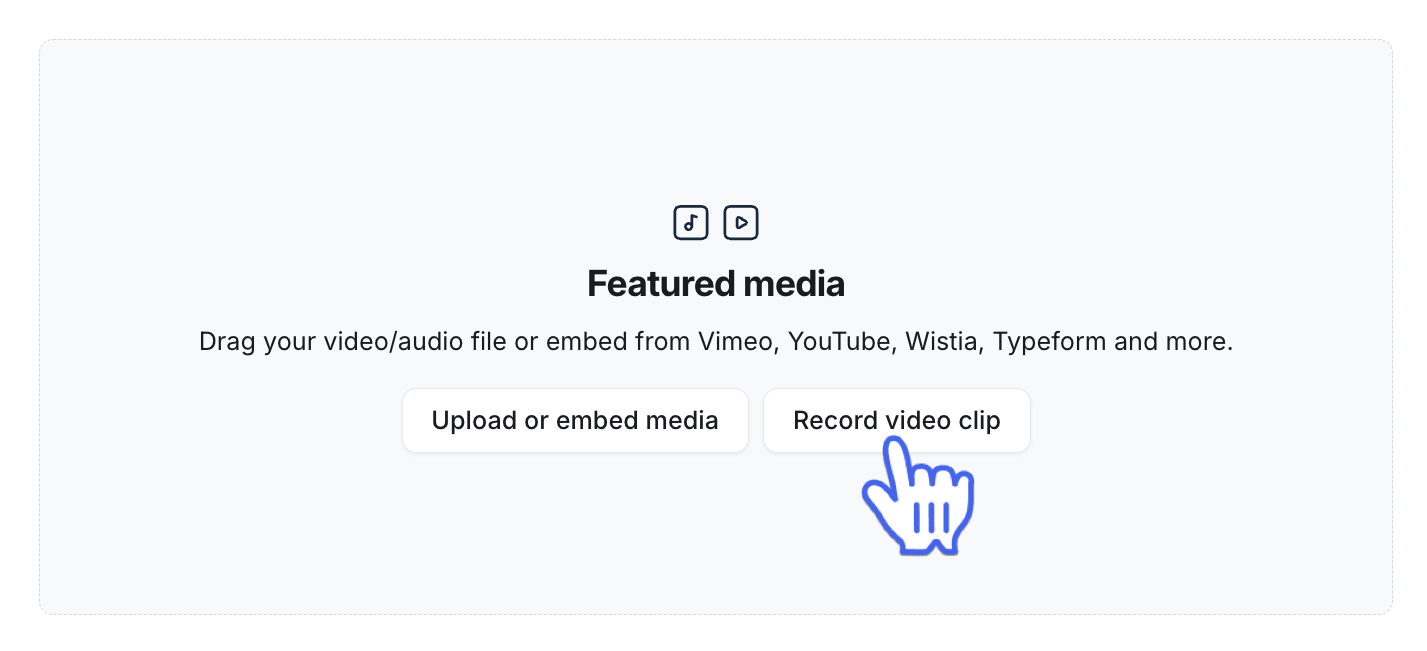
In the Featured media section, click Record video clip.
-
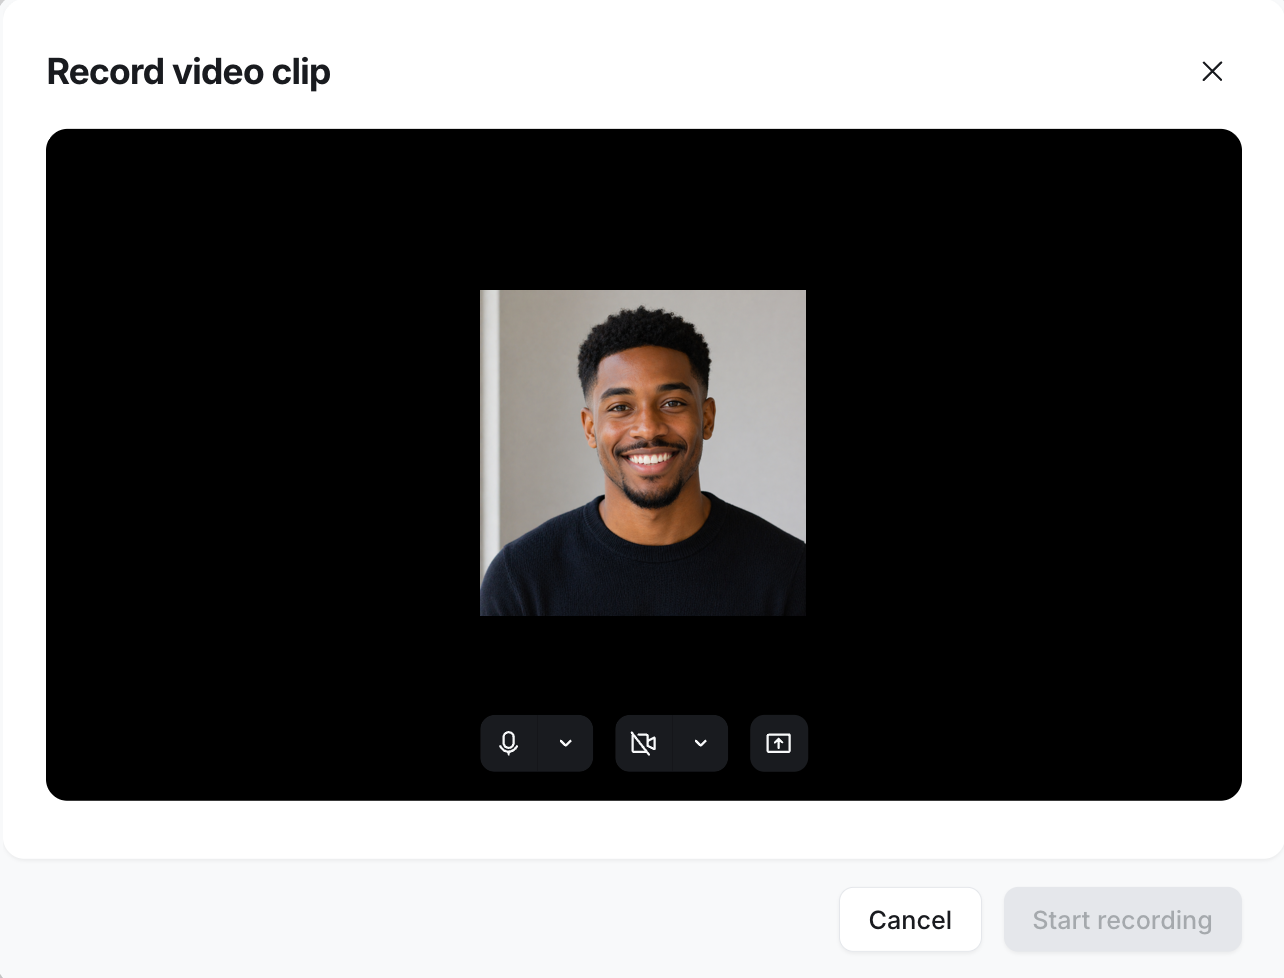
From the preview dialog, you can turn your camera and mic on or off, and choose to share your screen.
When you’re ready, click Start recording.
Once you’re done, click Stop recording. You can then choose to use the clip, start over, or download it to your device.
Click Use video to insert it into your lesson.
📚 To learn more about recording videos in Circle, please see our guide here.
Customize uploaded video:
Hover over the video player and click Customize video (setup icon) located in the top-right corner to:
Add a thumbnail
Add chapters
Enable transcriptions
Allow or disable downloads
📚 For step-by-step details, see Guide to video customizations.
Add text-based content
Use the text editor to add your core text-based content and elements in lessons.
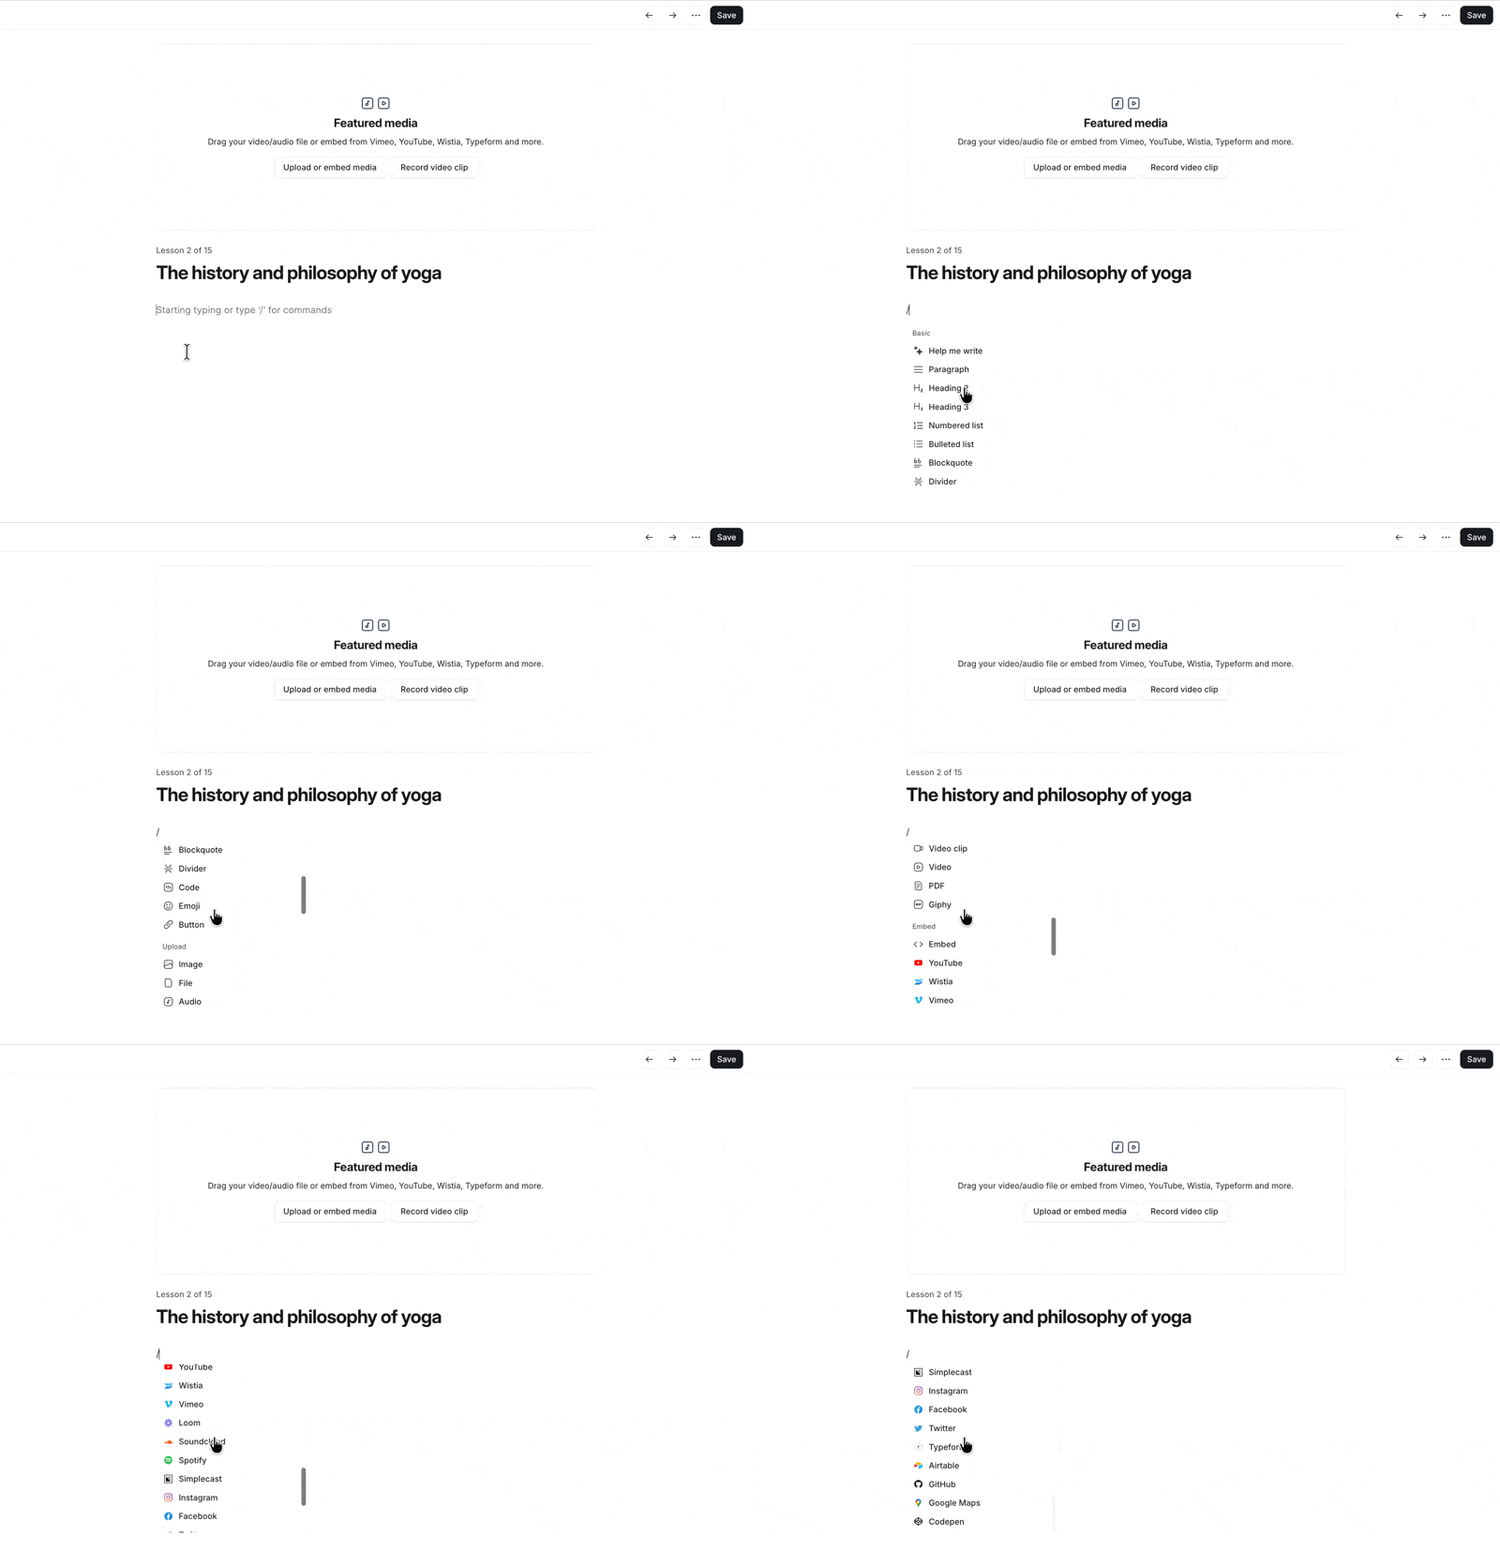
Within the editor, simply type the forward-slash (/) command to open a menu where you'll find various options to help you craft your content, including:
Help me write: Use the AI content writer to draft or edit lesson content. It helps simplify the writing process by generating content ideas, introductions, paragraphs, and more in a conversational tone.
Paragraph: Create standard text blocks for your content.
H2 and H3 headings: Use different heading styles to structure your text effectively.
Numbered and bulleted lists: Organize information within the lesson using lists.
Blockquote: Highlight and emphasize specific text with a distinct block quote style.
Divider: Add a horizontal divider to separate different sections of your content. Dividers improve visual flow, making your lesson easier to scan and visually organize different topics.
Code: Showcase programming or technical content, such as code snippets, in a more suitable format for your audience. Remember, while code blocks are excellent for sharing code snippets with students, they're not designed to incorporate custom scripts or active code into your lessons.
Emoji: Add emojis to your content.
💡 Tip: To embed a link with a preview directly within a lesson, press Enter after pasting the link in the editor. However, if you want to insert it as a clickable hyperlink, please press the Spacebar first after pasting the link.
Format text
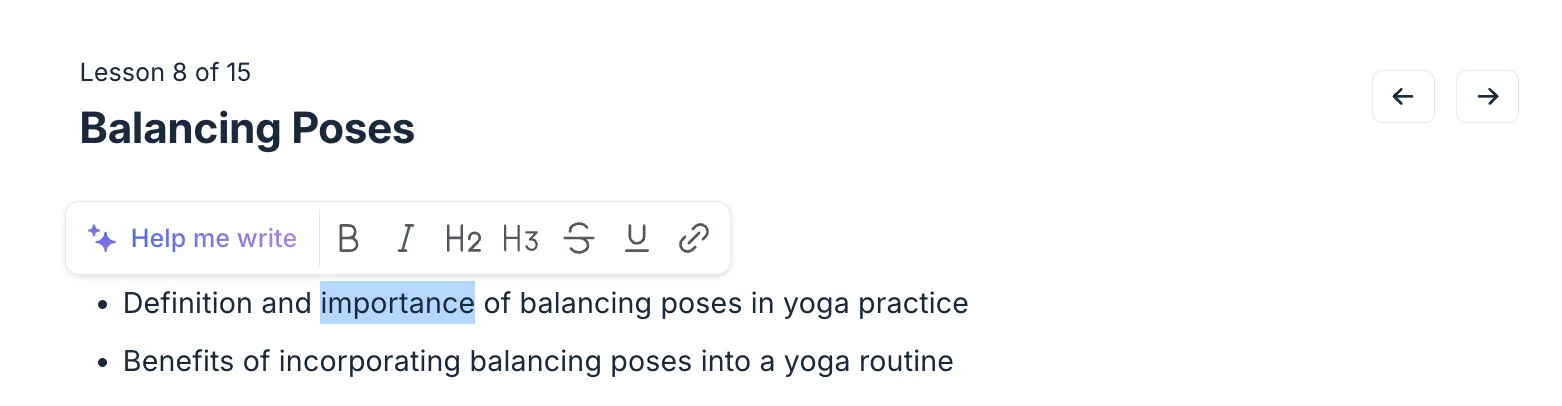
To edit written text in the editor, you can also highlight the text by selecting it. A formatting bar will appear with options such as:
Help me write: Use the AI content writer to get assistance in rephrasing, enhancing, summarizing, and translating the selected content directly in the editor.
Bold: Emphasize important words or phrases by making them bold.
Italic: Use italics to add subtle emphasis, such as for quotes, titles, or unique terms.
H2 and H3 headings: Apply H2 or H3 headings within highlighted text to create structured sub-sections in your content.
Strikethrough: Cross out text using the strikethrough option to show edits, corrections, or retired ideas in your lesson.
Underline: Underline text to add emphasis or highlight particular points.
Hyperlink: Turn highlighted text into a clickable link by adding a URL. Hyperlinks are ideal for referencing additional resources and related content or directing readers to specific pages within or outside your community platform.
Link community content
You can link to various community content, such as lessons, posts, events, and spaces, within the lesson.
To link the community content, type the Hashtag # followed by the title of the content, like the name of the space. As you type, suggestions will pop up. Then select the content you want to link from the results.
Add media and files
Incorporating media elements and files into your lessons enhances their depth and engagement.
Simply type the forward-slash (/) command to access a menu where you'll find various upload options, including:
Images: Bring your lessons to life by adding images. Upload, embed, or choose from the Unsplash library, supporting JPG, PNG, or GIF file formats.
Files: Easily attach various file types, including PDF documents, as attachments within your lesson.
Audio: Integrate audio files directly into your lessons in MP3, WAV, or OGG formats.
-
Video: Upload or embed video content within your lessons. For uploads within the lesson body, we support various file formats, including MP4 and MOV.
To enhance the uploaded video, you can add a thumbnail, chapters, enable transcriptions, and manage download permissions. To do so, click the Customize video (setup icon) located in the top-right corner of the video. For more information, see Guide to video customizations.
Embeds: Enhance your lessons by embedding media from external providers like YouTube. We support multiple embed providers in lessons. For a detailed list of embed providers, please refer to our guide here.
ℹ️ Note: It's important to note that each file you upload, whether it's a video, audio, or other files, has a maximum size limit of 4GB. If you are looking to add a larger file, we suggest exploring the embed options to add media directly from your hosting provider, such as YouTube, Loom, or Vimeo.
Add buttons
Add buttons to direct members to valuable resources, such as your website, specific areas within the community, supplementary materials, or other essential links.
They stand out visually, making it easy for members to identify important links that can enhance their learning experience. Plus, buttons you add to lessons are also visible in the mobile apps, ensuring your members can engage with these calls to action seamlessly on any device.
To add a button to your lesson, follow these steps:
Type the forward-slash (/) command in the editor and select Button from the menu.
-
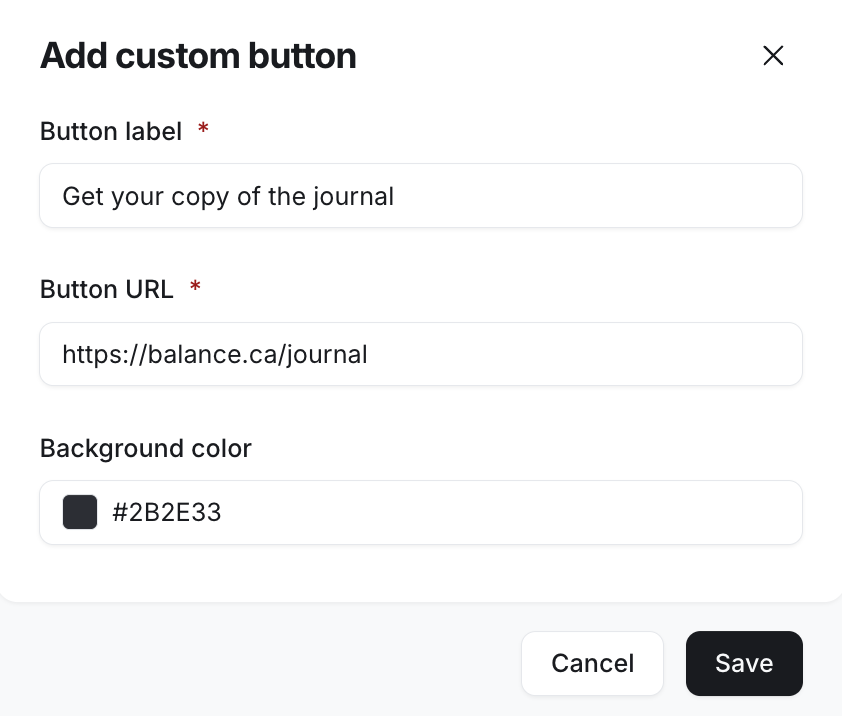
In the button editor, enter the following details:
Enter the button label, which is the text that appears on the button (e.g., "Learn More”).
Add the URL or link where the button should direct members when clicked.
-
Customize the button color to match your branding. You can either enter the desired HEX code or click the current color to open the palette and choose a color visually.
Click Save to add the button.
Adjust button alignment
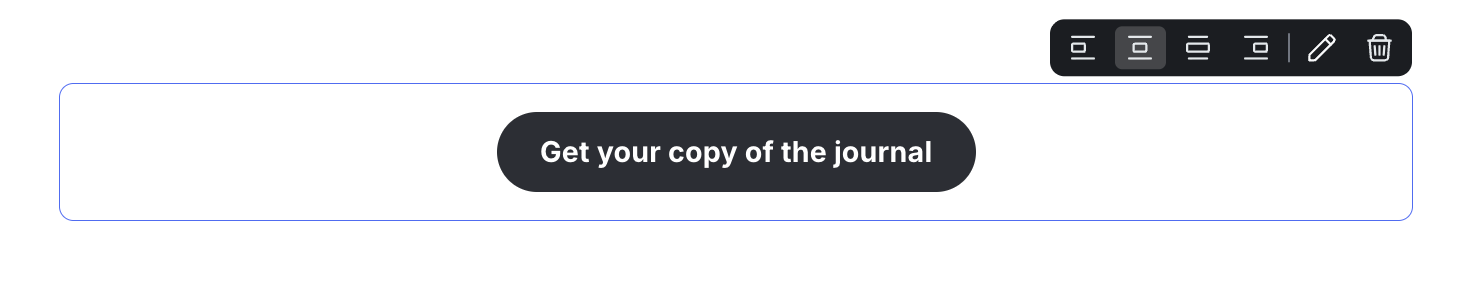
You can control how your button is aligned within the lesson to optimize its visual impact:
Align the button left, center, or right.
Make the button more prominent by centering it with an extended-width display.
To adjust the alignment, hover over the button and click the icon for the alignment style at the top-right of the button.
Edit or delete buttons
To modify or remove a button, hover over it. Then, select the edit or delete icon at the top right of the button to make your adjustments.
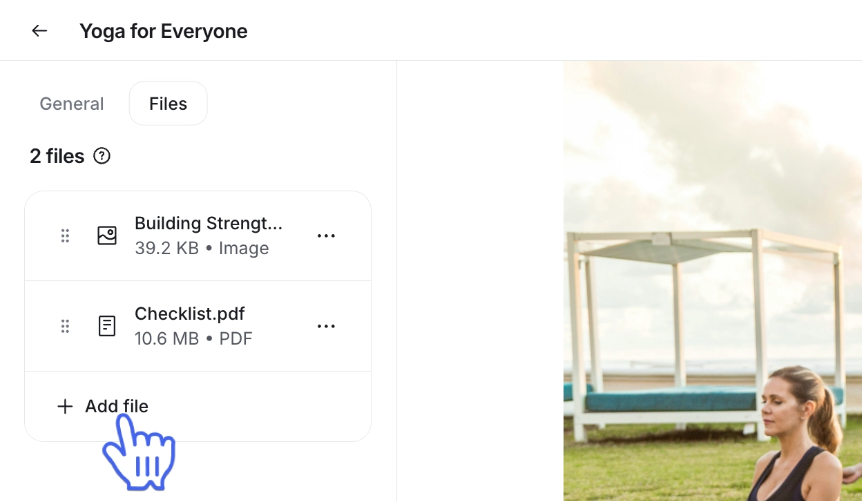
Add resources to the files tab
You can attach up to 15 supplemental resources per lesson, such as PDFs, spreadsheets, or videos.
These files are displayed separately in the Files tab for students' convenience, so they can download resources to their devices at any time.
To upload a new file:
Go to the Files tab in the left sidebar.
-
Click the Add file button.
Select the desired file from your device.
📚 For more information, see Manage downloadable files in lessons.
Ready to configure lesson settings?
📚 To learn more about setting up various options specific to the lesson, see Configure lesson settings.