Guide to video customizations
Last updated: October, 2026
Videos can be more effective when they’re tailored to your content strategy. This article walks you through how to access various video settings and customize your videos for a better viewing experience.
About video customization
Video customization gives admins control over how videos appear and how users interact with them. You can, for example:
Add a thumbnail to make videos stand out.
Provide transcripts to improve accessibility and engagement.
Add chapters to make longer videos easier to navigate.
You can customize uploaded videos and live recordings added in various community areas, including:
Posts
Lessons feature media and lesson content
Questions within quizzes
Event descriptions
Comments within posts and events
Availability
Video customization options are included in all community plans.
There’s one exception: Automated transcriptions are only available on the Business plan and higher, and only if the Automated transcriptions feature has been enabled in your community.
Who can make changes
Only community admins can customize videos. As an admin, you can access video customization options on the desktop app, web browsers, and mobile browsers.
How to access video customization options
There are two ways to access video customization for a video:
ℹ️ Note: For videos in event description, you will have to post/publish it first for the video customization setting icon to appear.
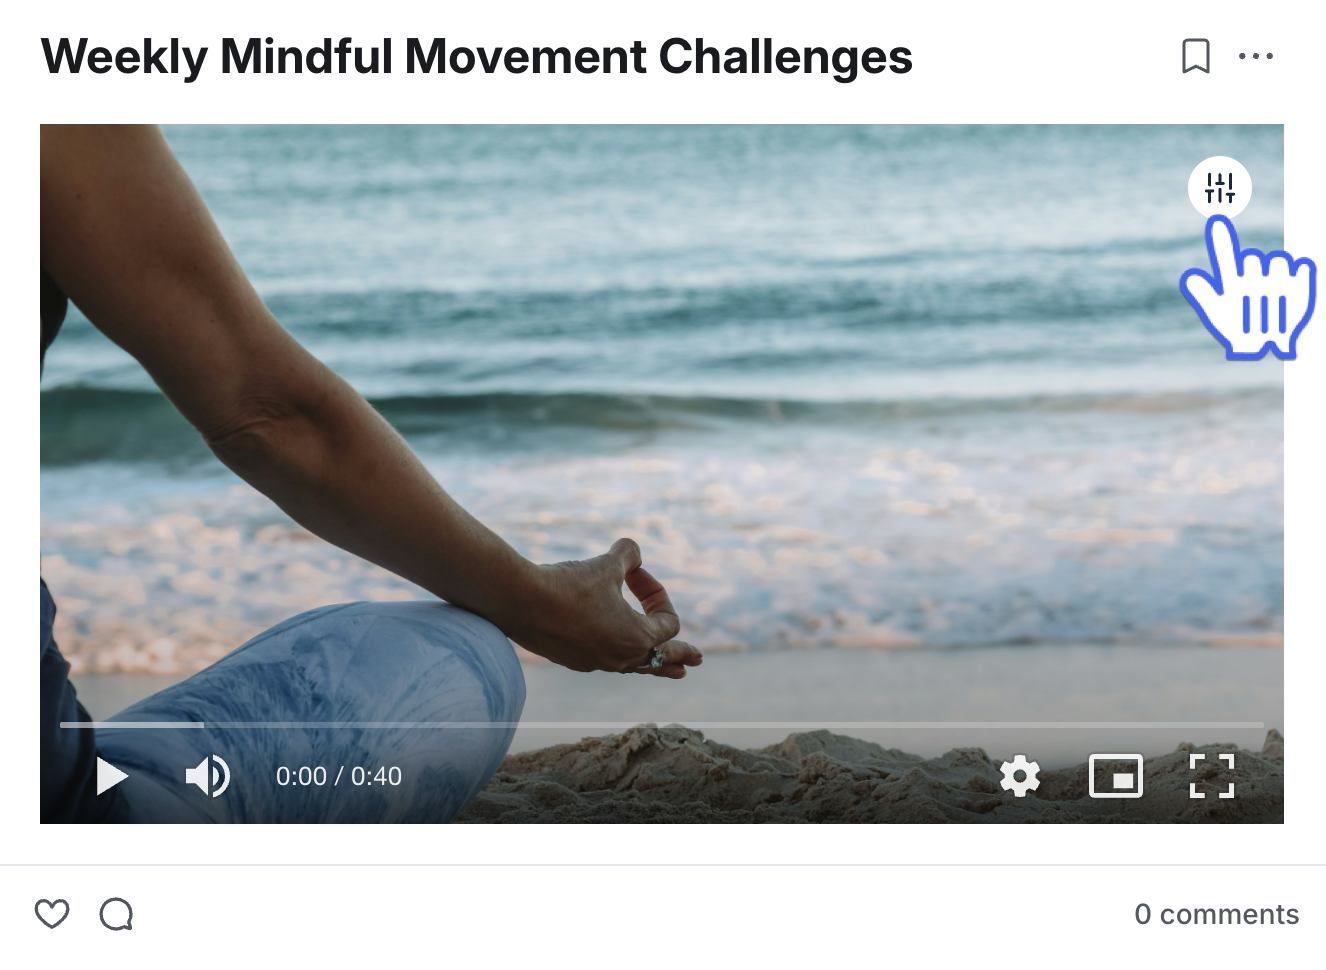
From the video itself:
Click Community in the left sidebar, then select Media.
Go to the post, lesson, or other location where the video is added.
-
Hover over the video and click Customize media (setup icon) in the top-right corner.
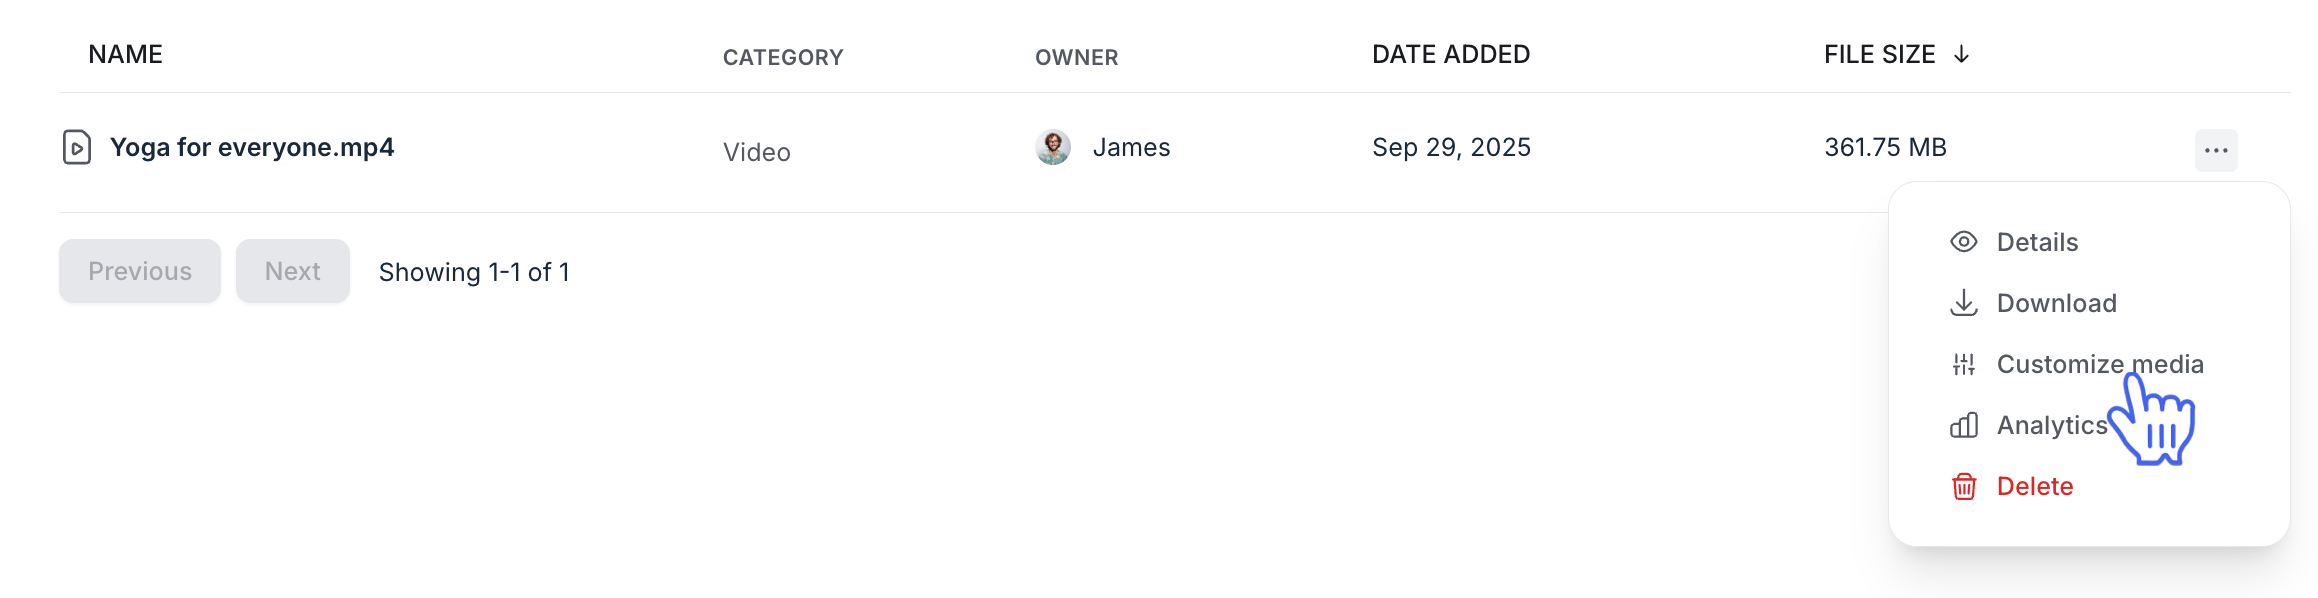
From the media manager:
Click Community in the left sidebar, then select Media.
Navigate to the Videos tab and find the video you want to review.
Hover over the video entry, click More actions (three dots) and select Customize media.
Video editor interface
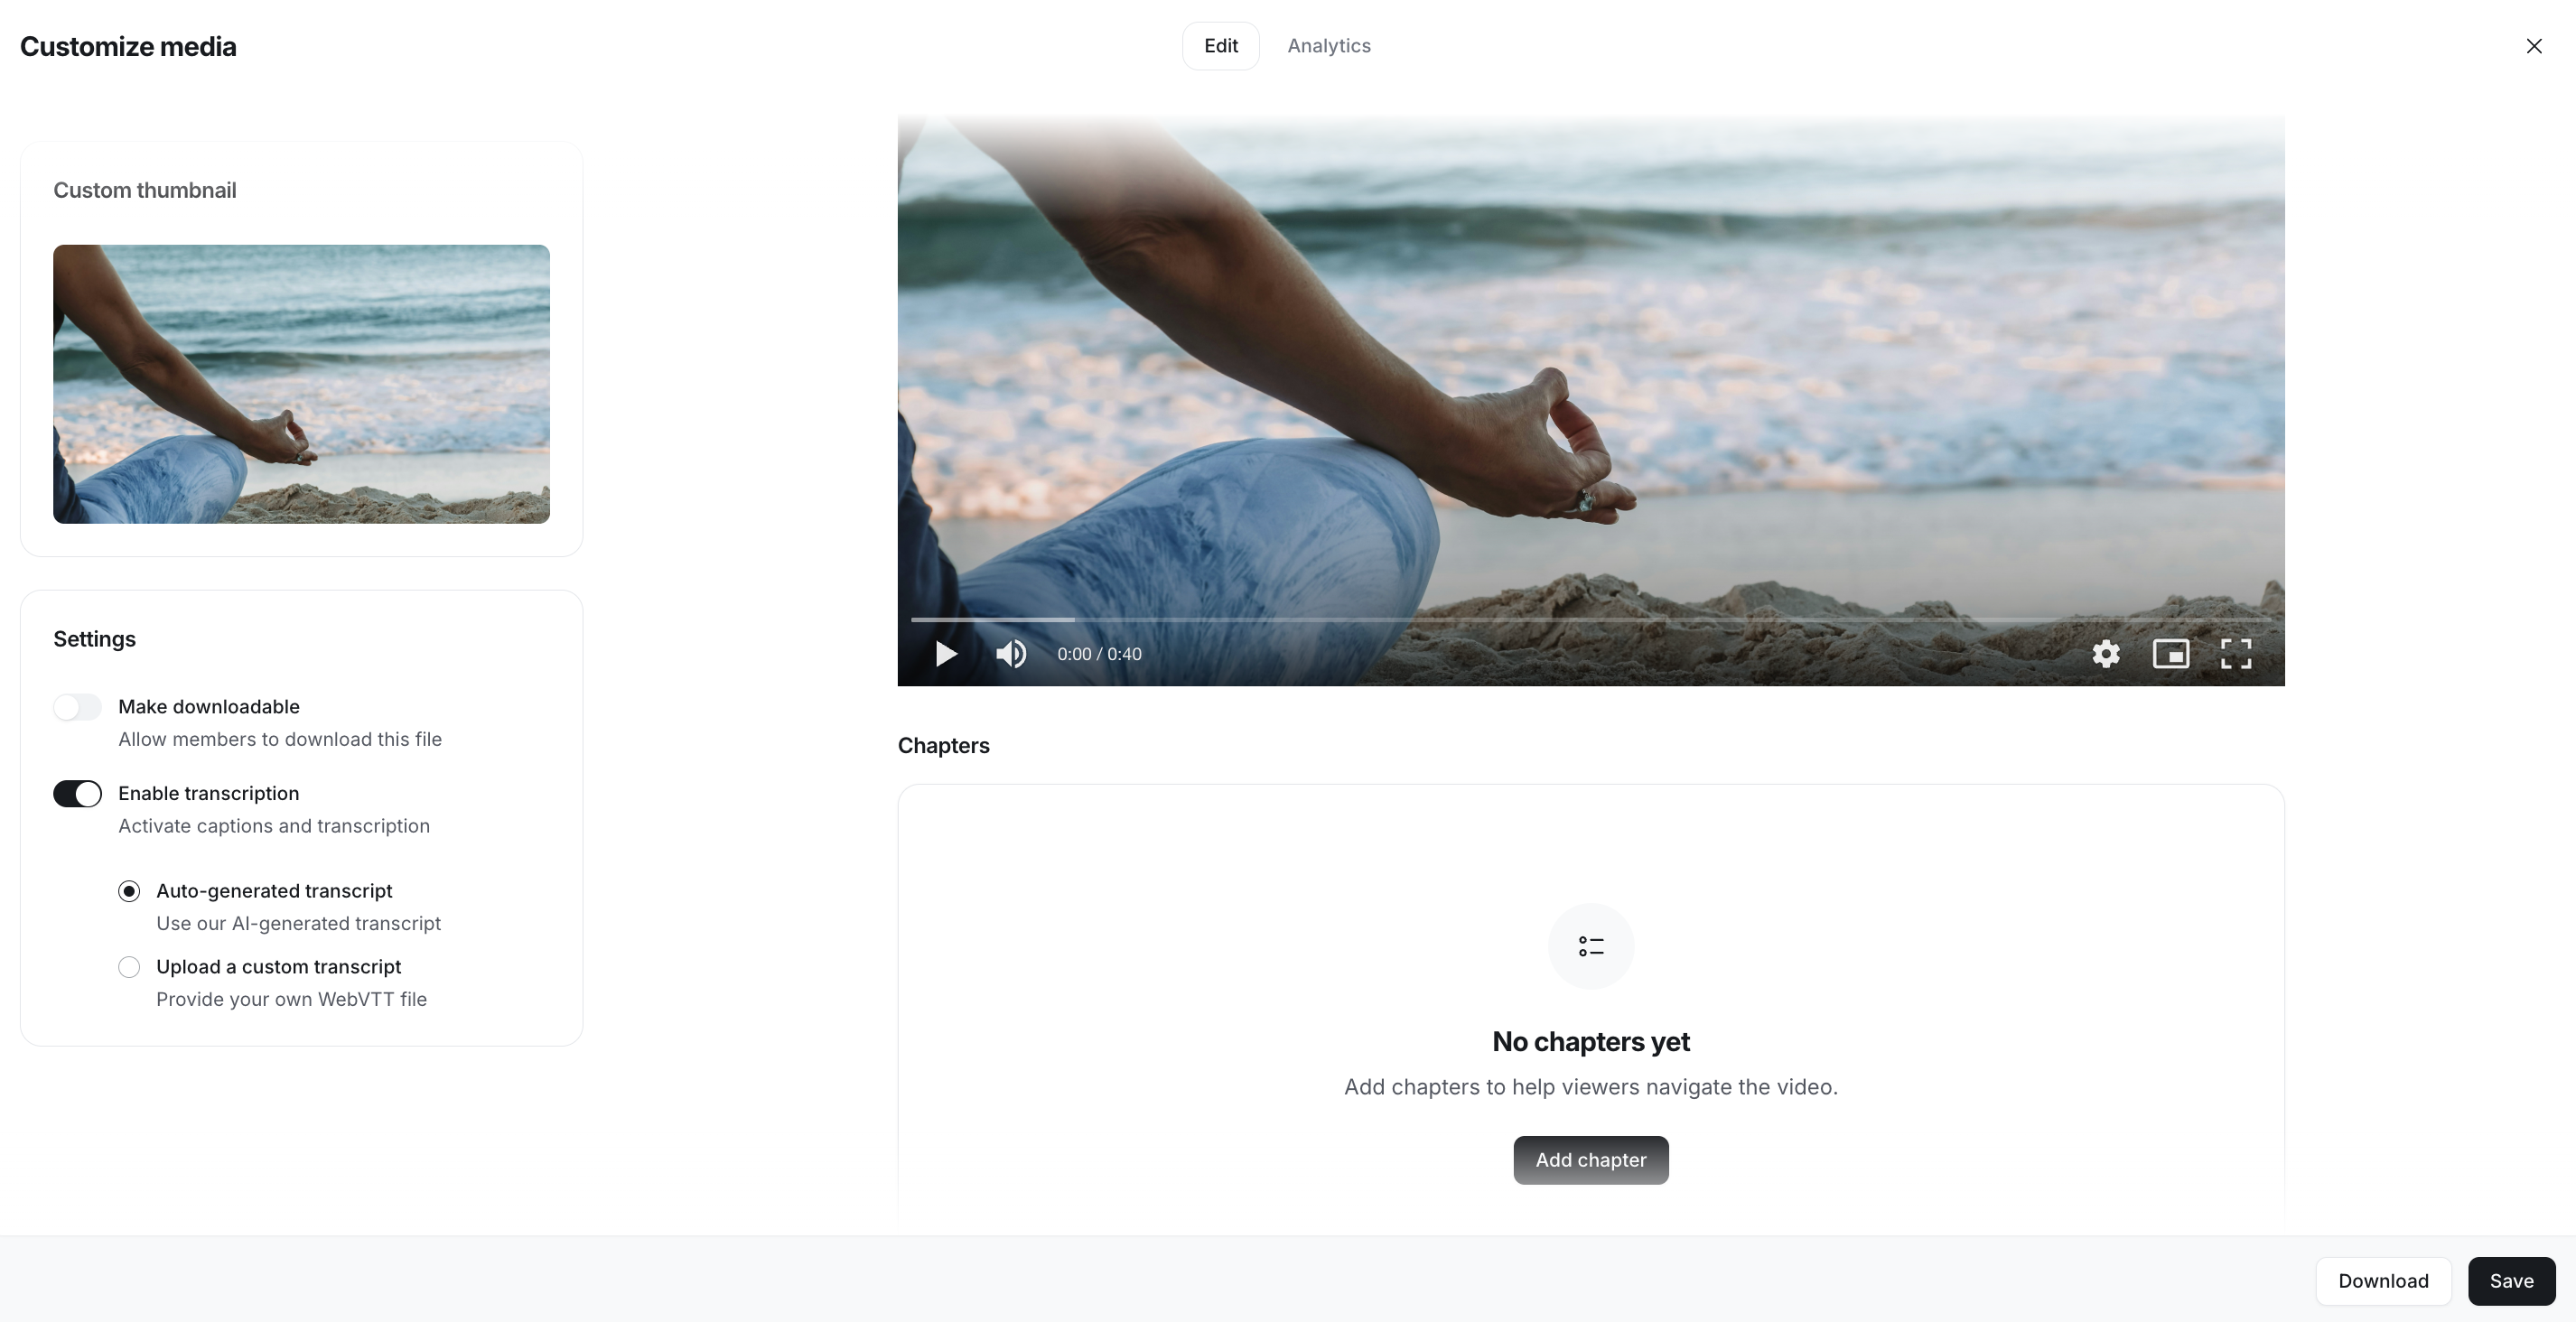
When you open the video editor, you’ll see the following main areas:
Left sidebar: Contains all the tools you need to customize the video, such as appearance and settings.
Preview area: Lets you watch the video, view captions, and check how changes will look. You can also add and manage chapters directly below the video.
-
Header: From the header, you can navigate to analytics and save your customizations.
Customization options
The left sidebar gives you quick access to core settings:
Custom thumbnail: Upload or embed an image to give your video a more engaging preview.
Make downloadable: Decide whether members can download the video.
Enable transcription: Turn on captions and transcripts for accessibility. You can use automated transcripts (if available on your plan) or upload your own WebVTT file.
📚 To learn more about managing these settings, see Video settings: thumbnails, downloads, and transcripts.
Chapters
Chapters let you divide a video into sections, making it easier for viewers to navigate. They are especially useful for longer lessons, webinars, or event recordings.
📚 For a step-by-step guide on adding and managing chapters, see Add and manage chapters in a video.