Configure lesson settings
Last updated: July, 2026
You have the flexibility to personalize each lesson by adjusting the options that help significantly enhance the quality of the learning experience for students.
Within each course lesson, you can set lesson status, add feature media, enable comments, and set default tabs. To navigate to the lesson settings, follow these steps:
Click Courses on the left sidebar and select Courses.
Click the More actions (three dots) icon on a course entry and select Edit course.
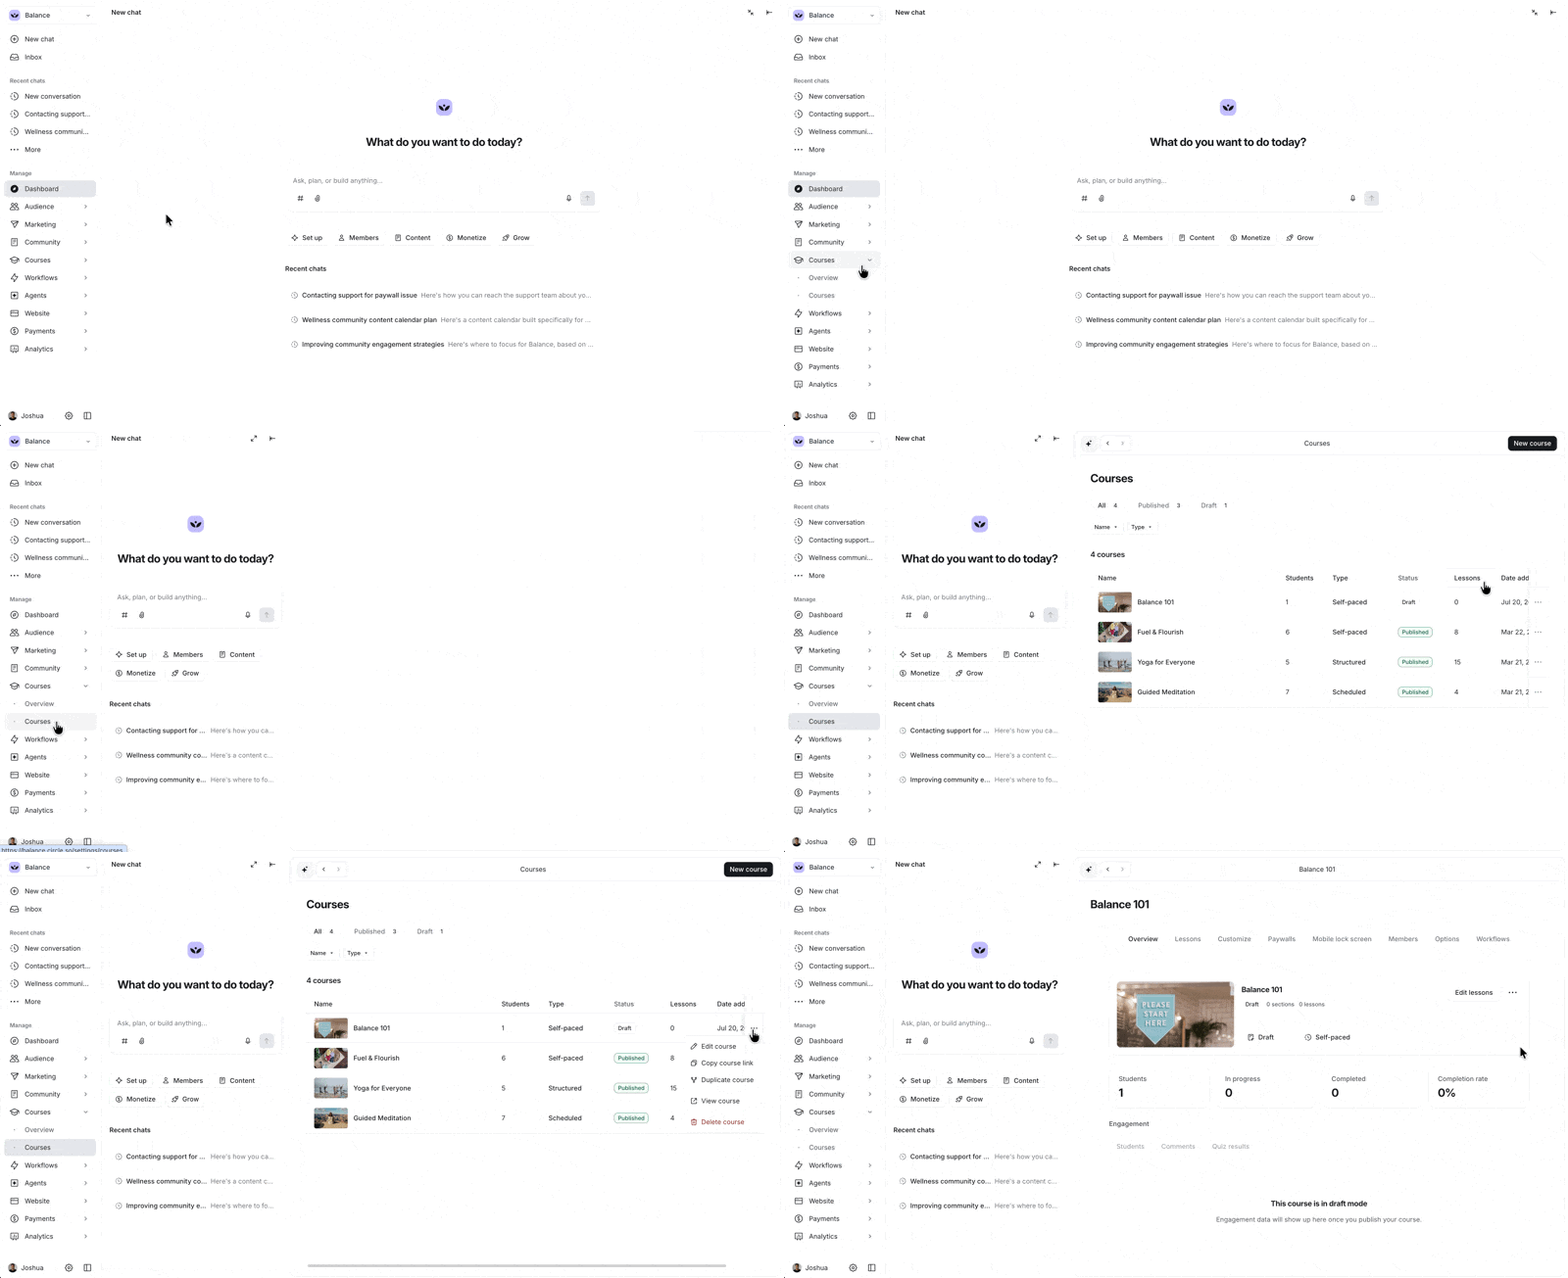
Click Edit lessons in the course dashboard.
Click the More actions (three dots) icon next to the lesson and select Edit.
Once you are in the lesson editor, you’ll be able to configure all options in the General tab in the left sidebar.
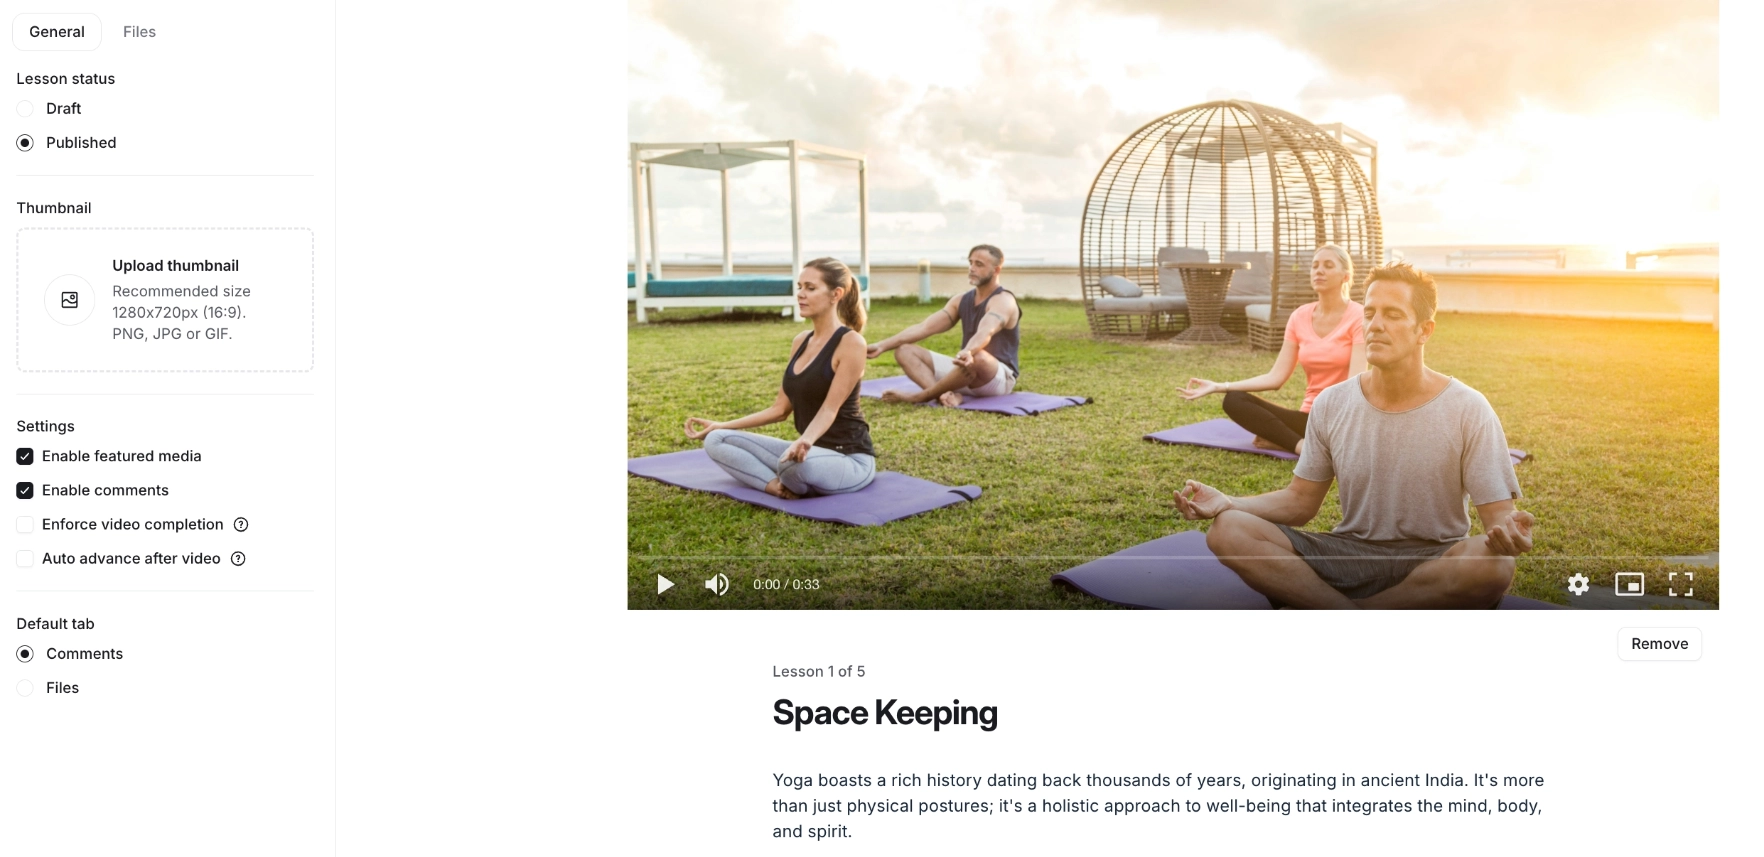
Let’s take a look at various configuration options for lessons.
Lesson status
Lesson status defines whether a lesson is visible to students. There are two states: Draft and Published.
When you create a lesson, it's automatically set to Draft. In this state, the lesson is only visible to the course space moderator and admins and you can build the content without students seeing it. When you're ready for students to see the lesson, change its status to Published. The lesson becomes visible to course space members so they can access it.
ℹ️ Note : If the lesson is within the section that is configured to be dripped, students will only be able to access the published lesson after it is dripped.Settings
Featured media: This setting allows you to highlight specific media, such as a video or audio file, at the top of your lesson. You can toggle the visibility of the featured media using the Enable featured media checkbox. When enabled, the featured media will be prominently displayed, enhancing the visual appeal of your lesson.
Lesson comments: Enabling the comment section allows students to engage in discussions related to the lesson. This feature promotes interaction and collaboration among students, allowing them to ask questions, share insights, and provide feedback.
Enforce video completion: Turn on this toggle to require students to complete at least 90% of the video in featured media before they can complete the lesson. Please note that this option is only available when the media is uploaded in the featured media section.
Auto advance after video: Activate this setting to automatically direct students to the next lesson 10 seconds after the featured media video ends. Students will see a countdown timer and have the option to cancel the auto-advance. If no action is taken, the current lesson will be marked complete, and they will be taken to the next lesson. Please note that this option is only available when the media is uploaded in the featured media section.
Thumbnail
You can upload a thumbnail to visually represent your lesson.
📷 Recommended image size: 16:9 aspect ratio with minimum image dimension 1280 x 720 px.
To add a thumbnail:
Click Upload thumbnail. The Upload Thumbnail dialog box opens.
-
Choose a tab to add an image:
Unsplash – Select an image from the Unsplash library.
Upload – Upload an image from your desktop.
Embed Link – Add an image using a direct image URL.
-
Adjust the image:
Click and drag it to position it within the allowed dimensions.
Use the slider at the bottom of the dialog box to zoom in or out.
Click Save changes.
After the thumbnail is saved, go to the Lesson Directory to see it next to the lesson name.
Settings
Featured media: This setting highlights specific media, such as a video or audio file, at the top of your lesson. Select the Enable featured media checkbox to show it; clear it to hide it. When enabled, the featured media will be prominently displayed, enhancing the visual appeal of your lesson.
Lesson comments: Enabling the comment section allows students to engage in discussions related to the lesson. This feature promotes interaction and collaboration among students, allowing them to ask questions, share insights, and provide feedback.
Enforce video completion: Turn on this toggle to require students to complete at least 90% of the video in featured media before they can complete the lesson.
Auto advance after video: Turn on this toggle to automatically move students to the next lesson 10 seconds after the featured media video ends. Students see a countdown timer and can cancel the auto-advance. If they take no action, the current lesson is marked complete, and they're taken to the next lesson.
ℹ️ Note: Enforce video completion and Auto advance after video are only available when media is uploaded to the featured media section.
Default tab
The default tab setting determines which tab students see first when they access a lesson. There are two tabs visible in the course lessons:
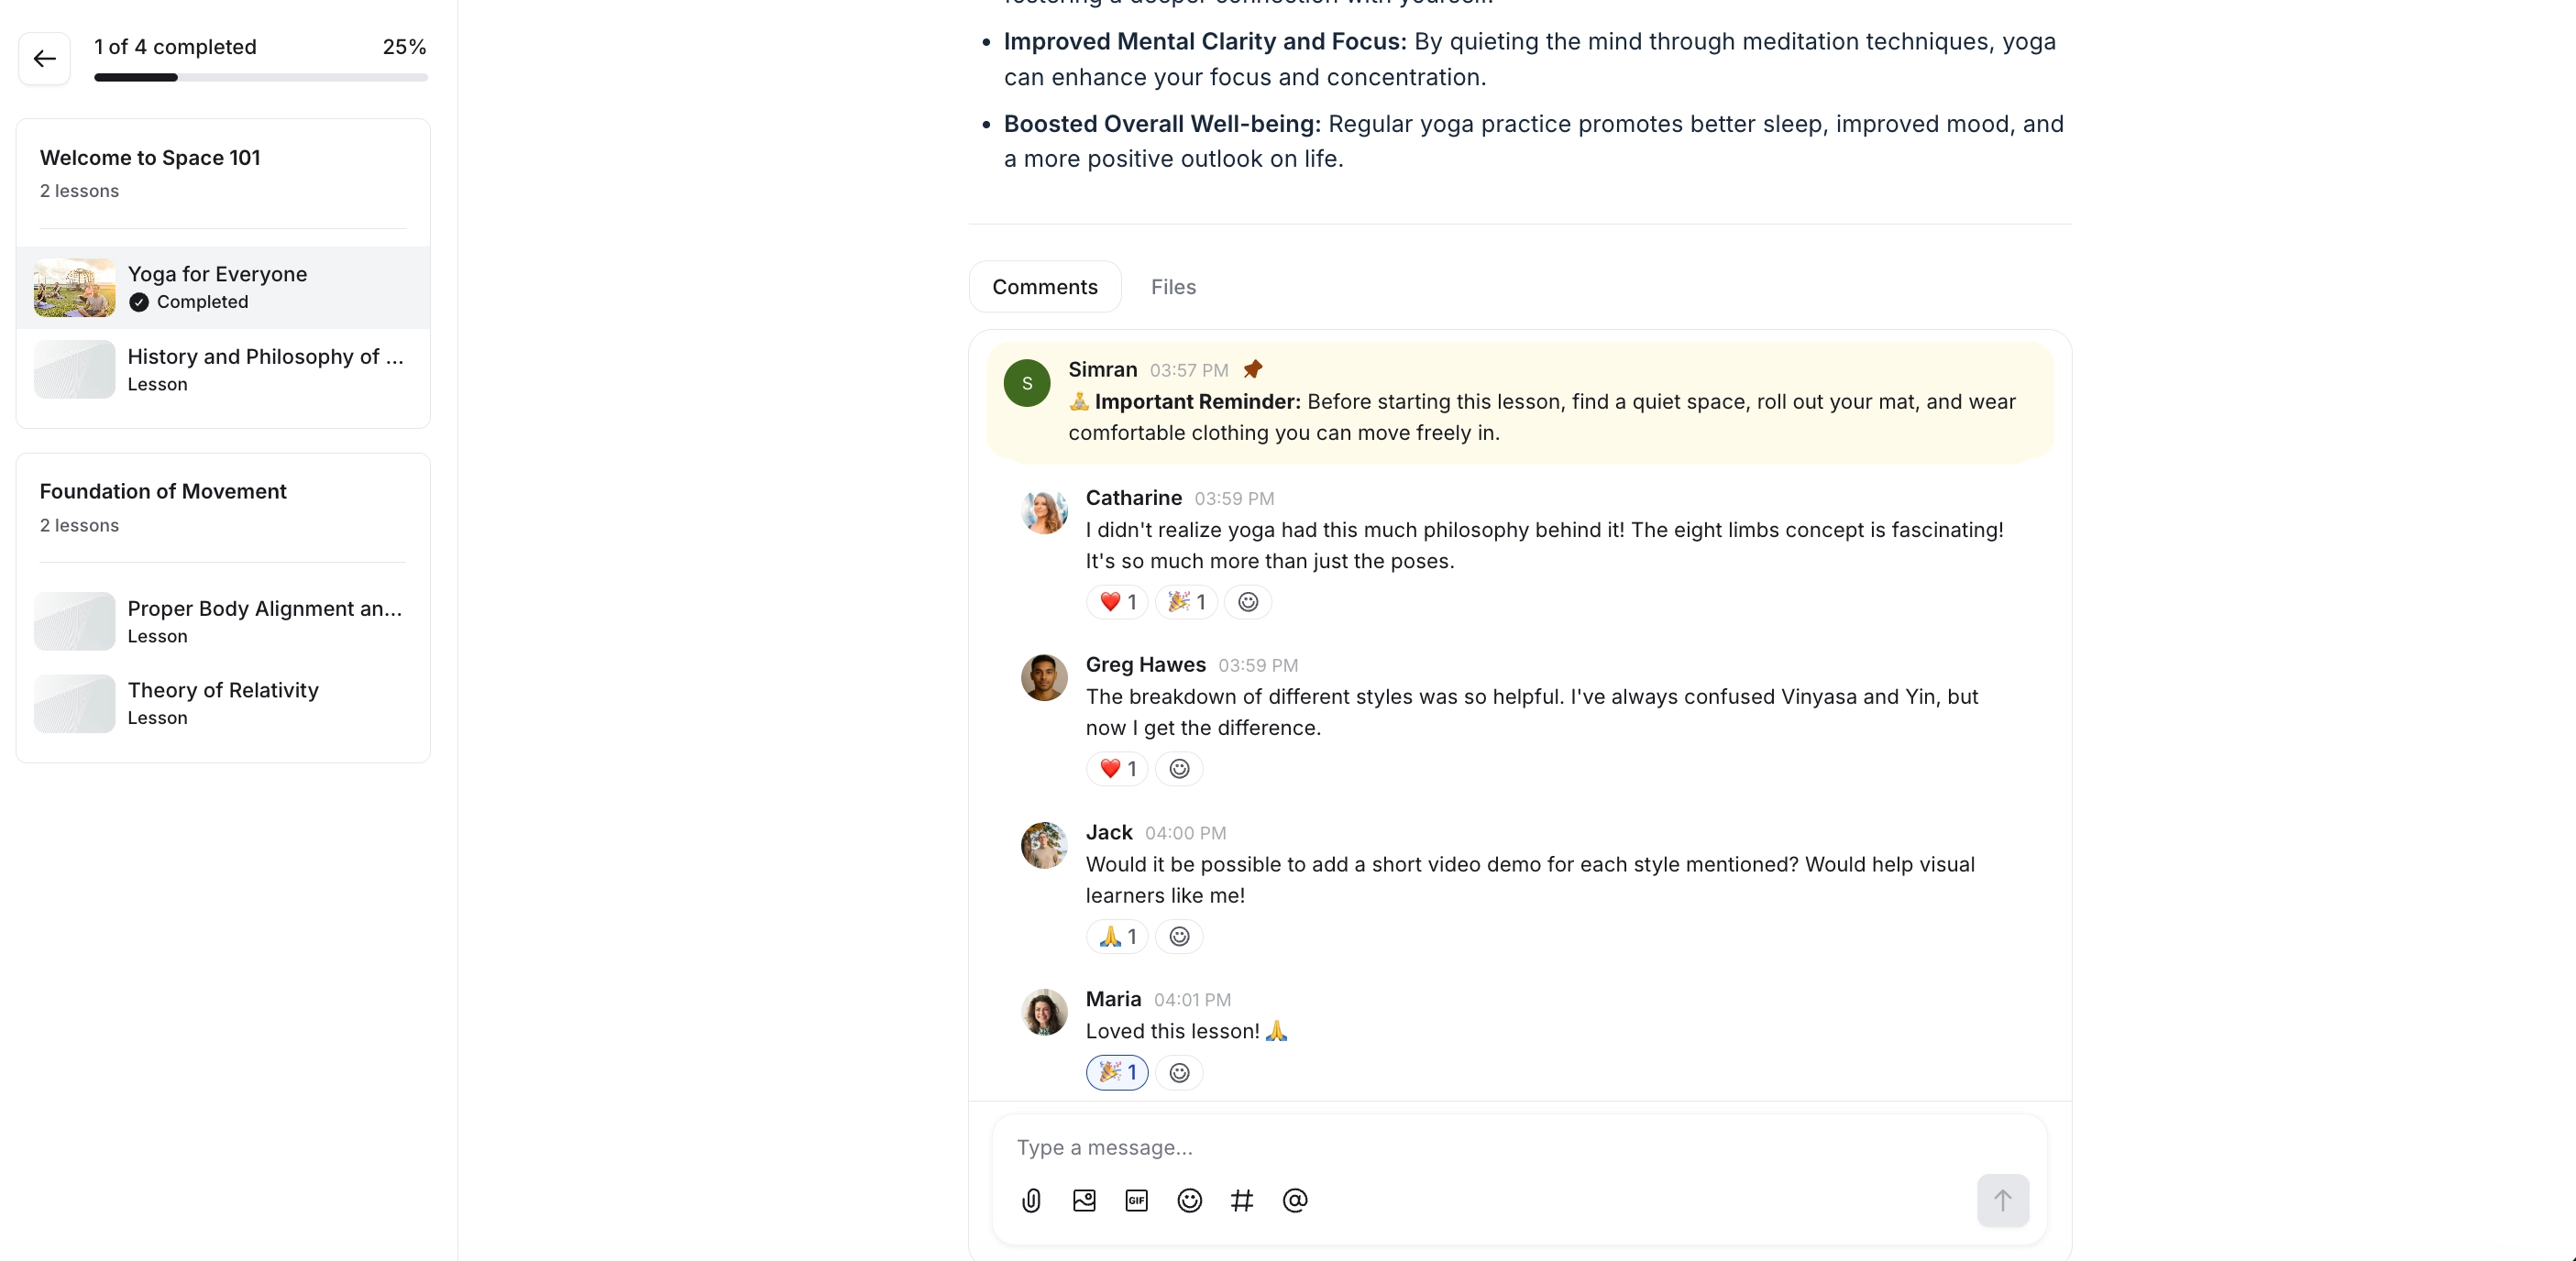
Comments: When enabled, this tab allows students to access and engage with the lesson content through comments. Students can ask questions, provide feedback, and interact with peers and instructors. All comments are displayed below the lesson, and students can add new comments directly from there.
Files: This tab gives students access to the files you have uploaded to the lesson's file manager. This can include supplementary materials, resources, or any other files relevant to the lesson. All files are displayed below the lesson, and students can click a file name to download it.
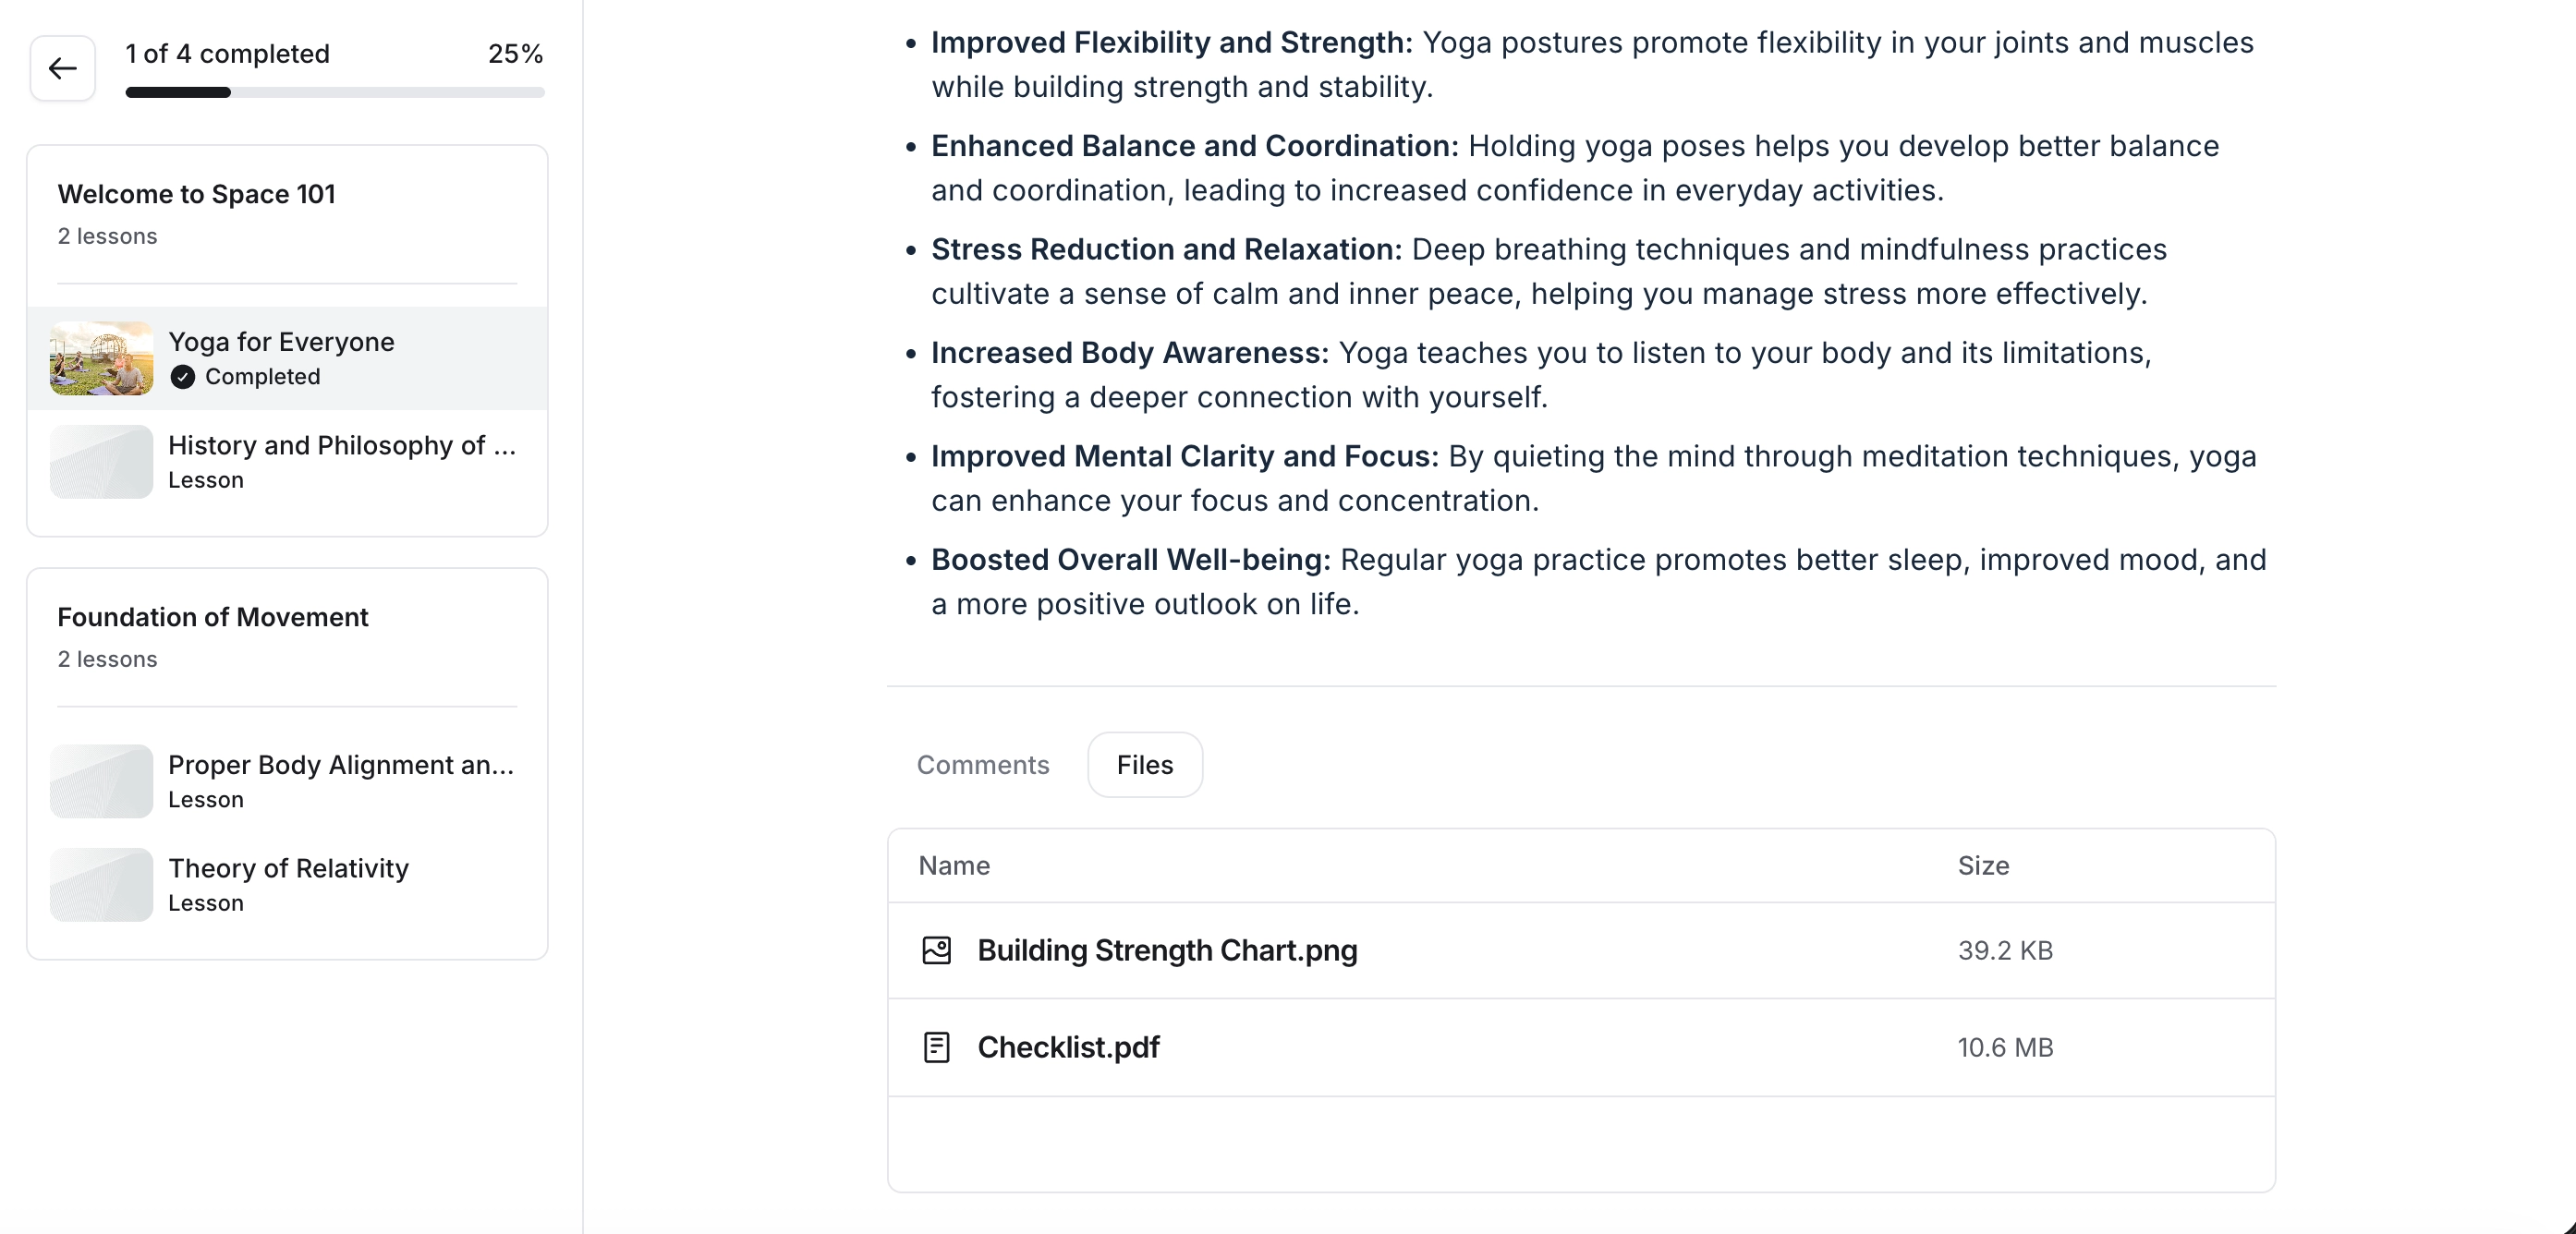
While the comments tab is set as the default tab, you can set the files tab as the default for each lesson by selecting it in the Defaults tab section.