Set up a custom automation workflow
Last updated: September, 2026
Automation workflows operate seamlessly in the background, reducing your workload and improving efficiency. It puts your various community interaction and management strategies on autopilot. Automation workflows streamline administrative tasks by executing actions automatically in response to predefined triggers. This article will walk you through creating custom automation workflows tailored to your community's unique needs.
Before we delve deeper into workflow creation, here are some key things to know:
Workflow audience: Workflows can be triggered for different user groups, including non-members, members, and even invited members who have not yet confirmed their profiles. This ensures you can design workflows suited to every stage of user engagement and perform actions that are available to them.
Flexibility: Automation workflows can be enabled or disabled at any time, giving you full control. Pause workflows when needed to refine them or temporarily halt their execution.
Set up a new workflow
Let’s guide you through all the steps to create an automation workflow!
Step 1: Create a new workflow
Click Workflows in the left sidebar, then select Workflows.
Click New workflow in the top-right corner.
On the workflow creation page, click Start from scratch.
Select Automation and click Create workflow.
A workflow draft will be created, allowing you to leave and come back at any time to complete the setup. On the Workflows page, simply click the draft workflow to pick up where you left off.
💡 Tip: When you are working on setting a workflow, it automatically saves trigger and action steps when you complete a step and click Continue.
Step 2: Rename workflow
Give your workflow a meaningful name so it’s easy to identify. Click More actions (three dots) in the top-right corner, then select Rename. Enter your preferred name in the dialog box and save your changes.
Step 3: Set up a trigger
A trigger is the starting point for automation workflows. It represents various activities performed by community admins, members, and non-members, such as joining a space, completing a course, adding a tag, and more.
Triggers determine both what activates the workflow and to whom it applies. For example:
If you add a tag to Member A, all the actions configured for that workflow trigger (Tag added) will automatically run for Member A.
If Member B subscribes to a paywall, the actions configured for that workflow trigger (Subscribed to paywall) will be executed for Member B.
By leveraging various triggers, you can automate essential tasks like engagement, onboarding, and follow-ups. This enables them to nurture relationships, encourage participation, and scale their efforts without adding manual workload.
💡 Tip: For the comprehensive list of all currently available triggers and actions for workflows, see our guide here.
To set it up, click the Add a trigger step and select your preferred trigger. In the trigger details sidebar, you'll see the following sections:
Filter conditions (optional): Apply filter conditions to trigger the workflow only for individuals who meet specific criteria.
Inputs: Choose additional inputs depending on the nature of the trigger. For example, if you select the Tag added trigger, you’ll need to specify which tag and type of audience the trigger applies to.
When you're done setting up the trigger, click Continue to finalize the step and move on.
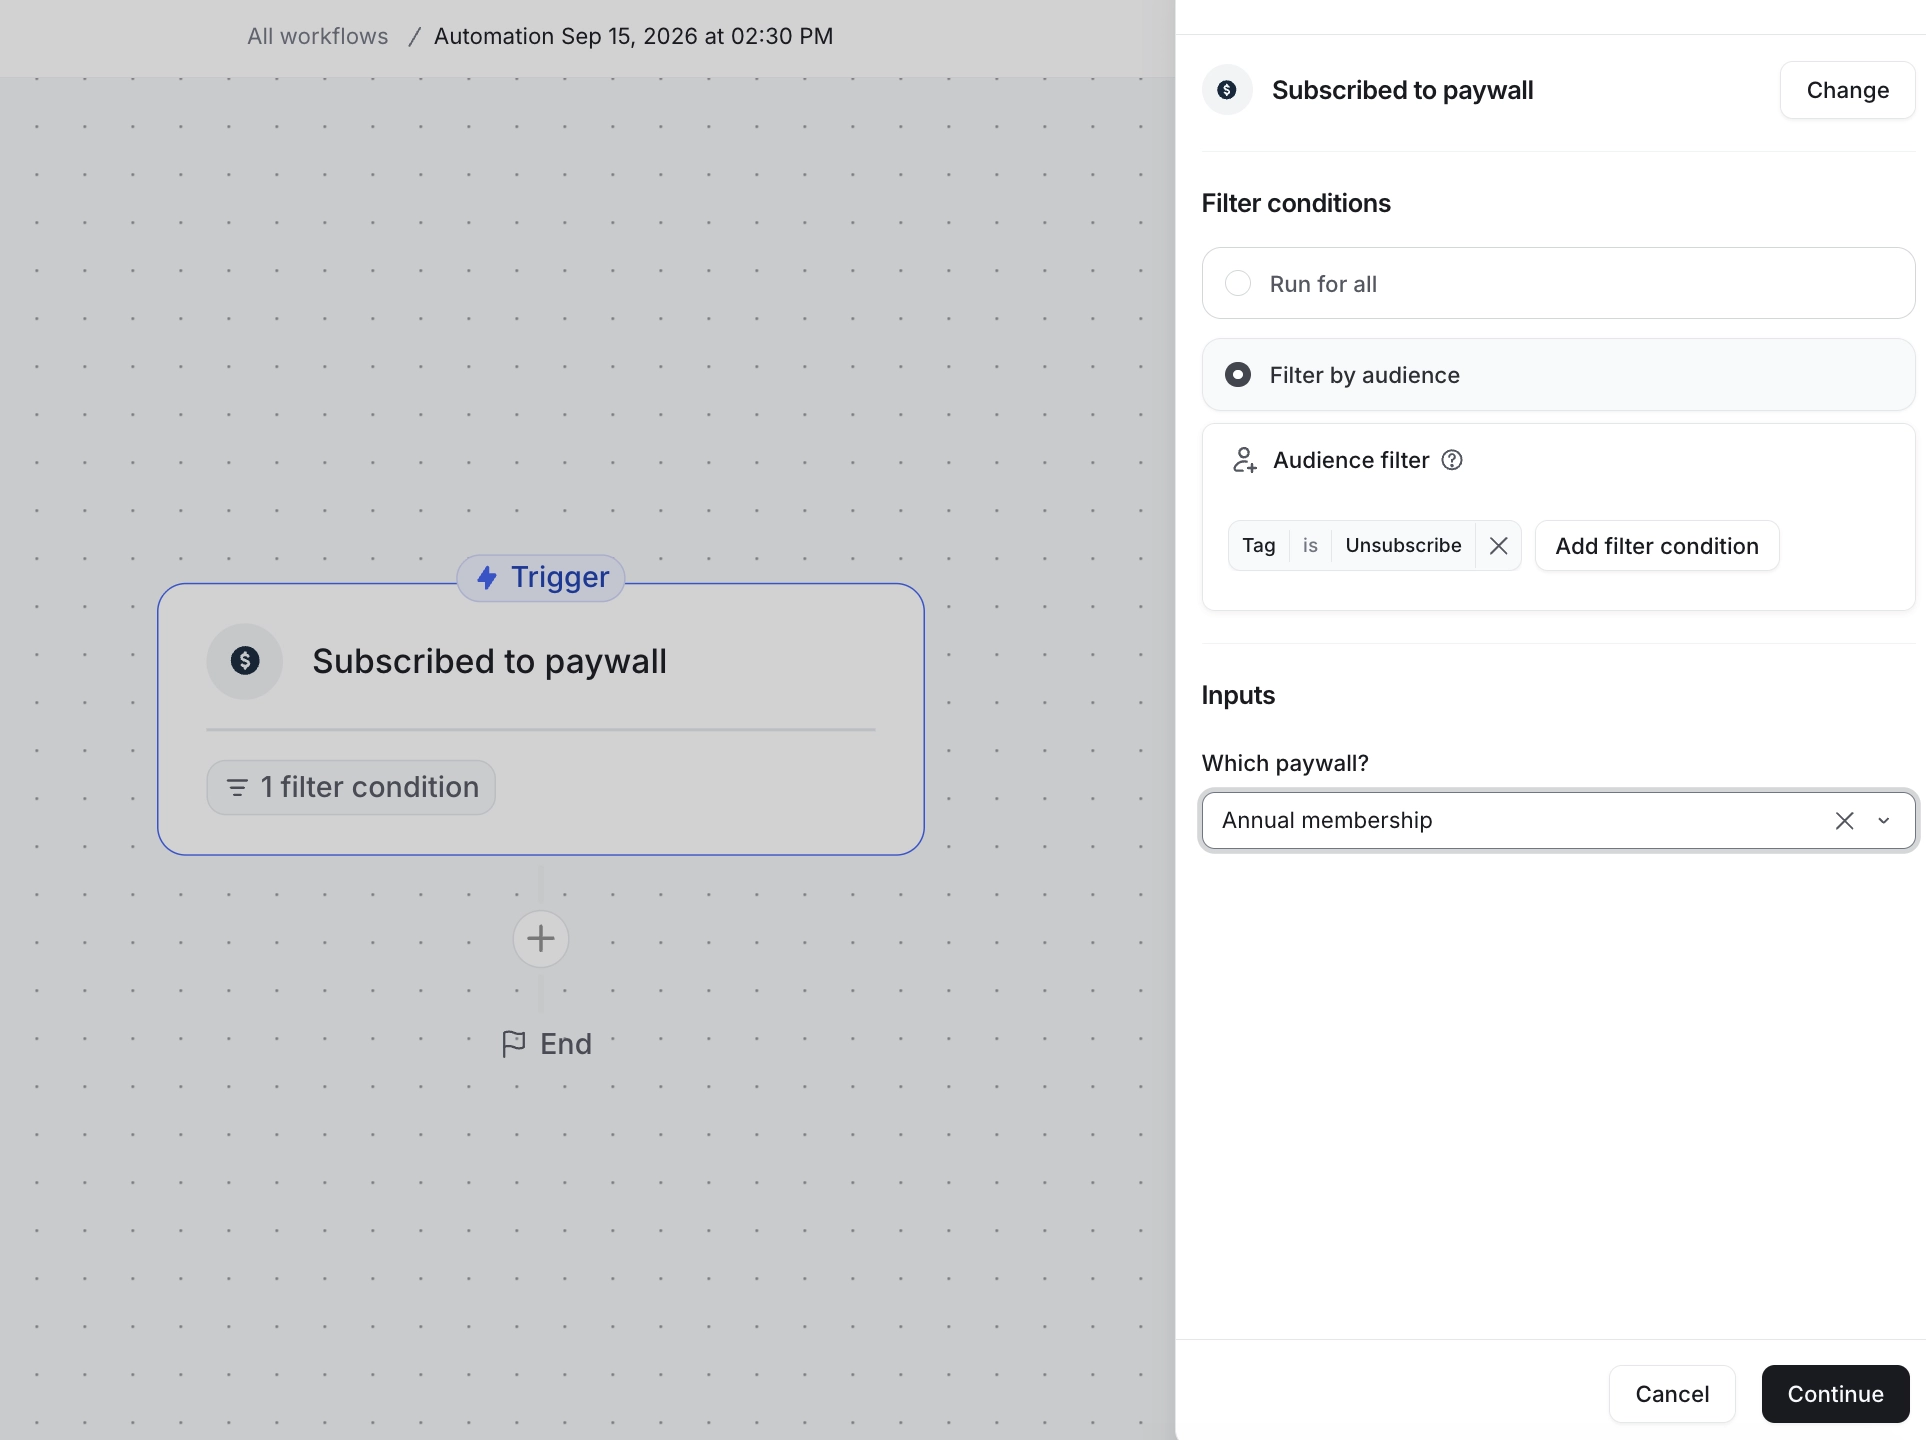
📚 To learn more about setting up the trigger step using our editor, see our detailed guide here.
Step 4: Set up actions
Actions are the tasks that a workflow performs once triggered. These tasks can include awarding gamification points, sending marketing emails, providing access, and more. You can configure one or multiple actions within a single workflow to automate a series of steps.
The automation workflow continuously monitors for the trigger event within your community. When the trigger occurs, it automatically executes the actions for the eligible member.
For example, if a member purchases a paywall subscription, you might want to nurture their experience by:
Sending a personalized welcome message (DM).
Adding a specific tag to their profile.
Initiating a series of marketing emails over the next three weeks to help them explore and engage with premium content.
💡 Tip: You have the ability to insert a delay action either before any other action or in between actions. This allows you to add a pause to the execution of the above actions for a specific amount of time. For detailed information on workflow delays, see our guide here.
To set up actions, click the ➕ icon below the trigger step and choose your desired action from the list. In the action details sidebar, you'll see the following sections:
Filter conditions (optional): Set filter conditions for actions to allow the workflow to perform actions only for individuals who meet the specified conditions.
Inputs: Choose additional inputs depending on the nature of the action. For example, if you select the Reward points action, you’ll need to specify the number of points.
Once you’ve reviewed the action details, click Continue to complete the step.
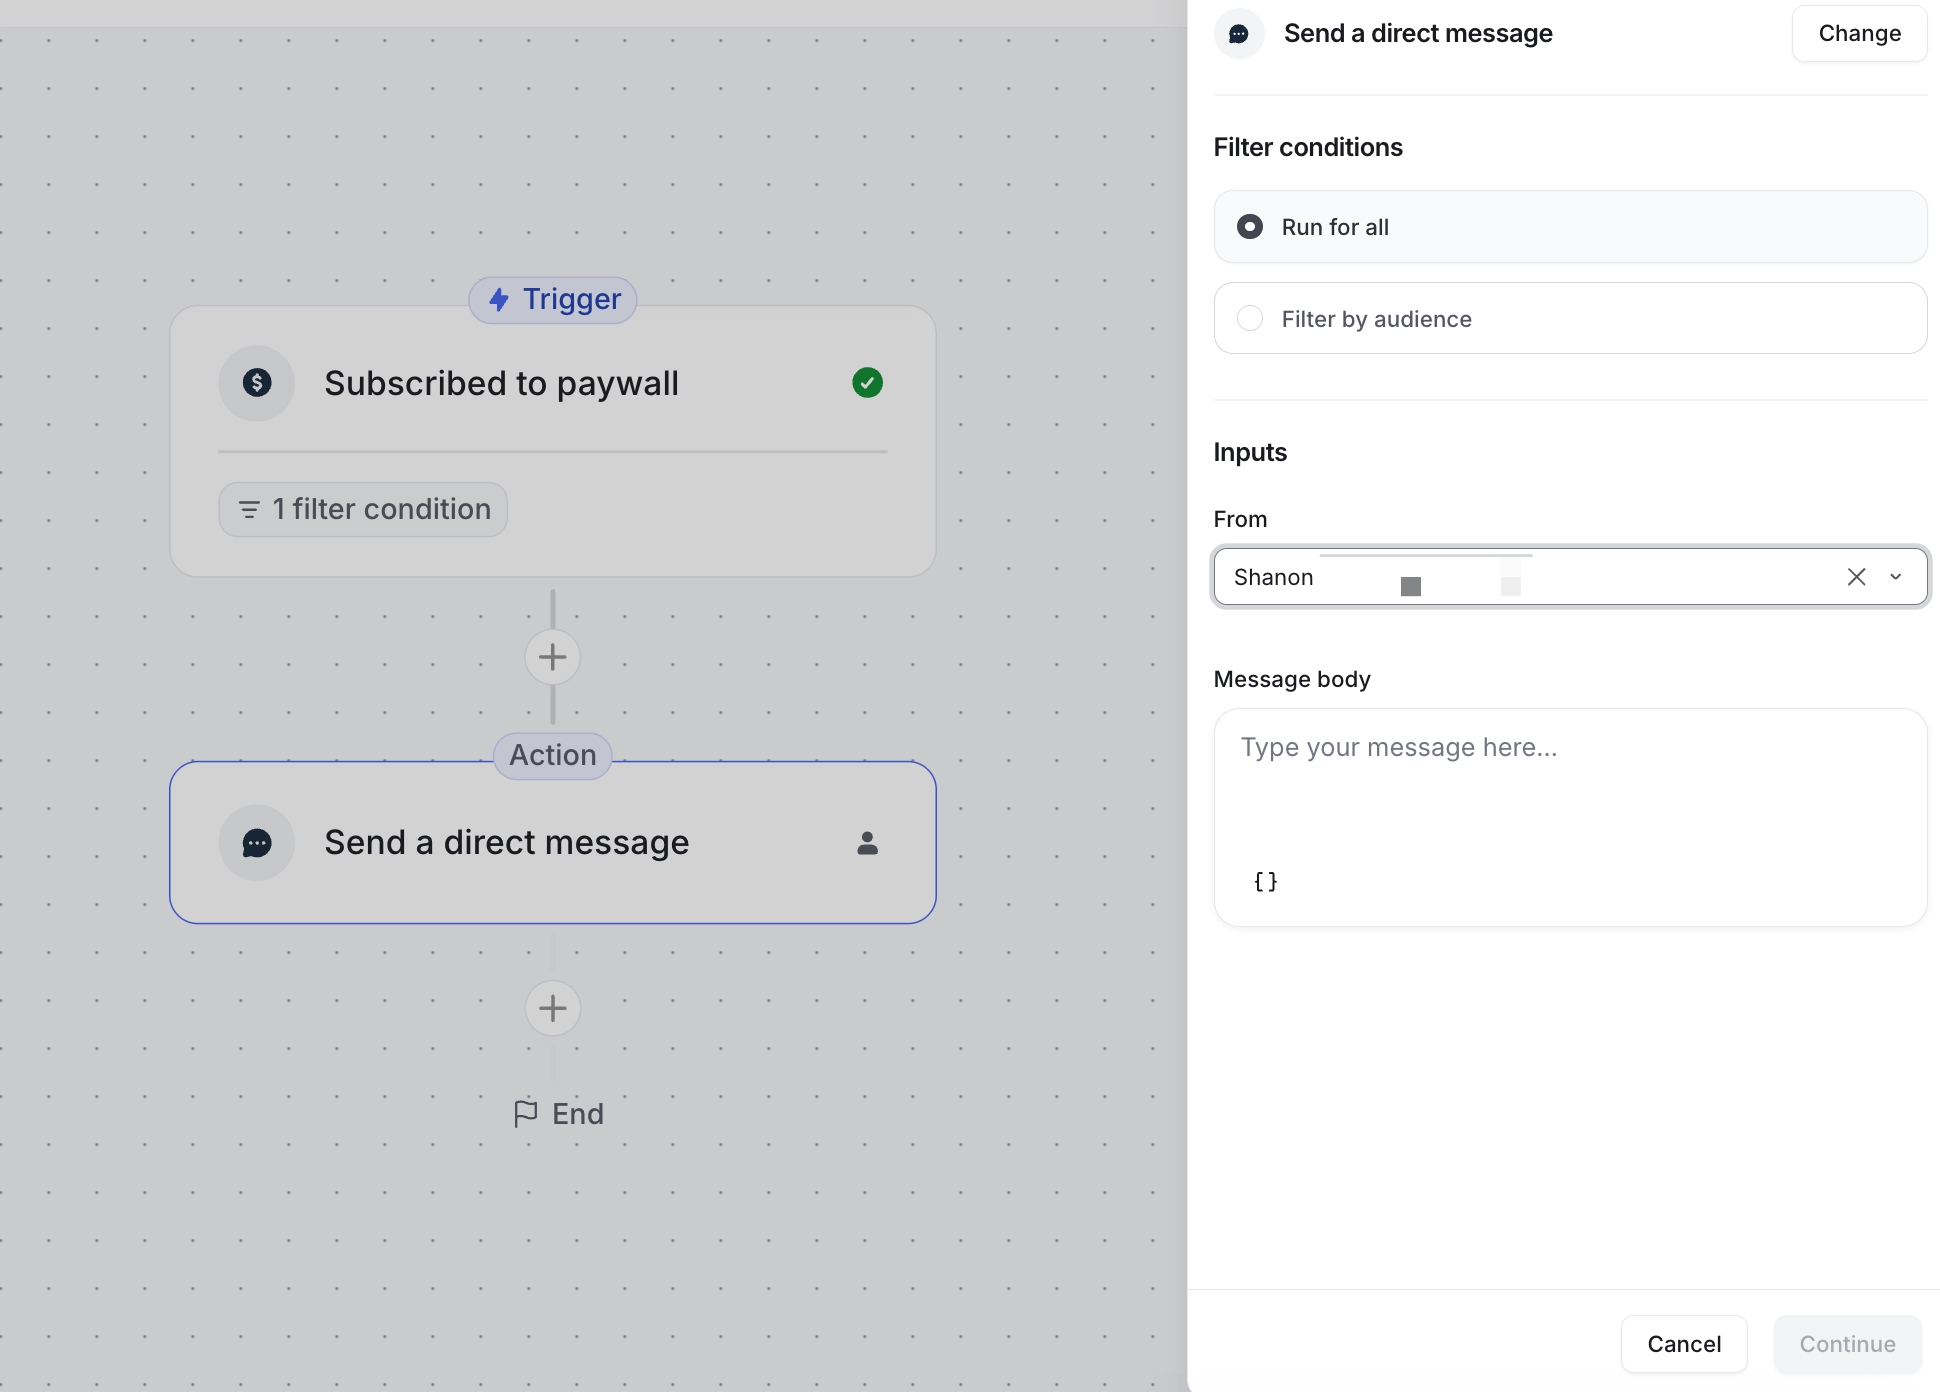
📚 To learn more about adding action steps using our editor, see our detailed guide here.
Activate workflow
Once you have set up your workflow trigger and actions, it’s time to activate your workflow!
When you're ready, click Activate in the top right corner and confirm your activation.
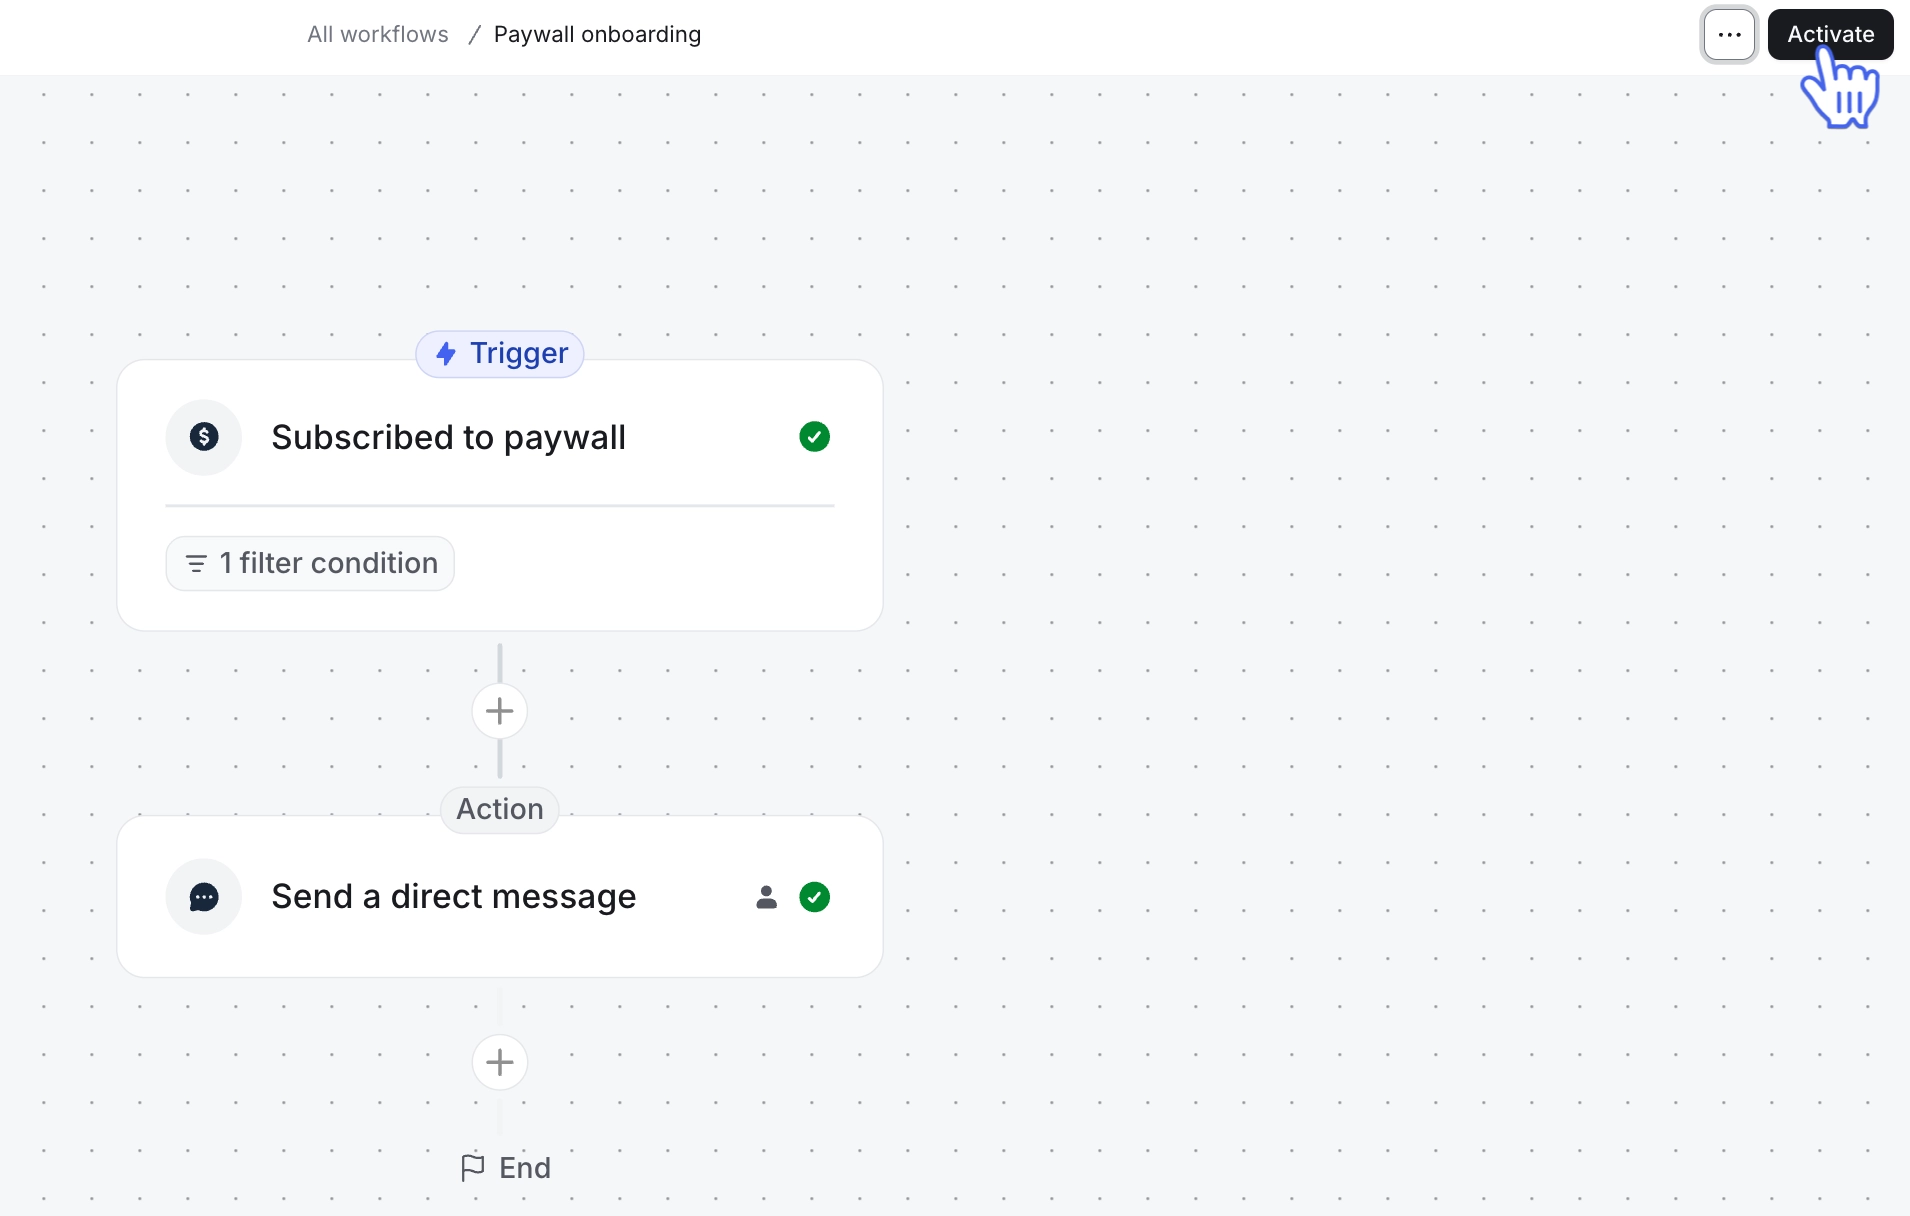
💡 Tip: You can access the workflow overview at any time by navigating to the Automations tab on the workflow page. From there, locate and click the workflow title. Alternatively, hover over the workflow entry, click the More actions (three dots icon), and select View.
After activation, you can still make changes to the workflow setup. Any updates you make will apply to future executions of the workflow.
📚 To learn more about editing workflows, check out our guide here.
Manage the workflow’s active state
Once your workflow is activated, you can turn it on or off whenever you need to. This is helpful when you want to temporarily stop the workflow from running. You can always restart the workflow once you're ready to resume the automated actions.
📚 To learn more about managing the workflow state, refer to our guide here.
View task history
Every time an automation workflow runs, the results for its tasks are recorded on the History page. Tasks are created for each member on whom the workflow was executed, providing a clear, detailed log of its performance.
These task history cards provide a detailed overview of each workflow execution, helping you track and analyze how the workflow is performed. It captures details like the trigger event, the actions performed, and the data involved in the process.
You can view the task history of the specific workflow directly from the workflow overview page. Click More actions (three dots) at the top-right of the page and select History.
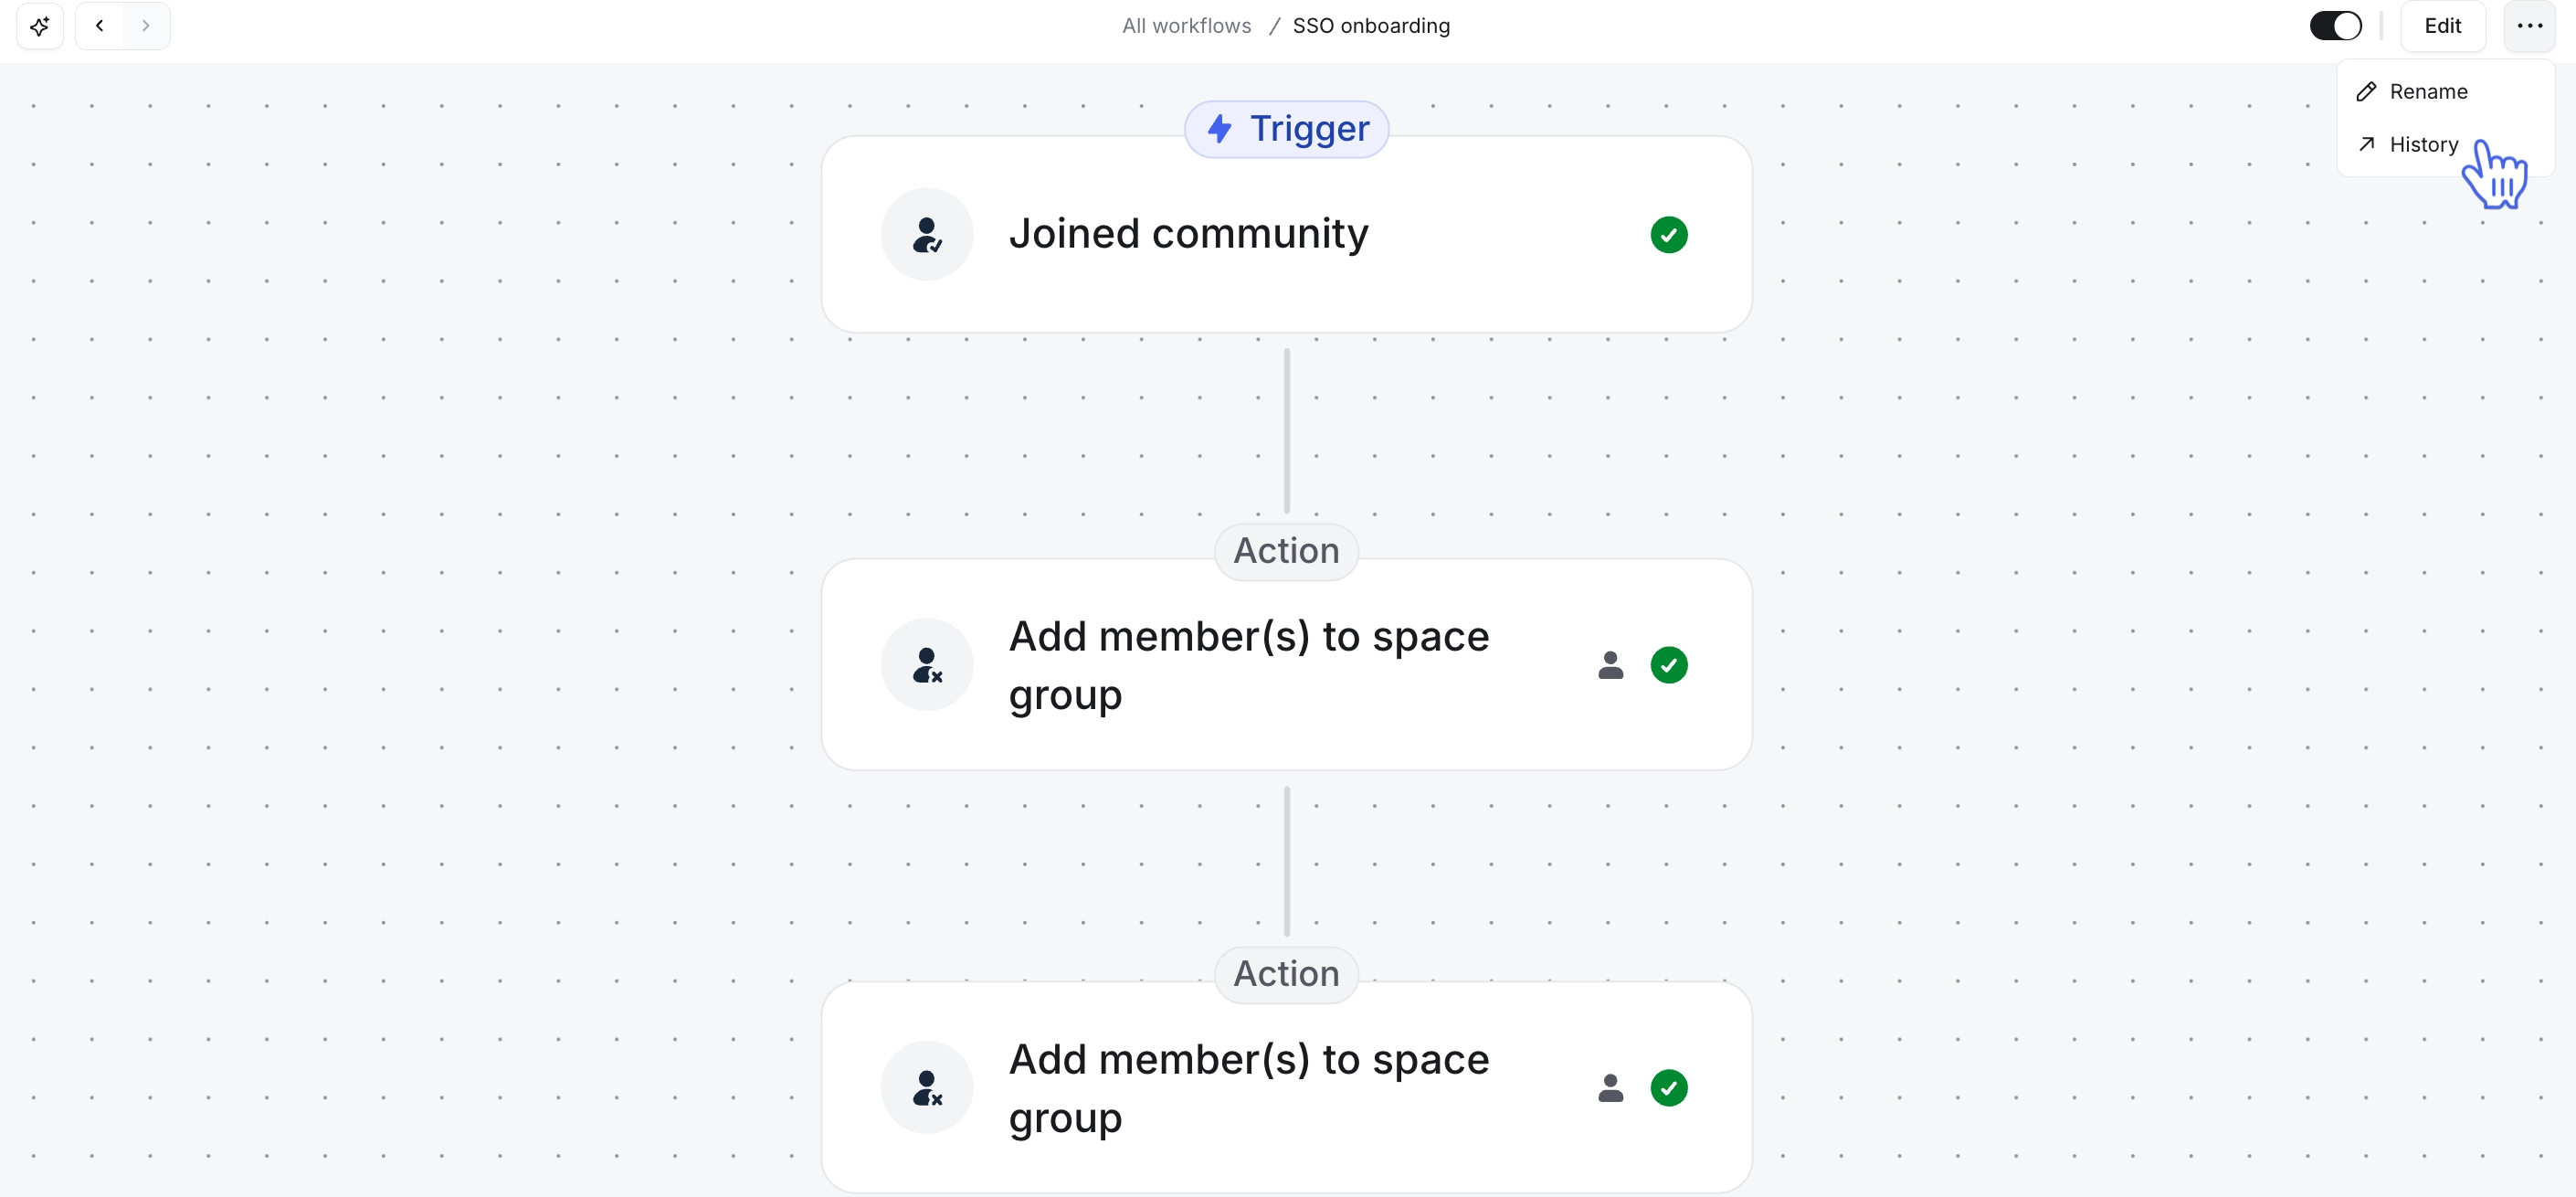
📚 To learn more about task history, see View task history of workflows.