Add delay action to workflows
Last updated: September, 2026
The delay action is a powerful option that lets you set a specific delay before the workflow executes its actions. Available for all types of workflows, delay action pauses the execution of a workflow action for a specified amount of time. This article provides key information on time delays and how to set them up.
This delay can be set in:
Hours: This is perfect for short-term pauses in actions within the same day. You can set a delay of one to 999 hours.
Days: This is useful for actions that need a break over one or multiple days. You can set a delay of one to 365 days.
Weeks: This is ideal for long-term execution plans, such as periodic check-in or timed access. You can set a delay between one week and 52 weeks.
Here are some benefits of using delay actions:
Human-like interaction: Add short delays to make workflows feel more natural. For example, set a delay before sending a push notification after members take certain actions.
-
Improved onboarding experience: Space out communications to avoid overwhelming new members joining the community, or existing members joining specific spaces or space groups. For instance:
Set a short delay in automation delay to send a welcome message to your members when they join the community.
Add a 1-week delay to a bulk-action workflow before sending a DM to request feedback on the content.
Timed access control: Use delay actions to automate granting or revoking access after a certain period. For instance, add a delay action of two weeks before the action to remove members from space.
Set up time delay action in a workflow
When configuring the automation or bulk action workflow, follow these steps:
-
In the workflow editor, click ➕ (Plus icon) below or above any step where you want to insert the delay.
💡 Tip: If you want to pause one day before sending the DM, add a delay action before the Send a direct message action.
Click the Choose an action dropdown menu, then select Time delay.
-
In the Wait for section, choose the duration type and the amount of time.
Click Continue.
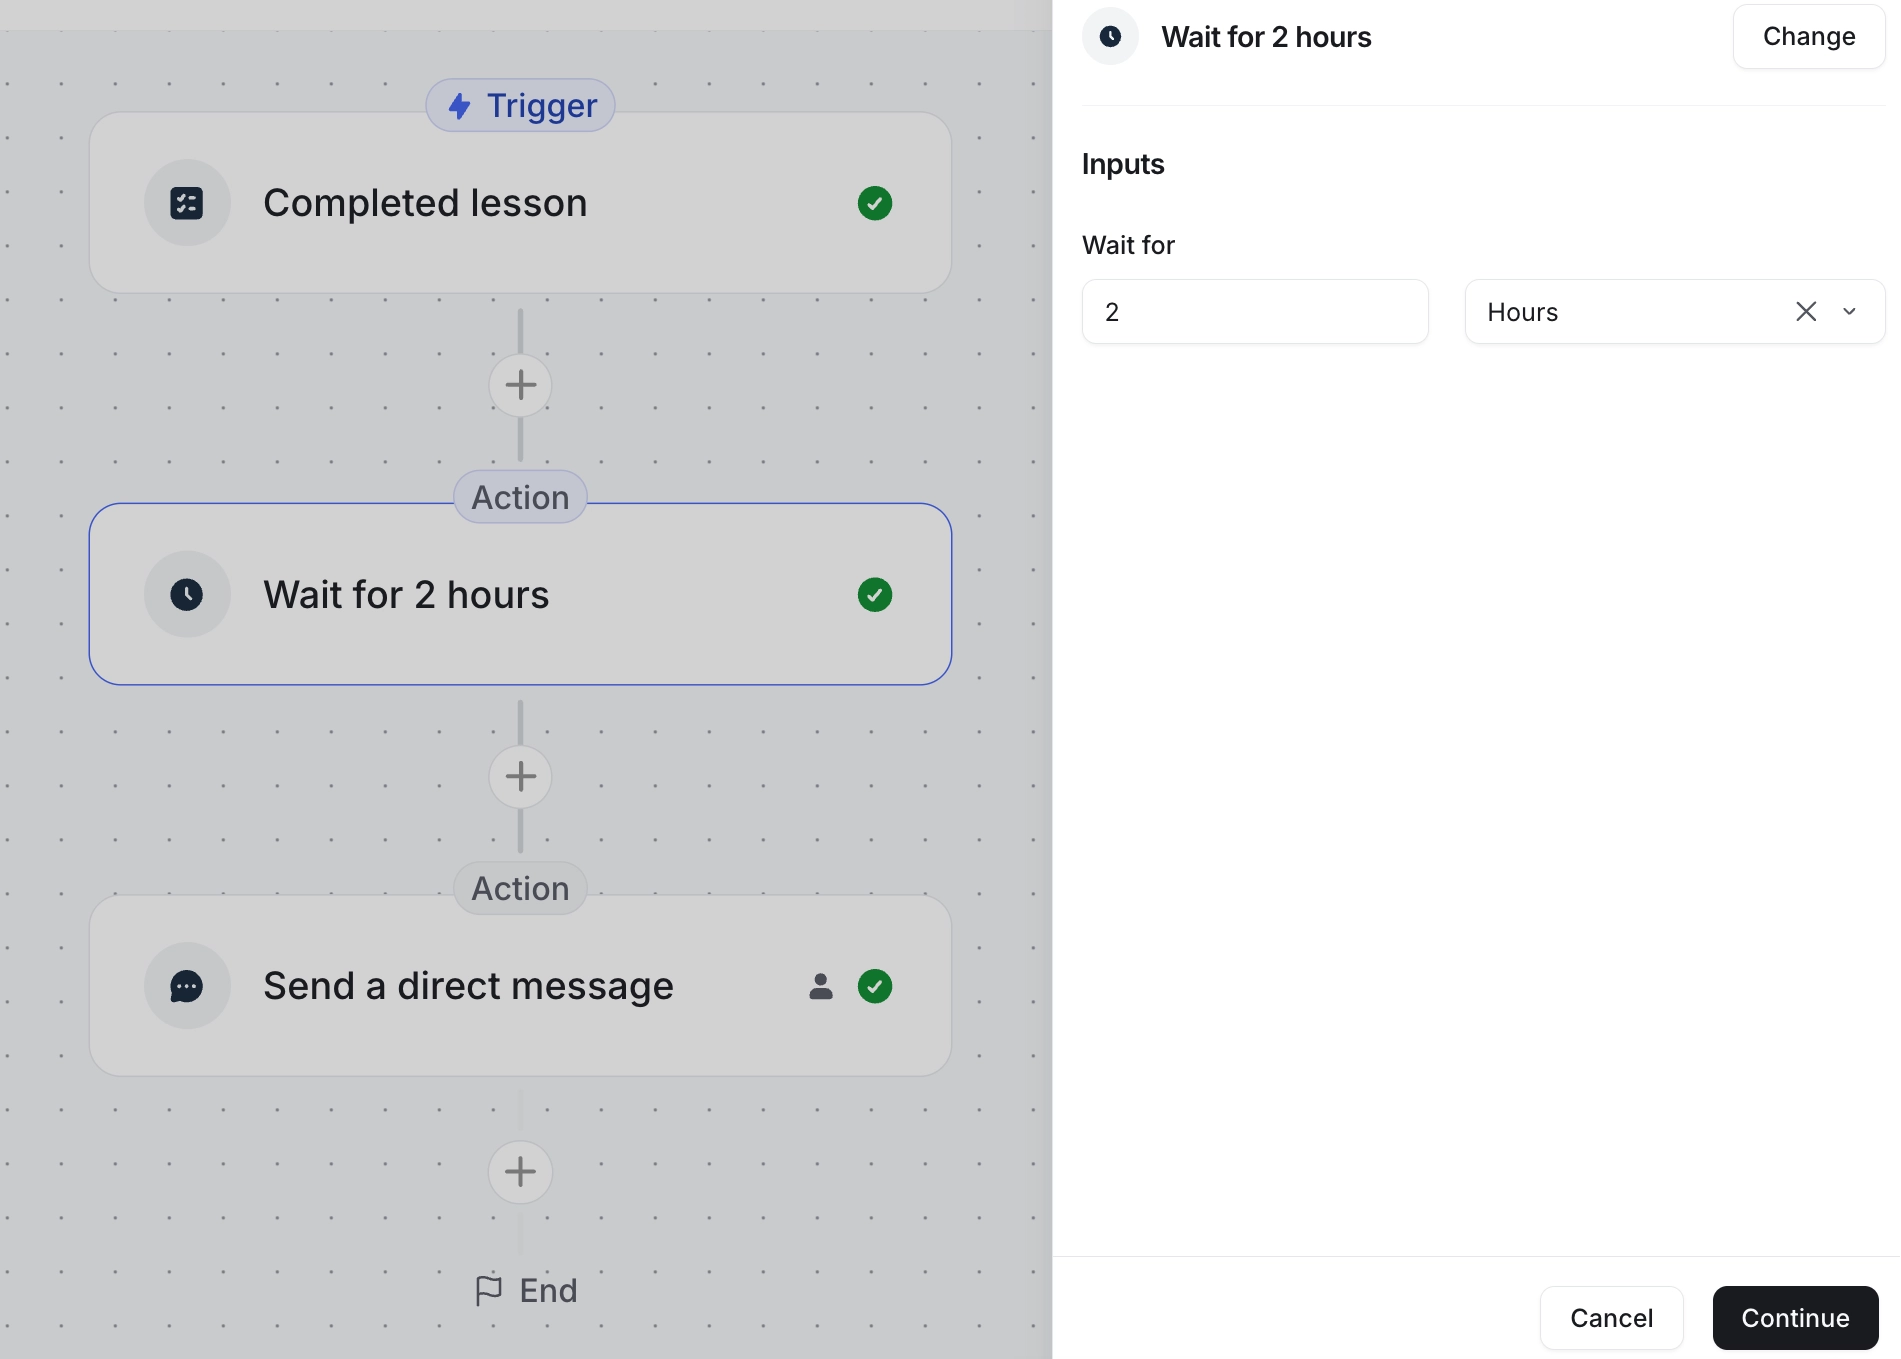
You can also add multiple time-delay actions between actions. This pauses the sequence, so the next action will start only after the delay time has passed.
Once you have activated the automation workflow, run the bulk action workflow, or scheduled the bulk action workflow, the time delay information will show up in the task history, where you can see the start and expected end of the delay.
After the delay ends, any actions you have configured in the workflow following the delay action will be executed.