Add filter conditions in workflows
Last updated: September, 2026
Filter conditions let you build smarter, more targeted workflows by setting rules that determine who a workflow applies to, based on specific criteria. This ensures workflows only run for the right people and content, keeping things precise and efficient. Filter conditions are entirely optional, so you can set up workflows with or without them.
There are two types of filter conditions:
-
Audience filters: These are the same filters you’ll find in the Manage audience page. You can filter by CRM, platform, and profile fields to build precise conditions.
Audience filters are available in all triggers and actions, except the time delay action and AI actions.
-
AI filter: This lets you filter based on the content of posts or comments. You simply describe what the AI should look for in plain language.
Available only for the triggers: Published a post and Posted a comment.
ℹ️ Note: AI workflows are also available to communities on the Enterprise plan, which is no longer available. For more information, see Circle legacy plans.
📚 To learn more about AI filters, see Setting up AI filters and actions.
These filters allow you to set up:
-
Precise triggers
Run onboarding workflows only for new members who match certain tags, locations, or profile fields.
Use an AI filter to trigger only when a post contains specific topics, sentiments, or questions.
-
Targeted actions
Send promotional emails only to members in your “VIP customers” access group.
Add members with a specific tag to a space without affecting everyone else.
RSVP only paying subscribers to an event.
Where filter conditions can be used
Filter conditions are available across all types of workflows, but they can only be applied to the following steps:
Triggers: Add conditions to a trigger so the workflow runs only for people who meet the criteria. If someone doesn’t meet the filter criteria, the workflow won’t run for them.
-
Actions: Set filter conditions so the workflow performs actions only on individuals who meet them.
If your workflow has multiple actions, you can set filter conditions for each one. When it runs, the workflow checks each action’s condition separately. If someone doesn’t meet the condition for a specific action, that action is skipped, and the workflow proceeds to the next step.
Setting up filter conditions
When editing a trigger or action step in the workflow editor, follow these steps to add filter conditions:
-
Enable filter conditions: In the step setup, select Filter by audience under the Filter conditions section. If you choose the Run for all option, filter conditions won’t apply.
If the trigger supports an AI filter, the Filter by audience and content with AI option will appear instead. When you choose this option, you can apply either the AI filter, audience filters, or both, giving you flexibility.
-
Apply audience filters: Click Add filter condition, choose a filter, and set the criteria. Certain filters support advanced conditions for more precise filtering.
-
Using advanced conditions: These conditions are available for text-type and list-type filters, such as name, headline, and location (including checkbox- and dropdown-type profile fields). Depending on the type of field you are using as a filter, you can use one of the following conditions:
Contains (for text, link, and number type fields)
Does not contain (for text, link, and number type fields)
Is
Is not
Is empty
Is not empty
ℹ️ Note: These filters are applied with the “And” condition, meaning it will only trigger or perform actions for individuals meeting all selected filter criteria. To further refine your conditions, you can apply the same filter multiple times to create highly specific combinations.
-
Apply AI filter criteria: Write your instructions in plain language (for example: “Posts that ask a question about billing” or “Comments that include negative feedback”).
Save the step: Configure the Inputs section for the step if applicable, and click Continue to save the step.
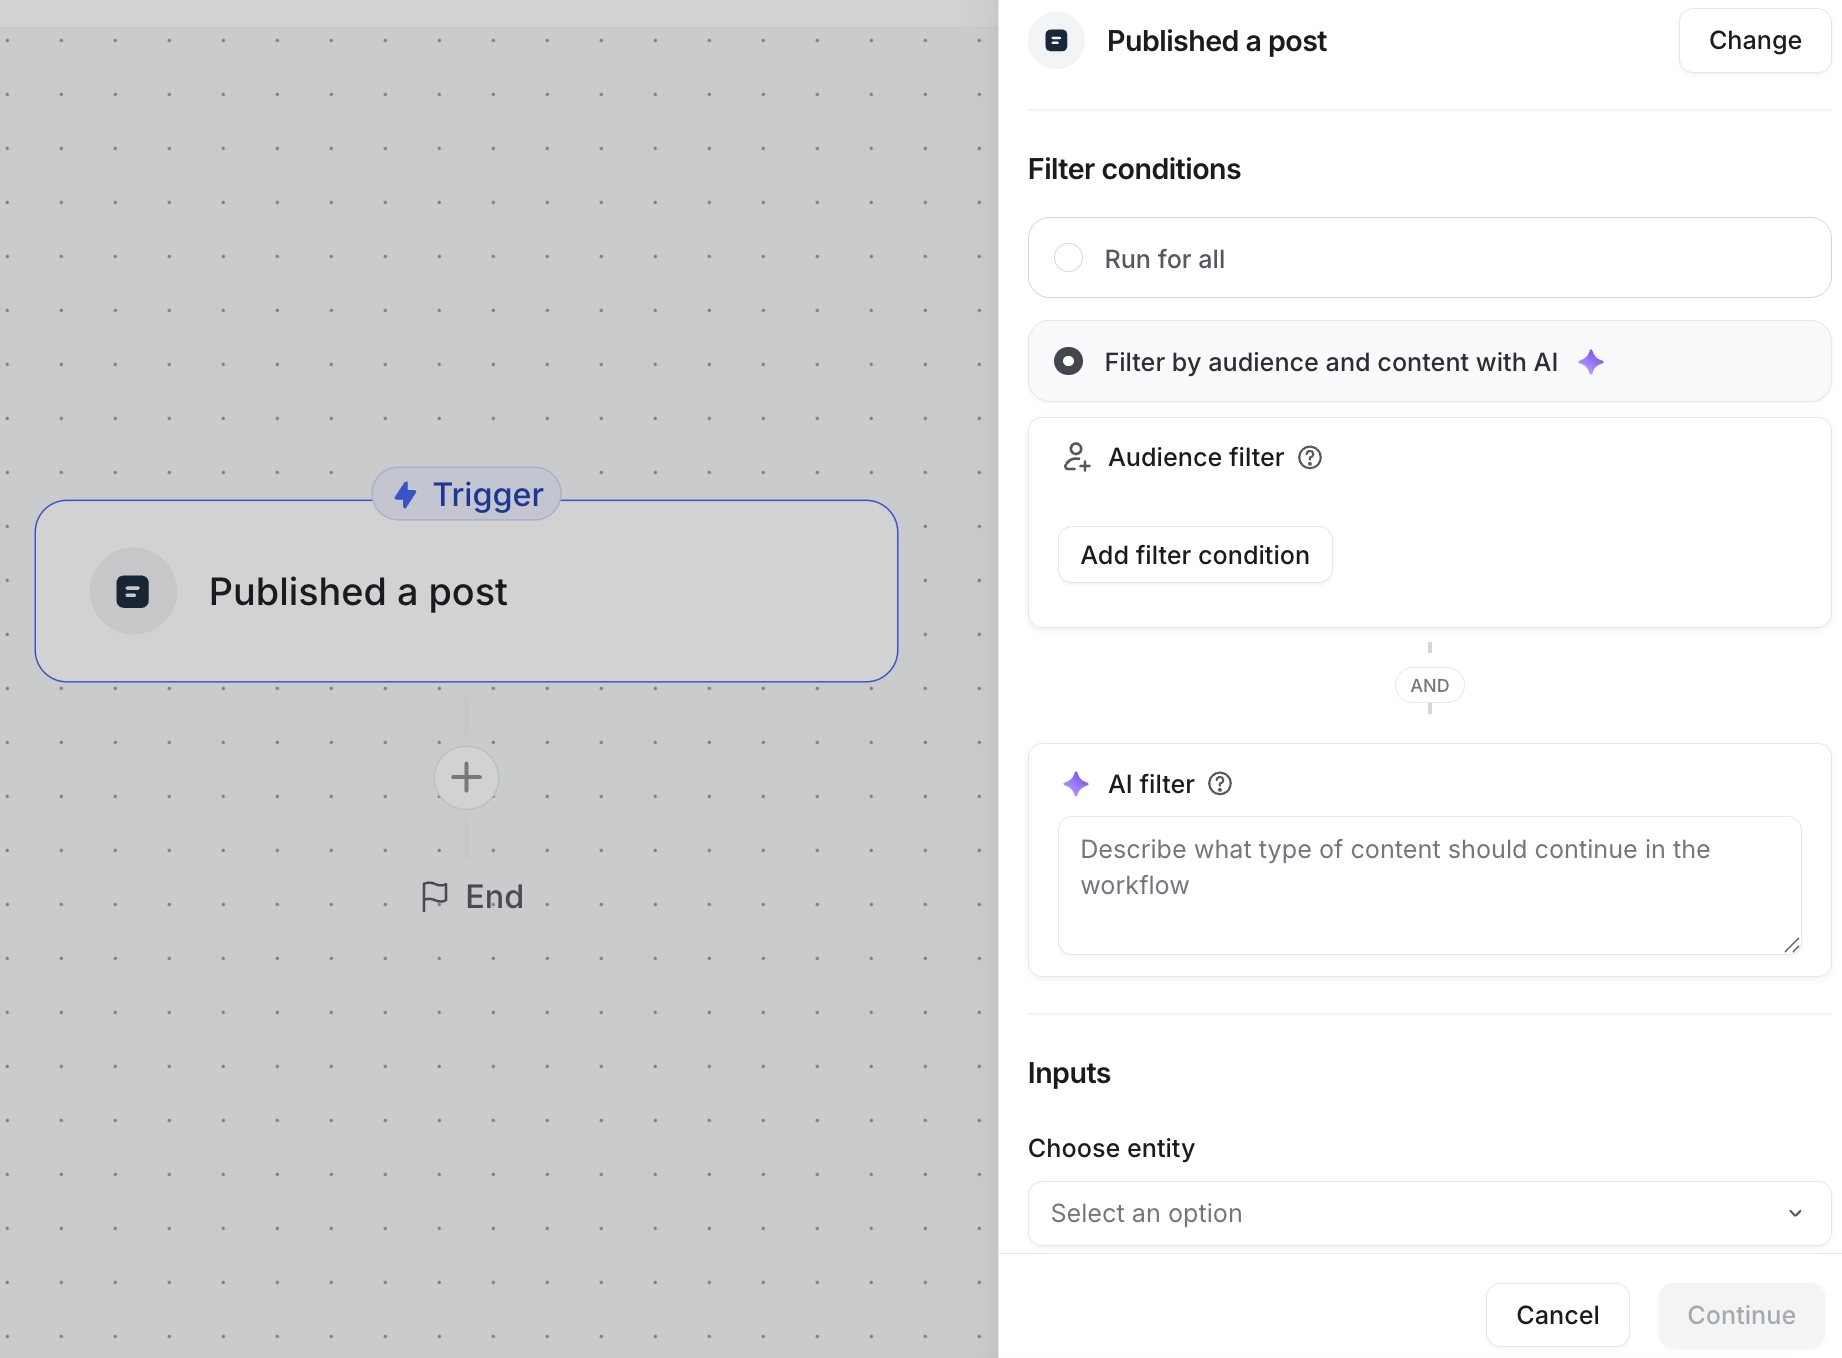
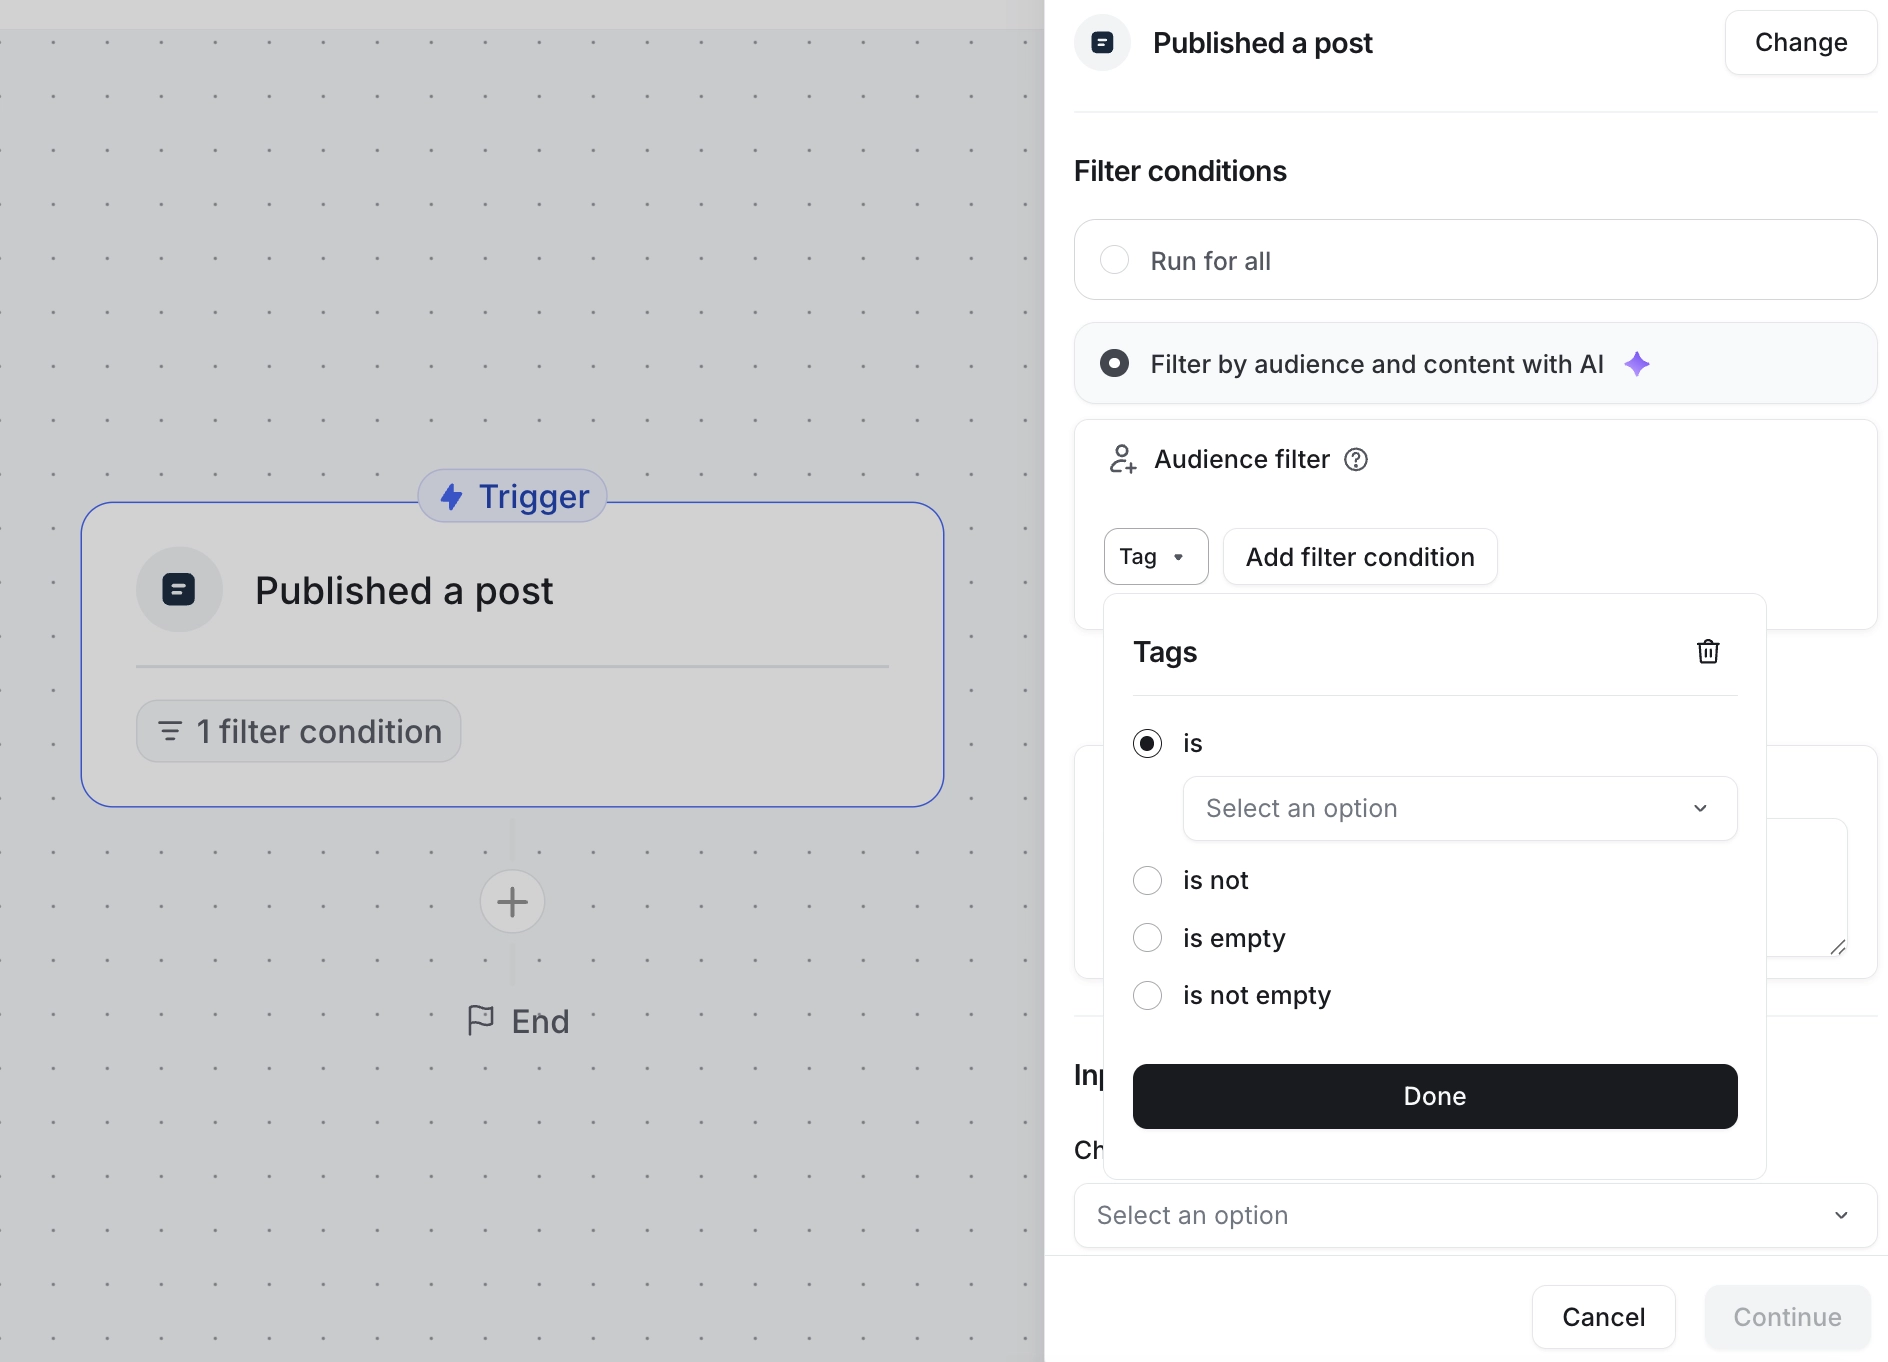
Once the filters are applied, the step will display badges indicating the number of audience filters applied and if the AI filter is applied. Hover over the filter condition badge at any time to quickly view the applied audience filters.
Updating filter conditions
You can update the filter conditions you have configured for the trigger or action when editing the workflow:
In the workflow editor, click the step you want to edit.
-
In the Filter conditions section, make your changes:
Edit audience filter: Click the audience filter you want to edit. Make your changes and click Apply or Done to update the criteria.
Remove audience filter: Click the X icon next to the filter to remove it.
Update AI filter: In the text field, make your changes. If you no longer want to apply the AI filter, keep the text field clear.
Click Continue to save the step.