Use the editor to build Circle workflows
Last updated: September, 2026
The Circle workflow editor is a powerful, canvas-based tool that offers an intuitive way to create and manage workflows in your community. This article will walk you through its key features and how to use them effectively.
Navigating the workflow editor
The workflow editor provides a clean interface to set up automation, bulk actions, and scheduled workflows efficiently.
To get to the editor:
Click Workflows in the left sidebar, then select Workflows.
Click New workflow in the top-right corner.
On the workflow creation page, choose a template or click Start from scratch.
When you enter the workflow editor, you'll find an intuitive canvas that displays the entry rule or trigger step and lets you add actions. This navigable space lets you move around and adjust your view with zoom controls, ensuring you can always maintain a clear understanding of your workflow's logic and structure as you build automations, bulk actions, or scheduled workflows.
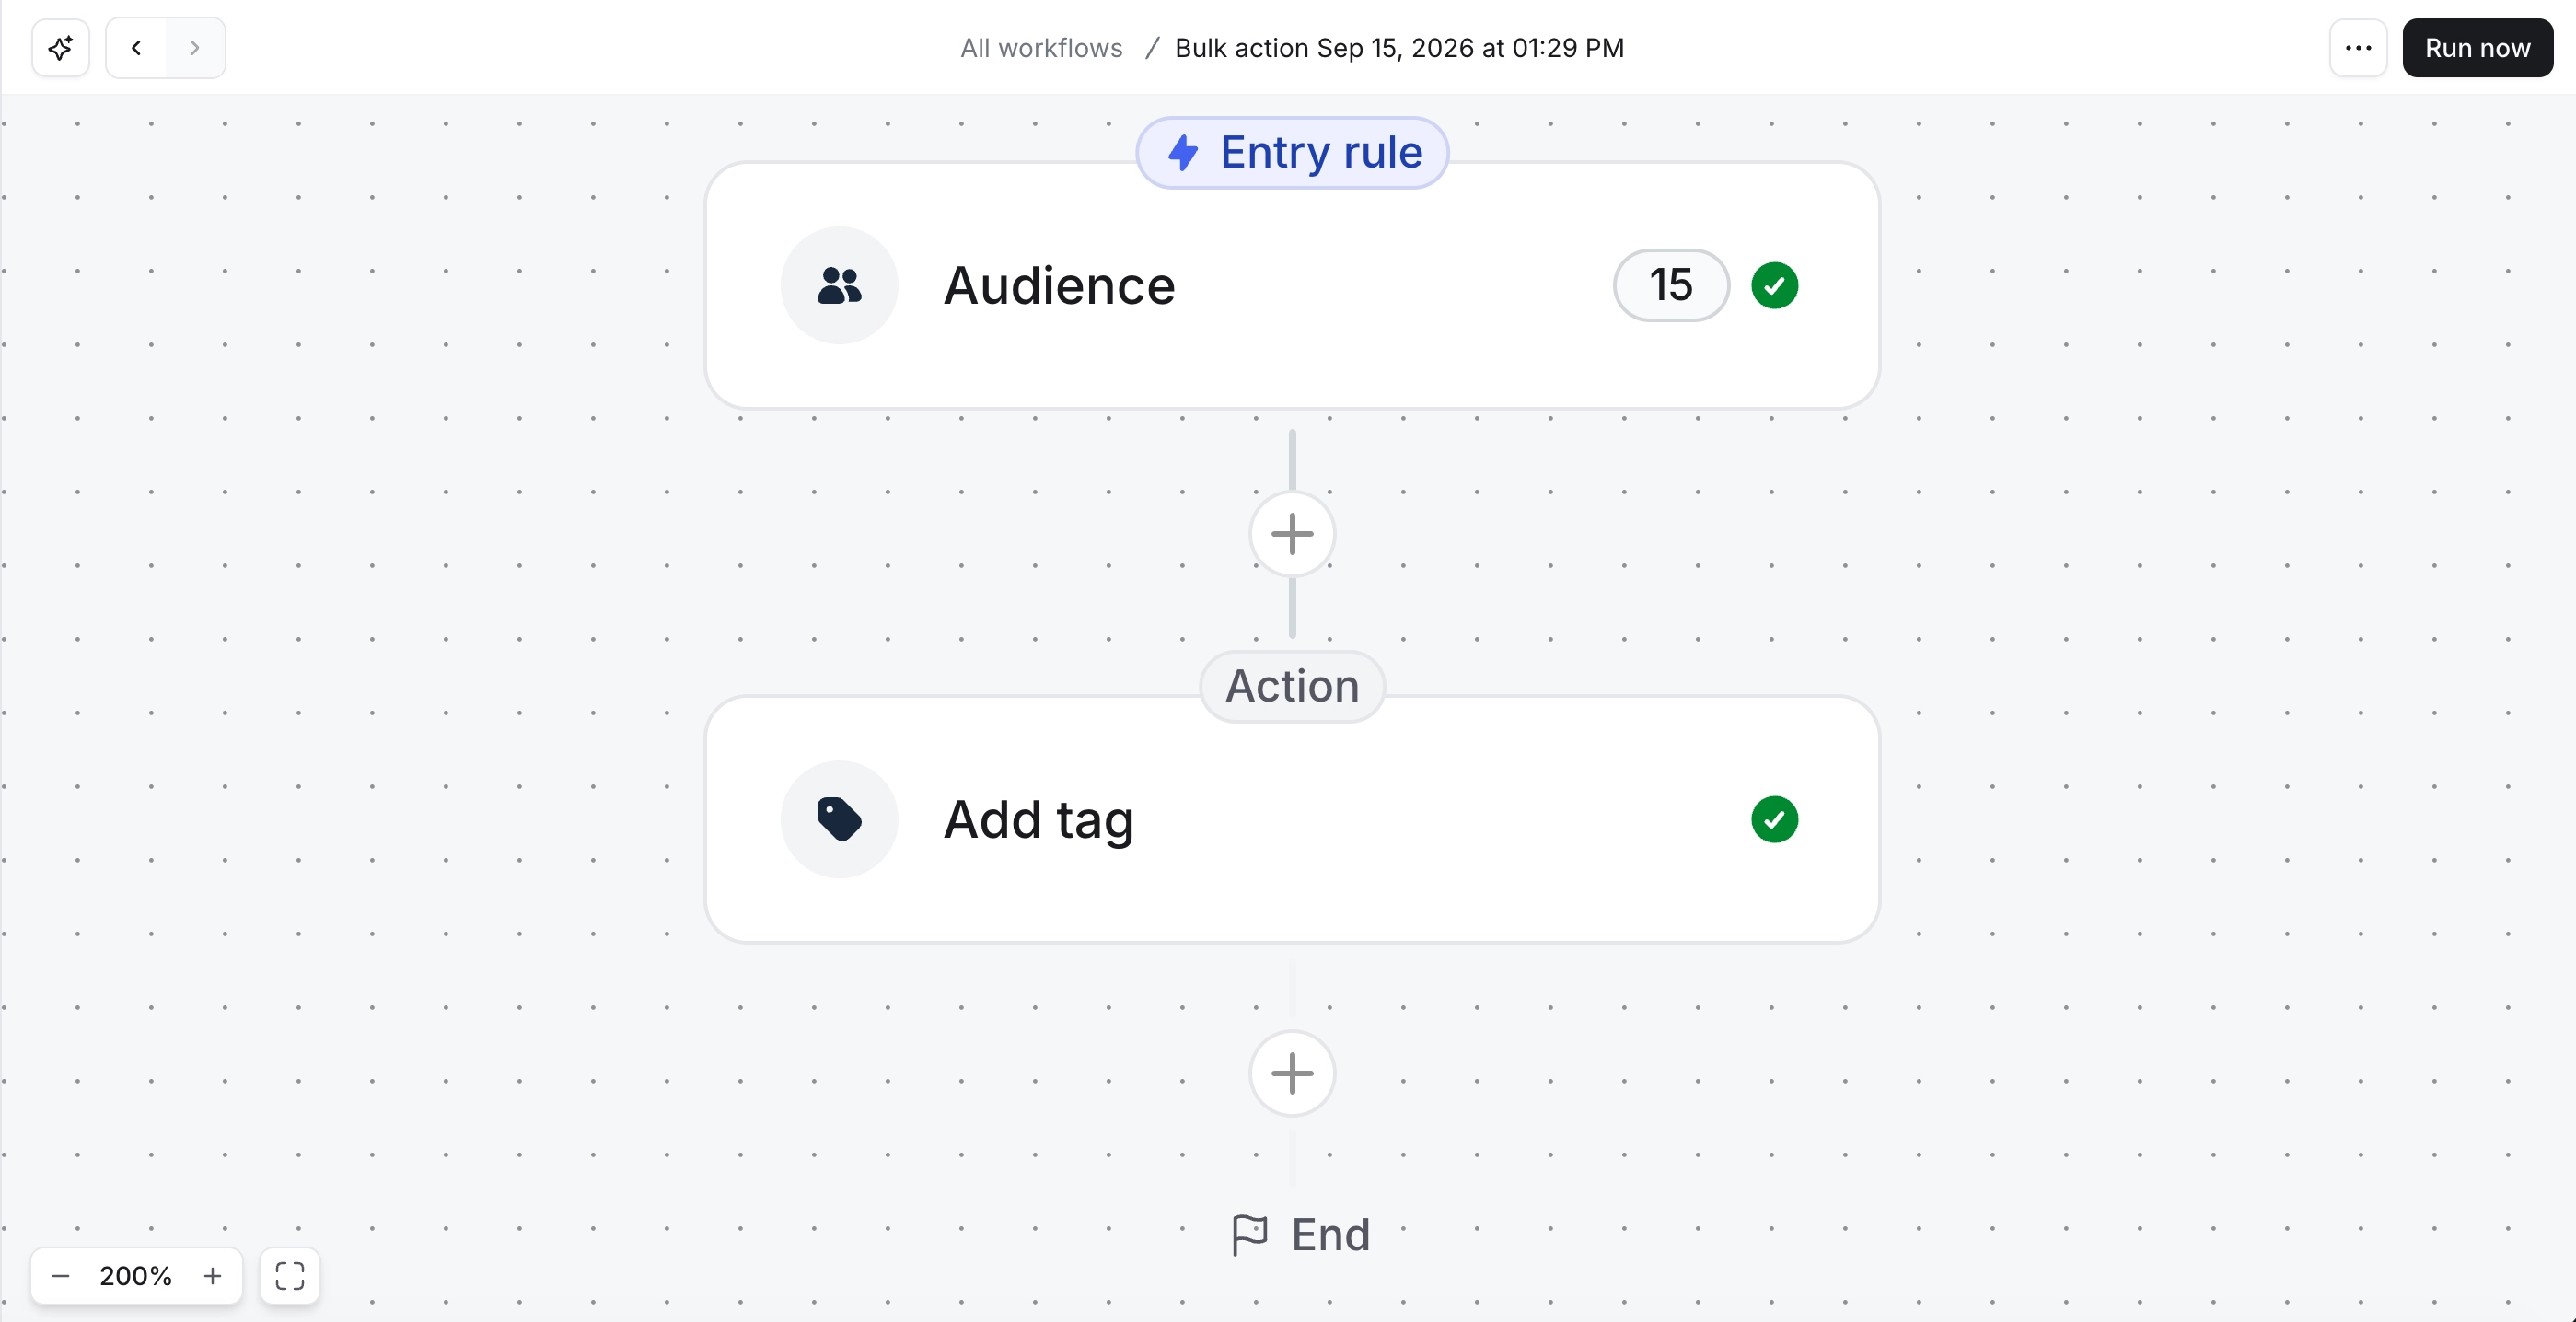
Let’s take a look at the navigation controls:
Zoom in and out: You can zoom in or out of the editor by holding the Ctrl (or Cmd) key while using your mouse's scroll wheel. Alternatively, you can use the ➕ and ➖ icons located in the bottom-left corner. The current zoom percentage is displayed between these icons. This allows you to focus on specific steps or get an overview of the entire workflow.
Fit to view: Click the Fit to view (square icon) at the bottom left to automatically adjust the zoom, ensuring that all the workflow steps fit within your screen. This is helpful when working with larger workflows, and you want a quick overview of all the steps.
Panning the canvas: Click and drag anywhere in the editor to pan across the workflow. This lets you to move across the canvas, ensuring smooth navigation.
Workflow steps
The workflow is built using steps that include either the entry rule or trigger, and actions. Each step is visually represented in the editor with a clear label at the top, making it easy to identify its purpose.
The steps are connected in a sequential flow from top to bottom. This ensures that the workflow executes actions in the specified order, starting from the first action and continuing through to the end.
Let’s explore the types of steps available in workflows and how you can set them up.
Trigger (Automation workflows)
A trigger is the starting point for automation workflows. It initiates the workflow actions when a specific activity occurs. These triggers represent various activities performed by community members or admins, such as joining a space, completing a course, adding a tag, and more.
Whenever the activity corresponding to the trigger occurs, the workflow begins executing the actions.
You can add one trigger per automation workflow, and it always remains the first step in the workflow sequence.
-
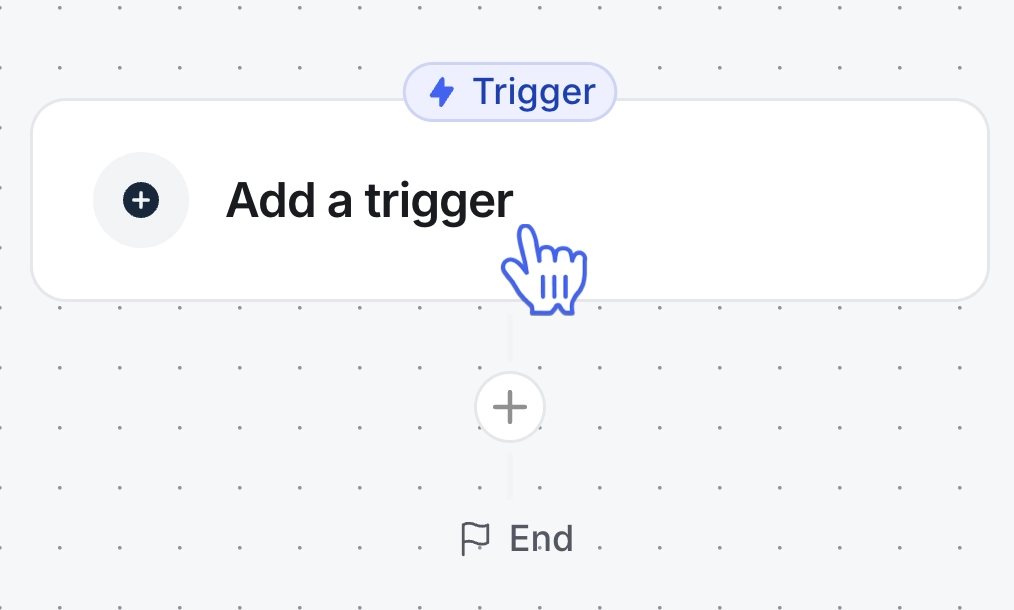
Click the Add a trigger step.
A right sidebar will open, displaying a list of all available triggers. You can scroll through the list or use the search bar at the top of the sidebar to find the trigger you need.
-
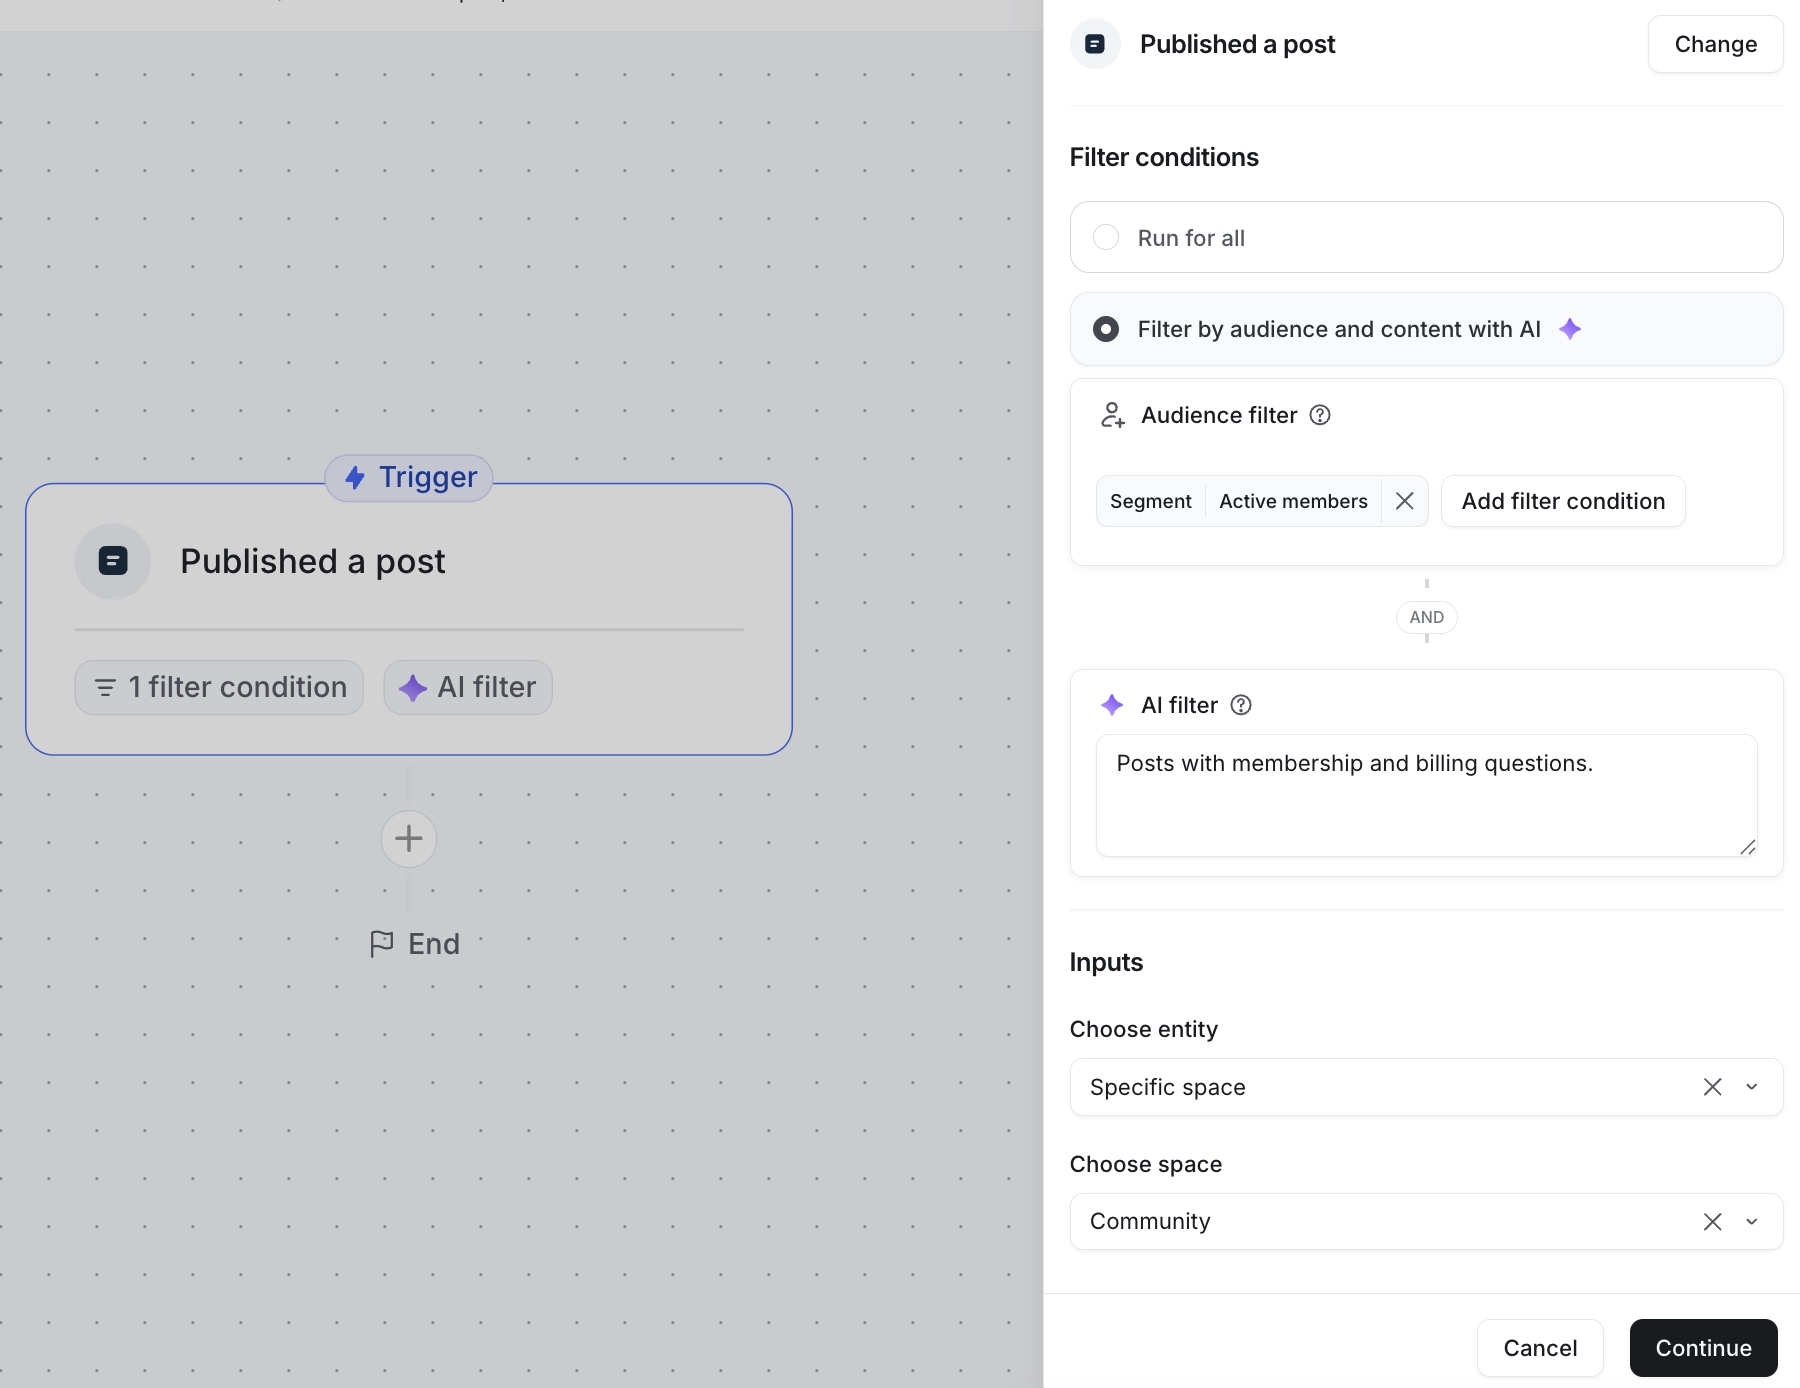
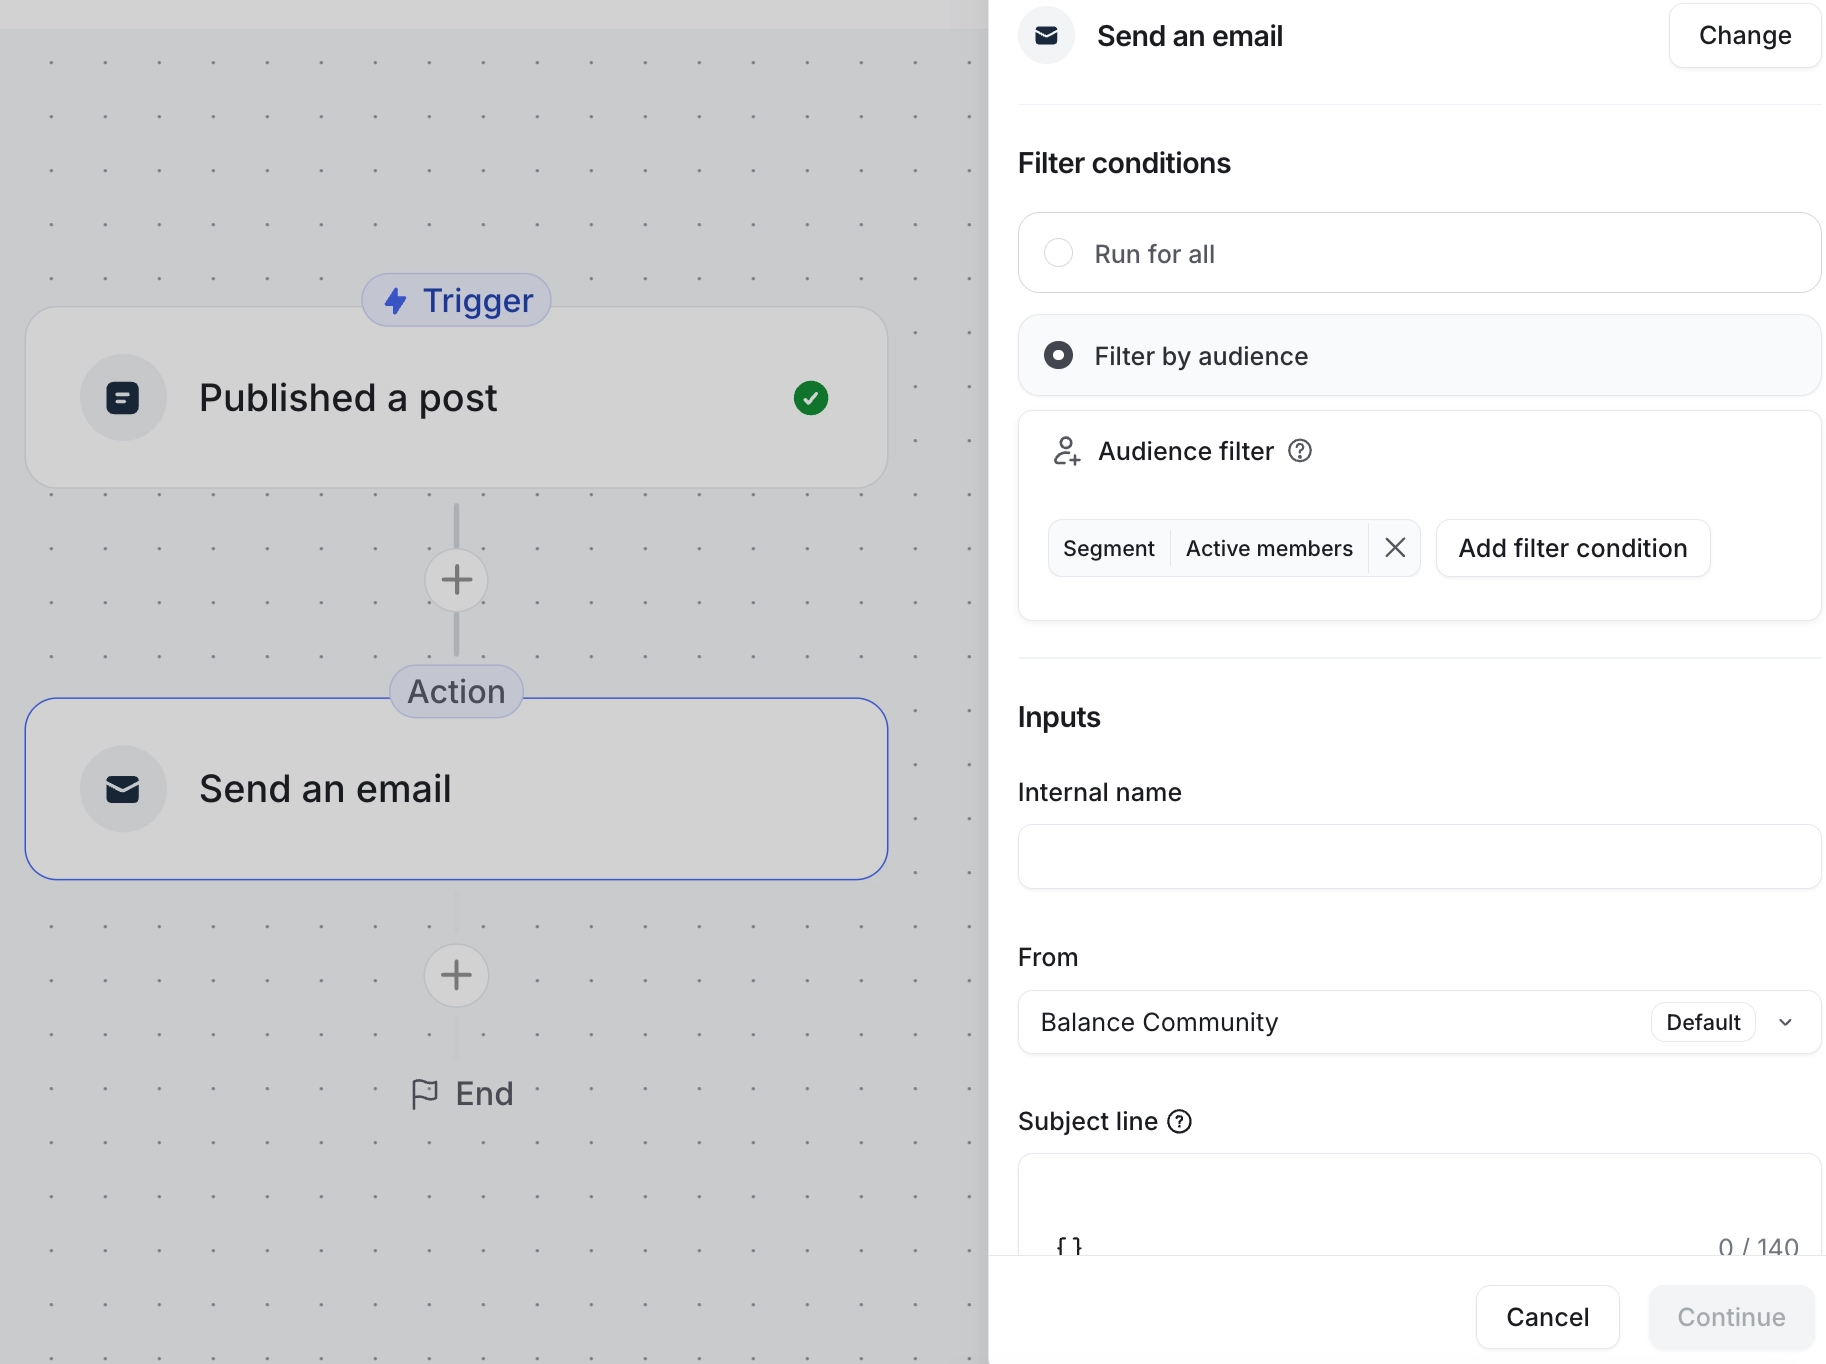
(Optional) Add filter conditions to trigger the workflow only for individuals who meet specific criteria.
You can use various CRM, platform, and profile fields as filters. For eligible triggers such as “Published a post”, the AI filter option also appears below the audience filters. This allows you to describe your filter criteria in natural language.
If you don’t want to set any filter conditions, select Run for all.
In the Inputs section, configure details depending on the nature of the trigger. For example, if you select the Published a post trigger, you’ll need to specify where the trigger applies.
-
After configuring the trigger details, click Continue on the sidebar to finalize the step.
Entry rule (bulk action and scheduled workflows)
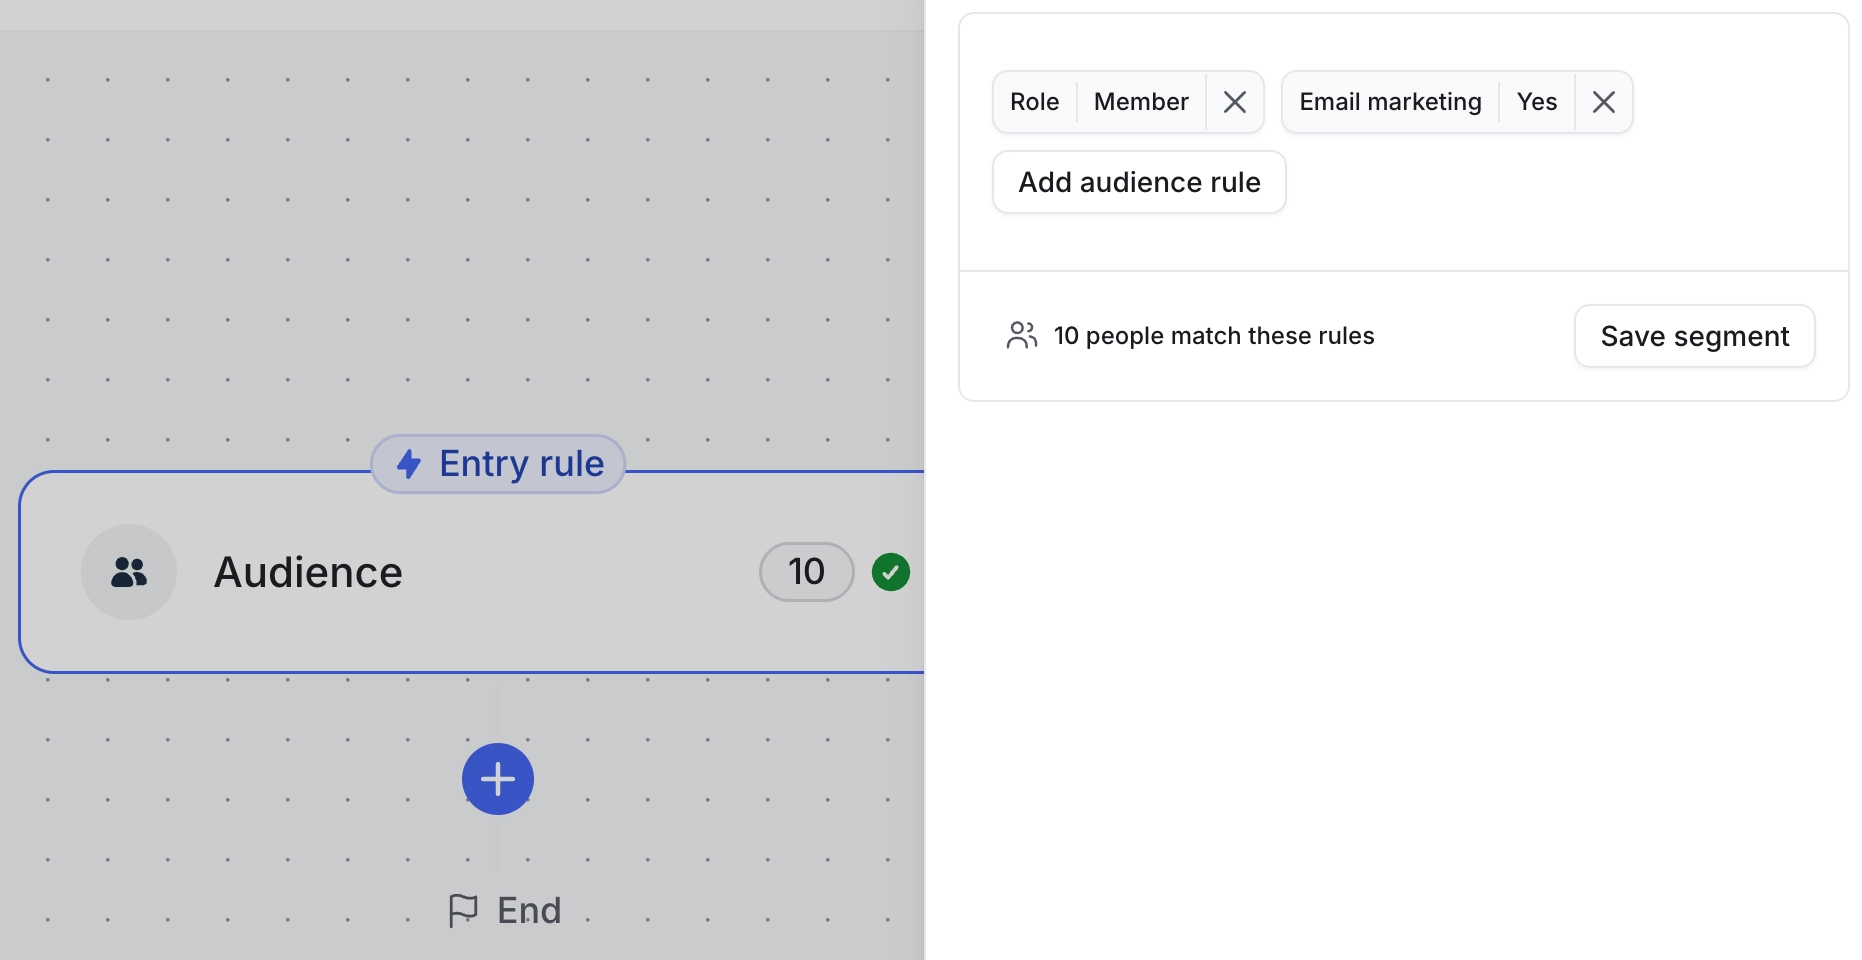
When creating bulk actions or scheduled workflows, the entry rule lets you define the audience by specifying multiple audience rules. This flexibility ensures you can fine-tune the selection of your target audience based on specific conditions.
These rules work similarly to the filters found on the Manage audience page. For example, using a Space audience filter to select all members who are part of the space as an audience.
The entry rule is always positioned at the top of the workflow sequence and serves as the starting point. Follow these steps to set it up:
-
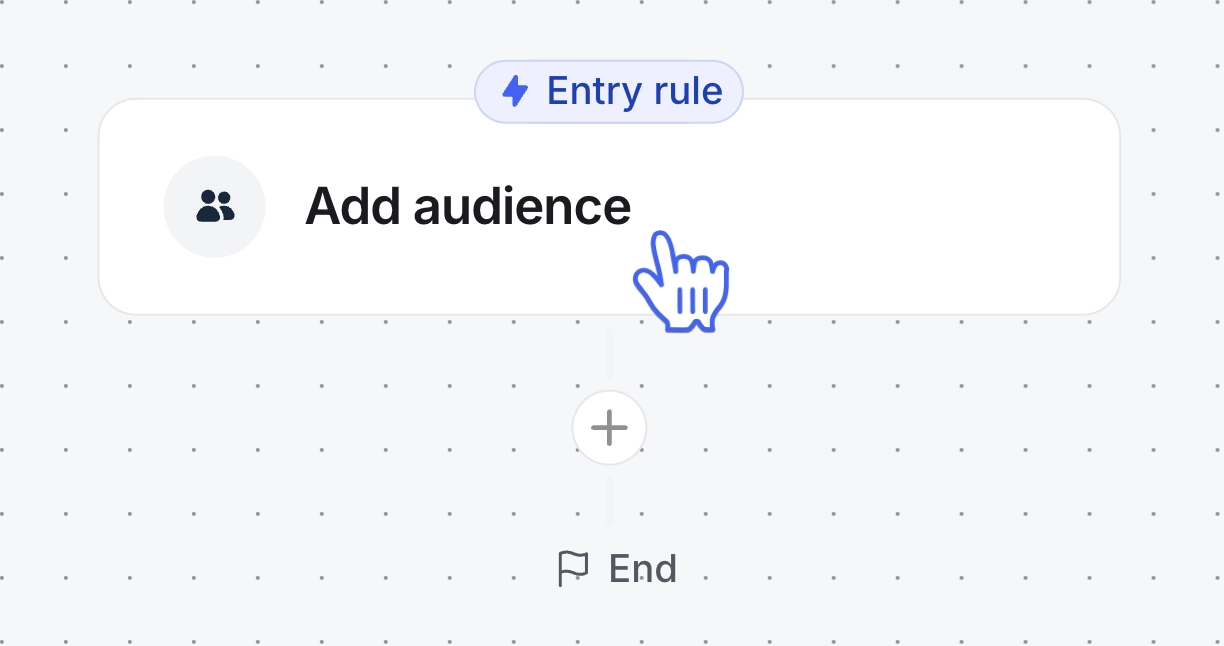
Click the Add audience step.
-
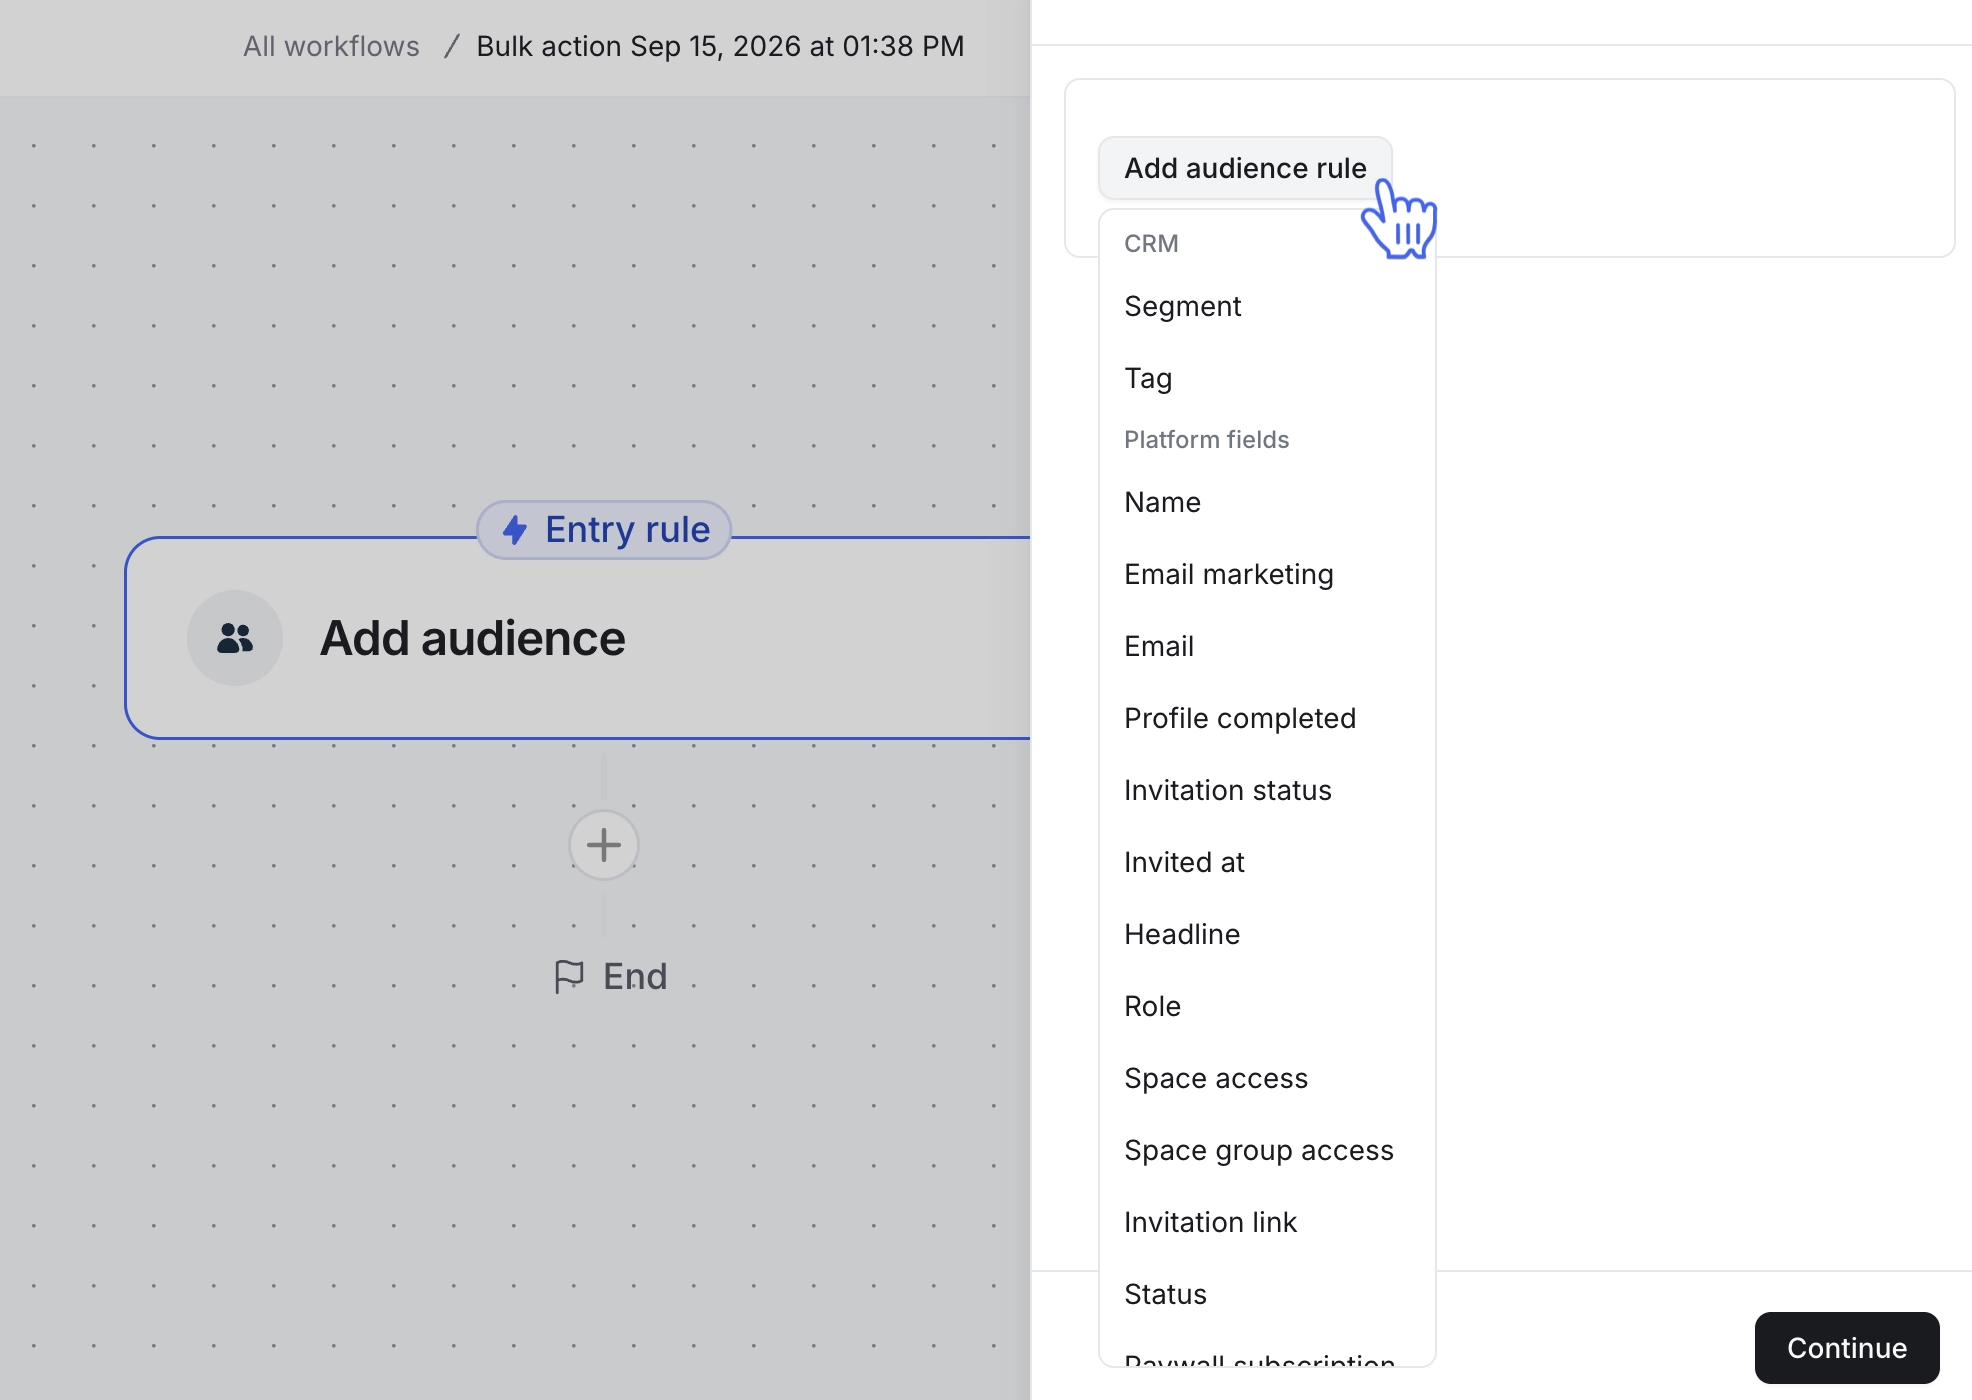
A right sidebar will open, letting you set up various audience rules. To start, click Add audience rule, and select from the list. Each audience rule prompts you to select its value. Once selected, click Apply or Done.
-
When setting up audience rules, certain rules support advanced conditions for more precise filtering.
-
Using advanced conditions: These conditions are available for text-type and list-type audience rules, such as name, headline, and location (including checkbox- and dropdown-type profile fields). Depending on the type of field you are using as an audience rule, you can use one of the following conditions:
Contains (available only to text, link, and number type fields)
Does not contain (available only to text, link, and number type fields)
Is
Is not
Is empty
Is not empty
-
-
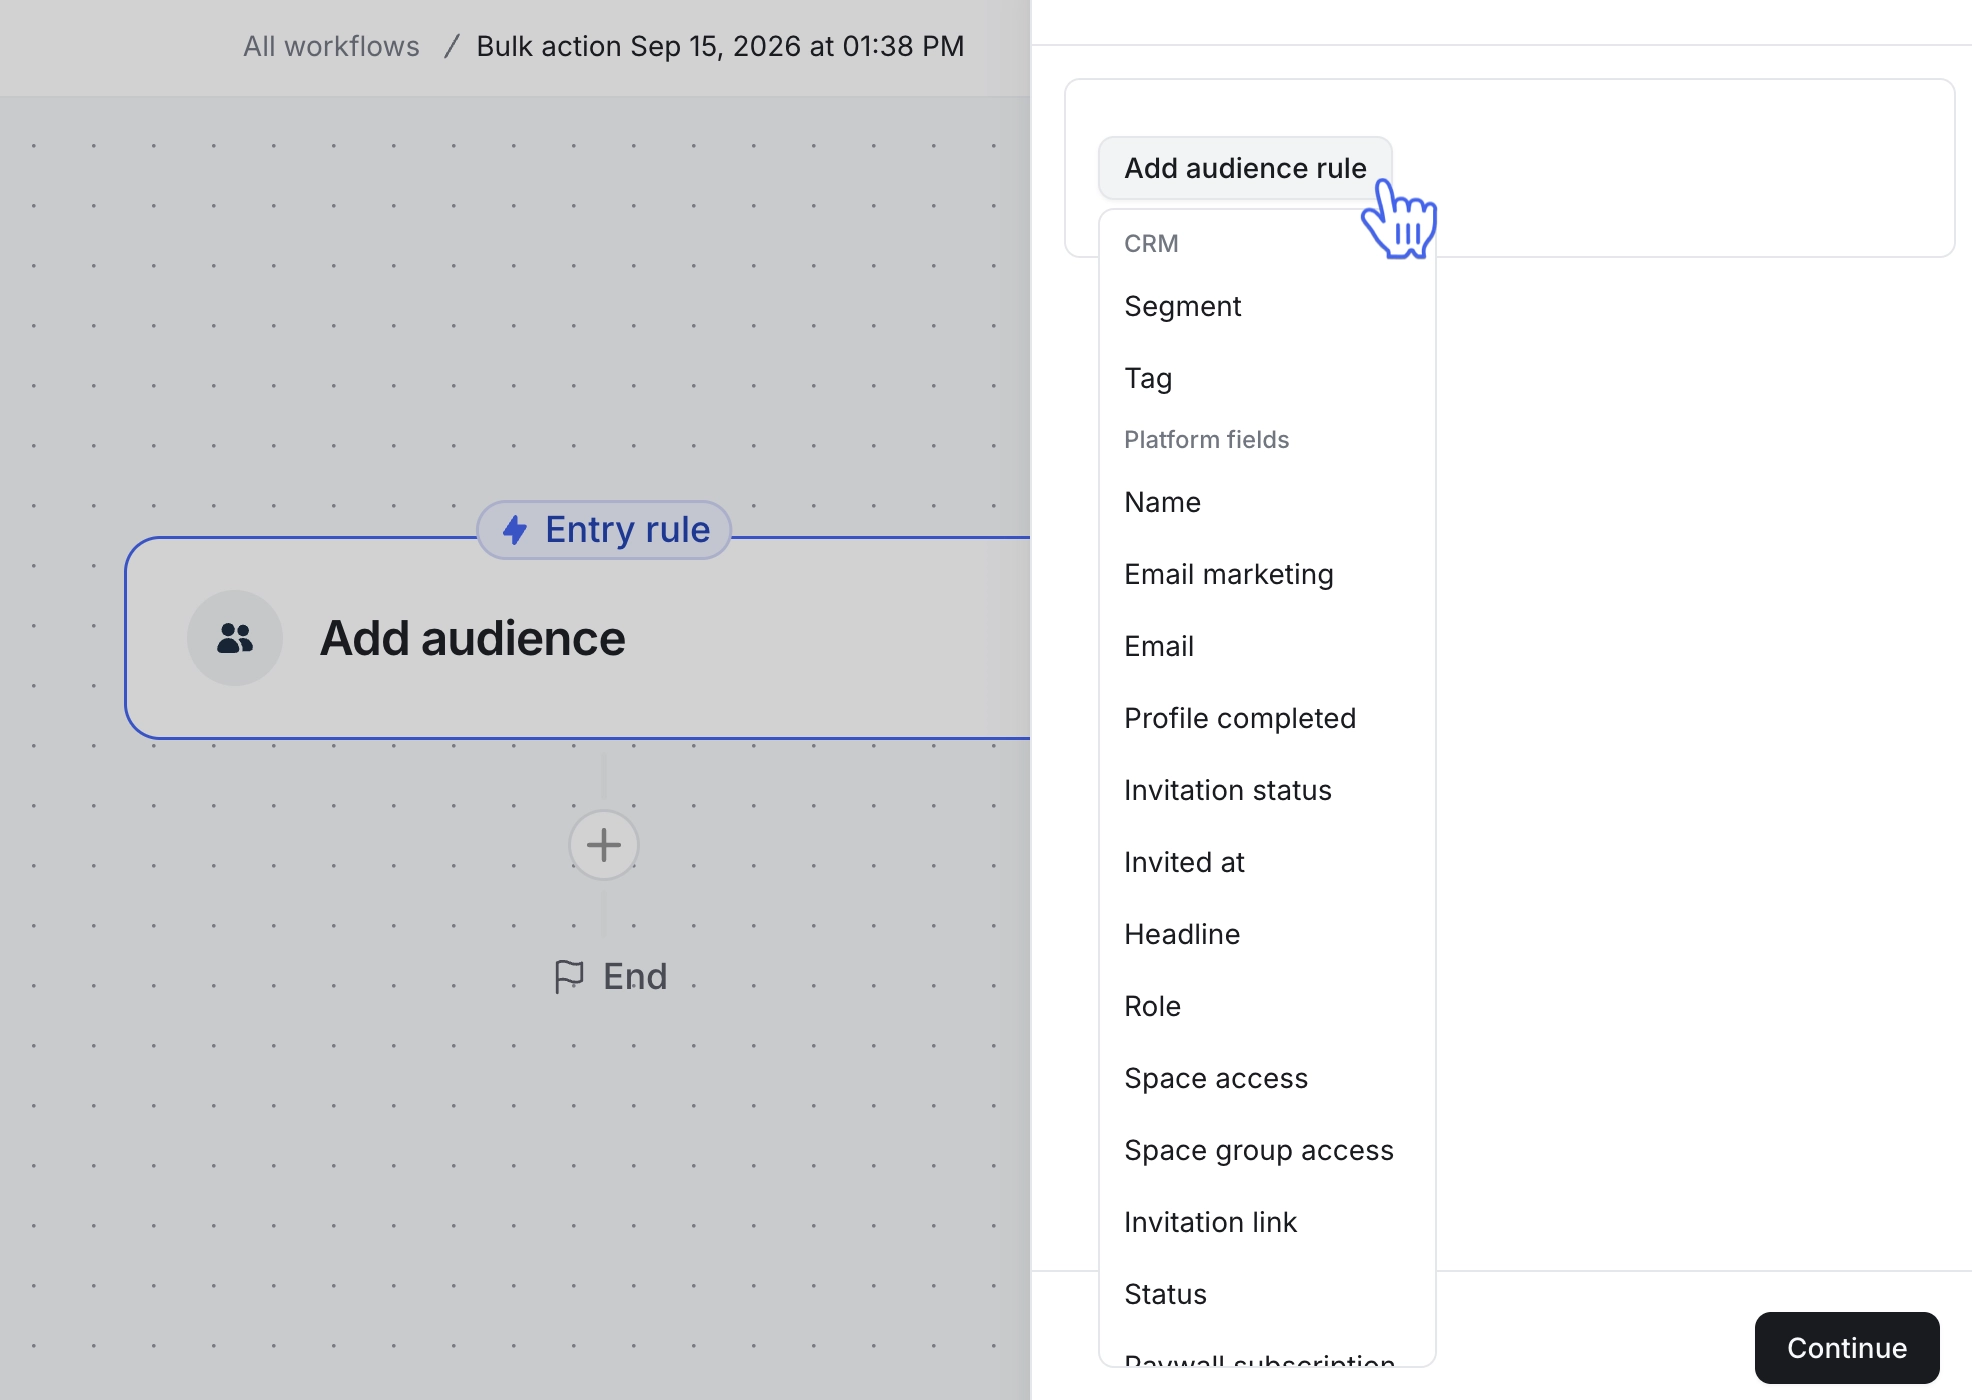
These rules are applied with the “And” condition, meaning all selected criteria must be met for a member or non-member to be included. To refine further, you can use the same rule multiple times with different conditions, creating a granular filter that perfectly matches your needs.
-
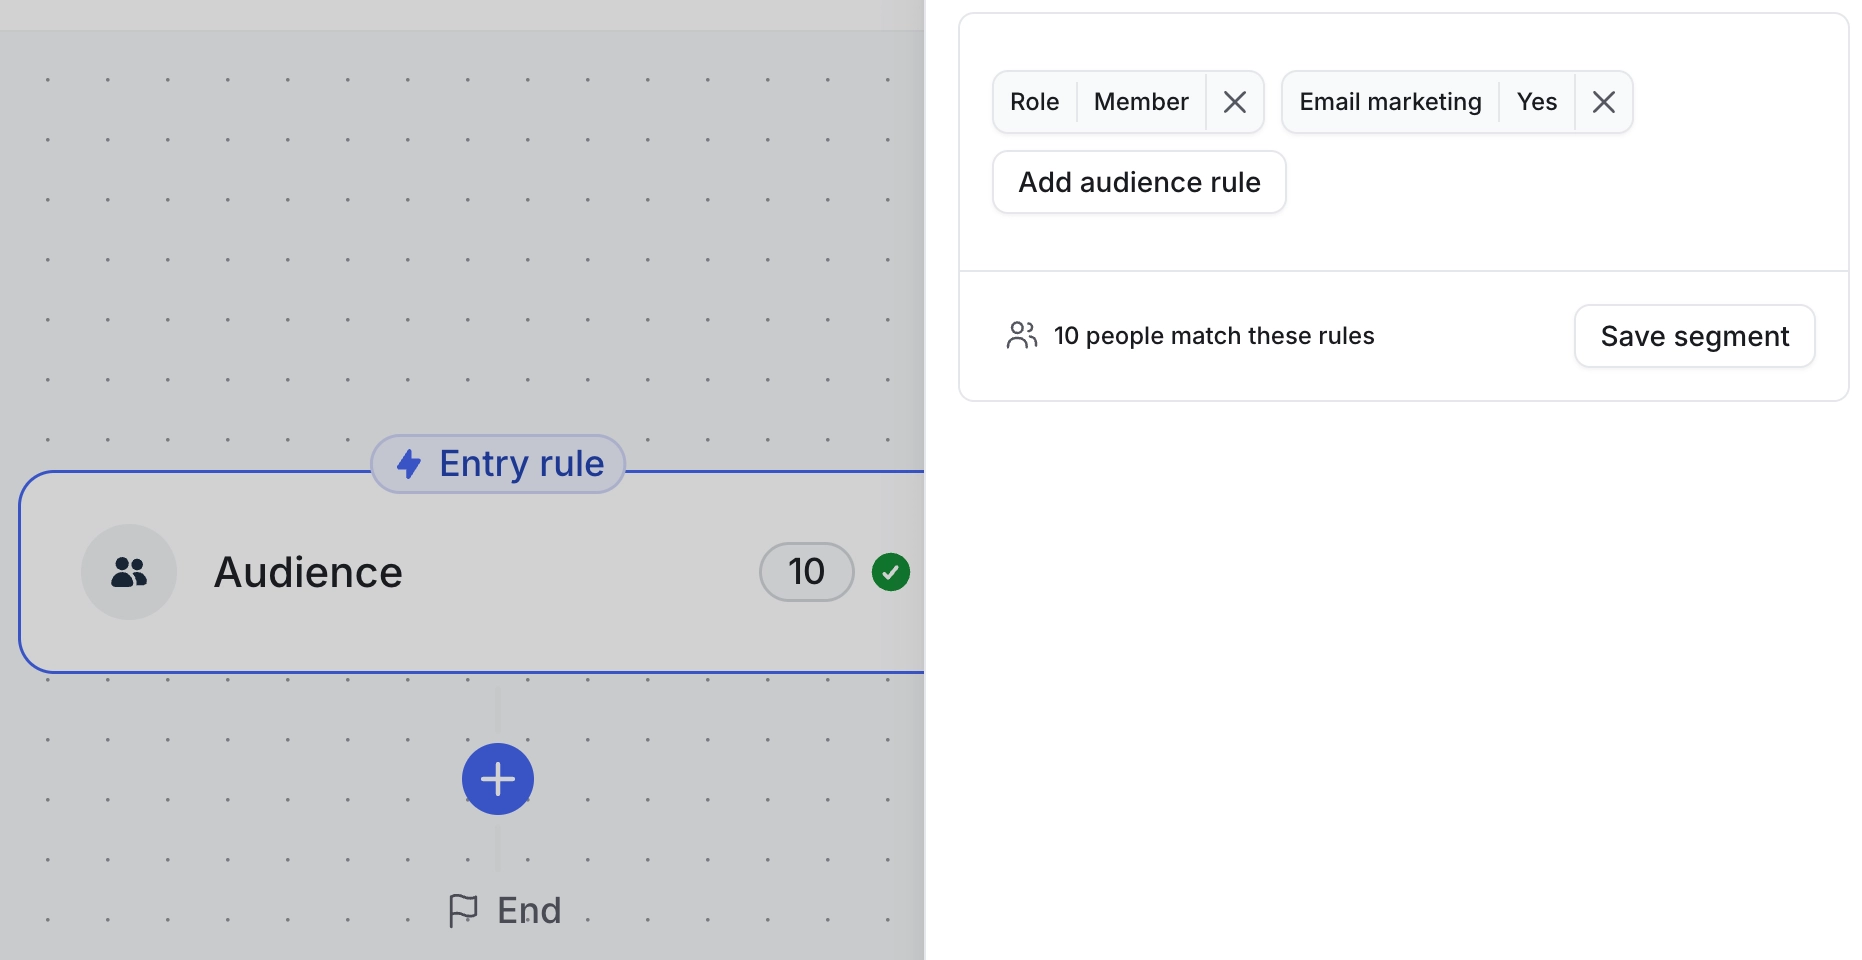
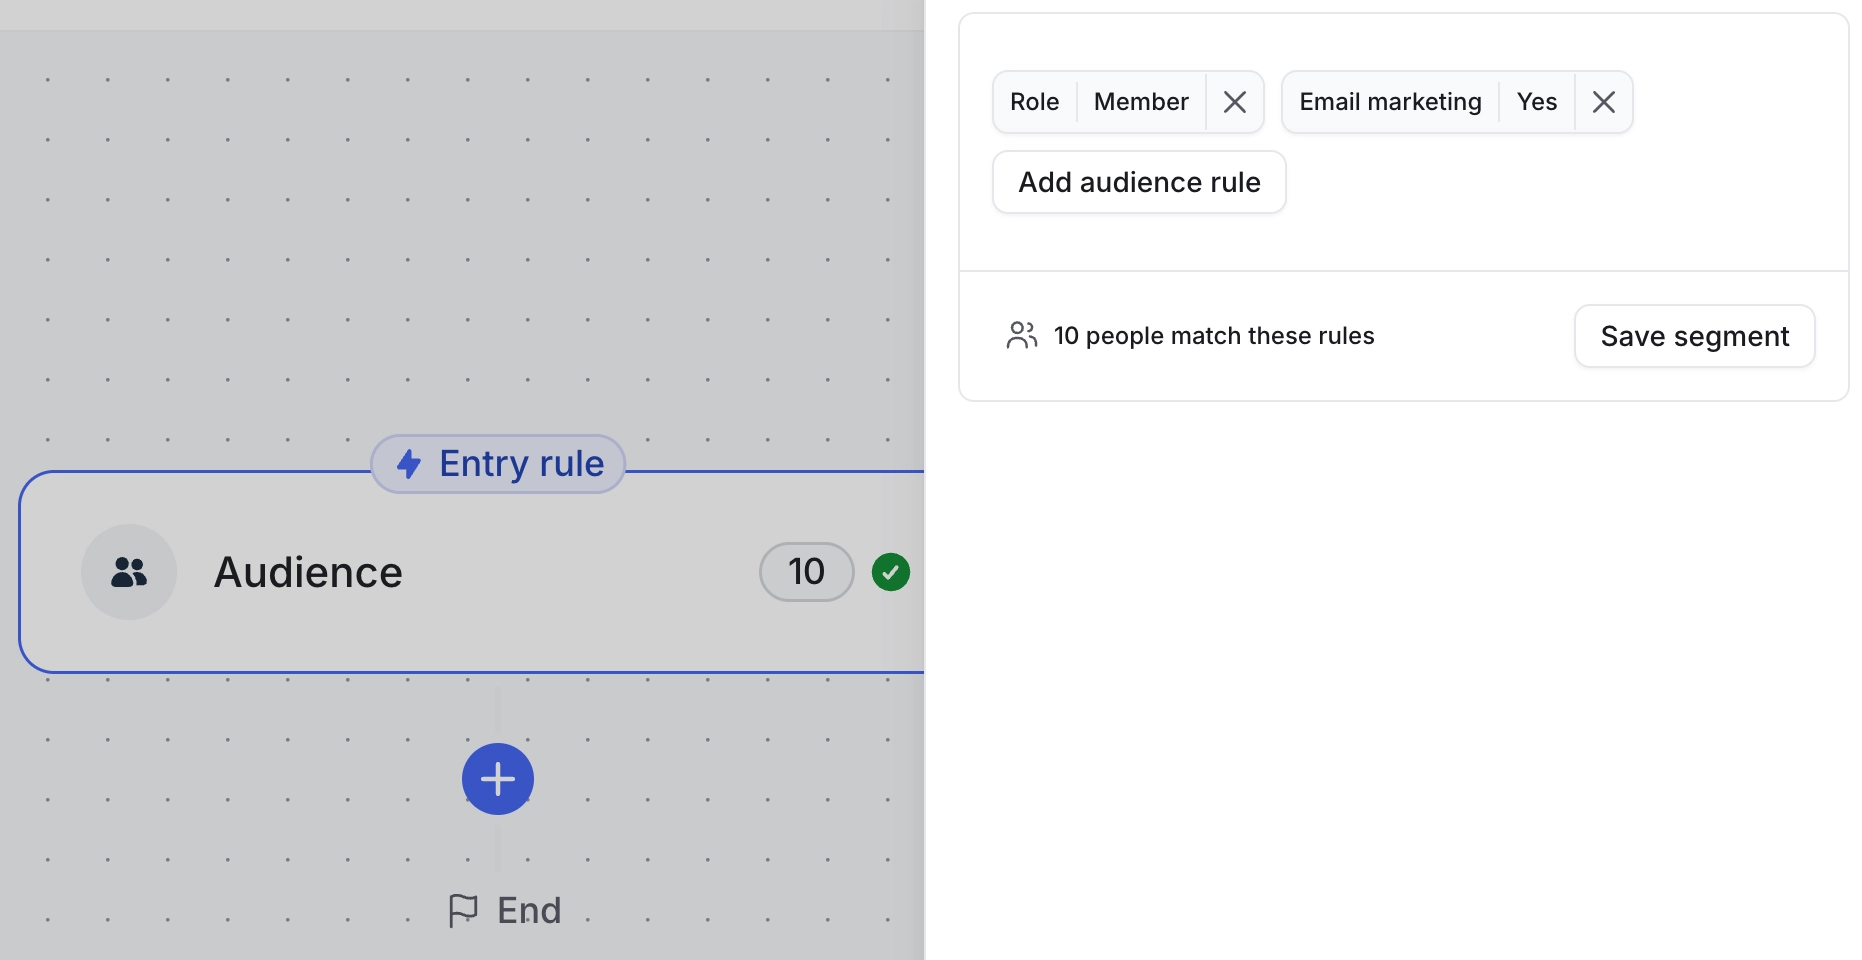
After setting up the rules, you can view how many members match your criteria and will be included in the workflow run. Simply click that information to view the full list of individuals included in the workflow.
Once you are ready, click Continue on the sidebar to finalize the entry rule.
Action
Actions are the tasks a workflow performs based on its configuration. For instance, an action could involve sending a direct message (DM) or tagging a member.
Automation workflow: Actions are performed automatically for an individual whenever the activity associated with a trigger occurs in the community.
Bulk action and scheduled workflow: Actions are performed for the audience when the workflow is manually run or scheduled to execute.
To set up your first action, follow these steps:
-
Click the ➕ icon below the entry rule or trigger.
-
A right sidebar will appear, listing all available actions. You can scroll through the list or use the search bar at the top of the sidebar to find the action you need.
-
(Optional) Add filter conditions to only allow the workflow to perform the action for individuals who meet certain criteria. If you don’t want to set any filter conditions, select Run for all.
In the Inputs section, configure details depending on the nature of the action. For example, if you select Add tag action, you’ll need to specify which tag you want to assign.
Once all details are configured, click Continue on the sidebar to finalize the step.
Adding multiple action steps
You can set up multiple actions within a workflow, offering flexibility and enabling a sequence of tasks. To add a new action either above or below an existing action, click the respective ➕ icon near the desired location.
Edit steps
You can easily update any step in your workflow, whether it’s a trigger, action, or entry rule.
Editing a trigger or action step
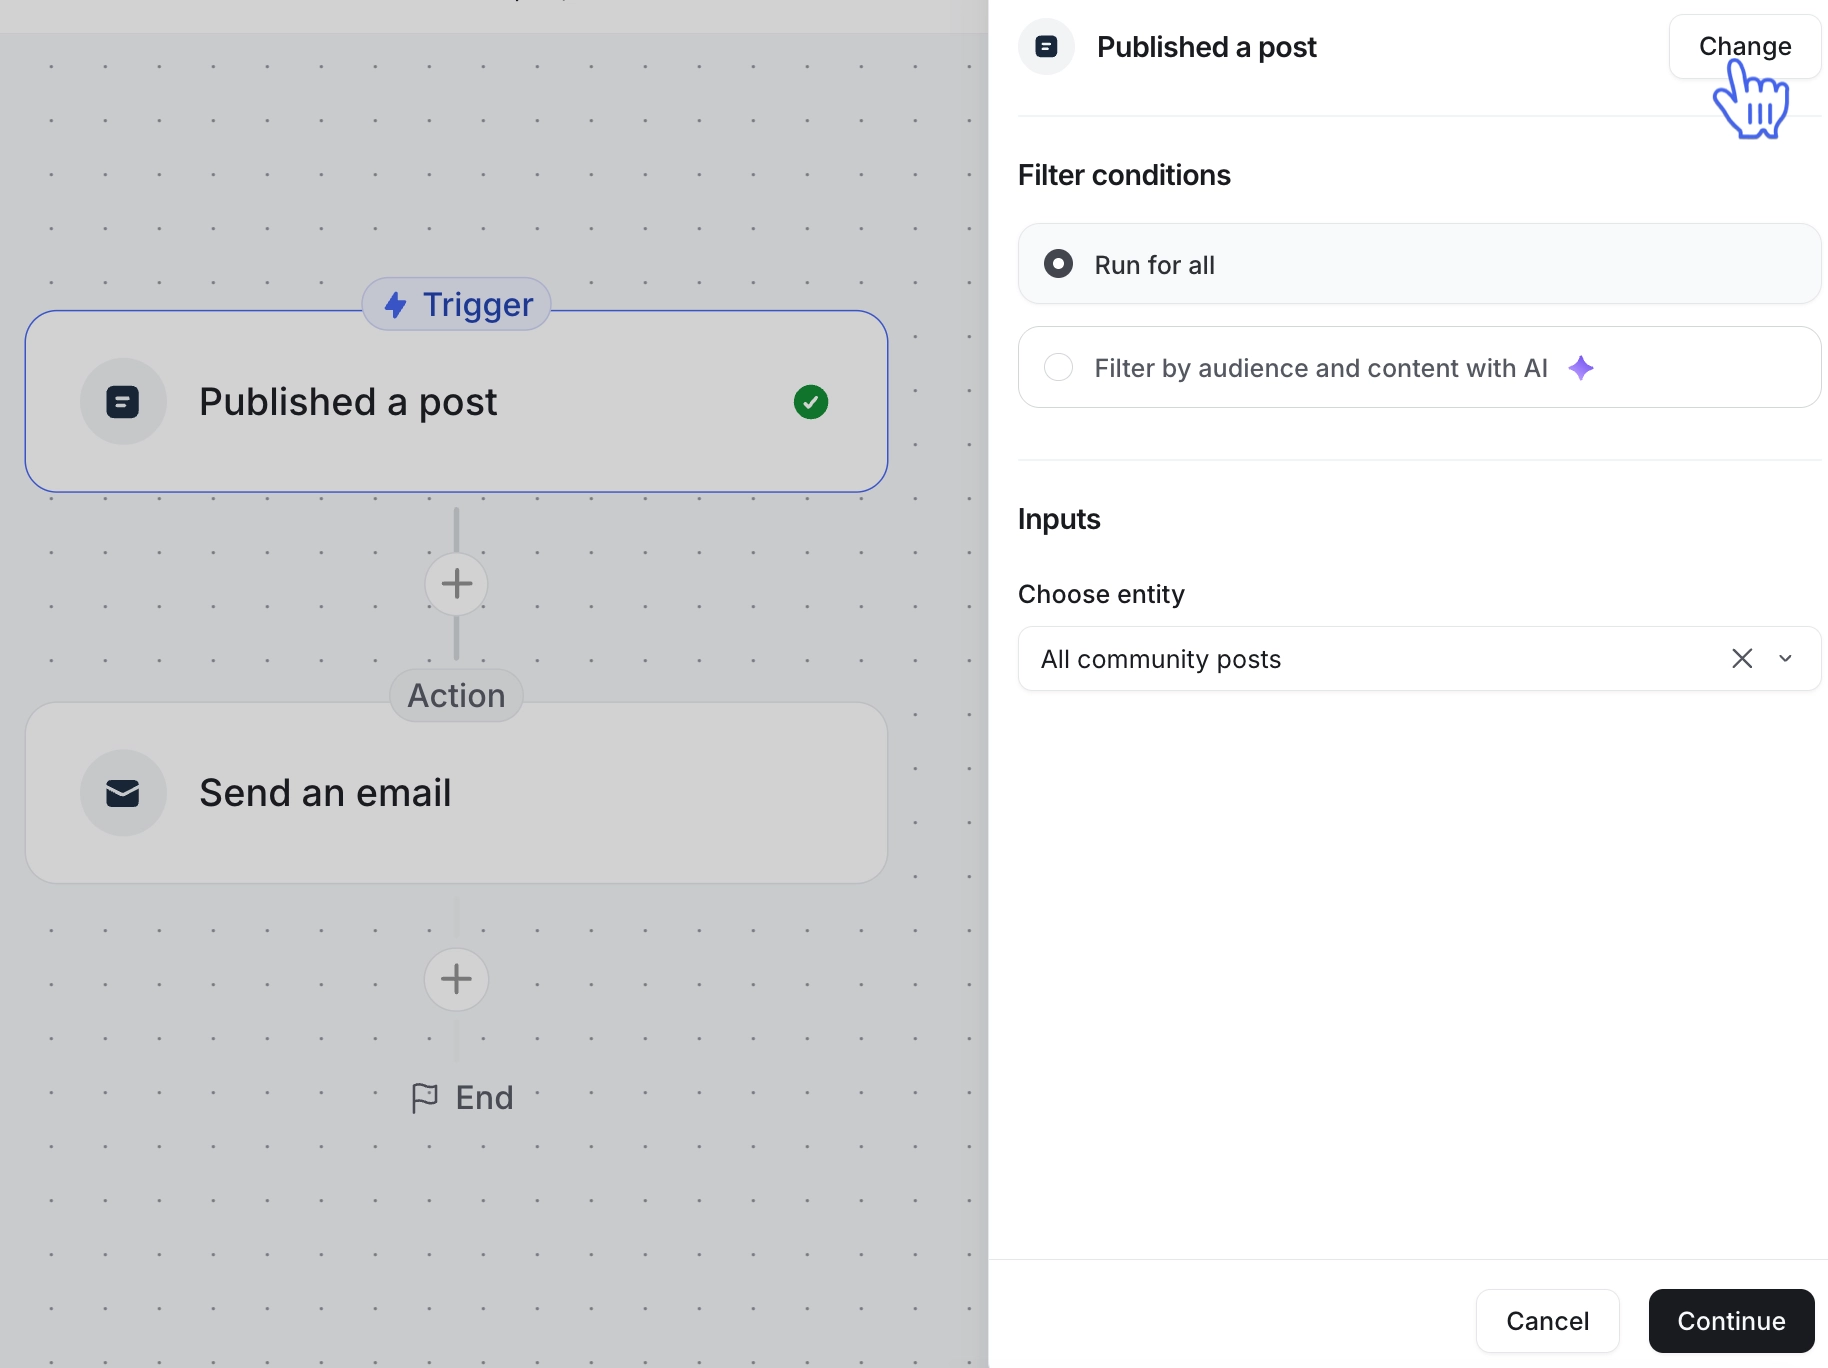
Click the step you want to edit.
In the right sidebar, click Change next to the current configuration to update the step.
-
Make the necessary adjustments, then click Continue to save the changes.
Editing an entry rule
Click the entry rule step.
-
Update the audience rule setup:
Edit a rule: Click the rule to adjust its values.
Remove a rule: Click the ✖️ icon next to the rule to delete it.
Add a new rule: Click Add audience rule to include additional criteria.
After reviewing and finalizing your changes, click Continue to save the updates.
Remove action steps
You have the flexibility to remove any action steps from the workflow. Click the step you want to delete. Then, click the Delete (trash bin icon) in the top-right corner of the right sidebar.