Create an event draft
Last updated: September, 2026
Events bring your community together, whether it’s a live workshop, a casual meetup, or a big announcement. This guide will walk you through the steps to creating an event.
About event creation
Hosting an event in your community starts with a draft. Drafts let you set up the essential details before making the event public in the event space. Creating one is a two-step process:
Create the event draft (covered in this article).
Finalize and publish the draft (covered in Publish an event draft article).
Who can create events
Community admins and event space moderators can create events within the event space. If you have enabled the Allow members to create events toggle in the event space settings, your event space members can also create and manage their own events.
ℹ️ Note: You can only create and manage events from the desktop app, web app, or a mobile browser.
Create a new event
To get started:
Click Community in the left sidebar, then select Spaces.
Click the space name to open the event space.
Click New event in the top-left corner.
Add basic details
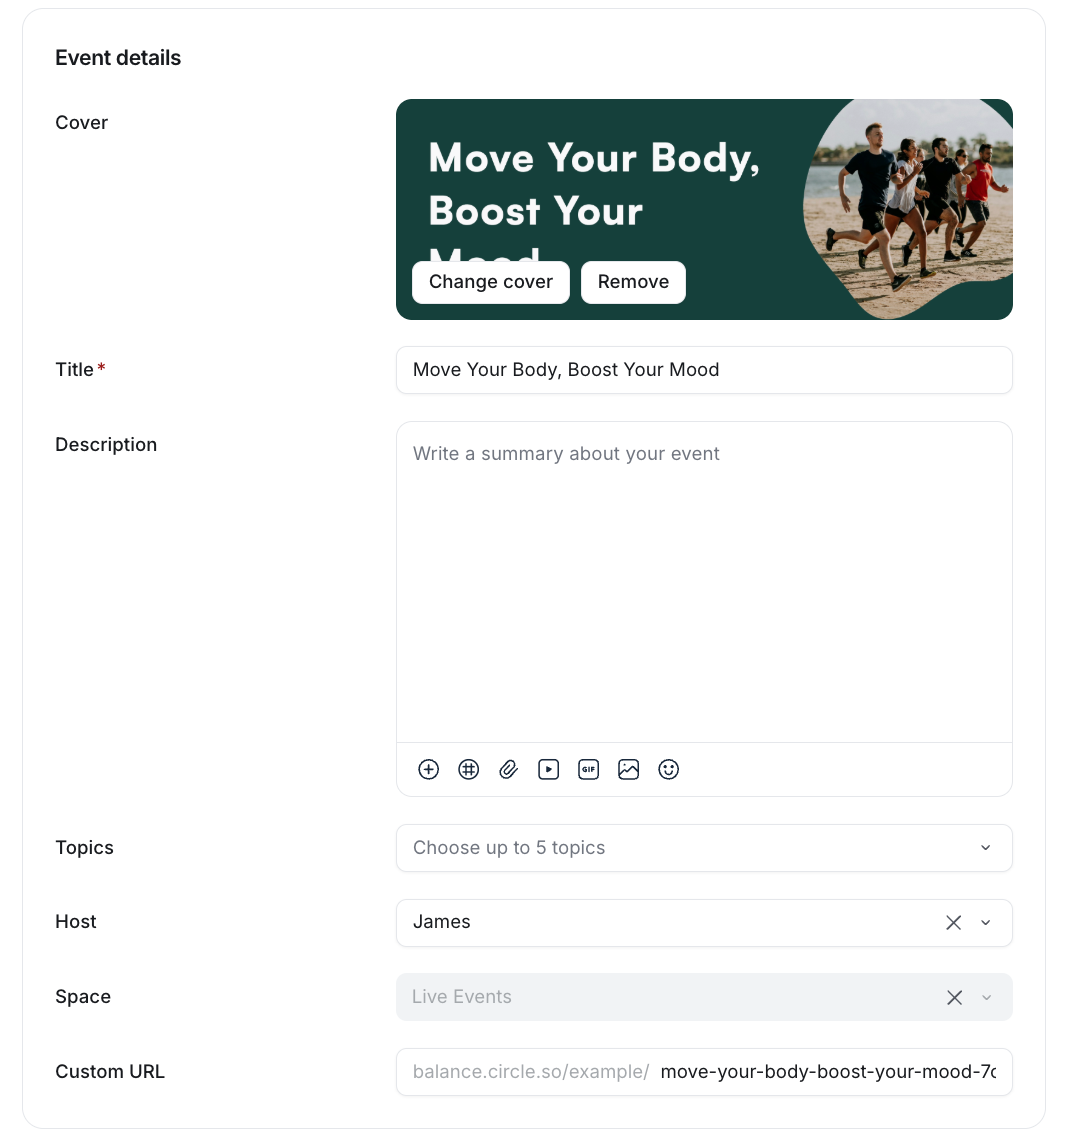
Start by filling in the essentials in the Event details section:
Cover image: Add a cover image for your event.
Title: Give your event a clear, recognizable name.
Description: Add a short explanation of what your event is about, what attendees can expect, and why they should join.
-
Topics: You can assign up to five topics to categorize your event within the space. Click in the topics field or type the topic's name in the field and select it from the list.
💡 Tip: If you’re an admin, you can create a new topic on the go while creating or editing an event. Write your desired topic name in the topics field and select the Create topic option. This will immediately create a new topic and add it to the event and the event space.
To explore further details on topics and configuration settings, please refer to our guide here.
Host: By default, the creator is the host. If you would like to have someone from your team or a member host the event, click the Host field to type their name and select them from the list.
Space: This is pre-filled based on where you started. You can switch to another space if needed, using the dropdown menu.
-
Custom URL
Set the event schedule
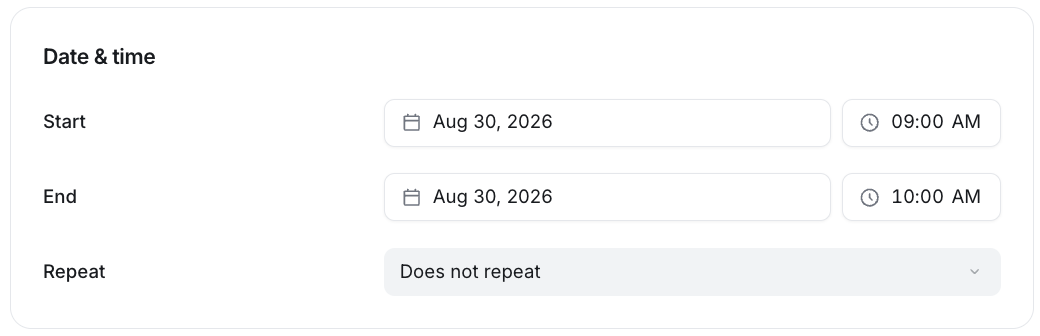
When configuring the event schedule in the Date & Time section, you can choose to create a one-time or recurring event.
❗Important: When creating an event, the event times use your computer's operating system time zone. To learn about time zones and how we account for daylight saving time, see Understanding time zones for events.
One-time event
To create a one-time event:
Pick a date and time for the start and end of the event.
-
Set the Repeats option to Does not repeat.
Recurring event
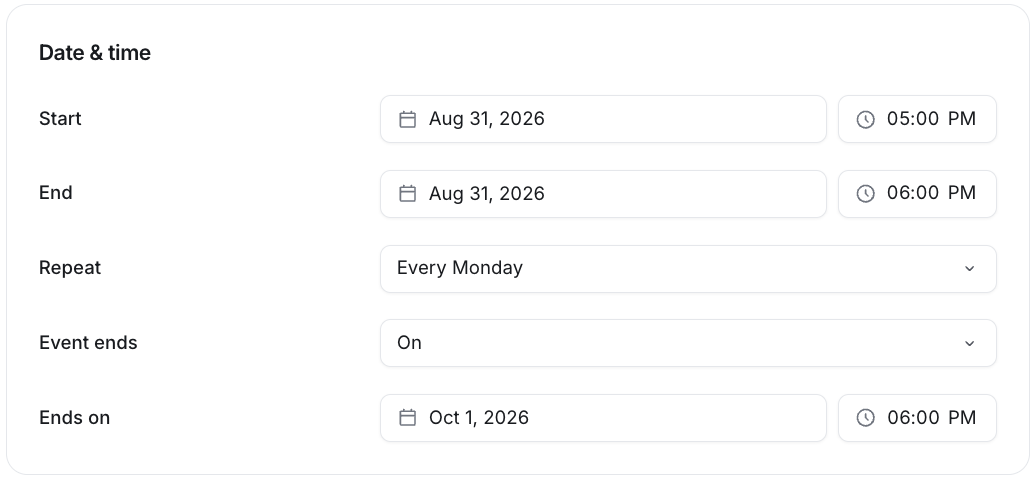
The repeats option allows you to create multiple events on a set schedule with just a few clicks. Perfect for weekly office hours, monthly workshops, or regular community meetups.
To set up a recurring event:
Choose a date and time for the start and end of the first event in the series.
Open the Repeats dropdown menu and select one of the available options based on the event’s start date. For example, if the first event is on a Monday, you can set it to repeat every Monday for weekly office hours.
-
Under Event ends, click the dropdown menu and choose one of the following:
-
On: End the recurring series on a specific date and time. New event occurrences will only be created up until that chosen point.
Keep in mind that the end date must fall within the limit of 60 total occurrences. You cannot select a date that would create more than 60 events in the series.
After: End the recurring series after a set number of events, up to a maximum of 60 occurrences.
-
❗Important: The Event ends option can only be set while creating the event draft. Once the draft is created, you cannot change the event end pattern, though you can still edit the repeat frequency of the series and the time and date. For more information, see Update published events.
-
Choose the location
One of the most important steps in creating an event is deciding where it will take place. The location sets the stage for how attendees will join, whether it’s online or in person.
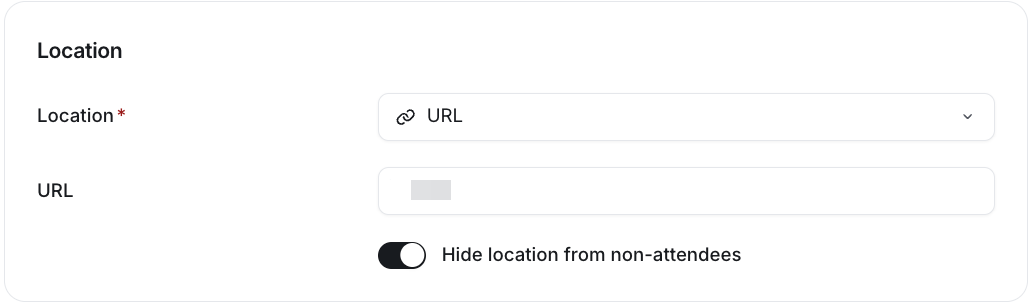
You can choose from several options when setting the event location:
Circle live stream or live room: Host your event directly in Circle.
URL: Link to a custom platform or a third-party hosting app. Select this option and provide the joining URL.
In person: Select this option if you are hosting an in-person event. Enter the physical address of the event that will be displayed on the event details.
-
To be announced: Not sure about the location yet? No problem. Choose this option for now and return later to change this to one of the other options if needed.
Configure the location privacy setting
For any type of location (except TBD), you can keep the event location private by turning on the Hide location from non-attendees toggle. With this enabled, the location will only appear to members who have RSVP’d to the event.
If your event uses Circle live location and you’ve enabled Automatically post recording to event, this setting will appear as Hide event location and recording from non-attendees. For more information, see the live settings information below.
Set up the Circle live location
The Circle live feature offers the flexibility to host an event virtually, either as a live stream or an interactive room. Once you choose this location, you can configure settings to control how attendees join, participate, and access recordings.
📚 For more information, see Using Circle live feature with events.
Here’s how to set up the Circle live location:
-
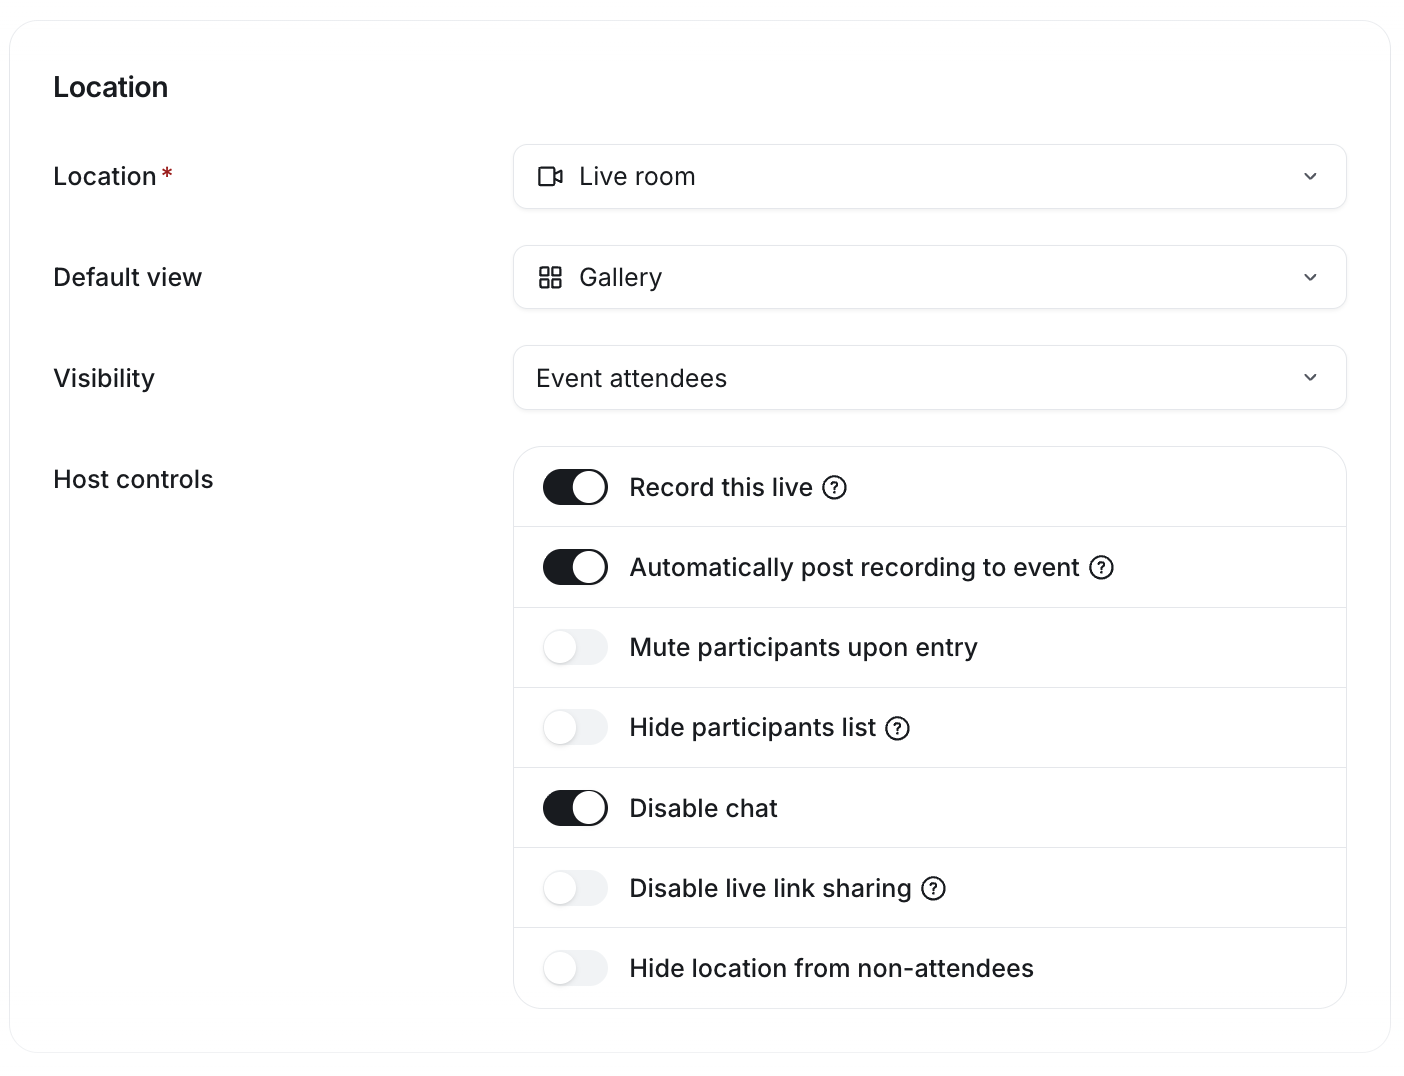
Location: Choose how you want to host your Circle live session:
Circle live stream: A broadcast-style session where attendees watch the host and co-host and interact through chat and Q&A.
Circle live room: A fully interactive session where attendees can join with video and audio, and can still use chat and Q&A.
Default view: Pick how attendees see the event when they join. Choose between Speaker or Gallery as the default view for attendees.
Visibility: Control who can see and access the live event session from available options. For more information, see Understanding visibility options for Circle live events.
To configure the live settings:
-
Record this live: Turn on the toggle to record this live event. If enabled:
The event host will receive an email with the recording after the event ends.
If you’re an admin, you can also access and download the live recording from the live dashboard.
Mute participants: Turn on this toggle to automatically mute all co-hosts and attendees when they join. They can unmute themselves afterward.
Hide participants list: Enable this toggle if you want to keep the attendee list hidden during the live session. Only the host, co-hosts, and live moderator will be able to view the list from the control bar.
Disable chat: Turn on this toggle to disable the chat during an event. When you disable chat, the chat panel is hidden for all participants on web and mobile. This is useful for one-way broadcasts, compliance-sensitive events, or sessions where chat would be a distraction.❗️Important: To prevent accidental activations, this setting cannot be changed once the event starts.
Disable live link sharing: Prevent members from sharing the event link. With this enabled, only those included in the visibility settings, those who RSVP, or those added as attendees will be able to join. Anyone outside those groups will not gain access, even if they have the link to the live session.
-
Automatically post recording to event: If recording is turned on, you can choose to have it posted automatically at the bottom of the event description on the event details page once the session ends. Please note that:
It may take up to an hour for the recording to appear after the event ends.
-
To make the recording visible for everyone on the event details page, be sure the Hide event location and recording from non-attendees toggle is turned off after the event ends. If this toggle is kept enabled, the recording will only be visible to people who RSVP’d to the event and will remain hidden from non-attendees.
Session limits for Circle live events
When you choose Circle live stream or Circle live room as the event location, session time limits may apply. Here’s how it works:
Live rooms with recording enabled: These sessions have a maximum duration of 8 hours. Once the limit is reached, the room will automatically end.
Live rooms without recording: There's no fixed time limit if you are not recording the live event session.
Live streams (with or without recording): Live streams also have a maximum duration of 8 hours. The session will automatically stop after 8 hours, even if you're not recording.
In addition to these per-session limits, every Circle plan includes a set number of live hours (the total hours you can host live sessions each month). To learn more about these plan limits, see our guide here.
Decide if it’s free or paid
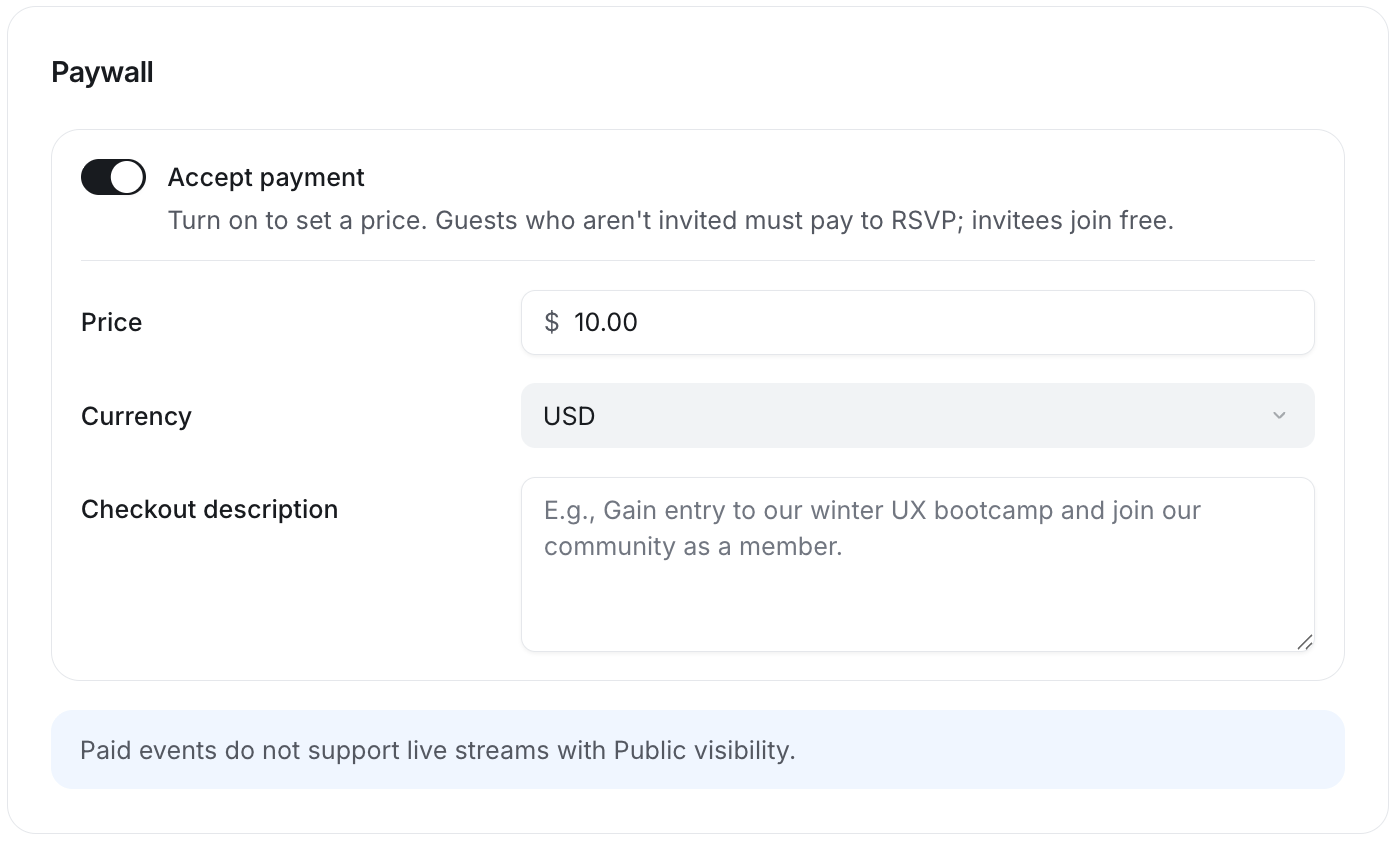
As an admin, you can decide whether your event should be free to attend or require a paid ticket. This setting is controlled in the Paywall section.
Free event: Select this option to keep your event free for attendees.
Paid event: With our paid event feature, you can set the ticket price for an event to charge everyone, including community members and visitors (non-members). You can set a ticket price, choose the currency, and add a checkout description.
📚 To learn more about how paid events work and how to set them up, see Create paid events.
Save the draft
When you’re done with the initial setup, click Save draft at the bottom of the page. This will create the event in draft status, making it visible only to the event host, admins, and space moderators.
You have two options from here: continue editing the event right away or leave it as a draft and return later to finish the setup.
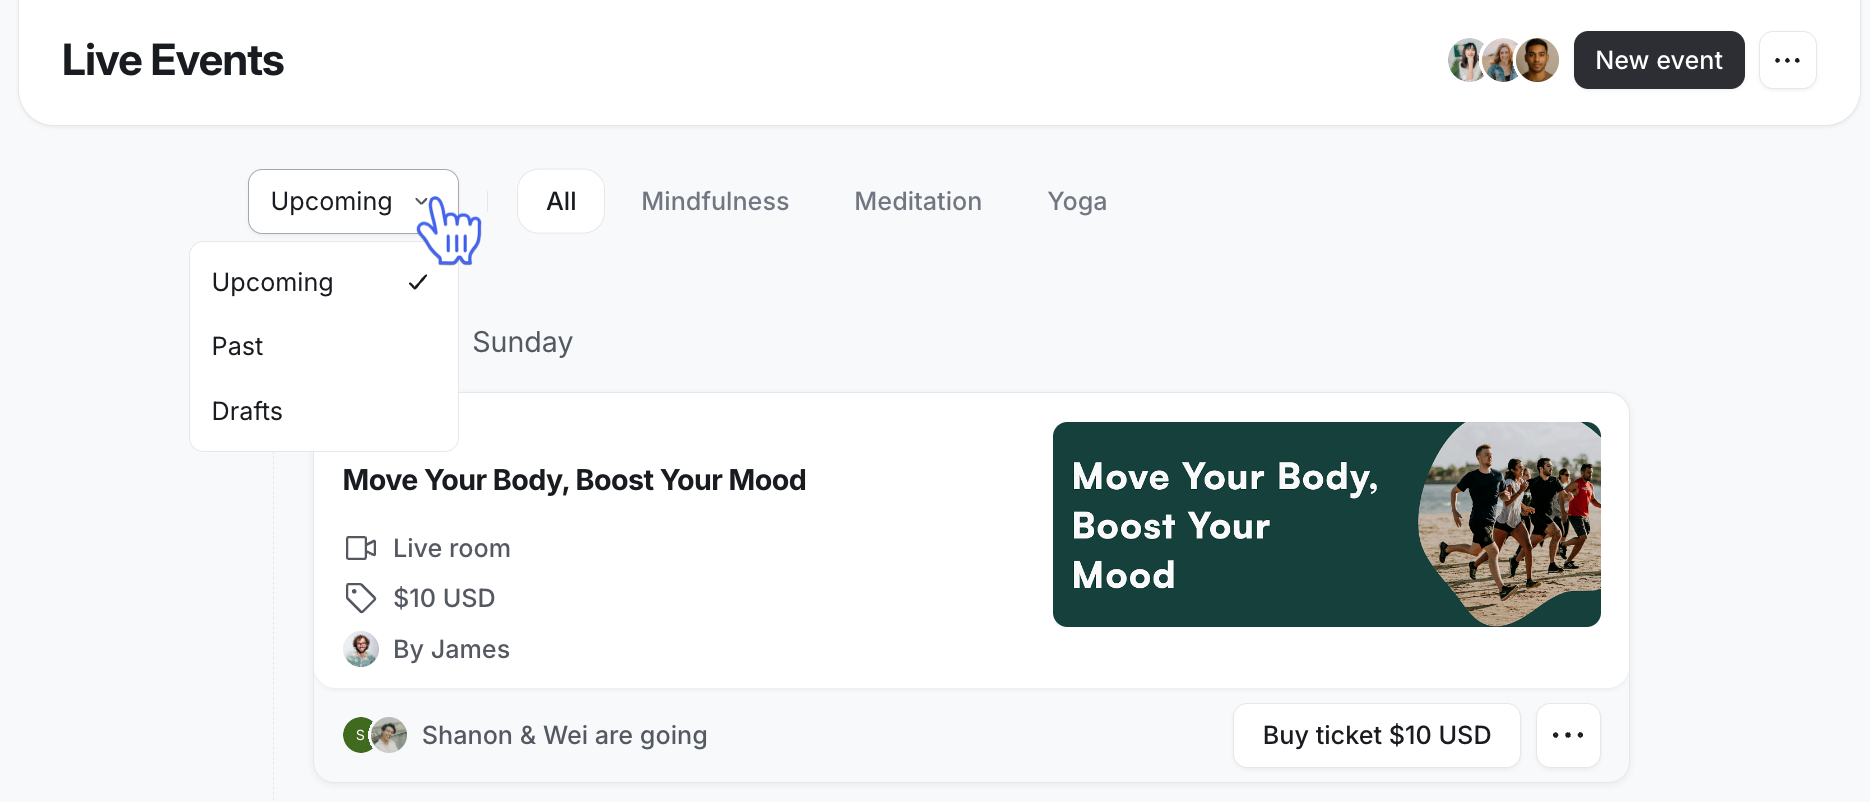
To access the event drafts:
Click the community logo in the left sidebar and select Back to community. Head to your event space in the left sidebar.
-
Click the category dropdown menu at the top, and select Drafts.ℹ️ Note: Members will only see the Drafts option if they are the host of an event that’s still in draft status. In that case, they’ll only see the drafts they are hosting, not drafts created by others.
Complete your event setup
Once your draft is saved, you can move on to setting up the rest of your event. This includes managing attendees, adding event cover image and description, setting up notifications and reminders, and configuring advanced settings.
📚 For detailed information on how to finalize and publish events, see Publish an event draft.