Configure important settings prior to setting up a paywall
Last updated: August, 2026
Preparing to implement paywalls in your community involves configuring essential community and space settings to safeguard your premium content and create a seamless experience. In this article, we'll walk you through the steps to configure these settings effectively.
Space access configuration
Ensuring that spaces you want to gate behind a paywall are set to private or secret is crucial for maintaining exclusivity and protecting your premium content. Let's take a look at why it's important and how you can achieve this.
Importance of private access
If you keep your space access set to open for spaces that are added to paywalls, it can lead to the following:
Paywall bypass: When spaces are set to Open, non-space members can voluntarily join the space anytime, bypassing your paywall. This compromises the exclusivity of your premium content.
Post-cancelation access: If a member cancels their subscription but previously had access to an open space via a paywall subscription, they can rejoin for free.
By configuring spaces with private or secret access, you can prevent these occurrences. This setting restricts access to members specifically invited by admin, those added through workflows or third-party integrations like Zapier, and individuals who've purchased a paywall. Additionally, it ensures that once a member is removed from spaces upon subscription cancellation, they do not get free access to paywalled spaces by themselves.
❗Important: Even if your community is private, you still need ALL individual spaces (that are part of your paywall access) set to private or secret.
Set space access
Click Community in the left sidebar and then select Spaces.
Locate the space and click the More actions (three dots) icon on the space entry.
Select Edit space from the dropdown menu.
Click the Customize tab.
-
Select Private or Secret in the Access section.
Click Save changes.
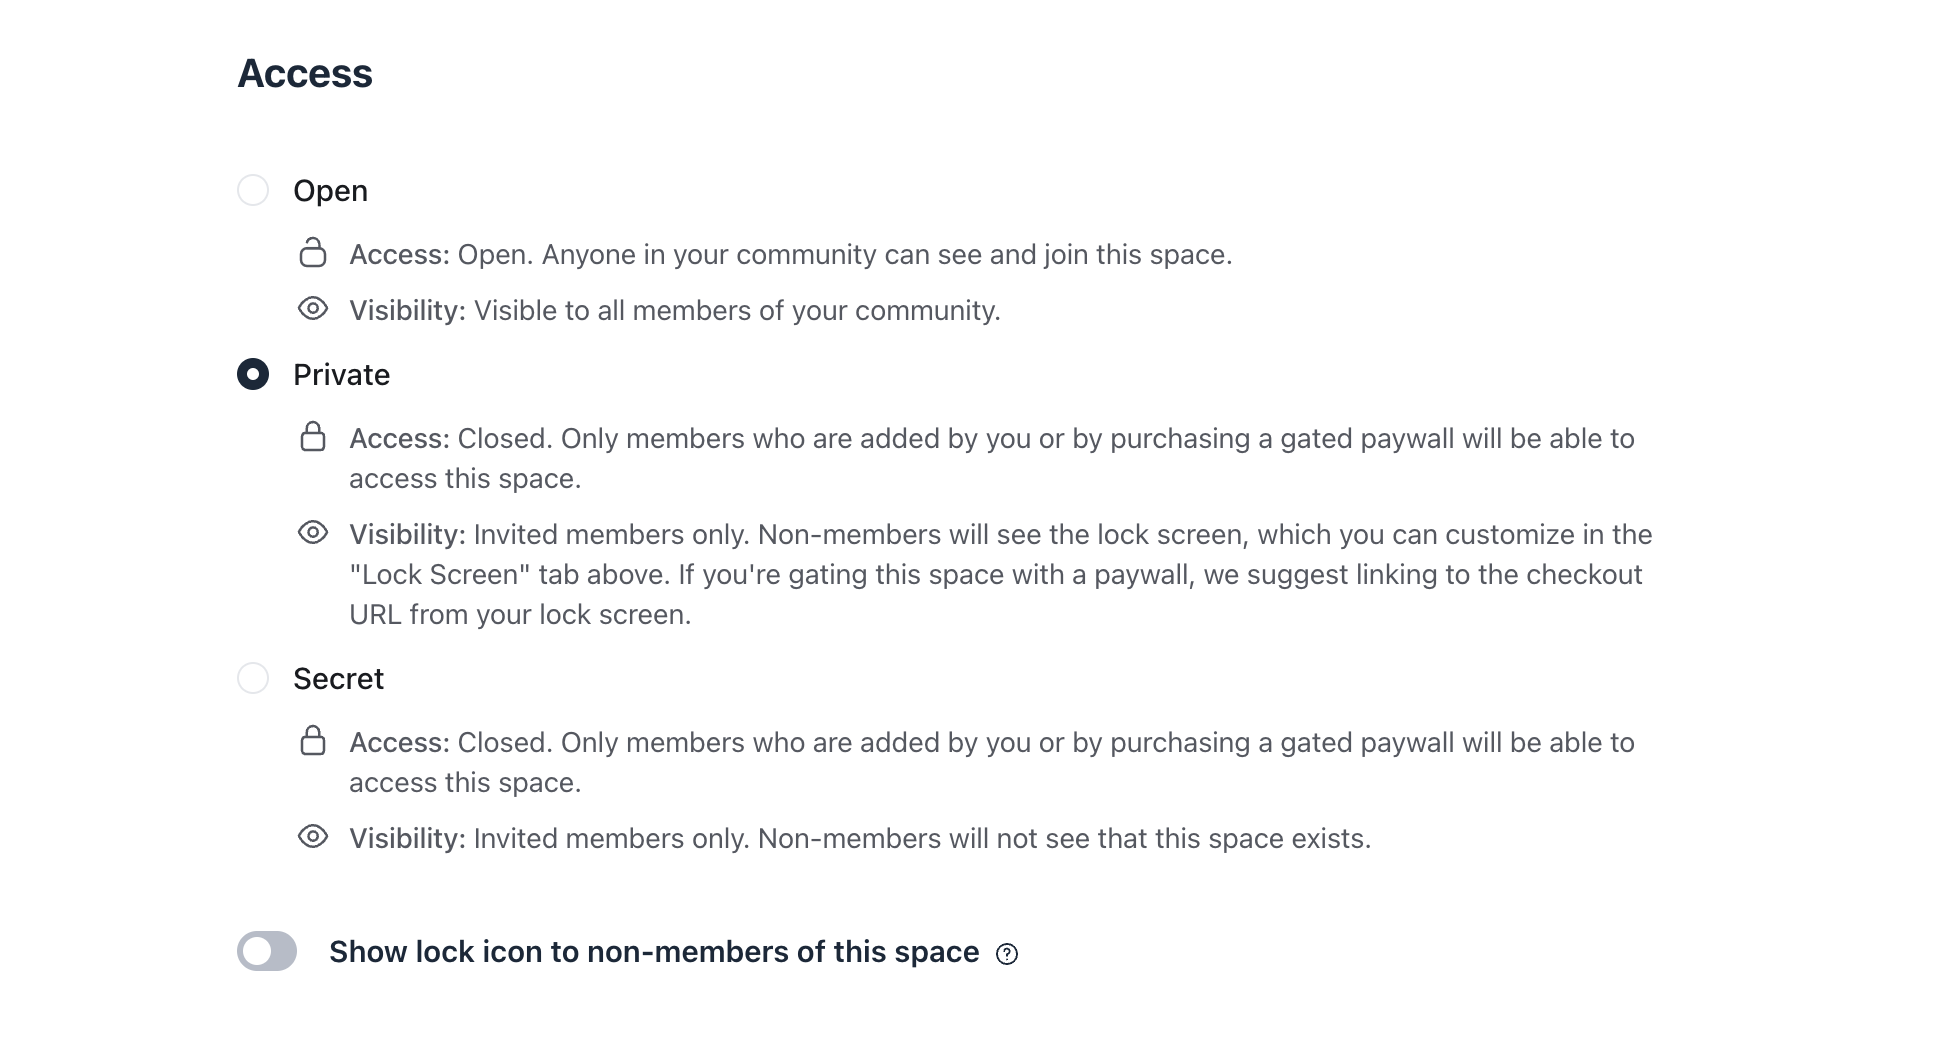
💡Tip: If you set your space to private, you can customize the lock screen that appears to non-space members!
📚 To learn more, see Gate spaces behind paywalls.
Invite access vs. paywall access
Let's take a look at the member access levels in relation to paywalls and what these access levels mean.
Invite access
Invite access offers individuals free lifetime entry to space until they voluntarily leave or are removed by an admin.
Members gain invite access to spaces in several ways:
When a member joins the space that is set to open access voluntarily.
When you invite a member to the space through manual invitations using default access sections in invitation methods, the add to space or space group action in workflows, or third-party integrations like Zapier, bypassing the paywall.
When you include the space in the default space access configuration in your member onboarding settings.
Paywall access
Paywall access grants individuals entry to spaces specified in the paywall access configuration. This access is tied to their subscription and is revoked upon cancellation or failed payments based on your failed payment configuration.
Members obtain paywall access to spaces by:
Subscribing via a paywall checkout URL.
Being added to a trial paywall through individual invites, bulk invites, invitation links, or manual subscription creation by admin.
📚 To learn more about these access types and the access conversion rule, see Understanding invite access and paywall access methods.
Default space access
In your member onboarding settings, you have the option to set default space access, which allows you to automatically provide free access (via invite access) to spaces when a new member joins the community, regardless of how they signed up for the community.
It is important that you remove all access groups that will be added to your paywall access from the default access configuration. This will help you avoid providing free access to spaces included in the paywall to someone who is not a subscriber.
To update the default space access setting:
Click your community name or logo (or the dropdown icon next to it) at the left of the top-left corner and select Settings.
Select Onboarding under the Audience section.
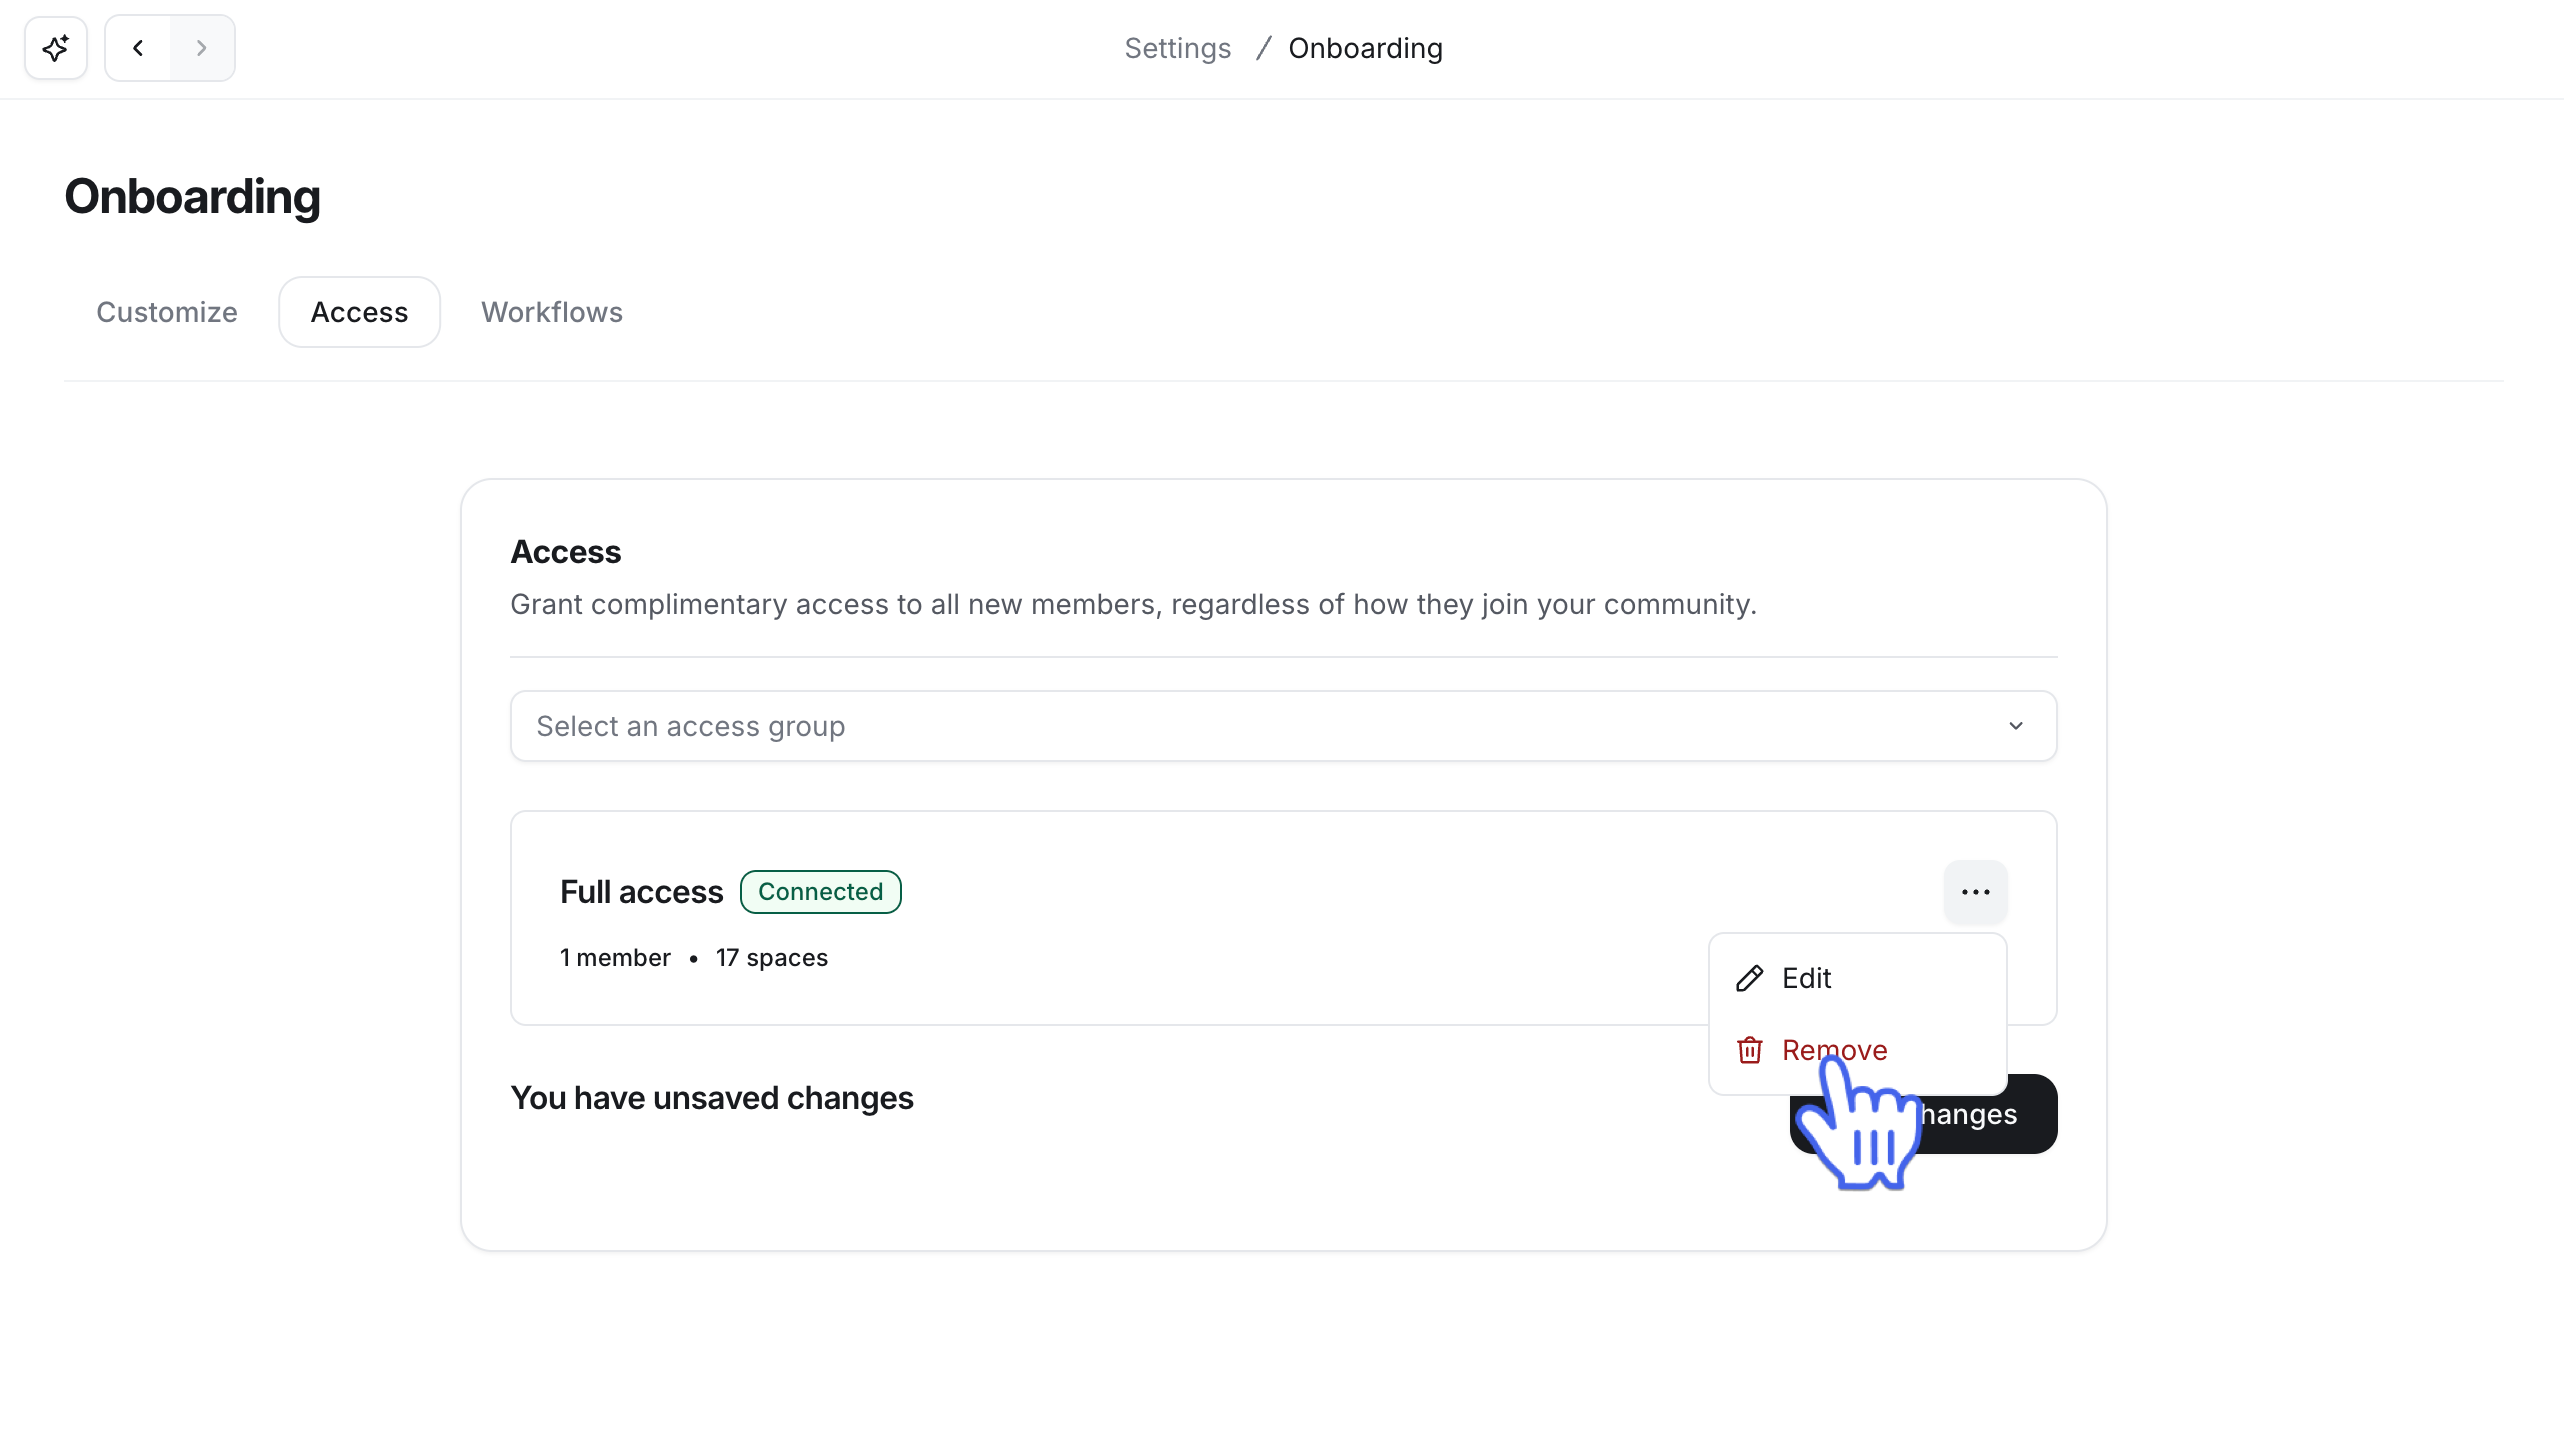
Navigate to the Access tab.
-
Click the More actions (three dots) icon on the acces group entry and select Remove.
Click Save changes.
📚 For an in-depth guide on managing the default space access setting, please see Automatically grant free access to spaces when members join your community.
It’s time to set up paywalls!
Once the above considerations have been addressed, let's get started with setting up paywalls along with other configurations to offer the best community experience to your members!
See the following articles to get started: