Create and manage paywall subscriptions from member profiles
Last updated: August, 2026
Admins can create a new subscription for individual members, along with options to manage their subscriptions and payments directly from the member profile! Let’s take a deep dive into how this works.
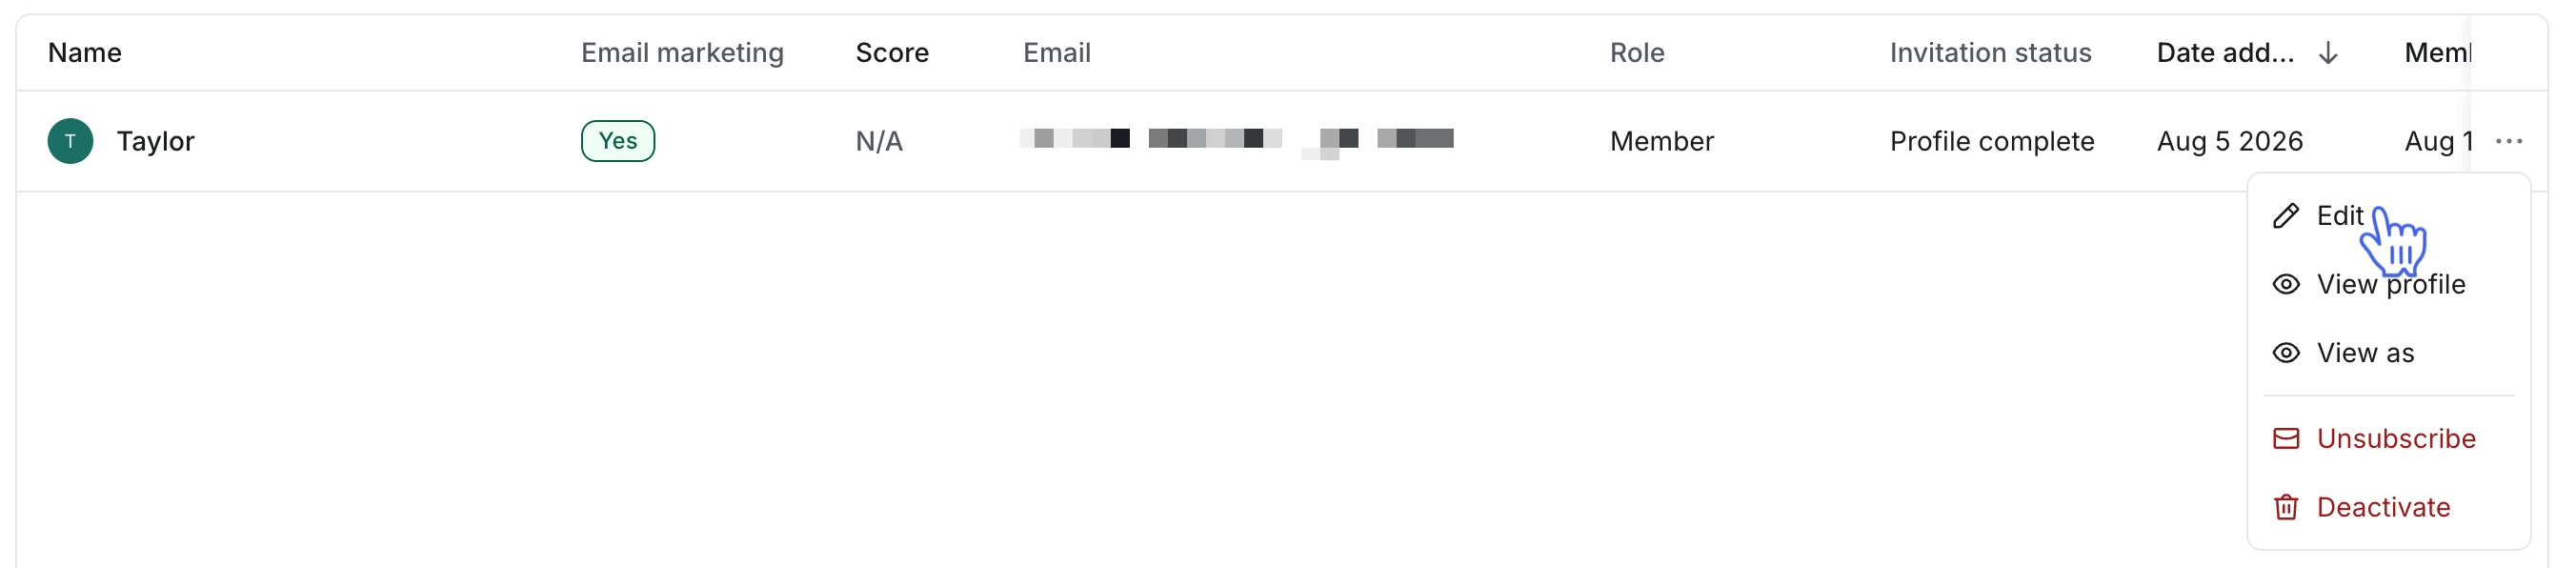
To get started, let’s navigate to the edit member profile page:
Click the community name or logo in the top-left corner → Members.
Search for a member using the filters on the search bar.
Click the More actions (three dots) icon beside the member entry.
Click Edit.
Create a new subscription
This is a great option for admins when they want to create a subscription on behalf of their members or looking to migrate a member from any other payment system to Circle paywalls in their community.
💡 Tip: You can automate the trial subscription creation based on certain event or bulk create it for your members based on filters using workflows! To learn more, please refer to Utilize workflows for paywall-related tasks.
To create a new subscription for a member:
Click Audience in the left sidebar, then select Audience.
Use the Filters option to find the member, then click the member's name.
Navigate to the Billing tab on the member profile.
-
Click Create subscription.
Configure subscription details and review summary (please see below for more details).
Click Start subscription.

Configure subscription
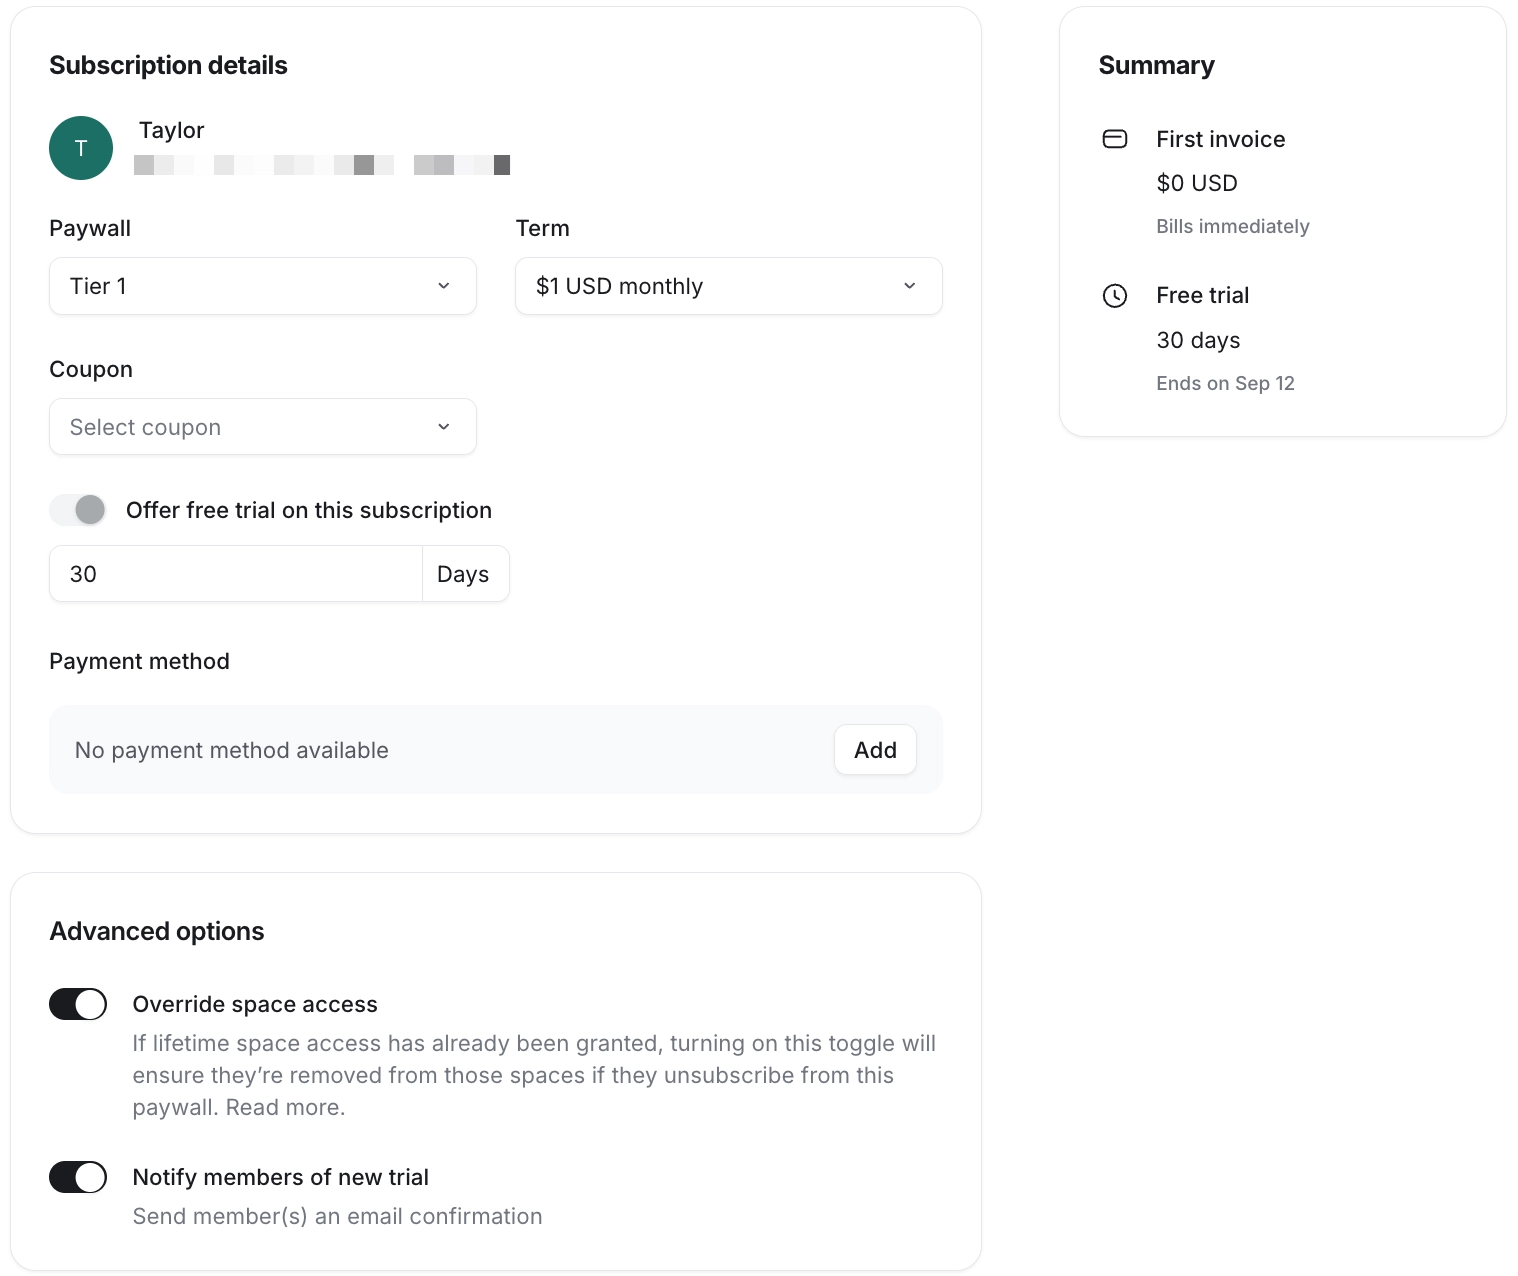
On the Create subscription page, set up all the paywall details for the member.
Step 1: Choose a paywall
Select a paywall and the desired billing cycle (pricing plan) from the dropdown menu.
Here are some key information when choosing a paywall:
If a member already has an active subscription, you won’t be able to choose a paywall from the same subscription group as their active subscription paywall.
You can select an archived paywall here to provide access to the legacy paywall plan.
Please note that you can only create a trial subscription for a paywall with recurring subscription or installment pricing without upfront payments.
If a paywall has only a one-time fee price or a paywall price with an upfront payment, it will not appear in the list.
Step 2: Choose a coupon
You can provide a discount on this subscription using a coupon from the dropdown menu.
💡 Tip: You can select an inactive coupon here to provide the discount from your past offers.
Step 3: Add trial days
Add trial days to the subscription to offer a free trial.
💡 Tip: You can provide up to 730 days of trial duration when creating a subscription.
❗Key information regarding trial days
Regardless of your paywall’s free trial configuration, you can override these default settings and provide a custom trial period dedicated to this specific member’s subscription.
Adding custom trial days won’t interfere with your paywall’s free trial configuration and credit card requirement.
If the member has a payment method added to their account: You have the option to enable or disable the trial days option.
If the member does not have a payment method added to their account: You must provide free trial days while creating a subscription.
Step 4: Payment method
If a member has a payment method added to their member account, you will be able to charge the member for this subscription.
Step 5: Override access
We recommend enabling override access because it will help replace invite access that the member had for the same content with access granted by this new paywall subscription.
❗Important: If a member already has access to any of the spaces/space groups under any other active subscription, both current and new paywall subscriptions will continue to grant access to these spaces/space groups until both of the subscriptions are canceled.
For example, let’s assume that:
You added Member A to Space 1 and Space 2 using the invite access method in the past, and they are still a member of both spaces via invite access.
Space 2 is also part of the Enterprise Membership paywall that you are choosing for the new subscription.
In this case, when you enable this toggle and create a subscription:
Member A’s invite access to Space 2 will be replaced with paywall access granted by the Enterprise Membership subscription.
As a result, when member A decides to cancel their subscription or their paywalled content access gets revoked due to your failed payment configuration, they won’t be able to access Space 2.
Member A’s access to Space 1 will remain the same regardless of member A’s subscription status.
📚 To learn more about invite vs. paywall access and failed payment configuration, see the following articles:
Step 6: Notify the member
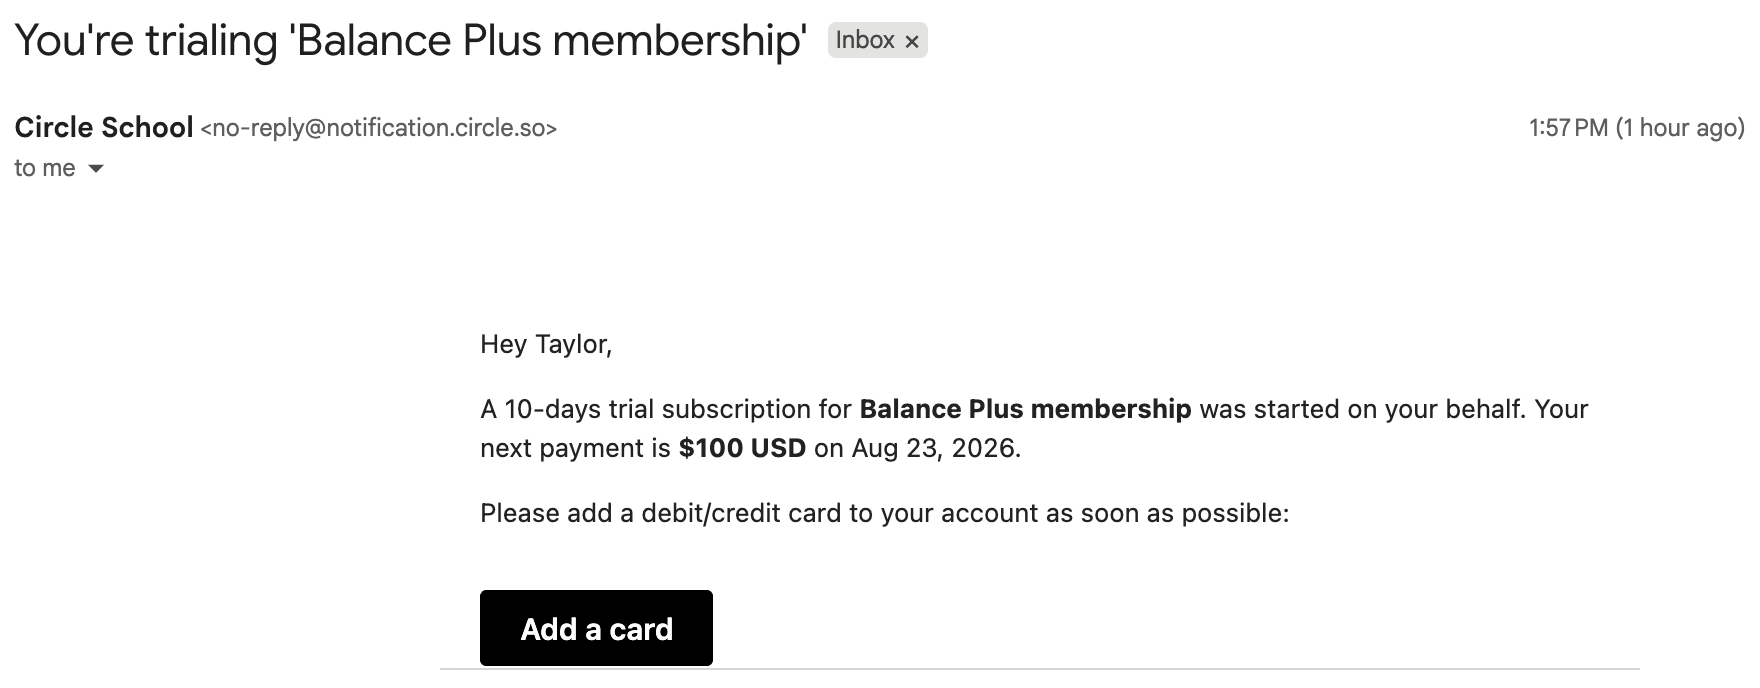
If you want to send an email to your members letting them know you've started a trial subscription for them, turn on the Notify members of new trial toggle.
ℹ️ Note: This email is automated and cannot be personalized.
Here is an example of an email notification that gets sent when you set up a paywall trial for your members.
Step 7: Review summary
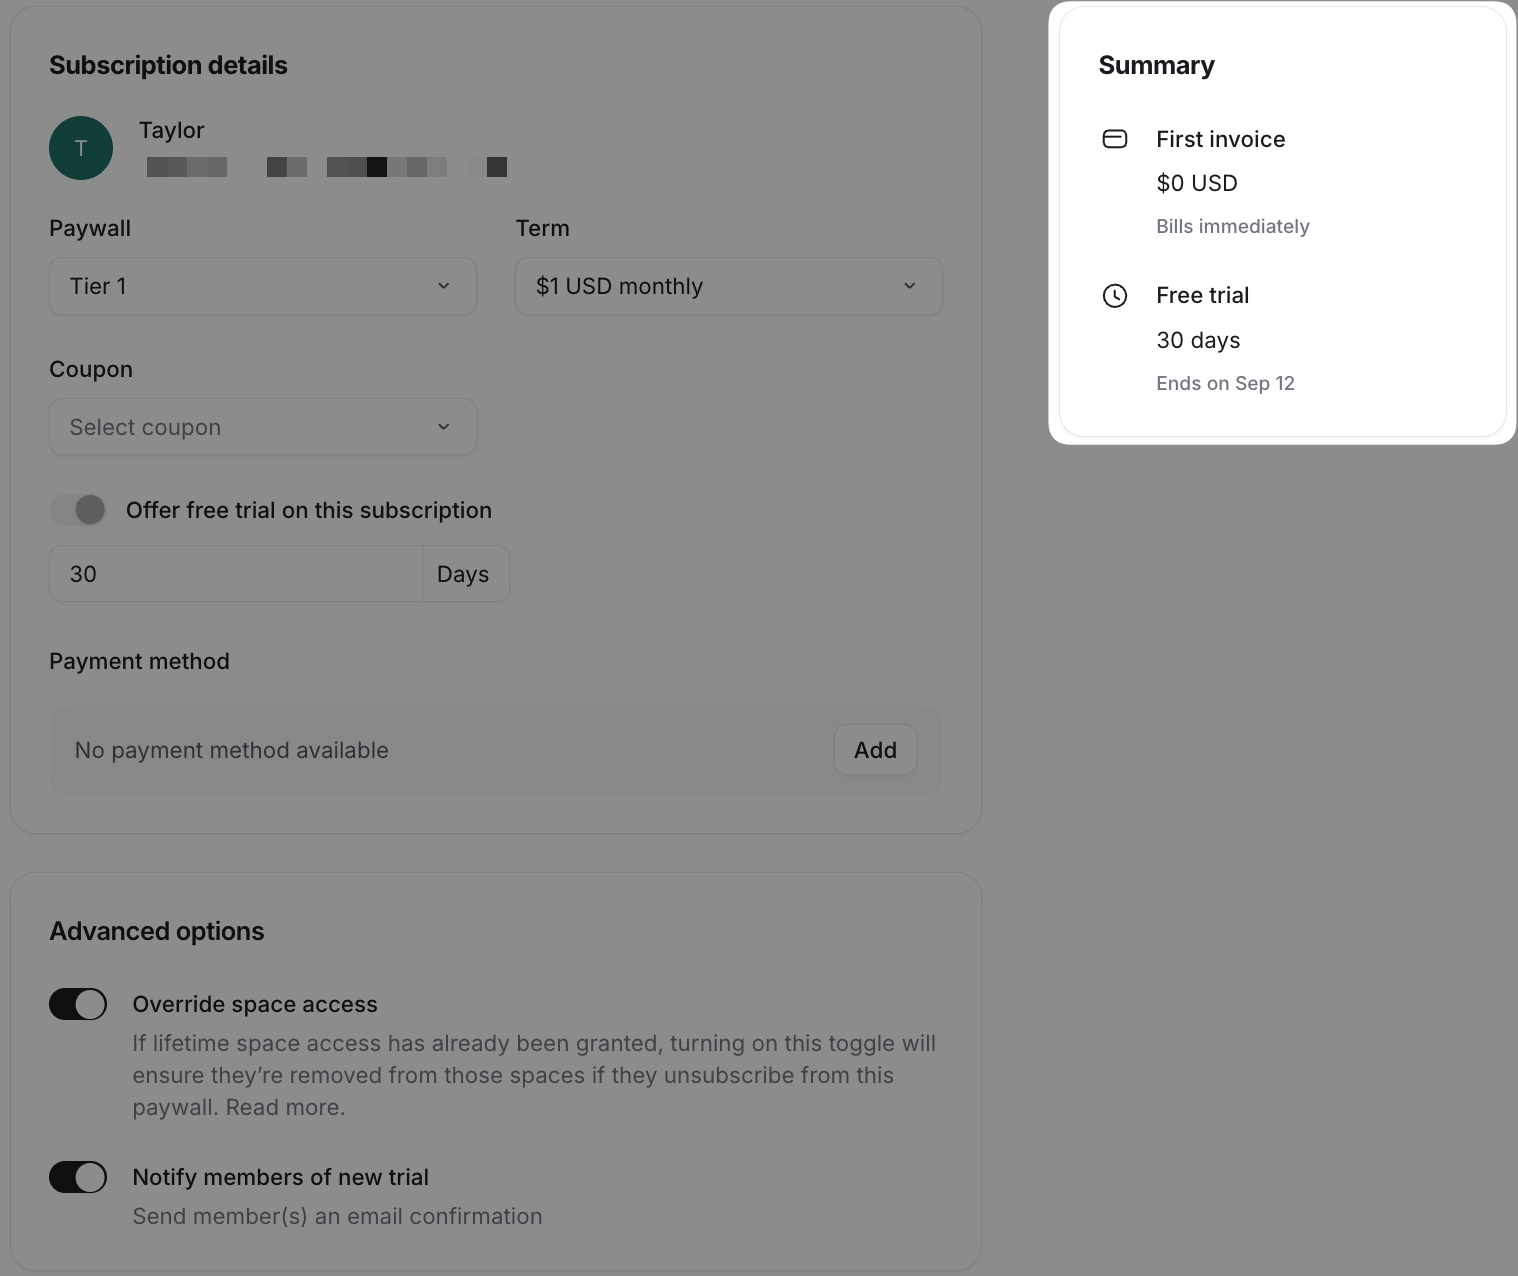
On the creation page, we display a subscription summary on the right sidebar that includes the first invoice amount, trial duration, and coupon information on the right sidebar.
View and manage subscriptions
To access subscription management options:
Click Audience in the left sidebar, then select Audience.
Use the Filters option to find the member, then click the member's name.
Navigate to the Billing tab on the member profile.
Navigate to the Subscriptions tab.
Click More actions (three dots) next to the member entry.
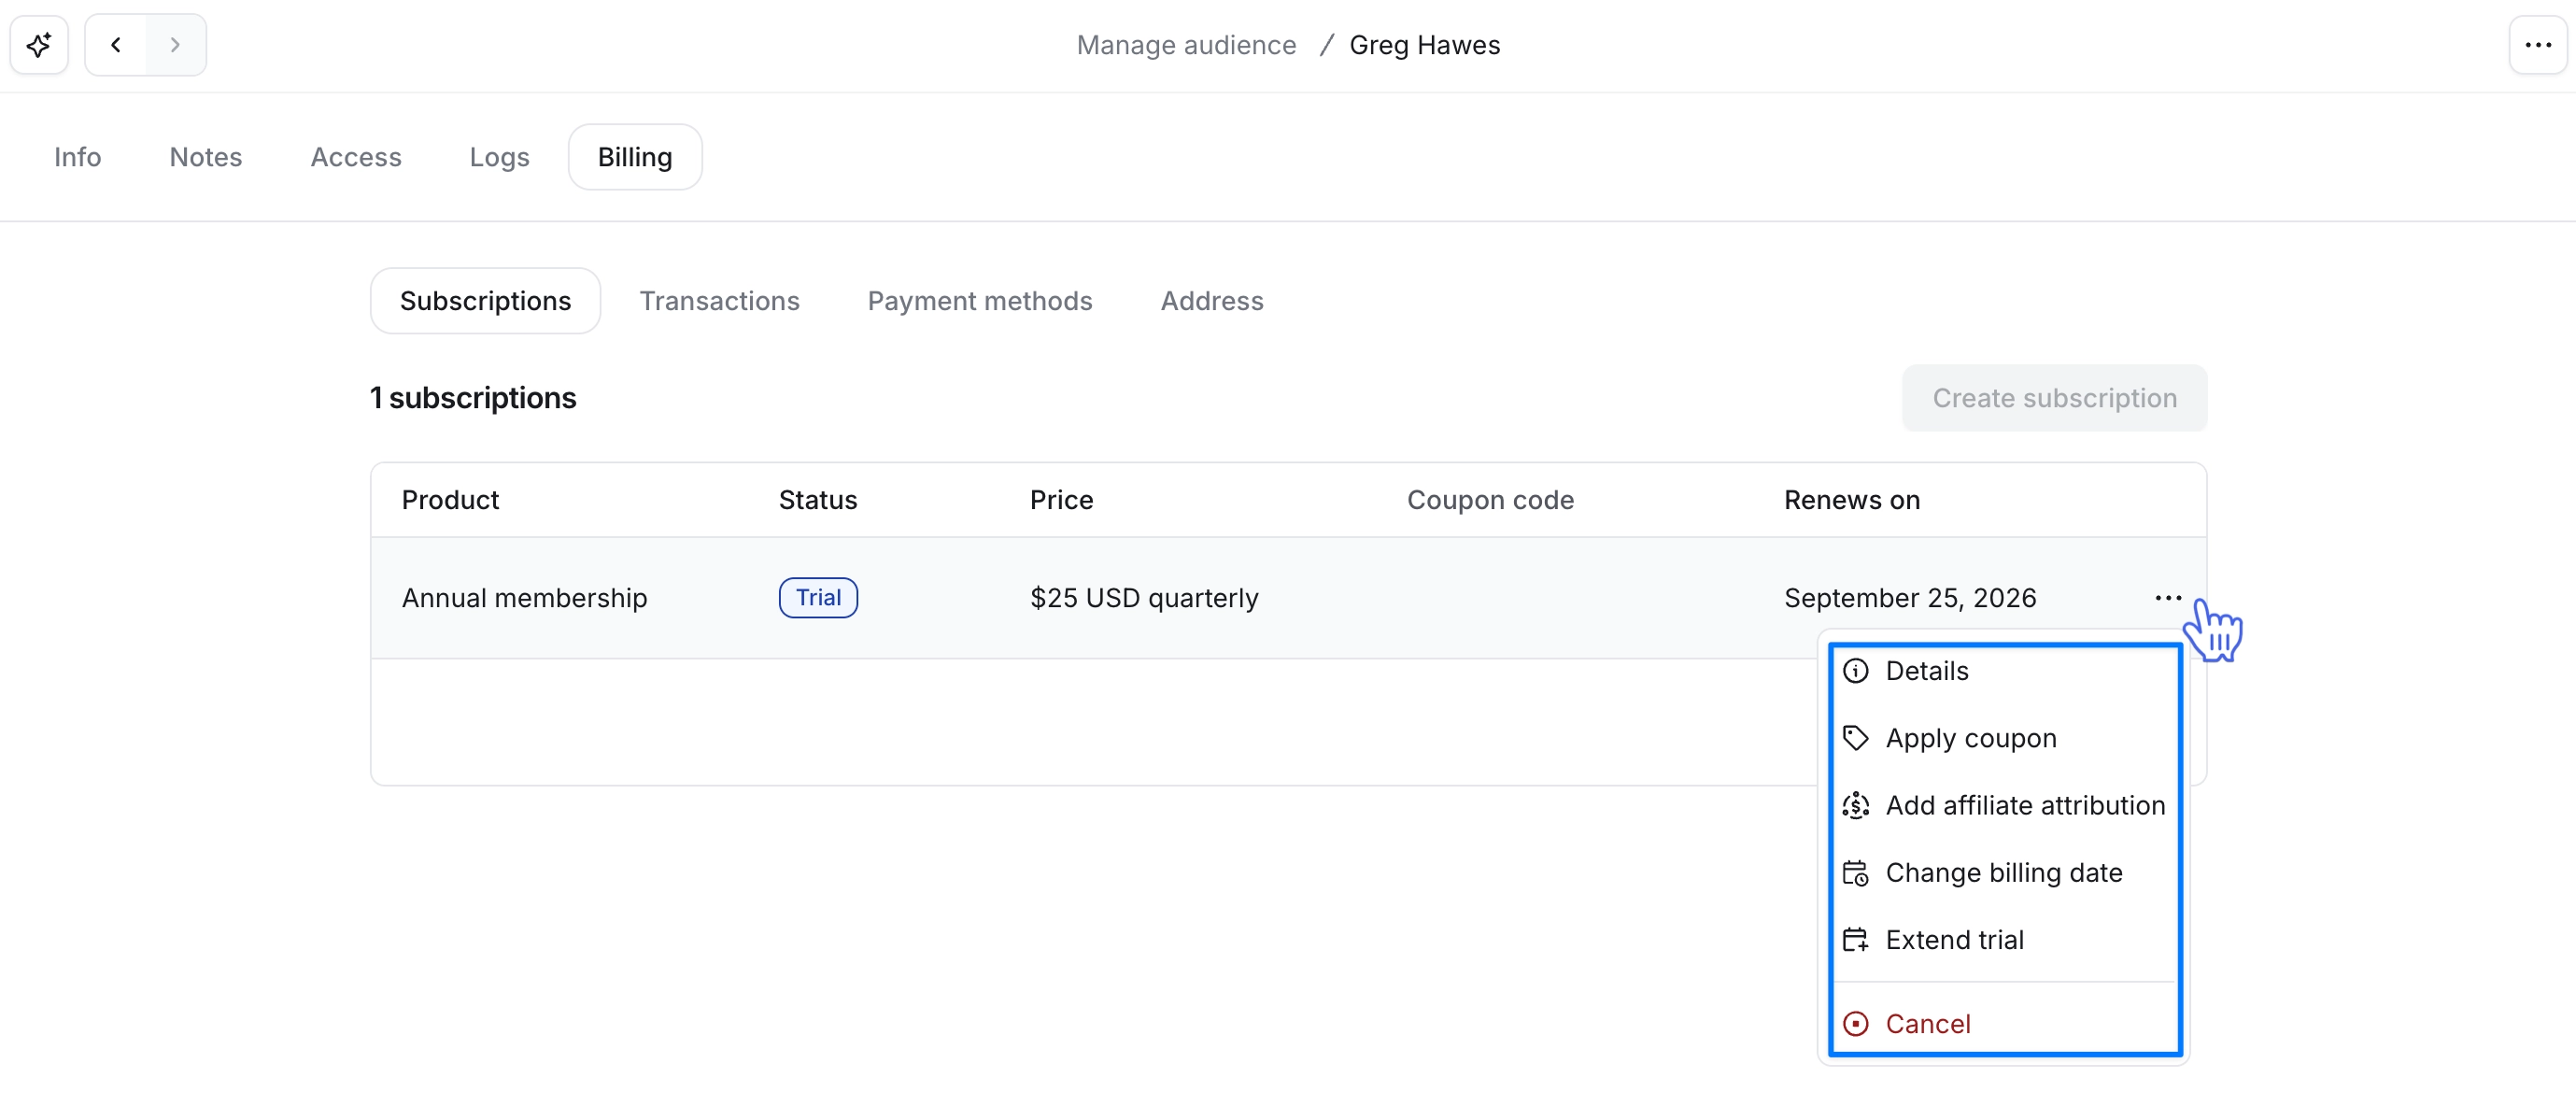
📚 To learn more about subscriptions, see View all member subscriptions.
View and manage transactions
To access transaction management options:
Click Audience in the left sidebar, then select Audience.
Use the Filters option to find the member, then click the member's name.
Navigate to the Billing tab on the member profile.
Navigate to the Transactions tab.
Click More actions (three dots) beside the member entry.
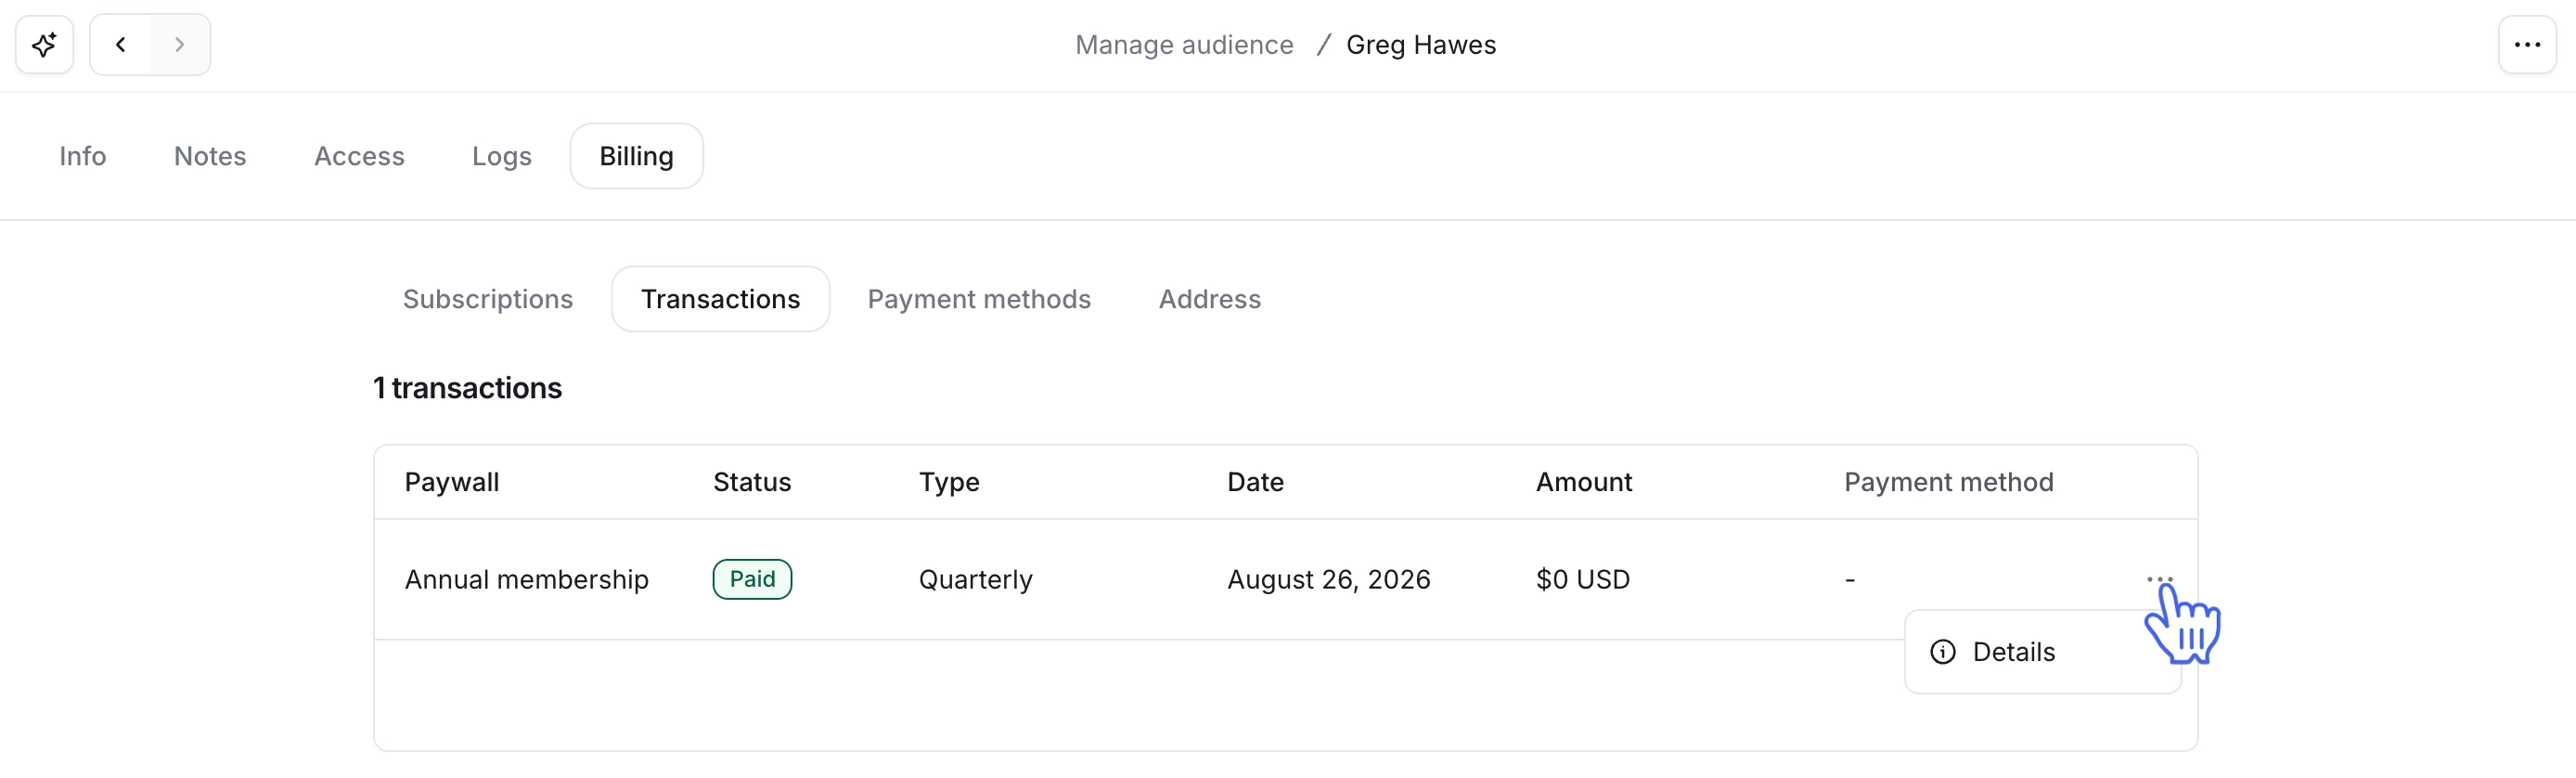
📚 For more information about transactions, see View all member transactions.