Invite members to your community
Last updated: June 18, 2025
Adding members to your community is a crucial step in its growth and development. Our invite feature makes it easy for you to invite new members and update existing member accounts of the community. In this article, we will guide you through detailed steps to invite members to your community.
About the invite feature
The invite feature is one of the community entry points that enables you to effortlessly bring members into your community. You can invite individuals by manually entering their emails or by importing a file to invite them in bulk.
When inviting members, you have the flexibility to define roles, access levels, and membership, including:
Assigning tags for organization and segmentation.
Granting admin privileges to manage the community.
Providing moderation privileges for specific spaces or space groups.
Providing free access to spaces or space groups via access groups.
Enrolling them in a paywall trial with a custom trial duration.
For bulk invites using the import file, you can also include additional member-specific data, such as tags and profile field information.
💡 Tip: While you can perform all the actions mentioned above, not all of them are required when using the invite feature. Assigning tags, providing members invite access (free access) to spaces and space groups, and adding members to a paywall trial is optional, and you can skip configuring them if they're not needed.
Important information regarding access when inviting members
When inviting members, you can grant access to community spaces through two methods:
-
Invite access (free access): With invite access, members get free access to the spaces you specify and can stay as long as they like, unless they leave or you remove them.
To set it up, go to the Access tab when configuring the invitation. Select Access groups or manually choose individual spaces or space groups using the Space access option.
This option works well for welcoming members into non-paywalled areas of your community.
-
Paywall access: If you have premium spaces that require a paywall purchase, paywall access is the way to go. Members gain access based on your paywall configuration, and it’s automatically revoked if their paywall membership ends or a payment fails.
When inviting members, you can add members to a paywall trial with a custom trial duration, regardless of your original paywall setup, via the paywall access method.
To configure a paywall trial, go to the Paywalls tab within the invitation form. For more information, see Step 6: Provide a free paywall trial (optional) in this article.
When configuring an invite, you can opt for one or both of these options based on your preferences. For instance, you can select an access group to provide free access to some spaces and also offer a paywall trial to experience exclusive membership access.
Using the invite feature for existing members
You can also utilize the invite feature to update various aspects of existing member accounts, including:
Adding new tags to existing ones that are already assigned.
Granting admin privilege.
Assign them as moderators of specific spaces or space groups.
Provide free access to spaces and space groups, using access groups in addition to what they already have access to.
Create a paywall trial with a custom trial duration on behalf of members.
When inviting existing members through the import file, you can include additional member-specific data like tags or profile fields in their profiles. The system handles profile field updates based on the field type:
Text, link, dropdown, and number fields: The old value will be replaced with the new value provided in the file.
Checkbox and picklist fields (e.g., tags): New selections are added to existing ones. For example, if a member already has a “Pro” tag and you add a “Coach” tag in the import file, they’ll have both “Pro” and “Coach” tags.
Step 1: Get started
To get started with member invites, follow these steps.
Click the community name or logo in the top-left corner and select Audience.
On the manage audience page, click Add in the top-right corner.
Select Invite members.
An Invite members form will appear on the screen. Follow the next steps to set up an invite as per your preference.
Step 2: Add details
On the Details tab, you’ll start by adding the basic information.
Choose a method to invite members
You have two flexible options when it comes to choosing a method for member invitation:
-
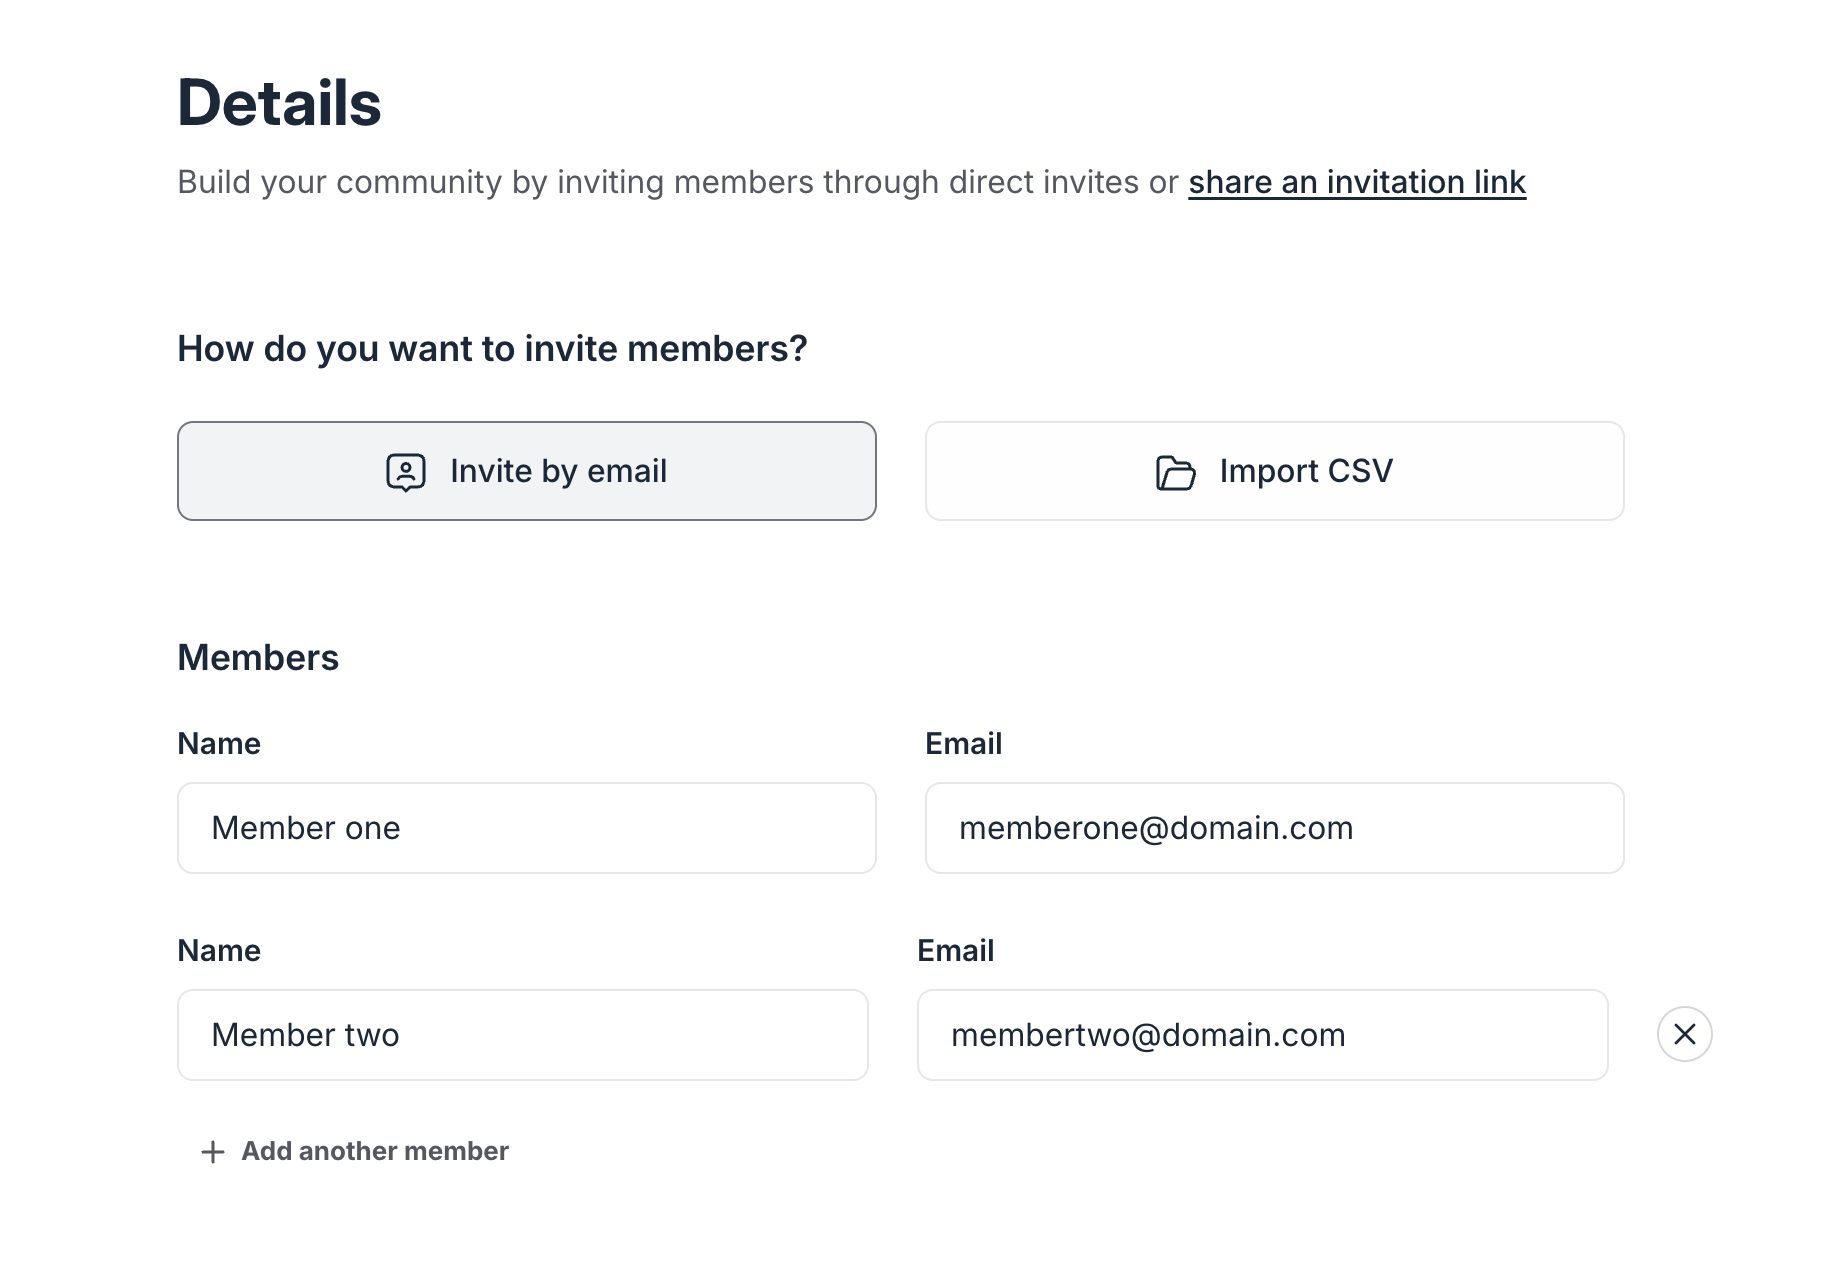
Invite by email: This method is ideal for inviting a small number of members using name and email.
-
Enter member email: In the Details tab, choose the Invite by email option to manually input member information.
-
In the Members section, enter the name and email address of each member.
-
Add multiple members: To invite multiple members simultaneously with the same configuration (e.g., tags, access, and paywall trial), use the Add another member button.
-
-
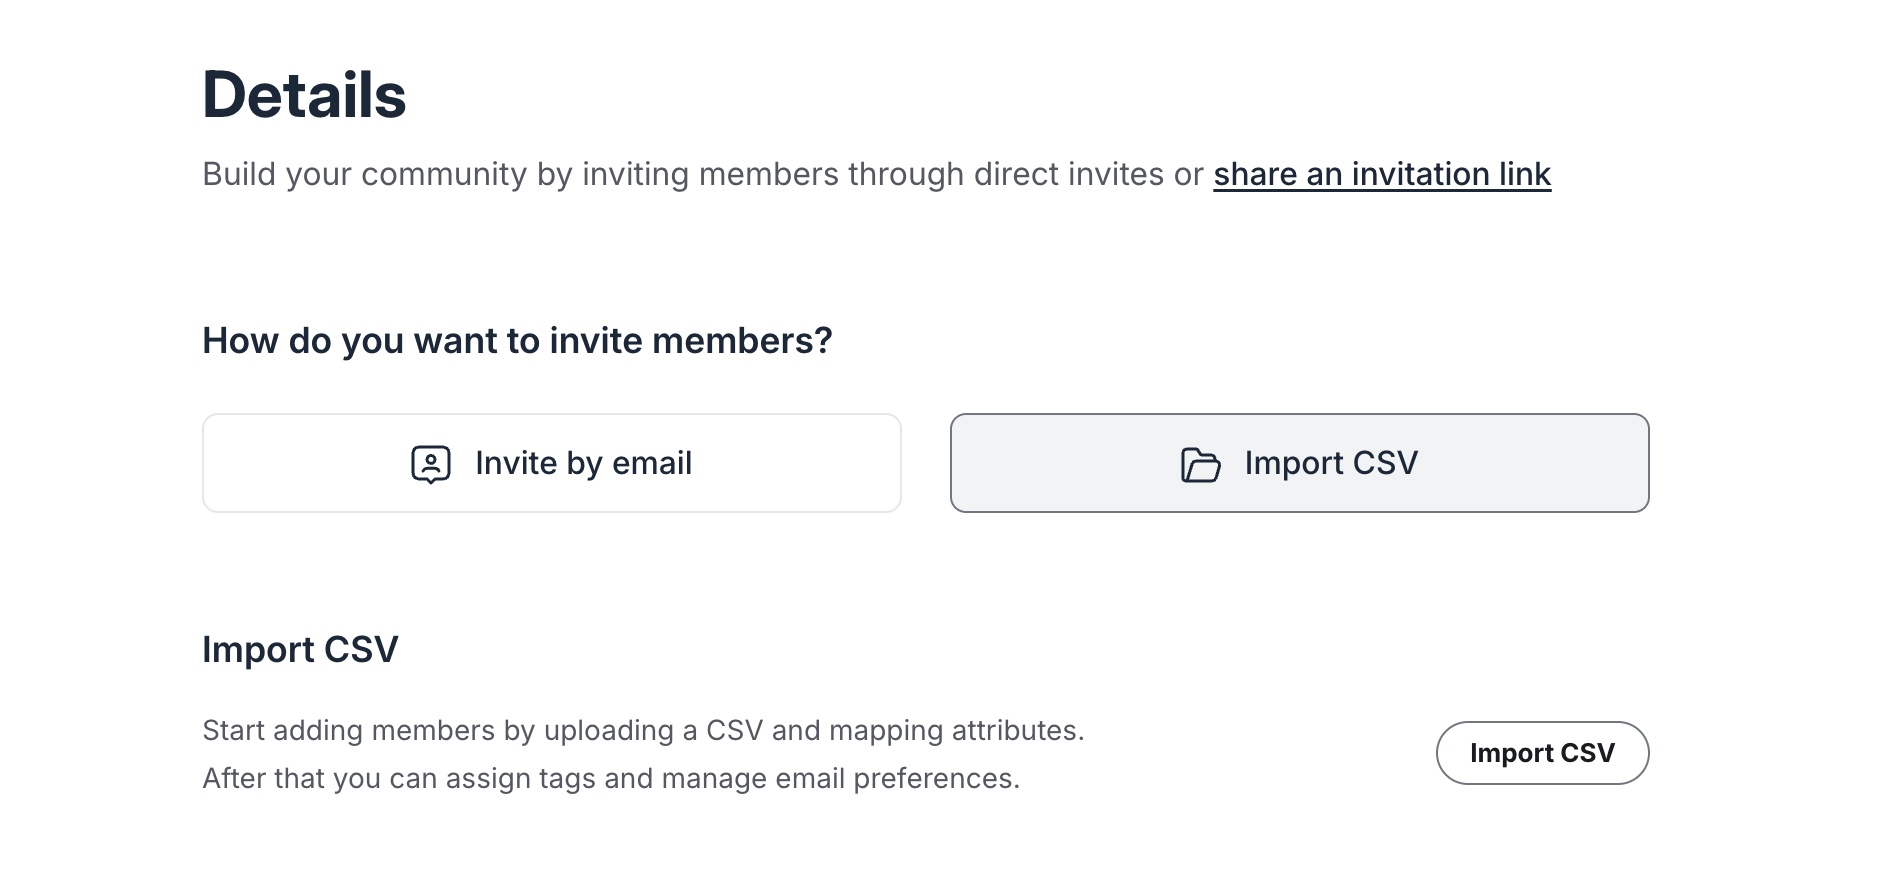
Import CSV: When you need to invite multiple members in bulk at once, this option offers a powerful and efficient solution. Once you are ready with the file, click Import CSV and add the file from your device.
-
Prepare import file: You can import members via a CSV or Excel file.
When importing in bulk, you can include member information such as names, email addresses, and profile fields (including custom fields).
To simplify this process, you can also download a template from the file uploader that includes all the necessary columns, including your community’s profile fields.
-
Upload the file: In the Details tab, select the Import CSV option, then click Import CSV to upload the file you prepared from your device.
Our member import tool allows you to map the columns in your file to the corresponding fields in Circle, review and resolve errors, and edit the import file directly in the editor. This eliminates the need to revise and re-upload the file.
Note that all members included in the import file will receive the same configuration set for tags, access, and paywall trial in the invite form. Ensure these settings align with your intentions before finalizing the invite.
For more information on the bulk import limit, preparing a CSV file, and general details, see Importing members in bulk.
-
Assign tags (optional)
Tags help you categorize or identify community members based on their roles, unique groups, and accomplishments within the community. You can easily assign tags you have already created in the community to all members part of the invite.
To assign tags, click the Select tags dropdown menu and type the tag name. Then, choose a tag from the available options. You can assign multiple tags.
💡 Tip: If you have created internal tags (that has the Show this tag on member profiles toggle disabled in tag settings) for admin purposes, you can assign it to members while inviting them.
Step 3: Configure permissions
To set up members’ permissions and space access, navigate to the Access tab.
Give admin privileges
Enable this toggle if you wish to provide administrative privileges for your community.
❗Important: Please use this option with caution. When enabled, members with admin privileges will gain unrestricted access to content management options, all space and community settings, including community billing, community plans, and member management.
Make moderator of spaces/space groups
Enable this toggle to provide moderation privileges for a specific space or space group.
ℹ️ Note: Each community plan has a specific limit of admin and moderator seats. If you exceed this limit when inviting members, you will be prompted with a message indicating this information before the invite goes through. You can either remove those permissions or members from the invite configuration or upgrade your plan before proceeding.
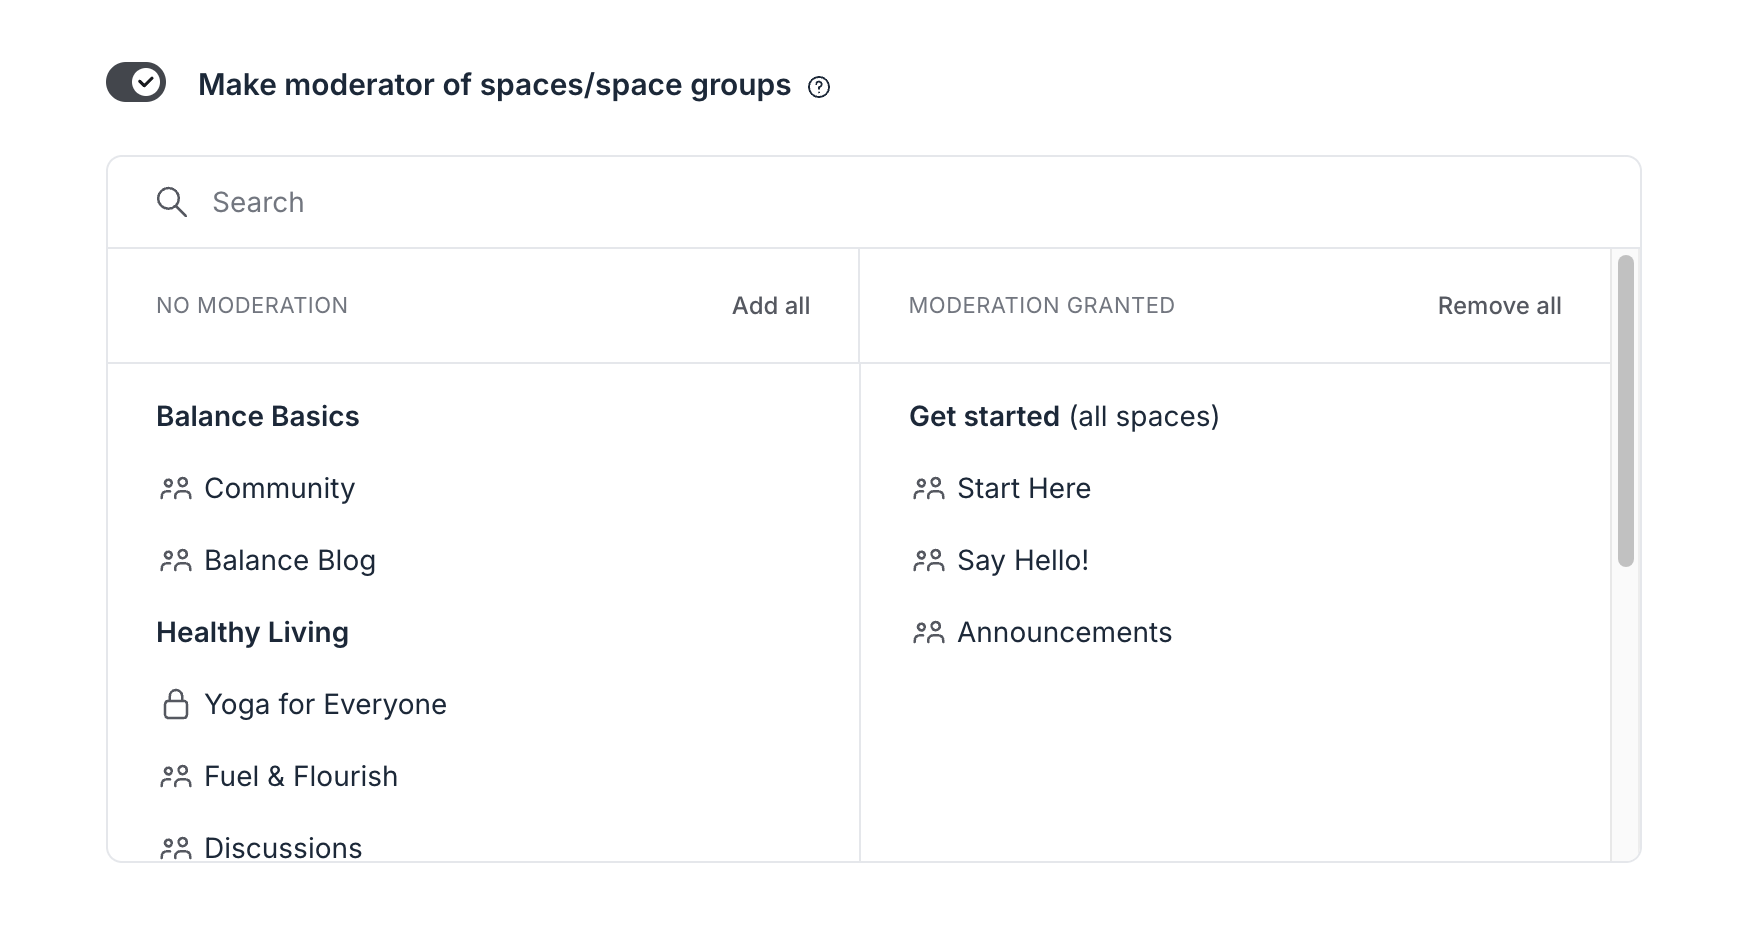
Once you enable the toggle, a table will appear to help you set up moderation grants:
-
The left column, labeled No moderation, lists all the spaces and space groups from your community.
To grant moderation privileges to these spaces, hover over a space or space group in the No moderation column and click Add to move them to the Moderation granted column.
-
The right column, labeled Moderation granted, shows spaces or space groups that have been granted moderation.
To remove the moderation privilege, hover over a space or space group in the Moderation granted column and click Remove.
-
💡 Tip: Use the search bar at the top of the moderation access table to quickly locate spaces or space groups.
-
Use the Add all or Remove all options located next to the column headers to grant or remove moderator privileges for all spaces and space groups at once.
-
📚 To learn more about moderation, see our guides here.
Step 4: Configure free access
Setting up access in the Access section is useful, especially when you want to provide your members with access that is meant to be accessible for free and not part of the paywall. Please keep in mind that members will have forever free access until the member leaves or is manually removed by the admin.
You have two ways of providing access within this section:
Access groups
Space access
Access groups
Access groups help you effectively define which spaces (and space groups) members get access to. This helps you streamline access management and eliminate the need for repetitive manual setups for entry points.
When using access groups, please review the following key considerations:
Impact of default onboarding access: If you have configured default access in your community’s onboarding settings, when members accept invites, they will also be added to the spaces and space groups from the onboarding settings.
Automatic access type conversion: If you include an access group that is also part of the paywall you've added in the paywall trial section, the invite access will be superseded by the paywall access. However, for overlapping spaces from access groups, the invite access stays as is. To learn more about the access conversion rule for access groups, see Understanding invite access and paywall access.
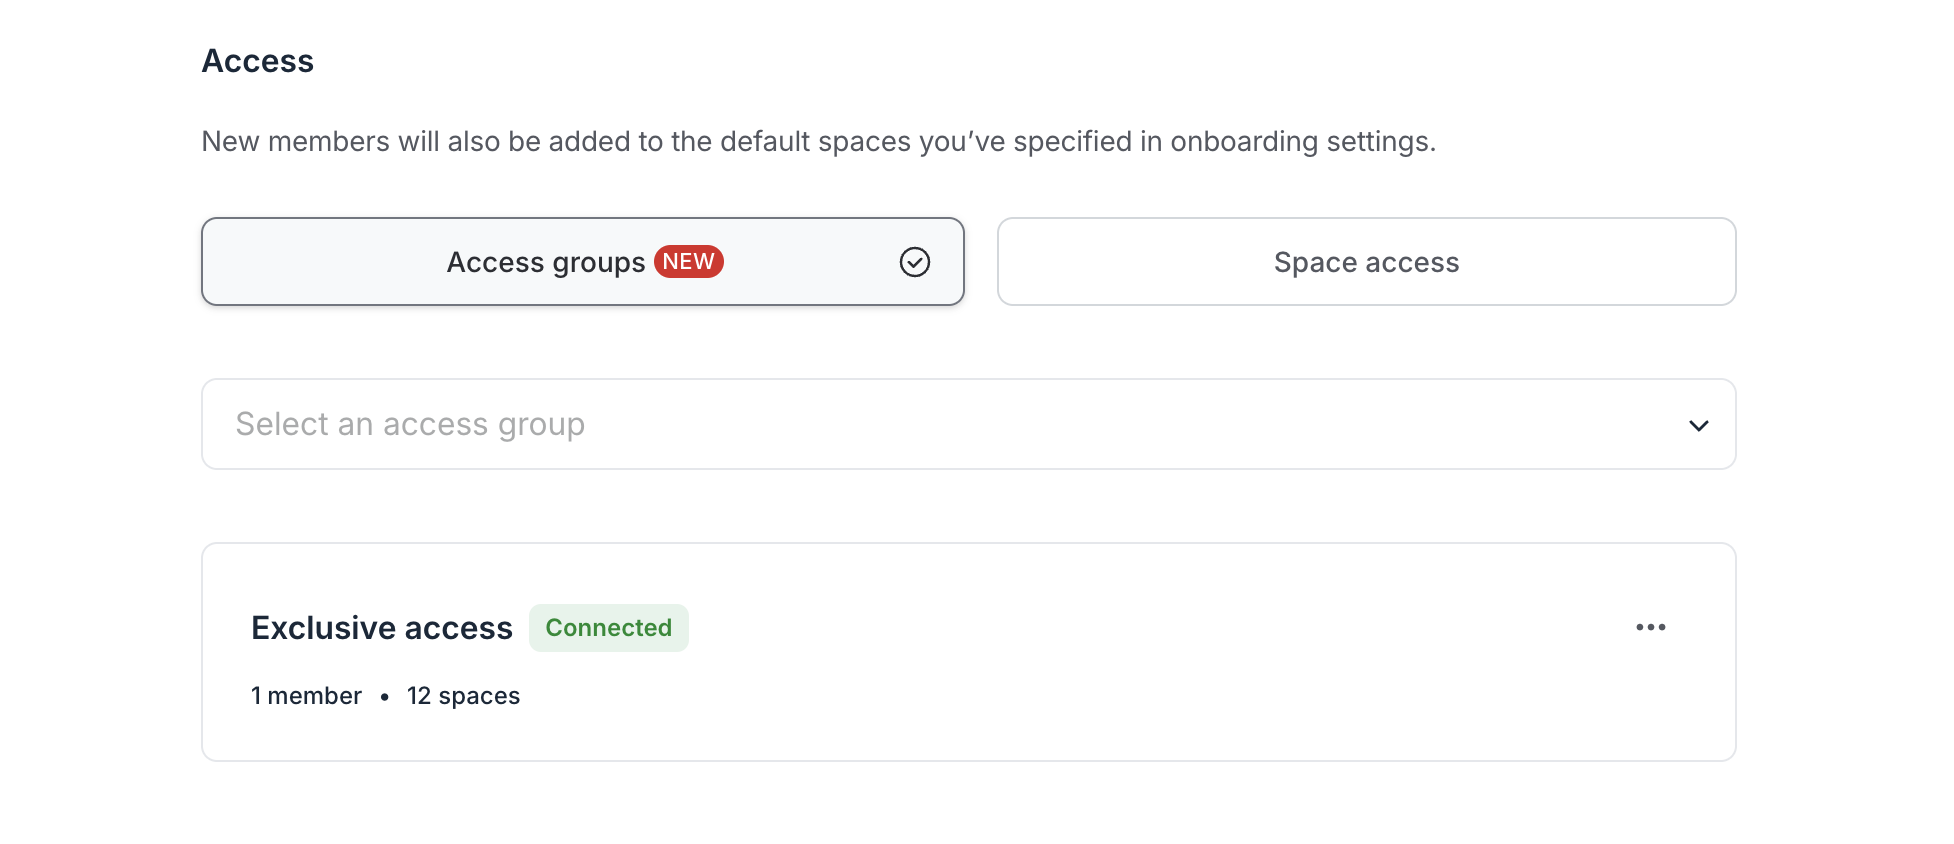
To provide access to spaces using access groups, select the Access groups option and then choose one from the list. You can add more than one access group here to provide members with access to multiple groups.
💡 Tip: If you add an access group by mistake, click the More actions (three dots) icon next to the group and select Remove.
To update the settings of a connected access group, click the More actions (three dots) icon next to the group and select Edit. This opens a new browser tab where you can modify the group settings.
Space access (legacy space access)
For communities created before January 29, 2025, you also have the option to manually provide access to various spaces and space groups instead of using access groups.
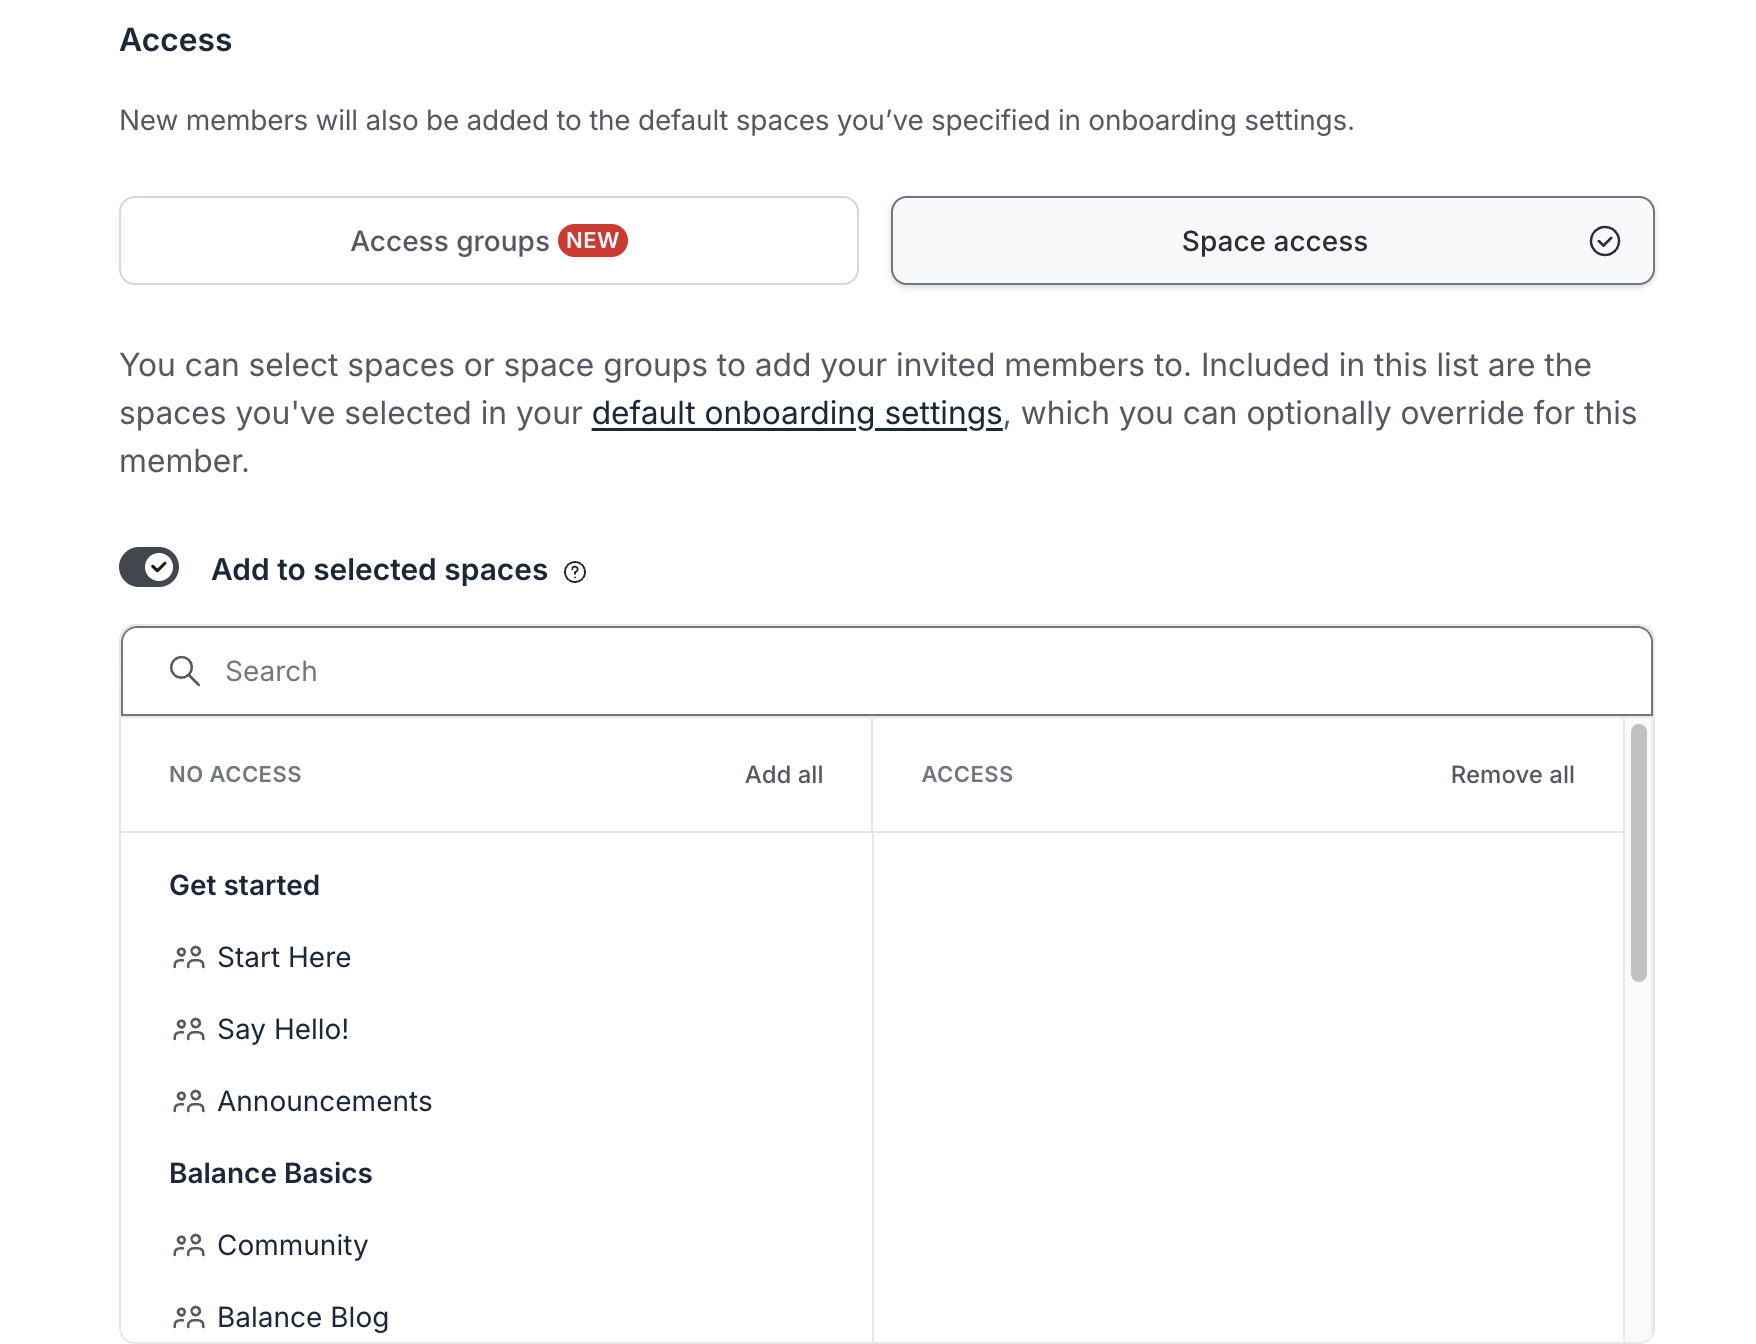
To use the legacy space access option, select Space access. Then, manually select the spaces and space groups to which you want to grant free access to your members.
When using legacy space access, please review the following key considerations:
Automatic access type conversion: If you include a space or space group in this Space access that is also part of the paywall you've added in the paywall trial section, the invite access will be superseded by the paywall access. To learn more about the access level in your community, see Understanding invite access and paywall access.
Impact of default onboarding access: In the space access form, you’ll see some spaces listed by default if you have selected legacy space access in your default onboarding settings. However, you have the flexibility to override it for this specific invitation by modifying the access form. To remove access to any spaces included from the default onboarding settings, enable the Add to selected spaces toggle, hover over the space in the Access column, and click Remove.
To select spaces, turn on the Add to selected spaces toggle and follow these steps:
-
To grant access:
In the No access column, hover over the name of the space group or space and click Add. This will move the space or space group to the Access column.
If you wish to provide access to all current spaces in your community, click Add all located next to the No access column header.
When you choose to add members to a space group, they will also be added to all spaces inside the space group, including secret and private spaces.
ℹ️ Note: If you select a space group with a setting (Automatically add members to new spaces within group) that enables members to access any future spaces, it will also apply to the invited members.
-
To remove access:
In the Access column, hover over the space or space group and click Remove.
If you wish to remove access from all current spaces, click Remove all next to the Access column header.
💡 Tip: In the access form, each space is represented with an icon indicating the space access setting:
👥 A people icon indicates an open space.
🔒 A lock icon indicates a private space.
👁️ A crossed-eye icon indicates a secret space.
Step 5: Customize invitation emails
When inviting members to join your community, you have the option to customize email invitations for members.
Customize the invite for new Circle members: This email invite is sent to members who haven't signed up for any Circle community before. Using the invite link from the email, members can create a new member account on Circle and a member profile when joining the community.
Customize invite for existing Circle members: This email invite is sent to members who’ve already signed up for a Circle community before. Since members have used their email to join any other community powered by Circle, they will be able to sign in using the same credentials, join the community, and create a member profile.
❗Important: Please note that any changes you make to invitation emails here will also apply to all future invitations. You have the flexibility to update it later from the onboarding settings.
To modify the invite, follow these steps:
Click Customize under the invite you’d like to modify.
-
In the Customize email dialog, make changes to the content.
Subject: Modify the subject of the invitation as per your preference. You can use the {invited_by_name} variable to auto-populate the member’s name in the subject.
Body: Customize the welcoming message to the body of the invitation email. You can utilize the {first_name}, {community_name}, {invited_by_name}, and {invited_by_email} variables to auto-populate various information in the body.
Click Save.
ℹ️ Note: Invite emails require the invite link hyperlinked within the email body. If the link is missing or broken, you will be prompted to re-insert the link. You have the flexibility to hyperlink the invite link to your preferred CTA text, such as “Join the community.”
Step 6: Provide a free paywall trial (optional)
On the Paywalls tab, you can configure paywall trial details to provide your members with a free trial of your exclusive membership offering.
You have the ability to choose subscription or installment pricing without upfront payments for a trial paywall membership. You can provide up to 730 days of trial duration without requiring credit card details upfront, regardless of your paywall’s trial configuration. This custom trial duration won’t interfere with your paywall’s original trial configuration or vice versa.
💡 Tip: Since you are creating a paywall trial on behalf of members, they do not have to go through the paywall checkout page or take any additional steps when joining the community. Similarly, if you are setting it up for existing members, they won’t need to do anything.
❗Important: As soon as you invite members, their trial duration will automatically start. To ensure that members are aware of the trial, you can choose to send an email confirmation of the paywall trial initiation.
To provide the paywall trial for your invited members, configure the following fields:
Paywall: Choose your desired paywall for the trial.
Term: Select a price from the eligible prices on the paywall.
Coupon (optional): Choose a coupon code if you want to automatically apply a discount when a member’s paid membership starts.
Trial days: Specify a custom trial duration of up to 730 days.
-
Notify members of new trial: If you want to send an email to your members letting them know you've started a trial subscription for them, turn on the Send members an email confirmation toggle.
ℹ️ Note: This confirmation email is automated and cannot be personalized.
📚 For detailed information about providing a free trial via invites and trial notifications, see Add members to paywall trial using invitation methods.
Step 7: Send invites
Once you are ready to invite your members, follow these steps:
Click Send invites.
-
Choose one of the following options:
-
Send invites: Choose this option to add members and send them an email invitation.
Please note that if existing members who have already confirmed their profile are included in your invite, they won’t receive email invitations even if you choose this option.
Add without notification: If you choose to add members without notification, they will not receive an invitation email. This can be an ideal option for communities that have SSO enabled, as members can directly log in using their SSO provider credentials.
-
Once the invite is on the way, you can track its progress in the bulk logs dashboard. Click View progress in the dialog to navigate to the bulk logs.
After sending invites
Once you have sent the invite, a member record will be created for each invitee, and their record will appear on the Invited tab of the Manage audience page.
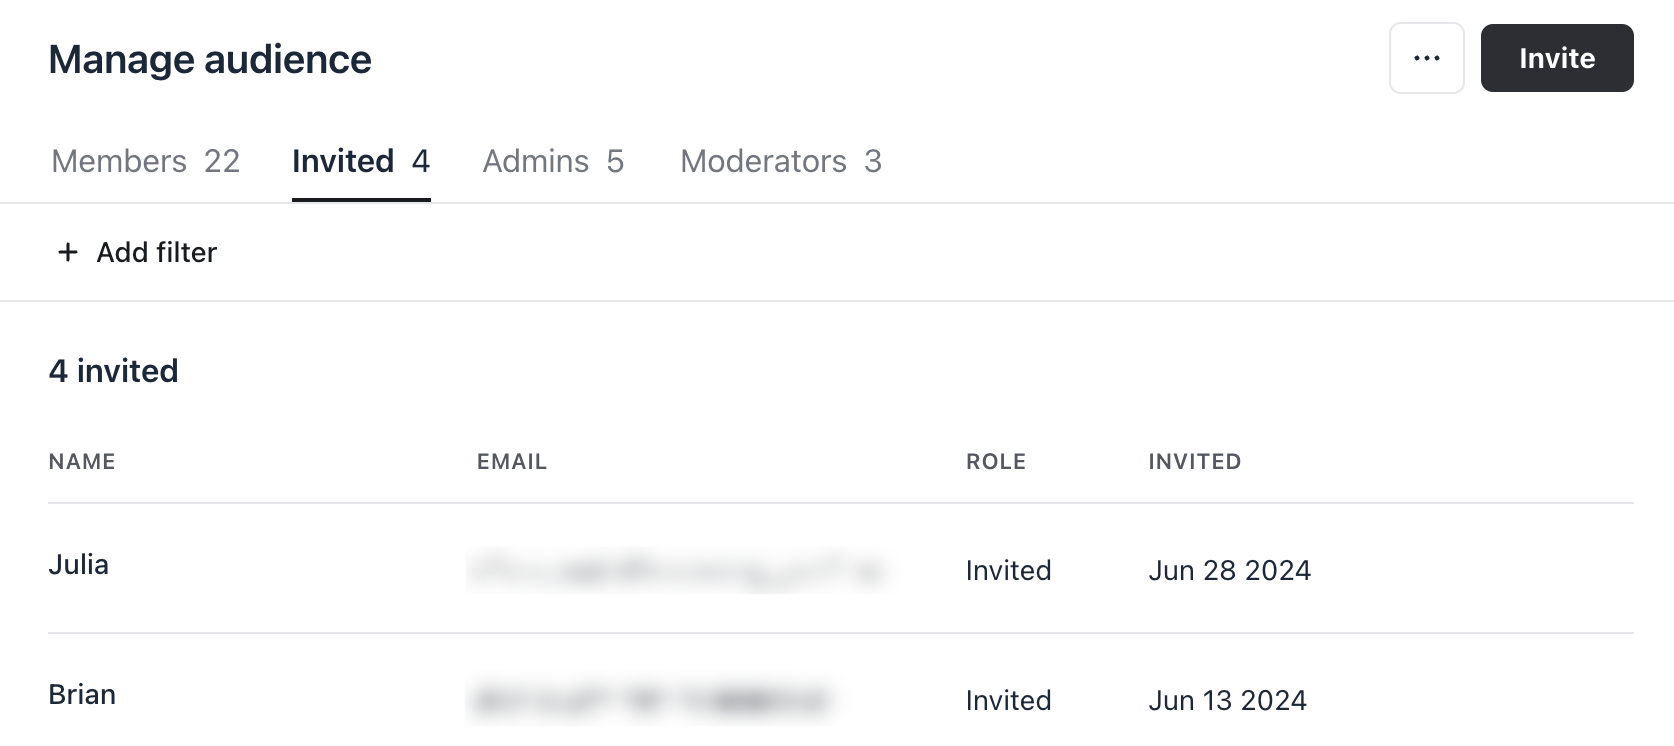
This indicates that the invite has been sent to members, but they have yet to complete the onboarding process. This process involves accepting the invitation and creating their member profile. Once members have completed the onboarding process, their profile will become active and move from Invited to the Members, Admins, or Moderators tab depending on their role.
📚 To learn more about the onboarding process and invited status, please see the following article: