Set up a public community
Last updated: August, 2026
If you want your community to be open to everyone while still deciding what non-members can see, set your community to public. This article walks through every setting involved: community visibility, visitor sign-up, default space access, individual space access, sidebar visibility, and the Feed.
Setting your community public helps ensure accessibility for everyone while granting you control over specific space content visibility to non-members, all based on your preferences.
📚 For more information about community and content access layers, see Different ways to configure community access and visibility.
❗Important: To ensure that your community is configured according to your preference, we recommend testing the setup by setting up a test member account and making a test transaction for paywalls (if applicable) before onboarding community members.
ℹ️ Note: The public community setup option is unavailable for communities on a trial plan. Once you upgrade your community to a paid plan, you can set your community to public.
Set your community to public
To make your community public:
Click Settings in the left sidebar.
-
Scroll down to the Website section and select General.
-
In the Visibility section, turn off the Make this a private community toggle.
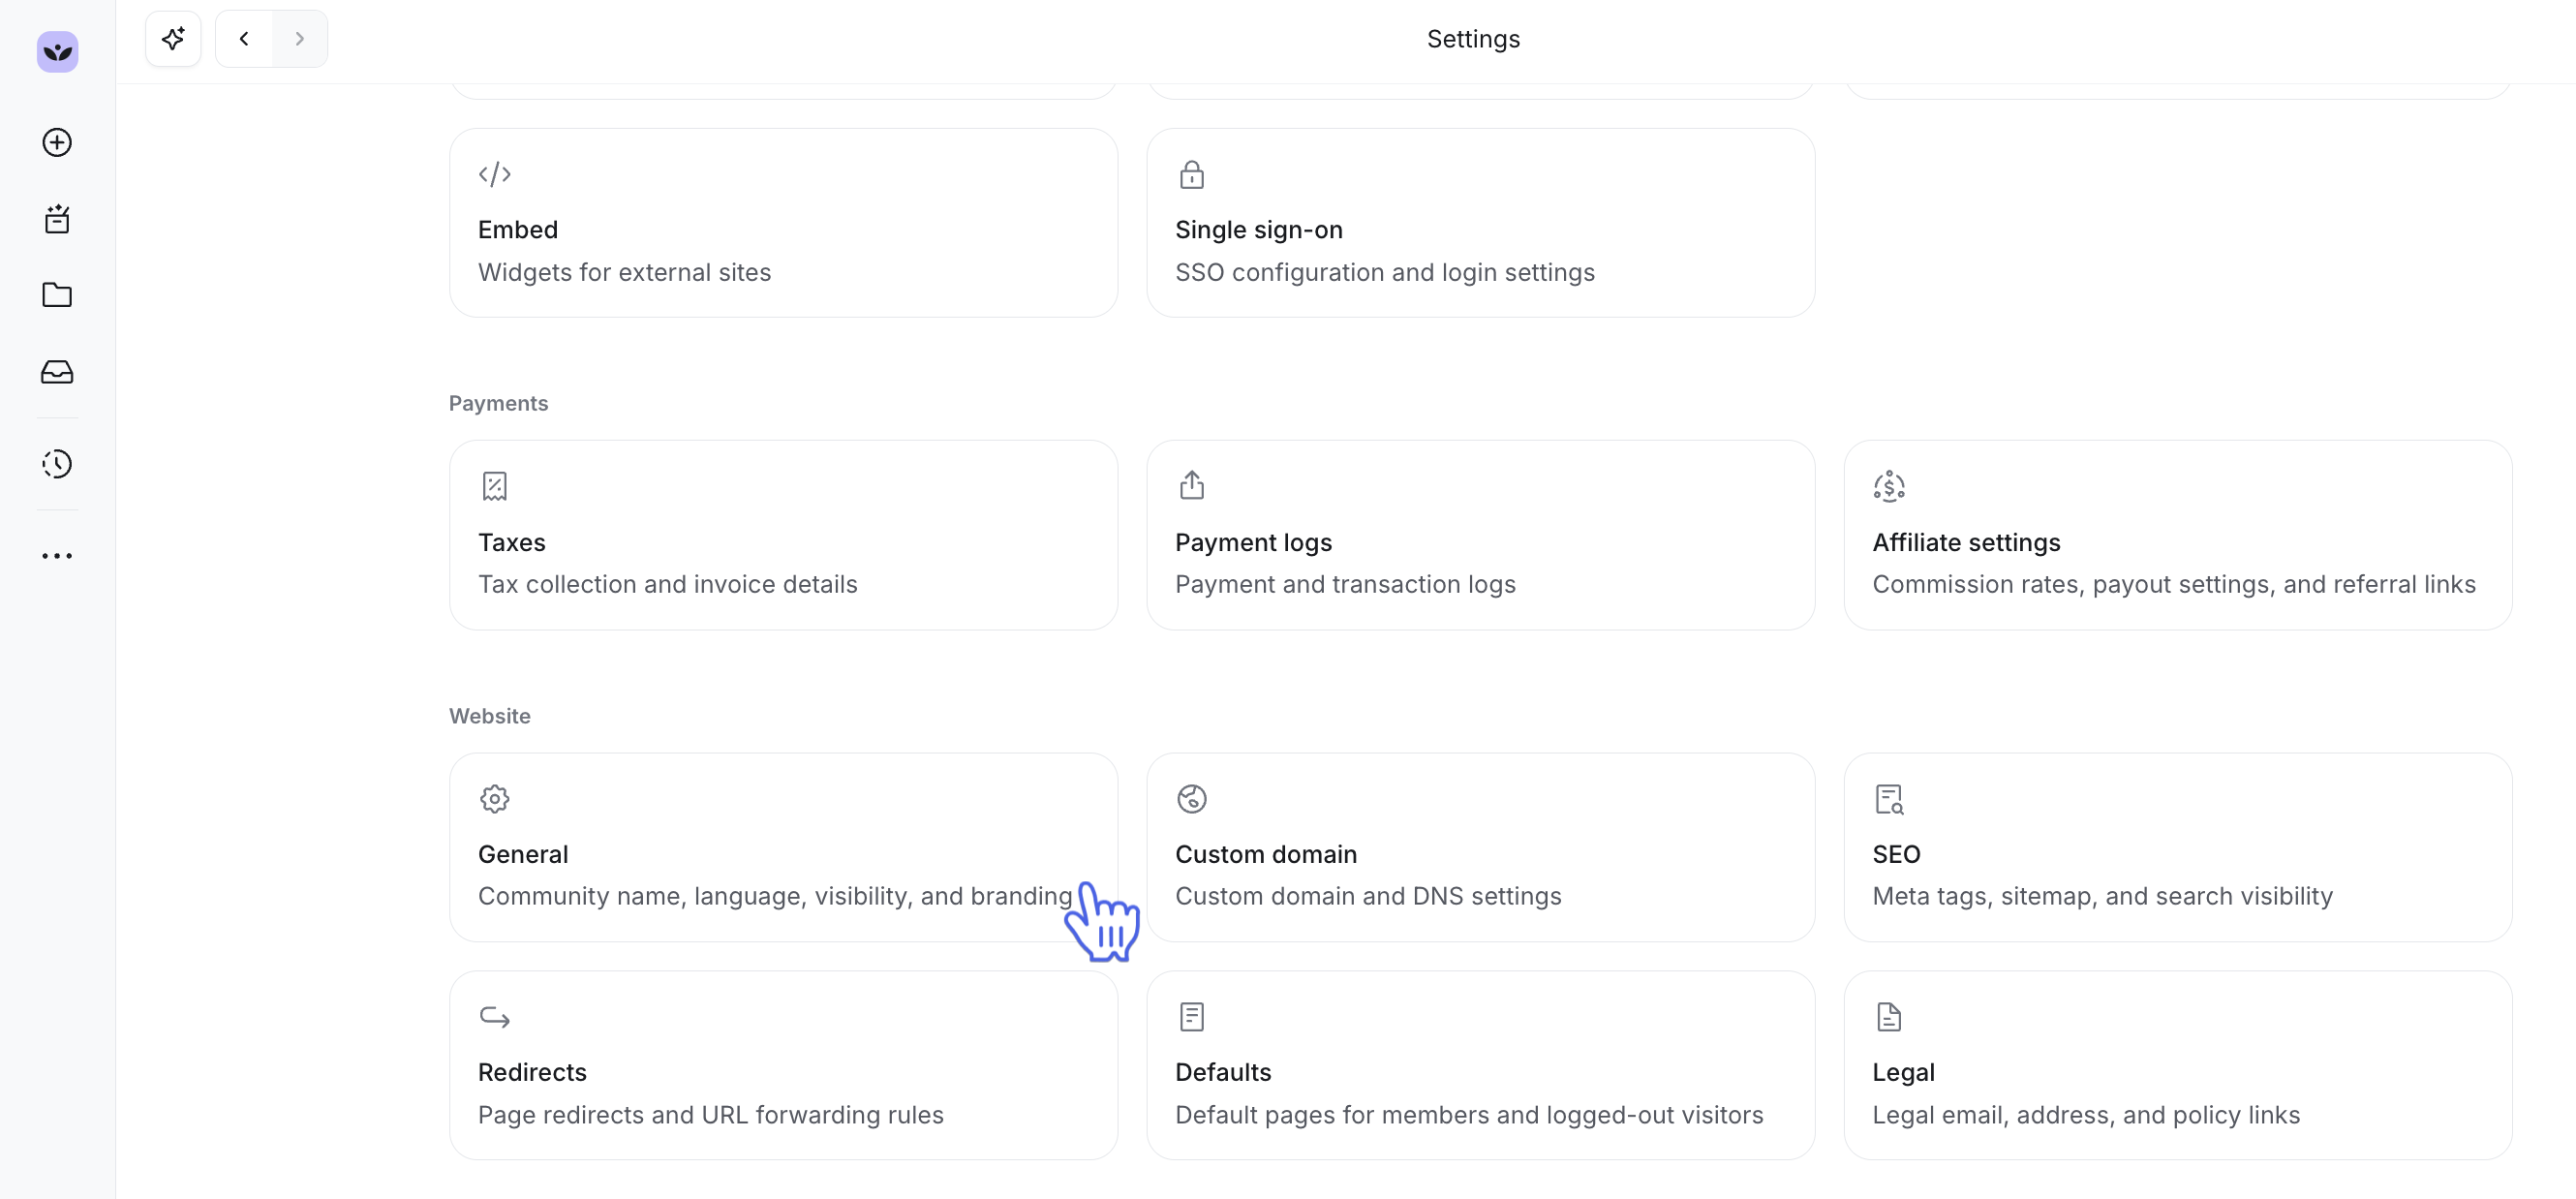
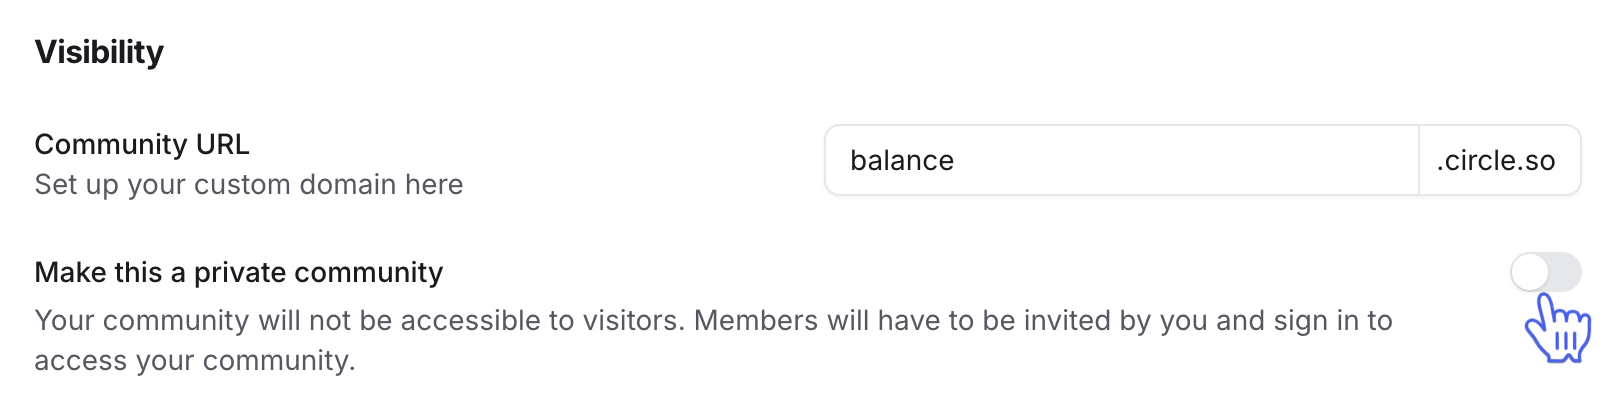
Click Save changes on the top-right corner.
Allow visitors to sign up
You can choose to allow visitors to create community accounts. Once they become members of your community, they can join any open space on their own and participate in it by creating posts, leaving comments, RSVPing to events, or starting an open course.
To enable the visitor sign up:
Click Settings in the left sidebar.
Scroll down to the Website section and select General.
Turn on the Allow visitors to sign up toggle in the Visibility section.
Click Save changes.
Once the sign up is active, visitors will see the option to sign up on the login page and on the top navigation bar while visiting the community.
ℹ️ Note: The allow visitors to sign up option is only available to non-SSO communities. However, if your community has SSO enabled, you can direct your members to sign up via your SSO provider or custom sign up page by enabling Allow members to sign up via a custom URL toggle and adding a custom sign up URL on the SSO settings page.
📚 For information about onboarding members via invitations or paywalls, please see Explore options available for onboarding members to your community.
Automatically give new members free access to certain spaces
To automatically grant new members access to specific access groups when they join your community, configure default access groups in your community settings. All new members will be automatically added to these access groups through invite access.
To add or update the default space access setting:
Click Settings in the left sidebar.
Select Onboarding in the Audience section.
Navigate to the Access tab.
-
In the Access tab, select the access group you want to add or remove.ℹ️ Note: For communities created before January 29, 2025, you have the option to manually provide access to various spaces and space groups instead of connecting access groups.
Click Save changes.
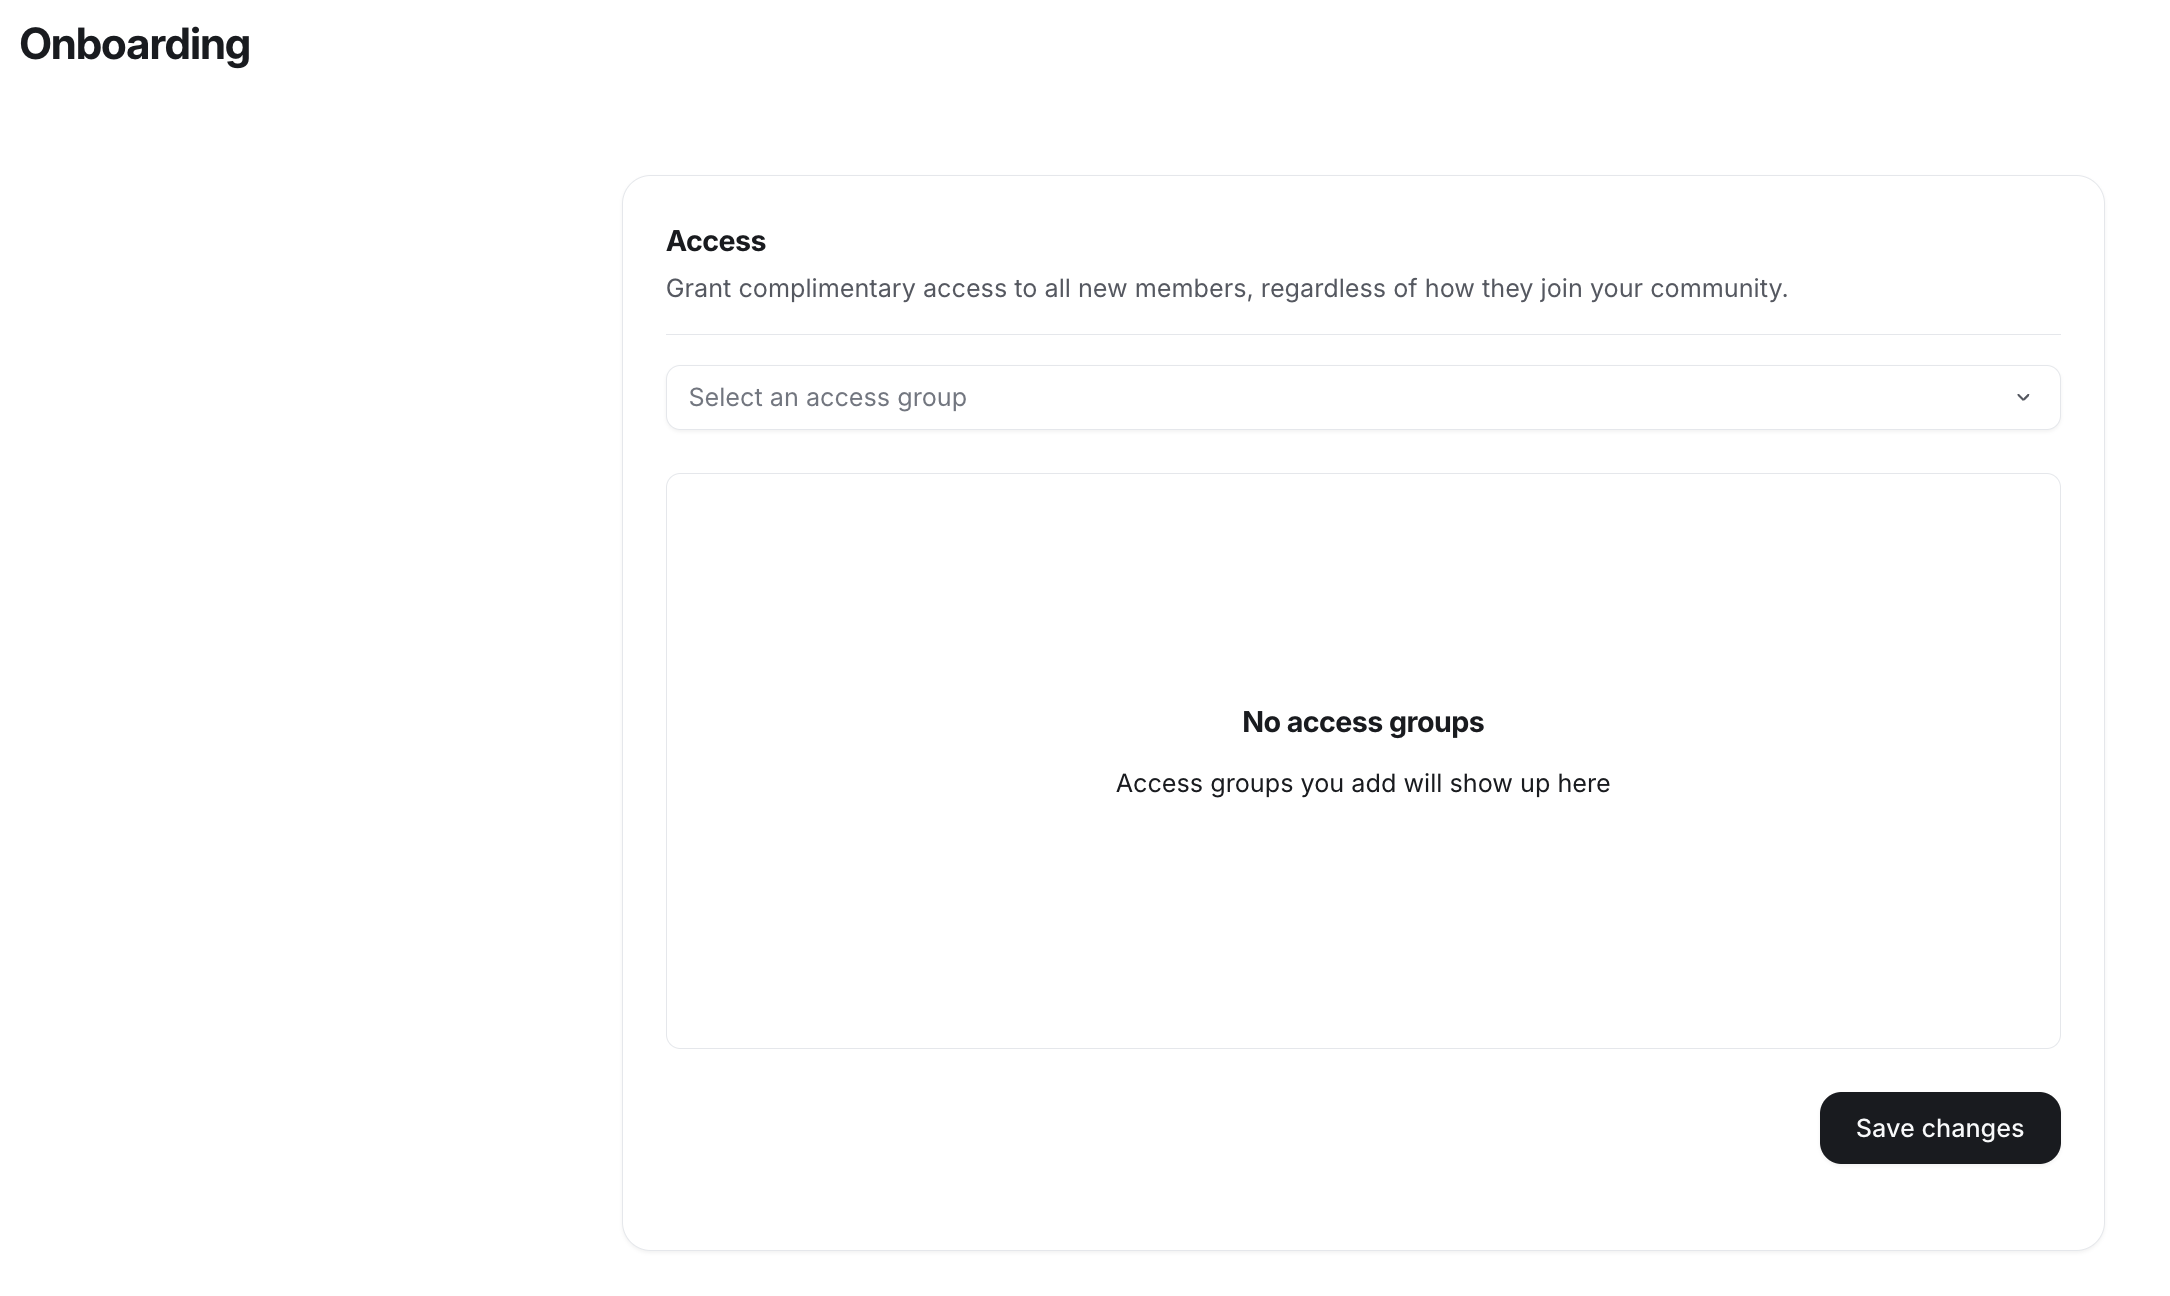
❗Important: Please note that if you plan to offer paywall membership in your community, we strongly recommend excluding access groups that are part of the paywall access.
Configure space access
Every type of space you create in your community offers three space access options: open, private, or secret.
When you create a new space, you'll have the opportunity to choose from these options, with the exception of course space. Course spaces are initially created in draft mode, allowing you time to build your course content before deciding on the space's access level.
To modify the space access for any existing space:
In the top-right corner of the space, click the More actions (three dots) icon, then go to Settings and select Customize.
-
In the Access section, select your preferred option.
Click Save changes.
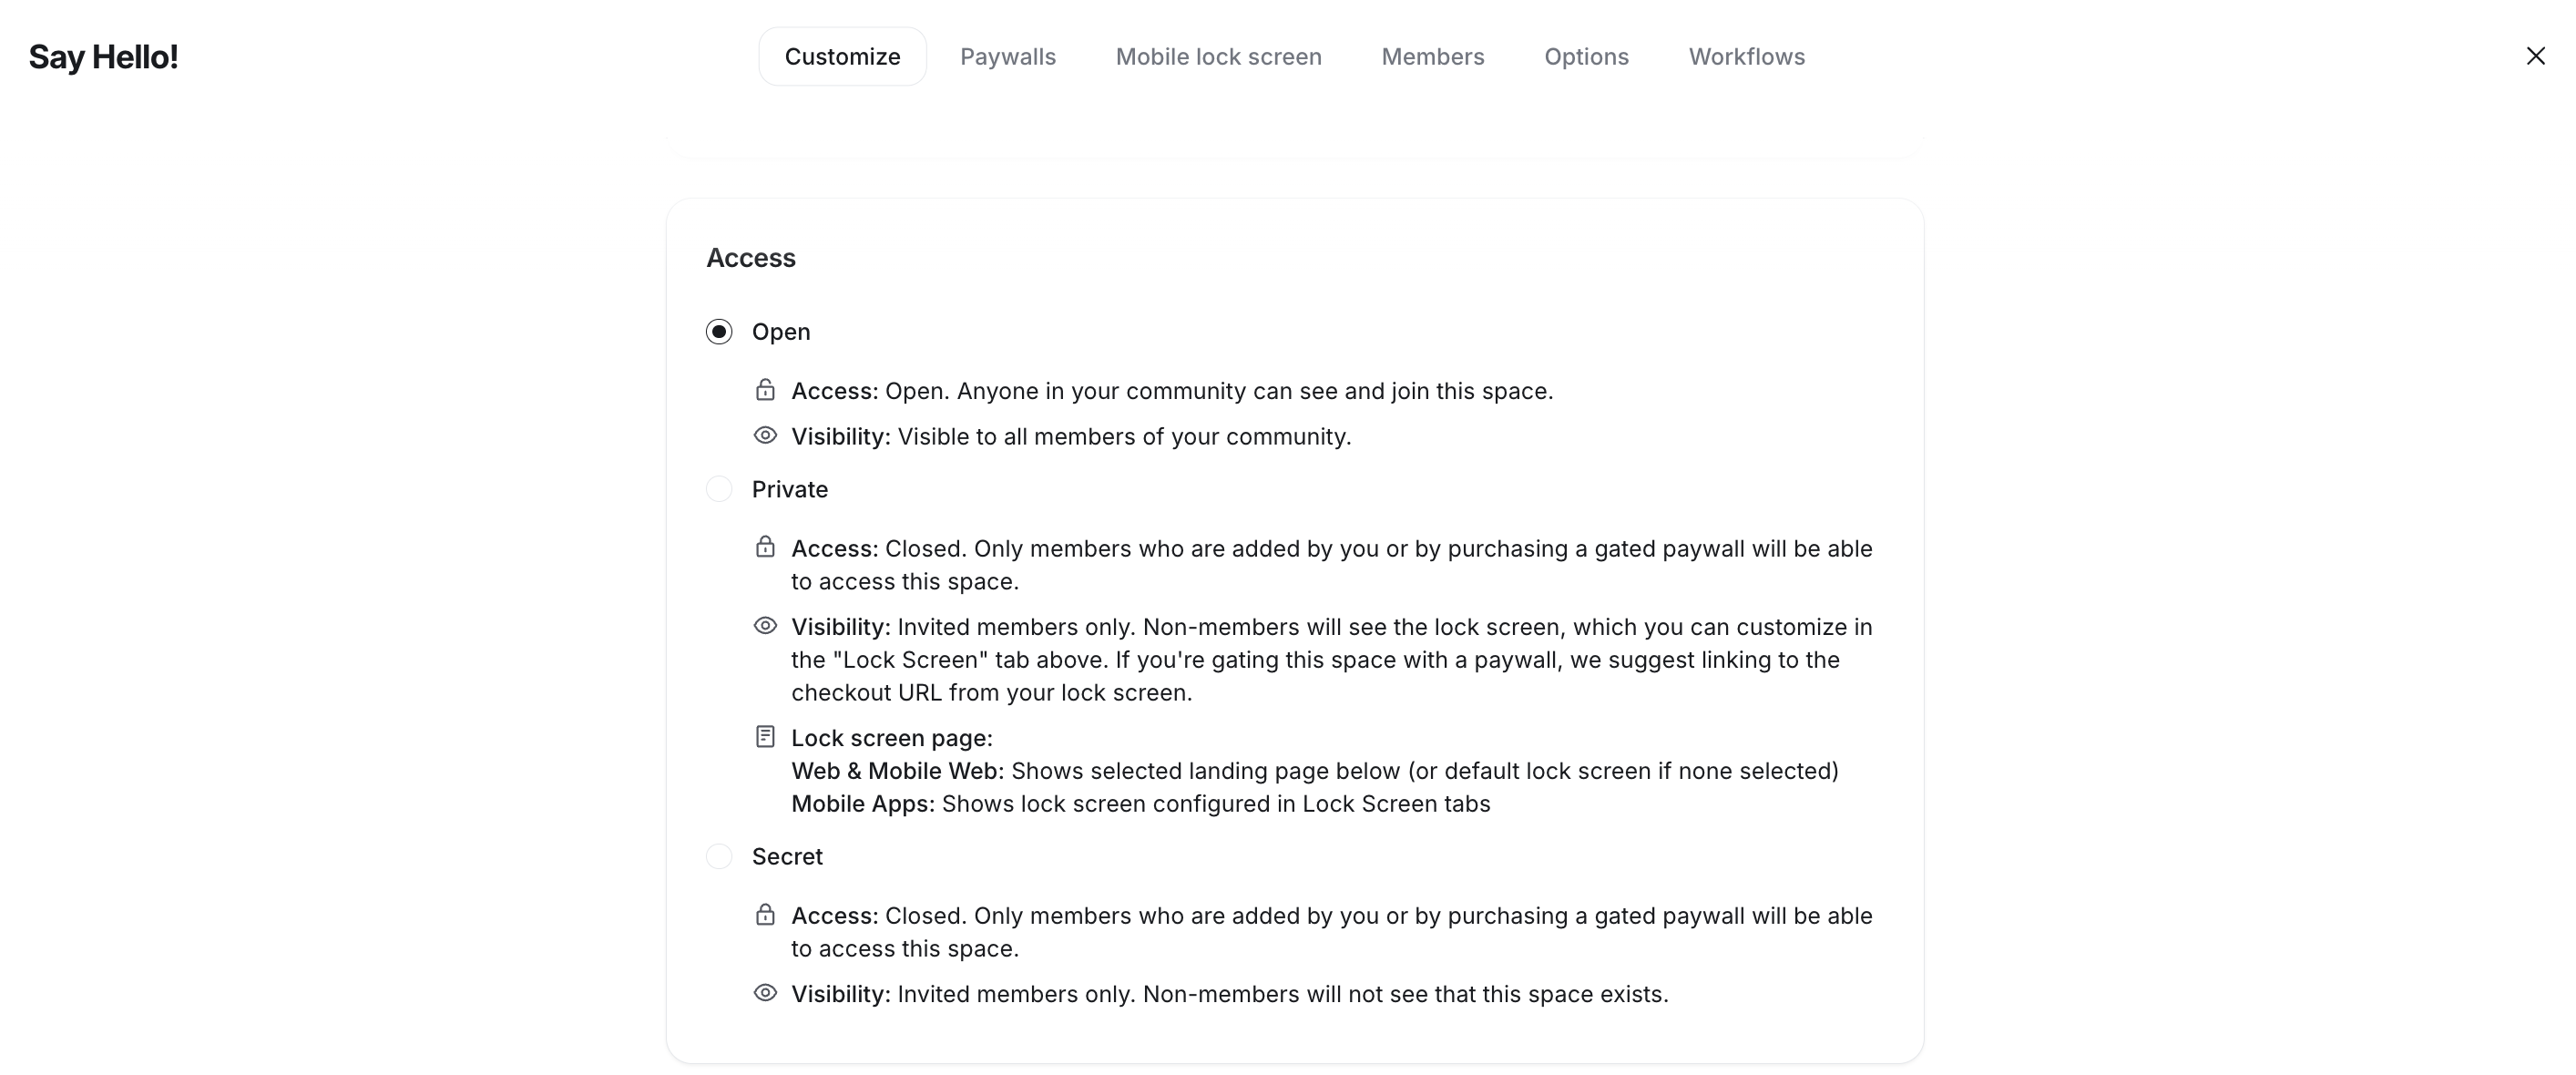
📚 For more information on space access and visibility, check out our guide on Managing space access and visibility.
Manage space and space group visibility for the sidebar
In addition to controlling access to spaces, you can customize the visibility settings in the community sidebar to show exactly what you want to non-space members and visitors.
These settings provide you with greater visibility options. For example, you might want one space group and its spaces visible to everyone, including visitors, while keeping another space group exclusive to space or community members. You can achieve this by adjusting the visibility settings for your space and the space group.
Space group settings
To access the visibility settings for the space groups:
Hover over the space group in the left sidebar.
Click the More actions (three dots) icon.
Select Edit space group.
Here, under Permissions, you have two key options:
-
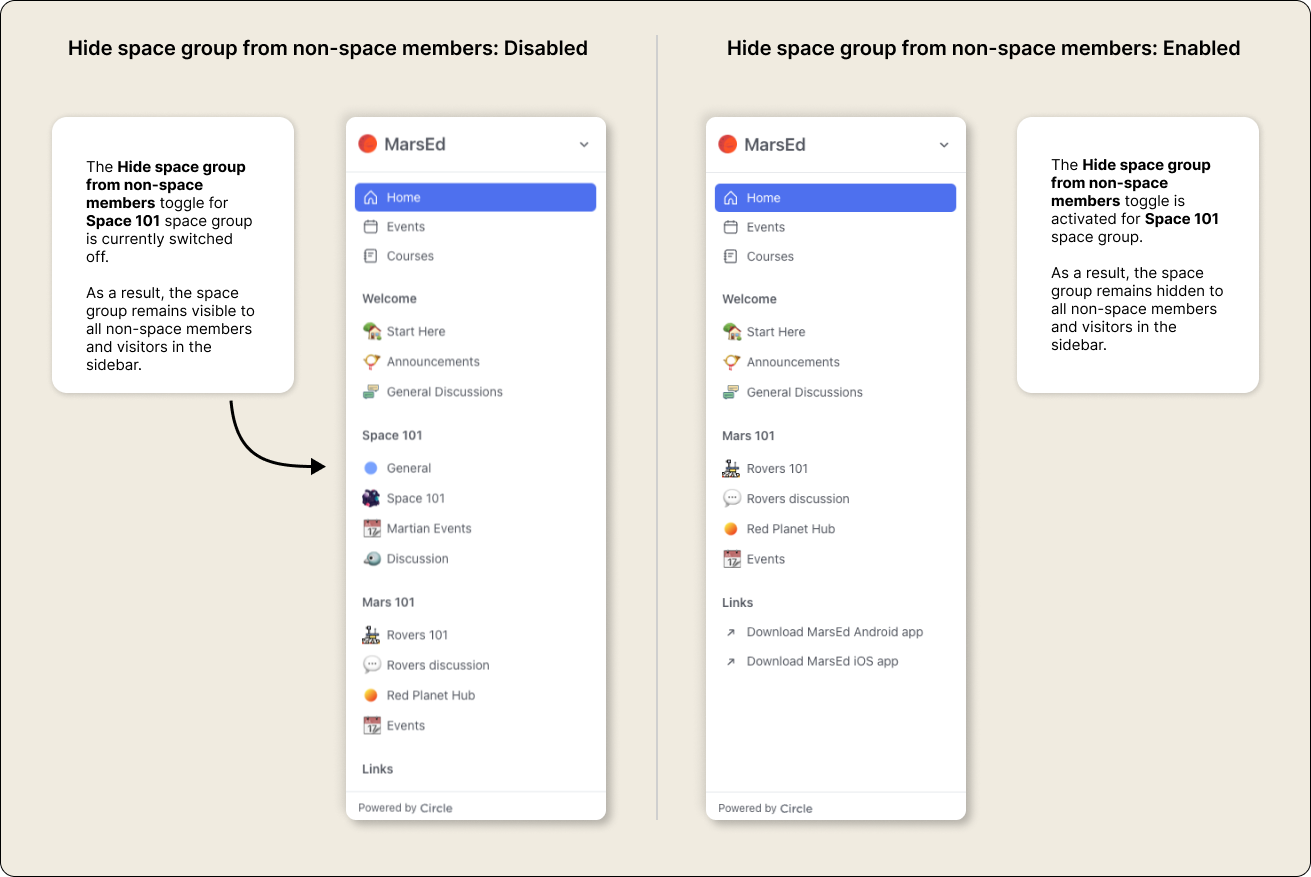
Hide space group from non-space members: Enabling this option ensures that community members who aren't part of at least one space within the group won't see the space group in the sidebar. This also means that visitors won't see or have access to the space group in the sidebar.
-
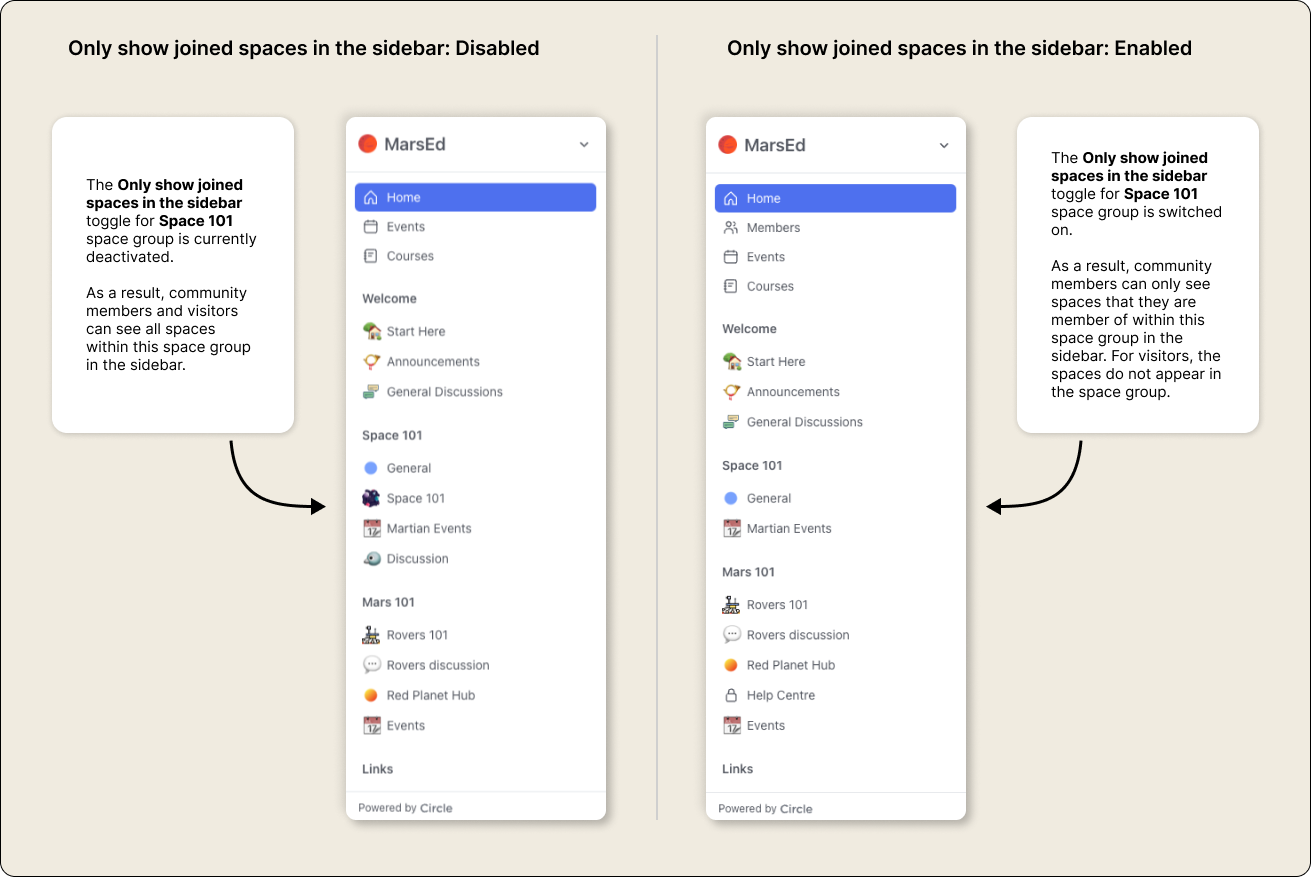
Only show joined spaces in the sidebar: When enabled, community members will only see spaces within a space group they have already joined. As a result, visitors won’t be able to see any spaces listed in the space group.
Space settings
In a public community, when a space is open or private, you can choose whether to show or hide it in the sidebar for visitors and logged-out members.
To manage this setting:
Click the More actions (three dots) icon in the top-right corner of the space.
Go to Settings and select Options.
Toggle the Show to logged out visitors option under Permissions as per your preference.
📚 For detailed information on managing these settings, please refer to our guide on Managing space access and visibility.
Configure the Feed for visitors and members
The Feed keeps your members informed about the latest happenings within the event and post spaces they're involved in. Additionally, you can allow the Feed to show content to non-space members and visitors from spaces that are set to open.
You can also customize the following:
Welcome banner: Enhance your members' and visitors' experience by adding a personalized welcome banner to the Feed. You can include featured media, such as an image or video, along with a rich media description. If you offer paid memberships through paywalls, you can include a checkout link directly in the banner's description to guide members to exclusive offers or paid content.
Default landing pages: Set a default landing page for visitors and for existing and new members. This default page can be your community's Feed or any specific space. Whenever anyone accesses your community URL in their browser (e.g., community.circle.so), they land on this default page.📚 For more information, refer to the Feed section in the Help Center.