Set up Bubble SSO
Last updated: October, 2026
❤️ Thanks to Circle user Joe Brown from Smaal for his help with the integration and this tutorial!
Circle supports single sign-on (SSO), and you can now integrate Circle with Bubble, making it a seamless experience for your Bubble members to log in to your community!
These members won't have to sign up or log in with their Circle account — instead, they'll use Bubble credentials and access Circle from your log in page.
Requirements
Before you follow this tutorial, please make sure that you're following these steps:
If you plan to use a custom domain, set that up first as this will change your Callback URL. Not doing this first can potentially lead to being locked out of your account.
Make sure you have a Bubble.io account and a Bubble app to use for setup.
-
Setup your Bubble database fields for Profile Picture and Full Name exactly as listed below, so that Circle can read them properly:
-
Profile Picture = profile_pic
-
Full Name = full_name
-
Make sure you are on Circle's Professional plan and above.


TL;DR: The short version
1) Signup to Bubble.io and Circle.
2) Circle
Visit your admin settings and click "Single sign-on"
Enable SSO in your admin settings area.
Disable "Allow users to login with Circle"
Set your SSO integration to "Bubble"
Copy the callback URL that Circle provides.
3) Bubble
Make sure your Bubble app has a login page for Circle to send users to for SSO. This page should have just one workflow for "Log user in" and Bubble will handle the rest.
Open your Bubble app and click Settings and then API.
Make sure you have enabled your Data API in your settings, and the Users checkbox is checked so that Circle can call your app's API properly.
Scroll to 3rd party auth, and set the "Login page for SSO" to be your login page.
Create a new 3rd party auth app in your settings.
Name your 3rd party app "Circle" or "Circle SSO"
Add Circle's Callback URL to your new 3rd party auth app in Bubble API settings.
4) Circle
Head back to your Circle single sign-on settings.
Paste in your Bubble app's URL, and the 3rd party auth client id and client secret.
✅ Success! If you've just done the TL:DR version of this setup then you're most likely already a Bubble pro 😎 If you need more clarification on any of the above - below are more detailed instructions with screenshots.
Step 1: Create your Bubble single sign-on page (Part 1)
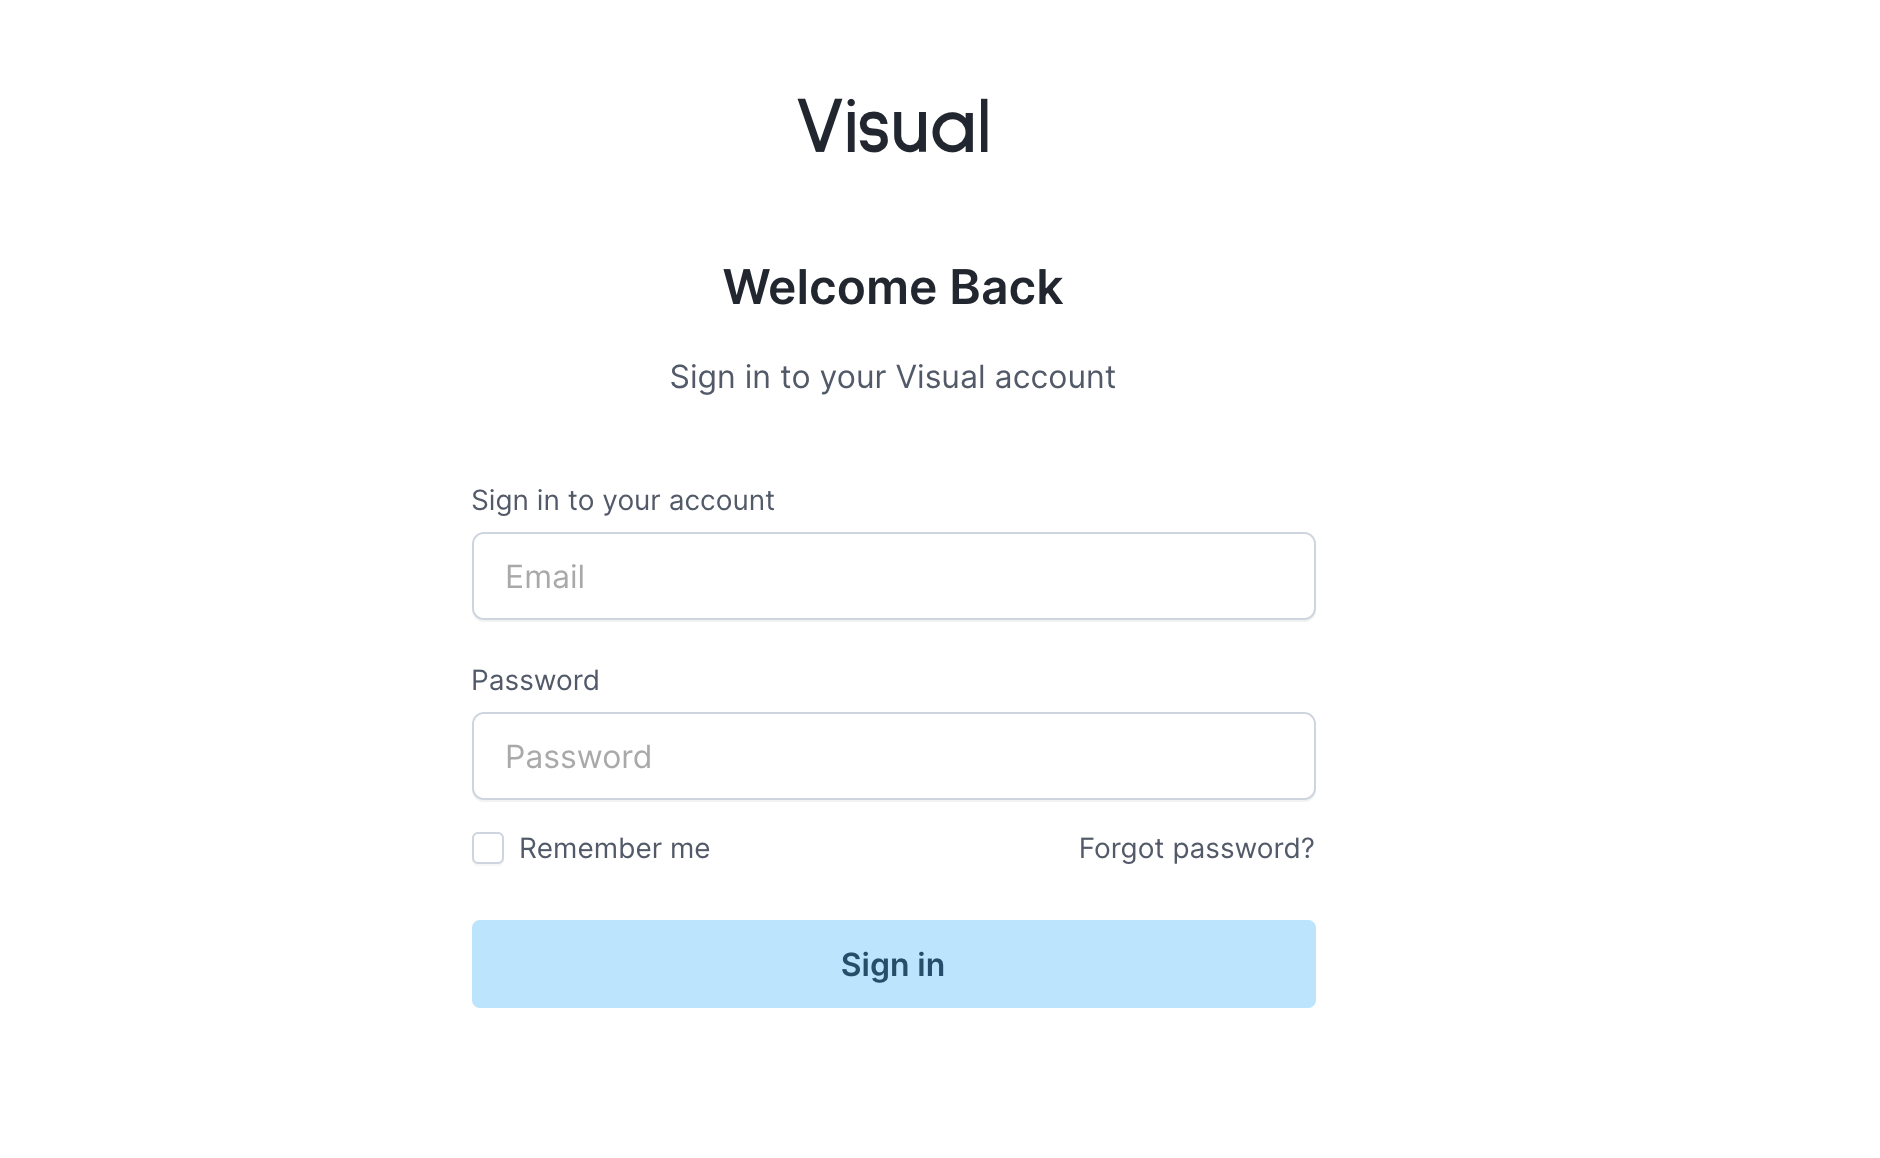
Create your login form for users.
This is where Circle will send users to login. As usual, the minimum fields for this is username/password and a button to press like "Login" or "Sign In."
💡 Tip: This page can have both a login form and a sign-up form on it. Just build it in Bubble like you normally would.
💡 Tip: This page can also be the same page you use for your regular users to login. It does not need to be a dedicated SSO page for Circle.
Create a new workflow to run when they click your login button.
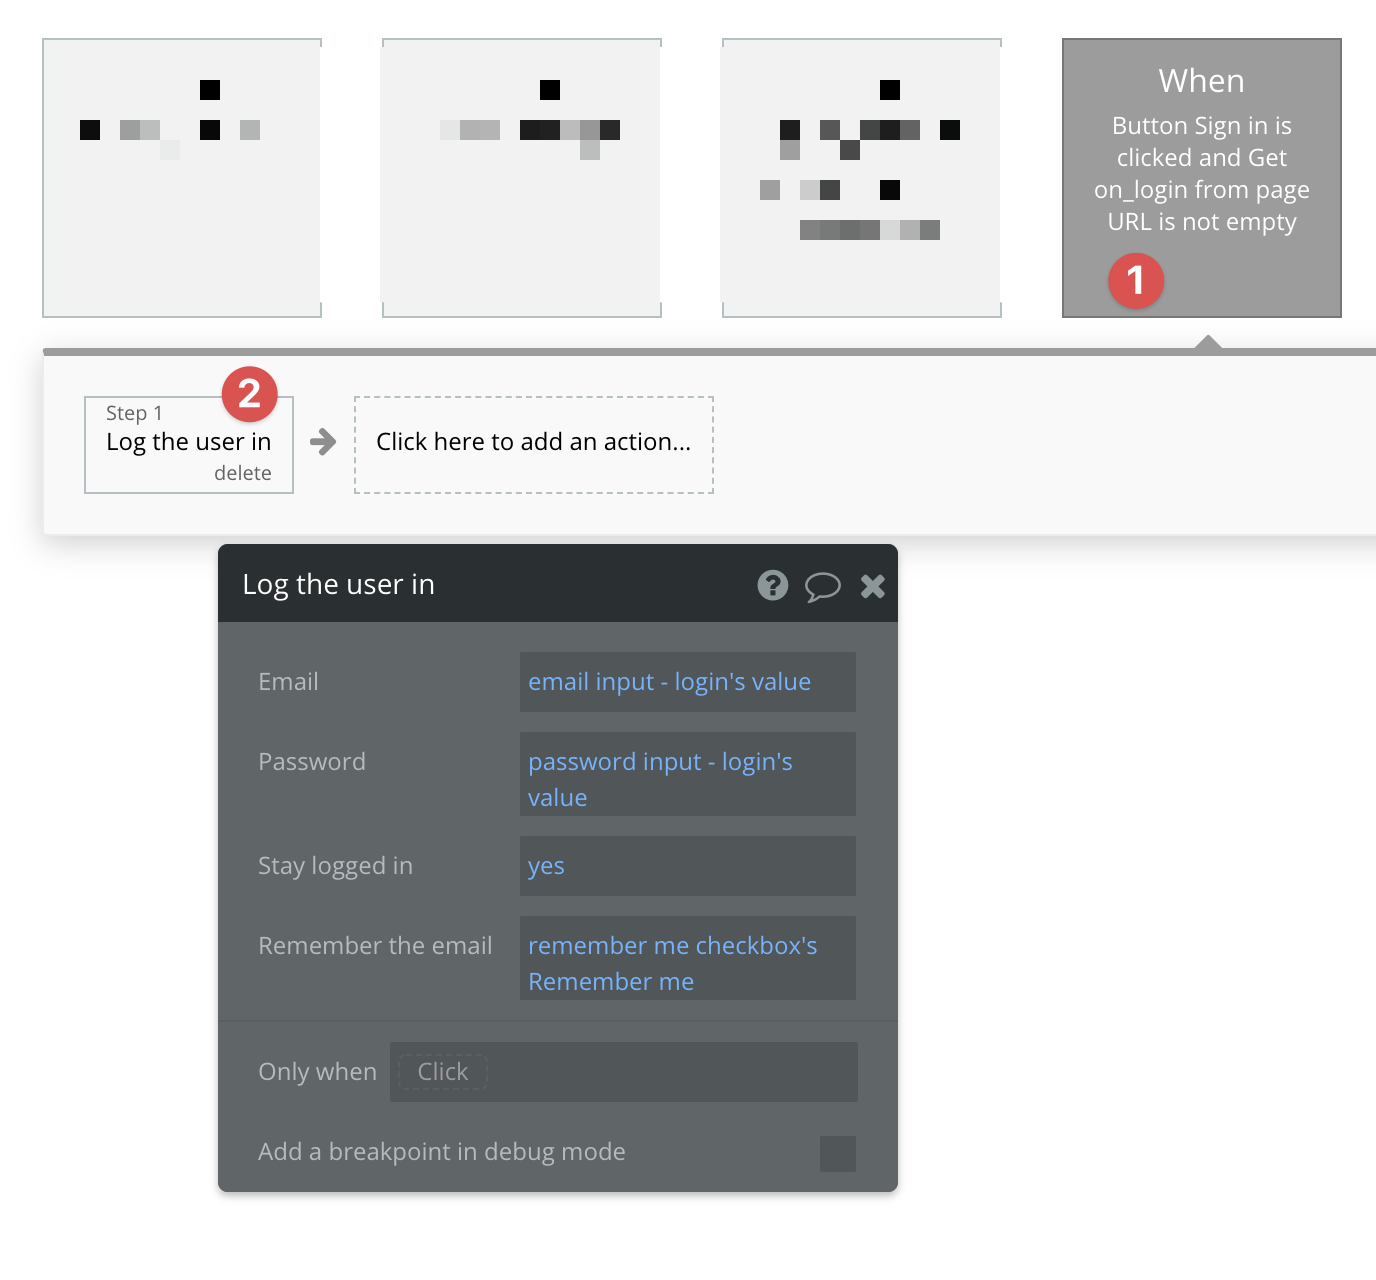
Add your email and password inputs to the fields for the "log user in" action.
-
Optional:
"Stay logged in" can be toggled to Yes if you don't mind their browser keeping them logged in.
"Remember my email" can be toggled to Yes if you don't mind the browser saving the user's email.
✅ Great work! If you're using a dedicated SSO login page, and not your app's normal login page, then you're done with this section and can move onto Step #2. If you have a single login page for both your app's normal users and your community, keep reading.
Step 1: Create your Bubble single sign-on page (Part 2)
Explanation: If you're an advanced Bubble user, you likely want a single page for all people to login or sign up at - including with Circle. To do that, you will need to build two separate workflows.
Workflow #1 will run for just users that came from your Circle SSO (or any other SSO app that integrates with your bubble app).
Workflow #2 will run for all your other users.
-
On your regular user login flow, add a conditional that checks the URL for a parameter called on_login, and add "is empty" at the end of this conditional.
This is a parameter that Bubble sets specifically for SSO and is what replaces the Client ID and Redirect URI in their security process. So, when checking to see if it "is empty," that means this workflow will only run when the user DID NOT come from a 3rd party app for SSO.
On your SSO-specific user flow, add a conditional that checks the URL for a parameter called on_login, and add "is NOT empty" at the end of this conditional.Again, this is a parameter that Bubble sets specifically for SSO and is what replaces the Client ID and Redirect URI in their security process. So, when checking to see if it "is NOT empty," that means this workflow will only run when the user DID come from a 3rd party app for SSO.
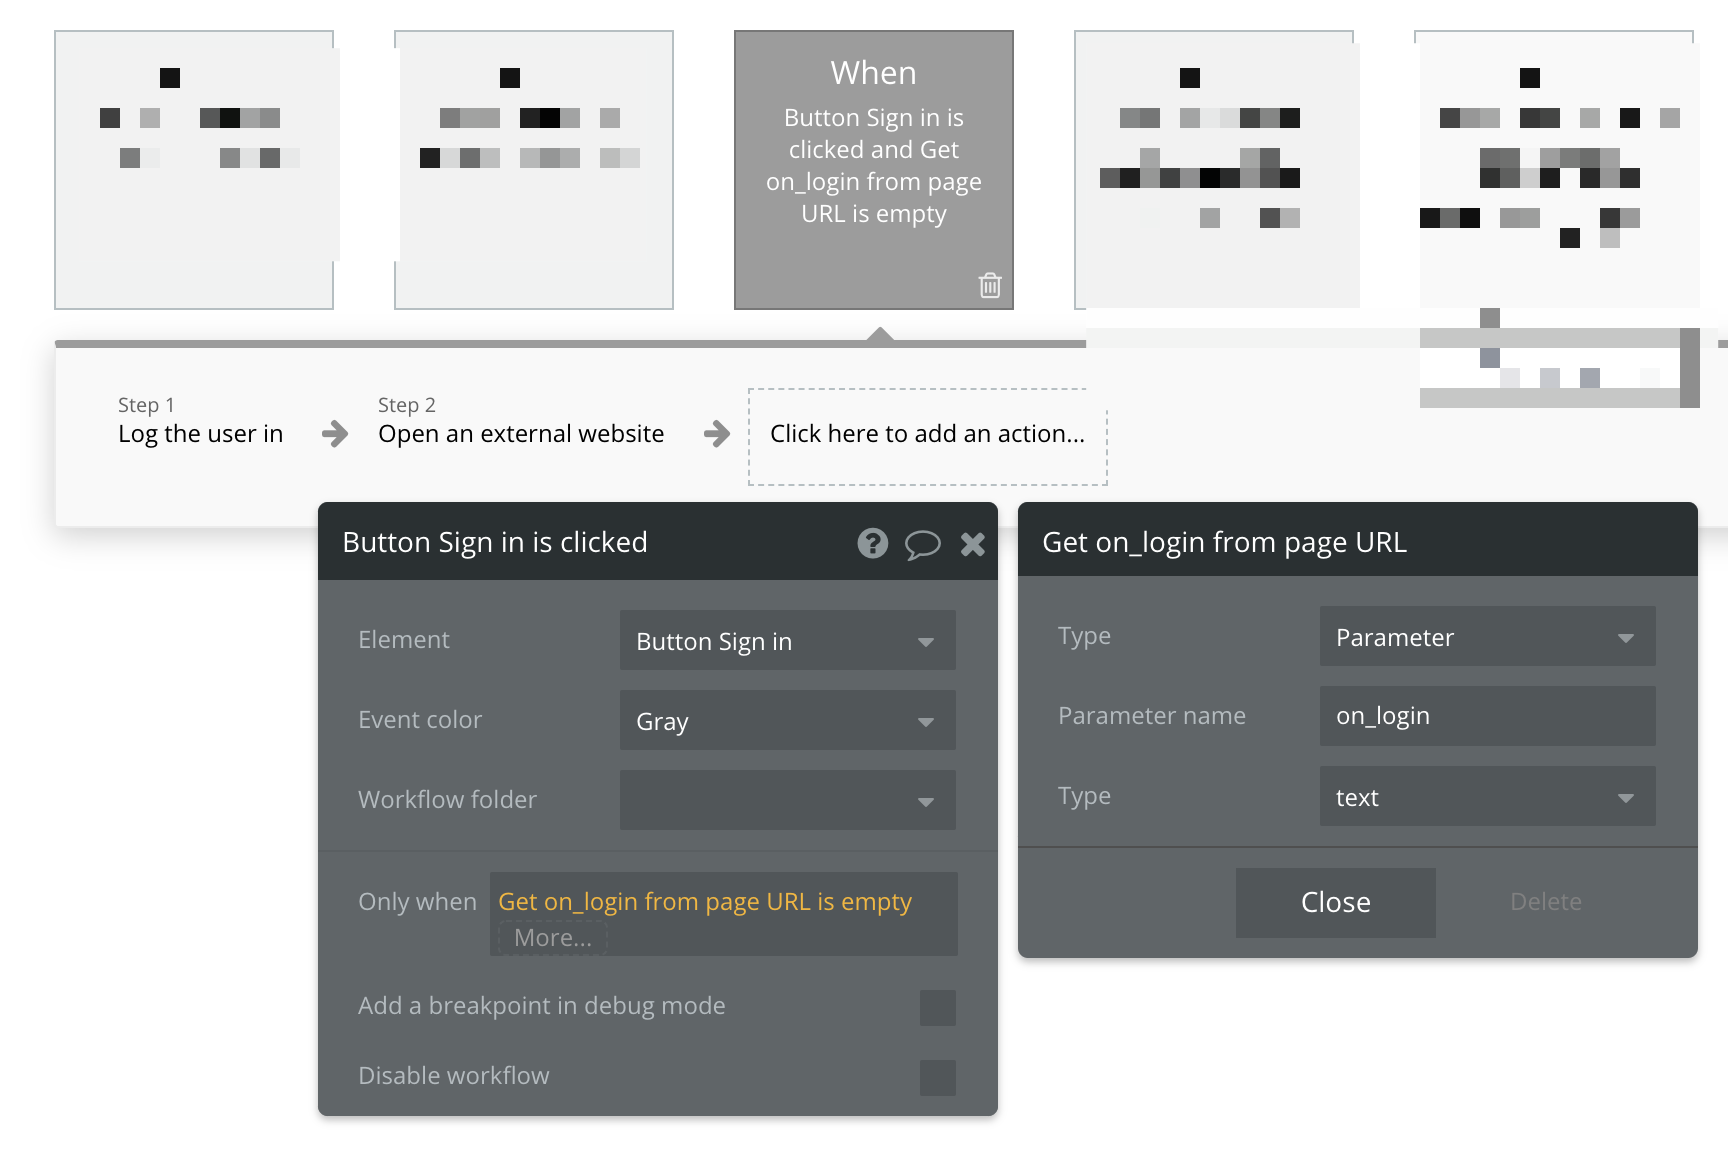
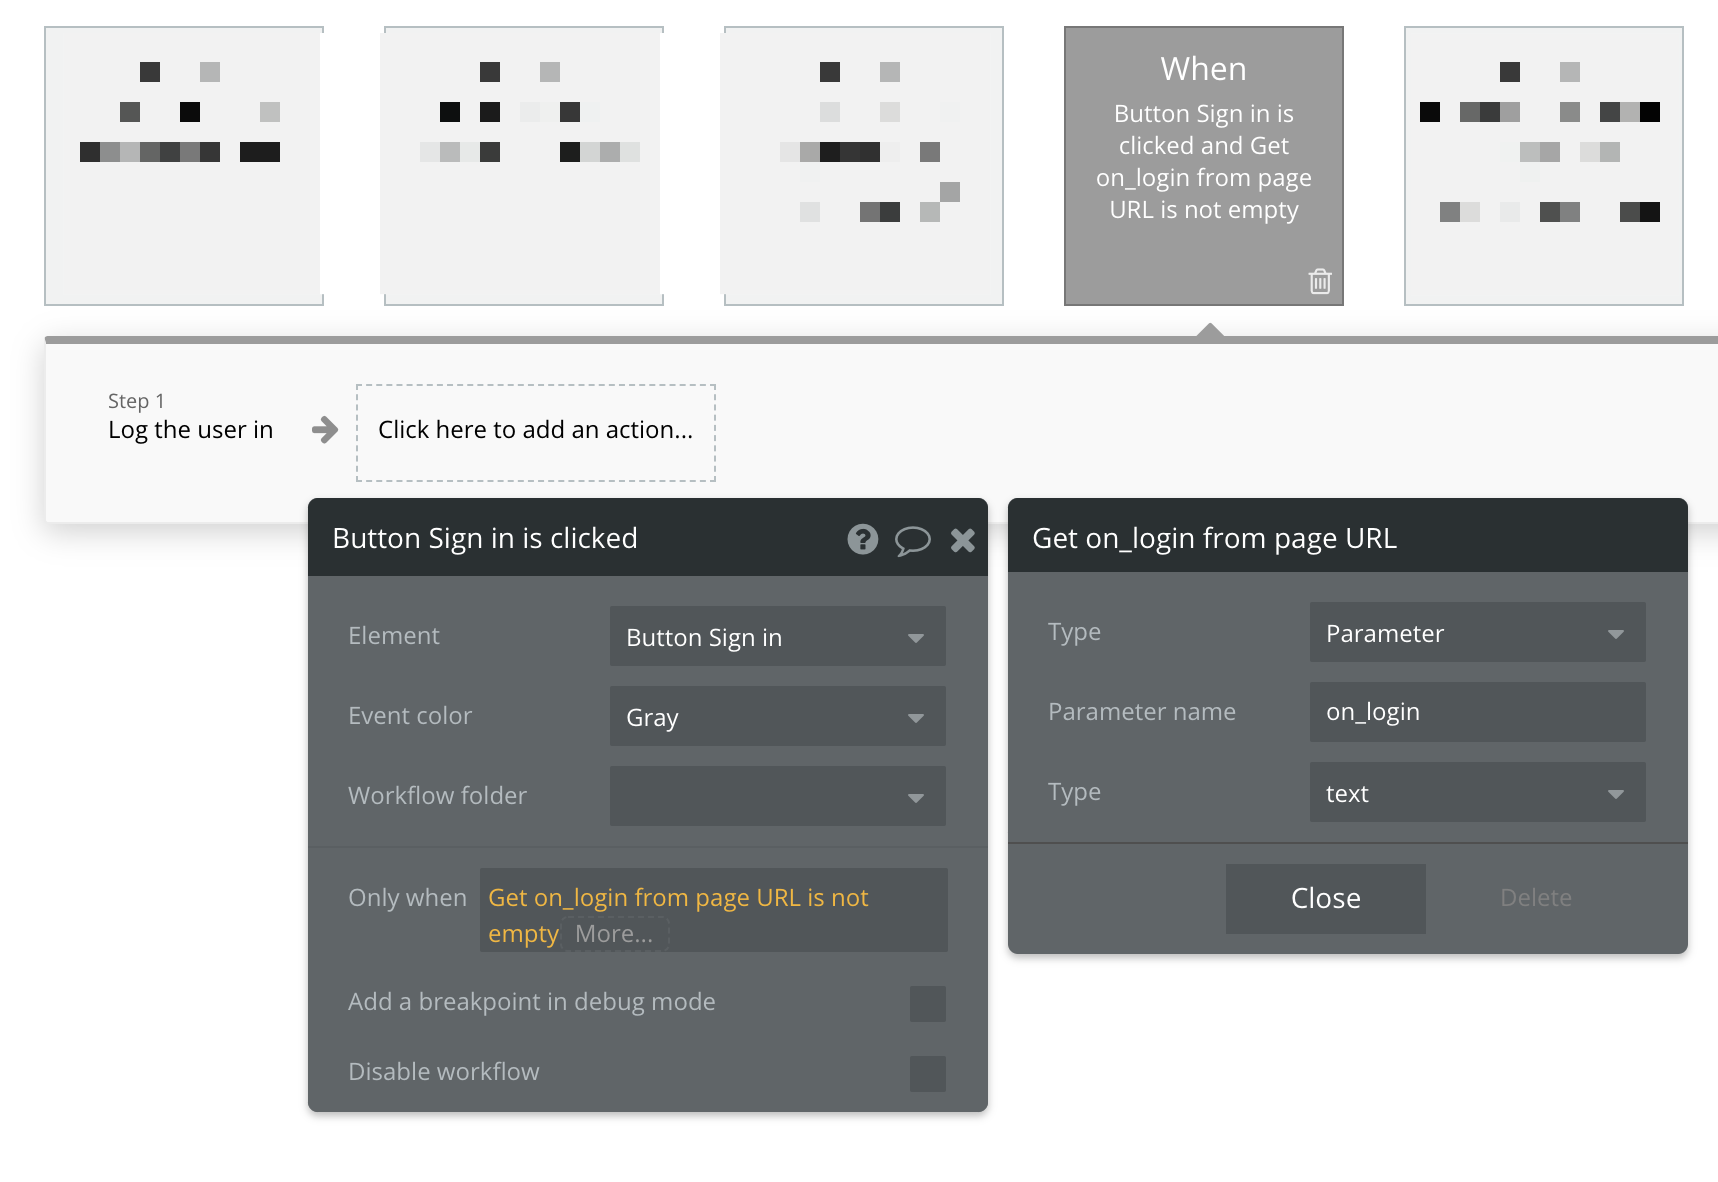
💡 Tip: on this SSO-specific workflow, you will ONLY need the "log the user in" action since bubble will take care of the redirect afterwards back to the original app.
✅ Success! You've now added a conditional to your multi-use login page and it should run properly for both your Circle SSO users and all other regular users.
Step 2: Setup Circle
To navigate to the SSO settings page:
Click the community name or logo (or the dropdown icon next to it) in the top-left corner and select Settings.
Scroll down to the Community section and select Single sign-on.
On the settings page, set up these basic settings as per your preference:
Allow members with a Circle account to sign-in: Switch this off unless you want to let Circle users sign in/up to your community without needing an account with your Bubble app.
Allow members to sign up via a custom url: If you'd like to provide users a custom page to sign-up, you may turn this on.
Skip profile confirmation step: If enabled, members with a preset name will not need to confirm their profile information when they sign in via SSO for the first time.
Enable state param: Enabling the state parameter enhances security by storing information in the session, adding it to the authorization URL, and verifying that the OAuth provider sends back the correct state parameter in the callback.
Once you've configured these settings, click Save changes.
OAuth Provider: Choose Bubble in the dropdown. Please keep in mind that this is only available for Circle’s Professional plan and above.
Copy the Callback URL, you will need this for setting up your Bubble settings.
Step 3: Finish Bubble Settings
Go to your Bubble.io project that you'd like to use as your SSO.
-
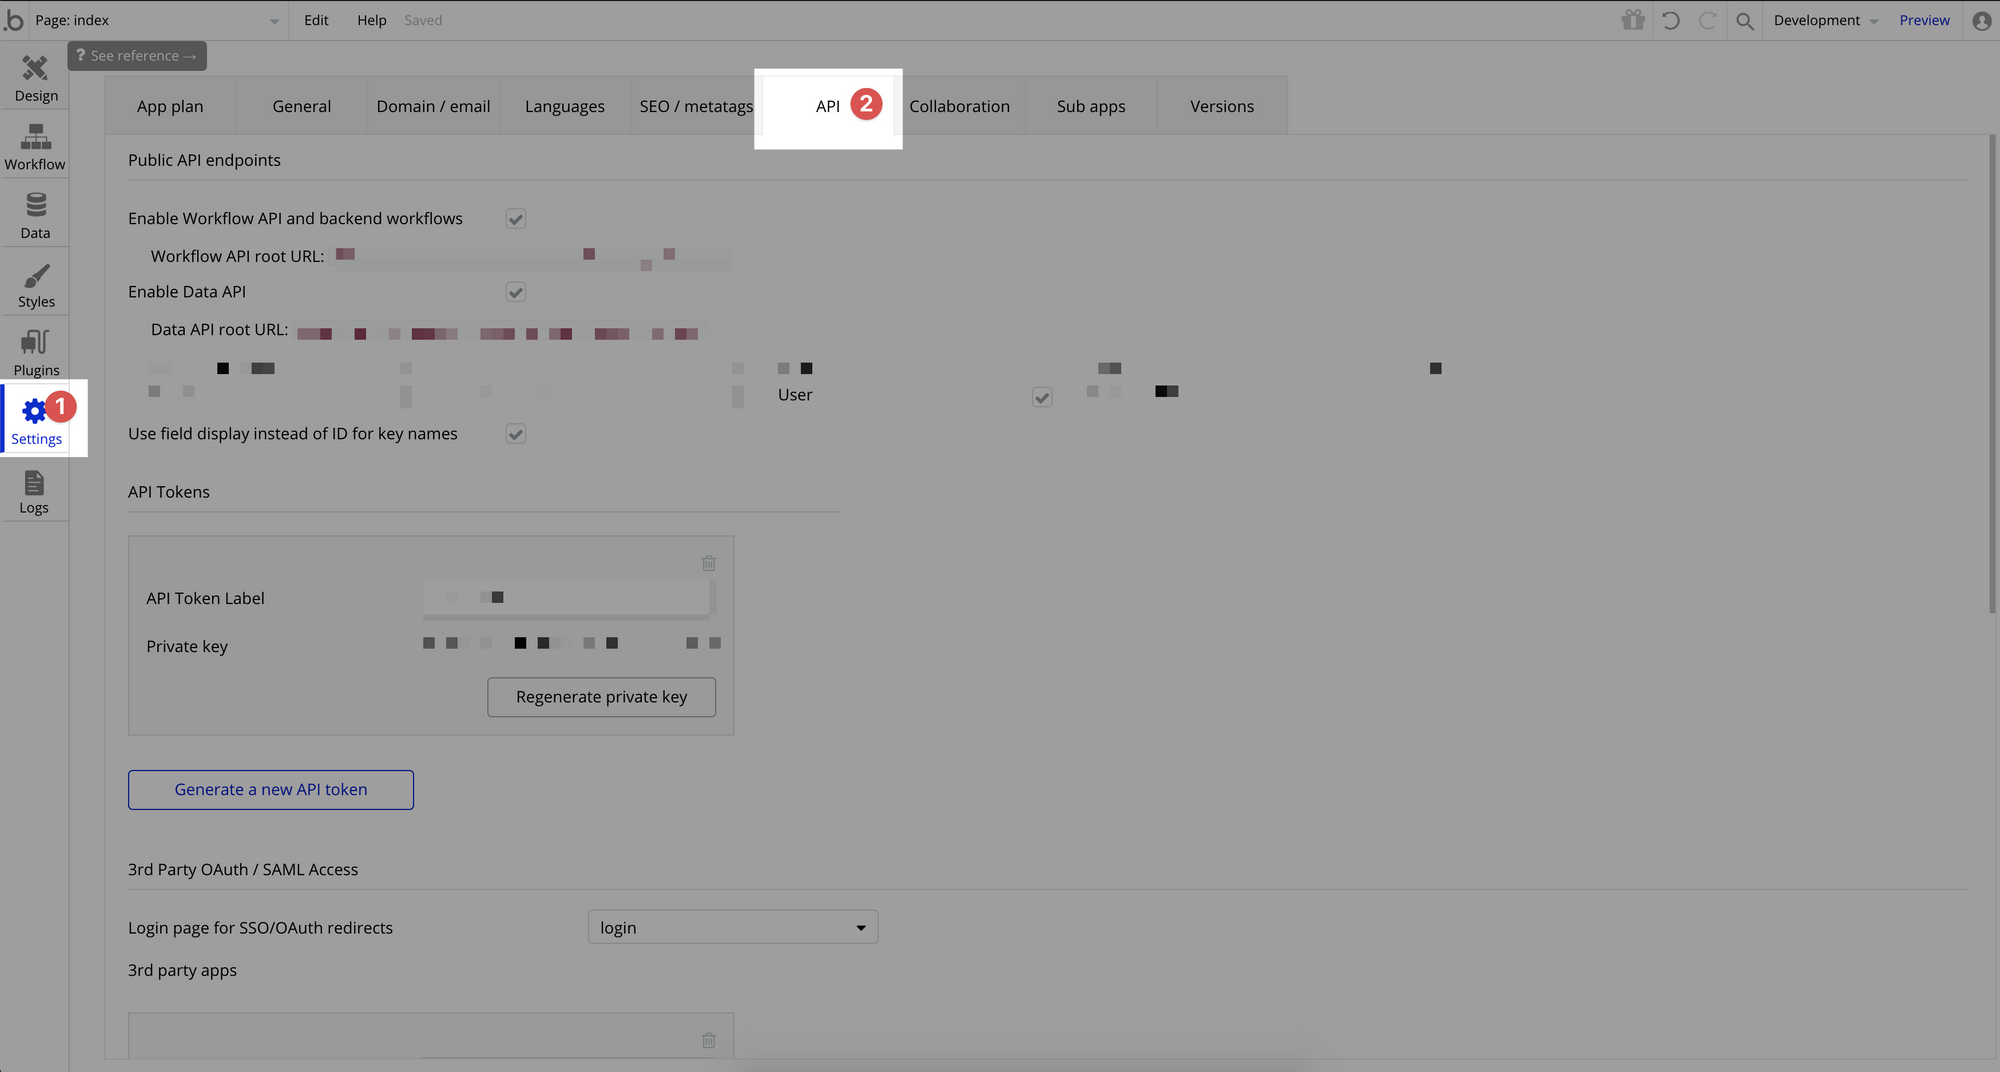
Click Settings in the left sidebar, and then click the API tab.
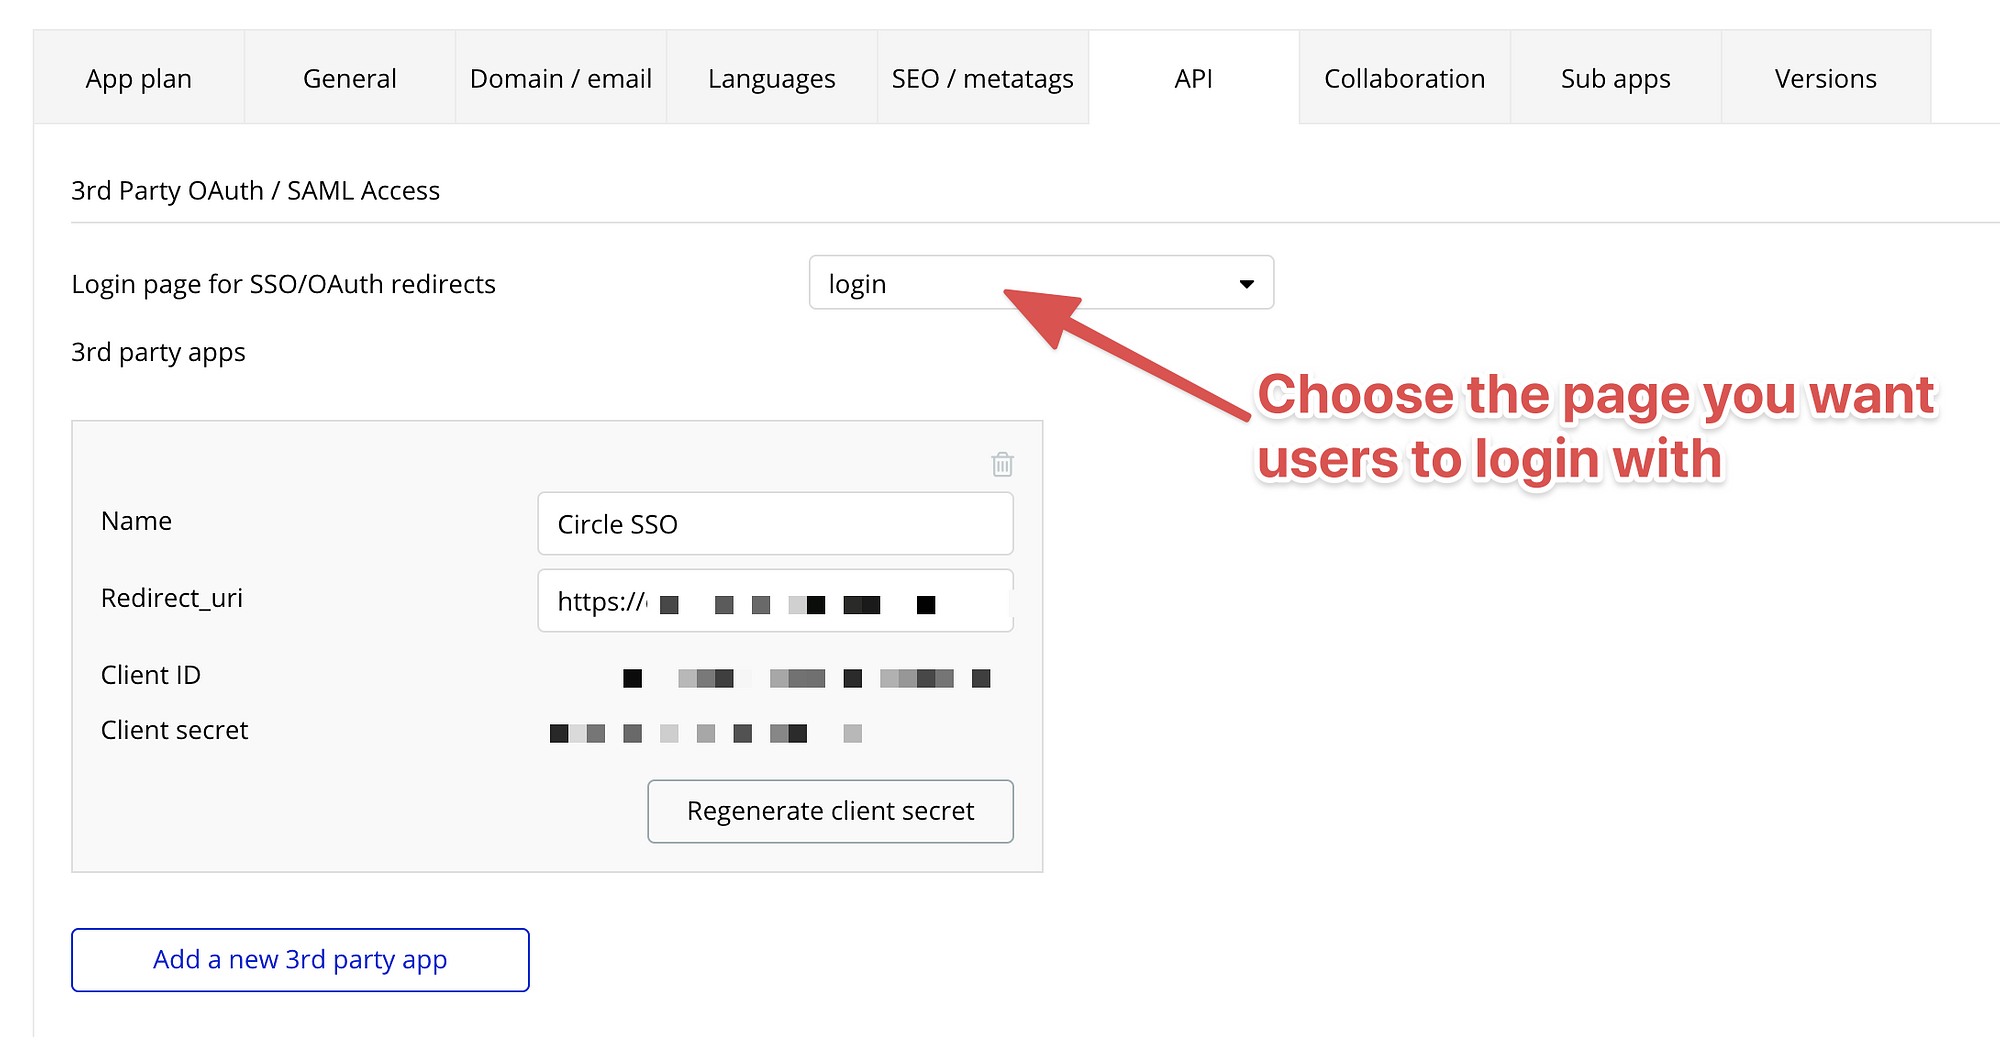
Scroll down to the section for 3rd Party OAuth/SAML Access.
For Login page for SSO/OAuth redirects, choose the page you have created for users to login.
-
Click "Add a new 3rd party auth"
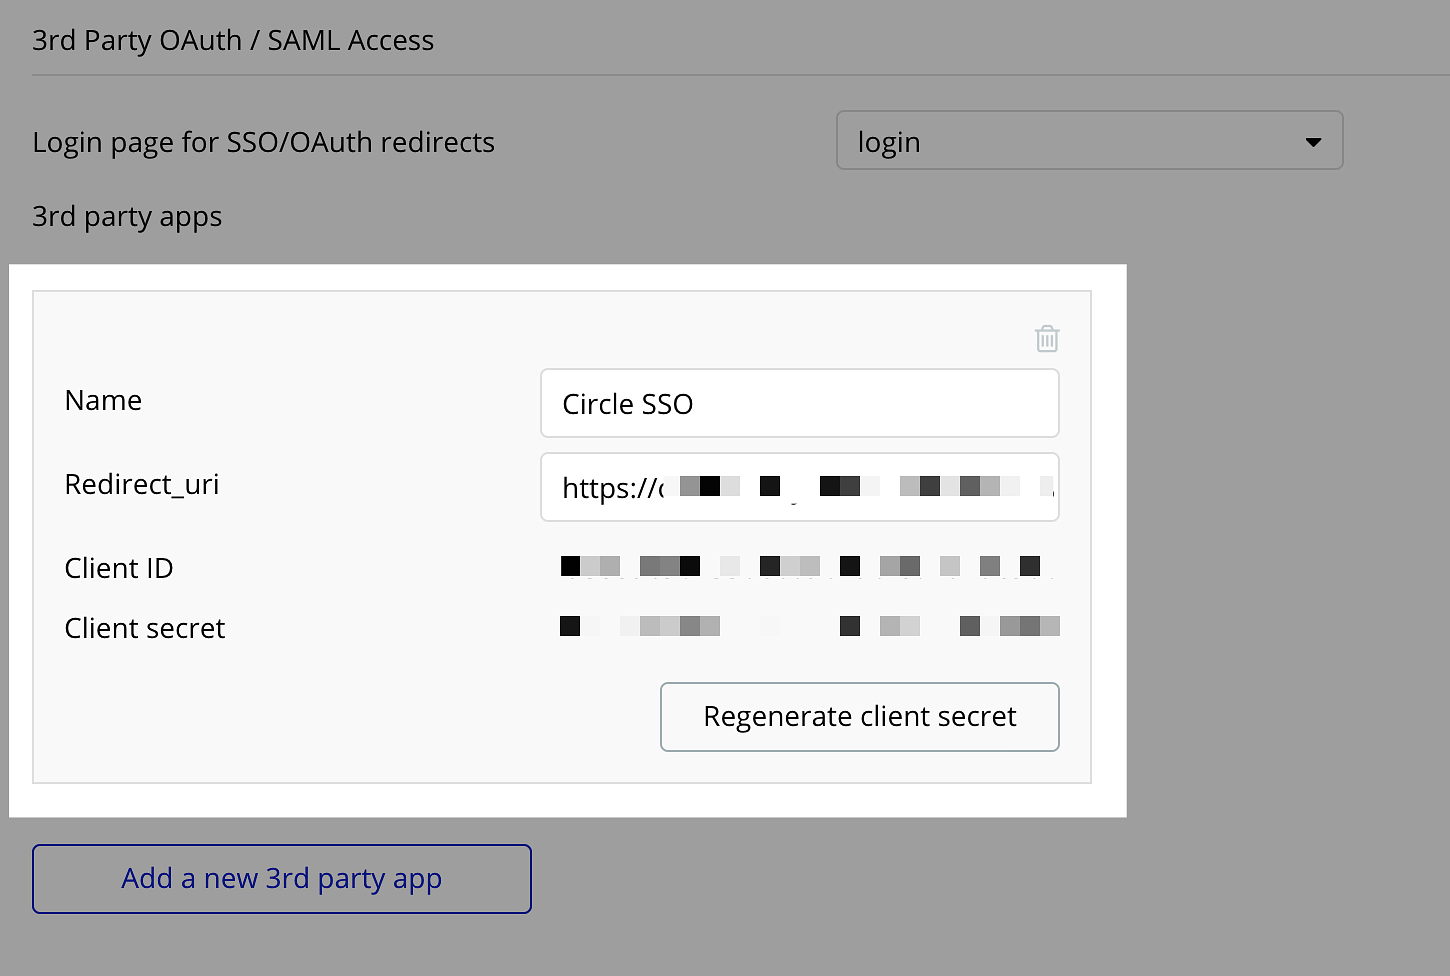
You will now see a box pop up with a Client ID and Client Secret. You will place these in Circle.
Step 4: Finish Circle Settings
Click the community name or logo (or the dropdown icon next to it) in the top-left corner and select Settings.
Scroll down to the Community section and select Single sign-on.
Copy and paste your Client ID and Client Secret from Bubble into the appropriate fields.
-
Under "Bubble URL," add your app's URL. If you're using a custom domain with Bubble, it will be your custom domain.
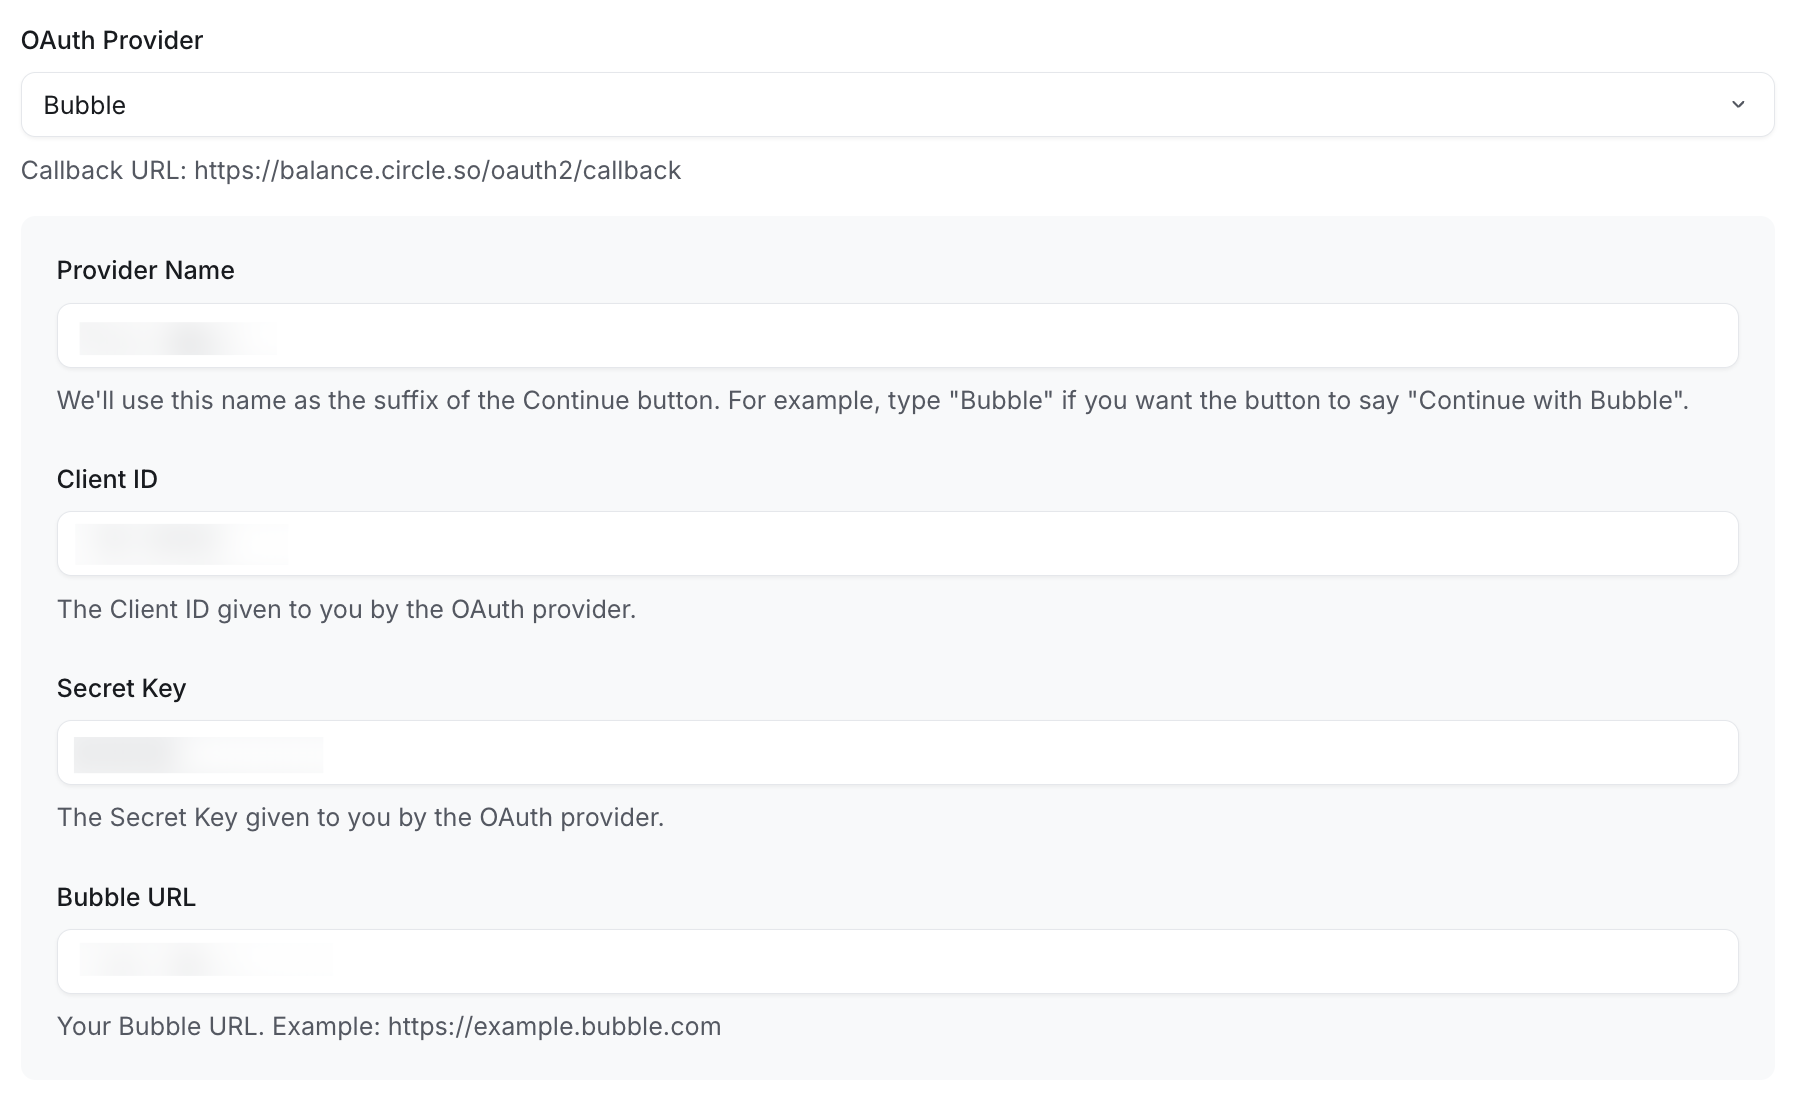
Once you've added information in these fields, turn on the Enable SSO toggle within Circle and click Save changes.
✅ Success! You've made it to the end. You should now be able to fully test logging into your Circle community FROM your Bubble app. Or if you've embedded your Circle community INTO your Bubble app, your users will automatically be logged in.
Verify SSO connection
Once you have enabled SSO for your community, you can also verify the SSO connection at any time using our verification feature! To do this, click Verify SSO connection on the header of the SSO settings page and log in through your SSO provider.

The tool will then verify your connection and provide logs for each verification step.
📚 For more information, see Verify your SSO connection.