Automate SSO member onboarding using Zapier
Last updated: February 01, 2024
With Zapier, you can set up automation to onboard your SSO members to your community, set their space and space group access, map profile fields, and add member tags based on the trigger event. In this article, we will guide you through the steps to set up a Zap in your account for seamless onboarding.
Using Zapier to onboard members to SSO-enabled community
Zapier is an excellent option for automating the task of providing members with specific access to your community based on certain events within your third-party app.
While the members require an account on your SSO provider in order to access the community, if there is no onboarding process set up to provide them access to specific spaces and space groups, members can only view and join open spaces in your community.
Zapier helps you simplify and automate this access management for your single sign-on (SSO) enabled community. Utilizing a Zap, you can configure spaces, space groups, tags, profile fields, and member profile settings based on events triggered by external applications such as Typeform, HubSpot, and even SSO providers like WordPress, Memberstack, Memberful, and more.
ℹ️ Check the availability of your preferred application on Zapier here.
Example scenario
Suppose you have two member groups in your SSO account: teachers and students. During account creation on your SSO platform, set up a Typeform for users to complete. The response to a specific question about their role in the Typeform will determine their access within the community through Zapier.
You can achieve this in two different ways using Zapier:
-
Create two identical Zaps in your Zapier account:
Zap 1: Set up Zap with a filter to only run if the response to the user role is Teacher. Zap action provides access to space groups relevant to teacher roles and applies member tags.
Zap 2: Set up Zap with a filter to only run if the response to the user role is Student. Zap action provides access to space groups relevant to student roles and applies member tags.
Use Zapier paths to create paths to perform different actions for different filters within one workflow.
💡 Tip: If you are using your SSO provider apps, such as WordPress, Memberstack, and Memberful, for your trigger, you can utilize the New user or New member as a trigger event.
Now, let's guide you through setting up a Zap based on this example.
Connect with Circle
If you're on the Circle Professional plan or above, integrating with Zapier is a breeze! You can use the API key from your Circle account to connect with Zapier.
After you are connected, choosing the Circle app in your Zaps will let you choose all available triggers and actions dedicated to Circle.
📚 To learn about connecting your community with Zapier, please see Connect Zapier to your community.
Create Zap
After you have successfully added connections for both Circle and your chosen trigger app, you are all set to create Zaps to automate the member onboarding!
💡 Tip: For detailed information on creating Zaps, please see Zapier’s guide here.
Step 1: Create a new Zap
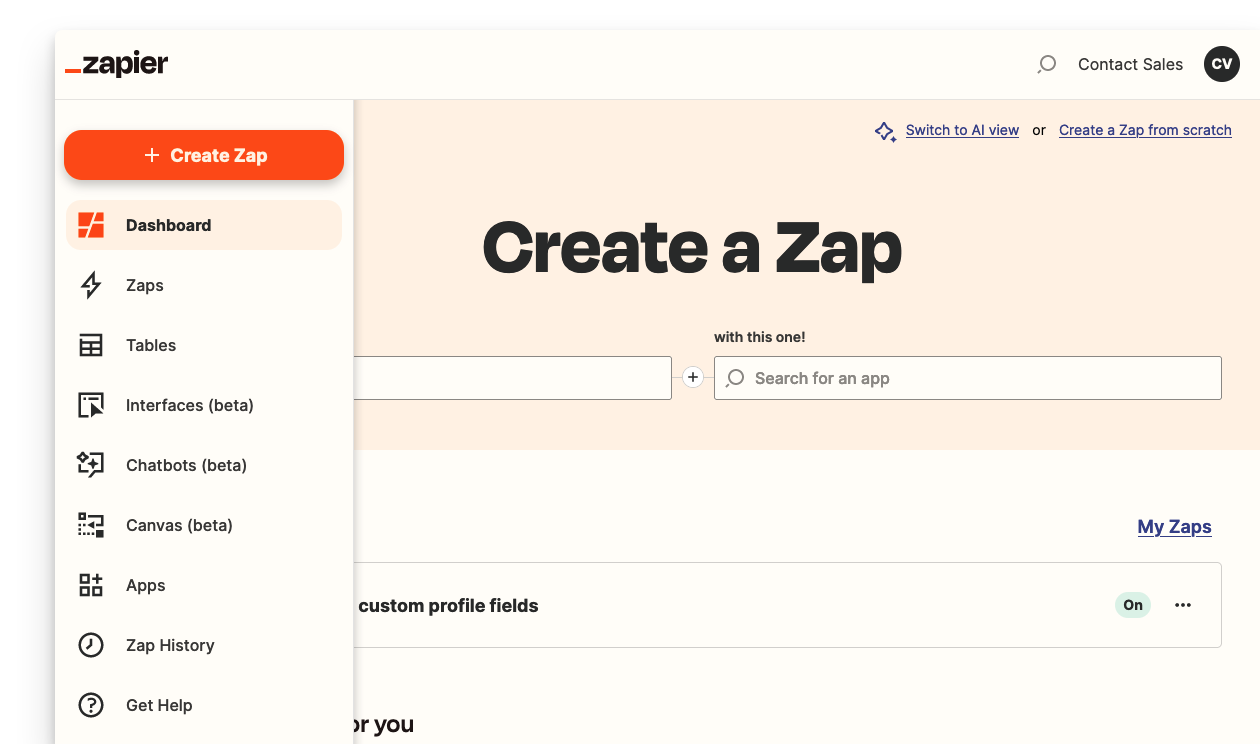
Navigate to your Zapier account dashboard and click Create Zap.
Step 2: Set up a trigger
To set up a trigger event:
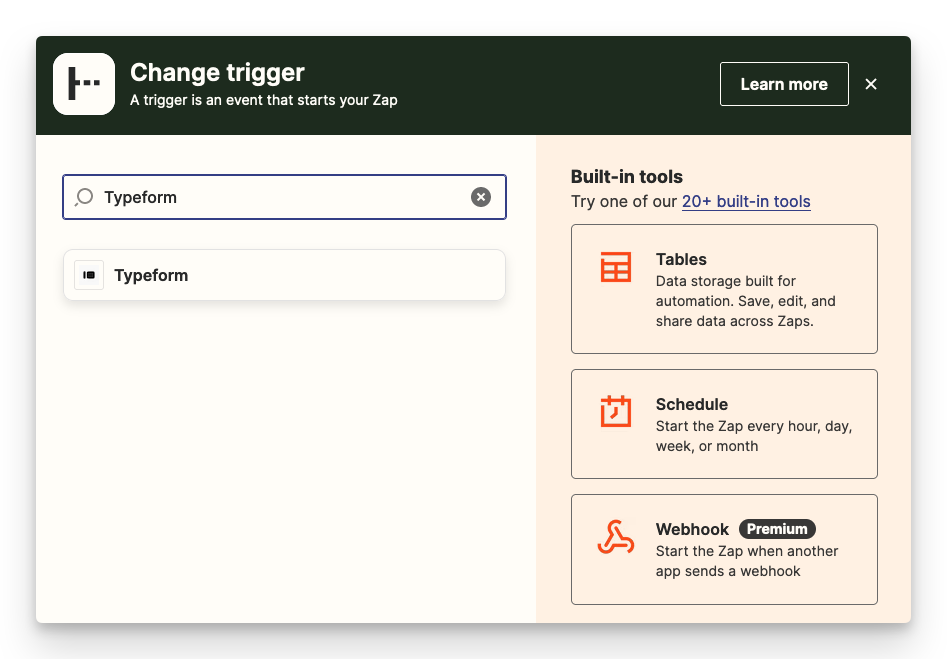
In the Zap editor, click the Trigger step.
-
In the Change trigger dialog, search for the app and select it from the results.
-
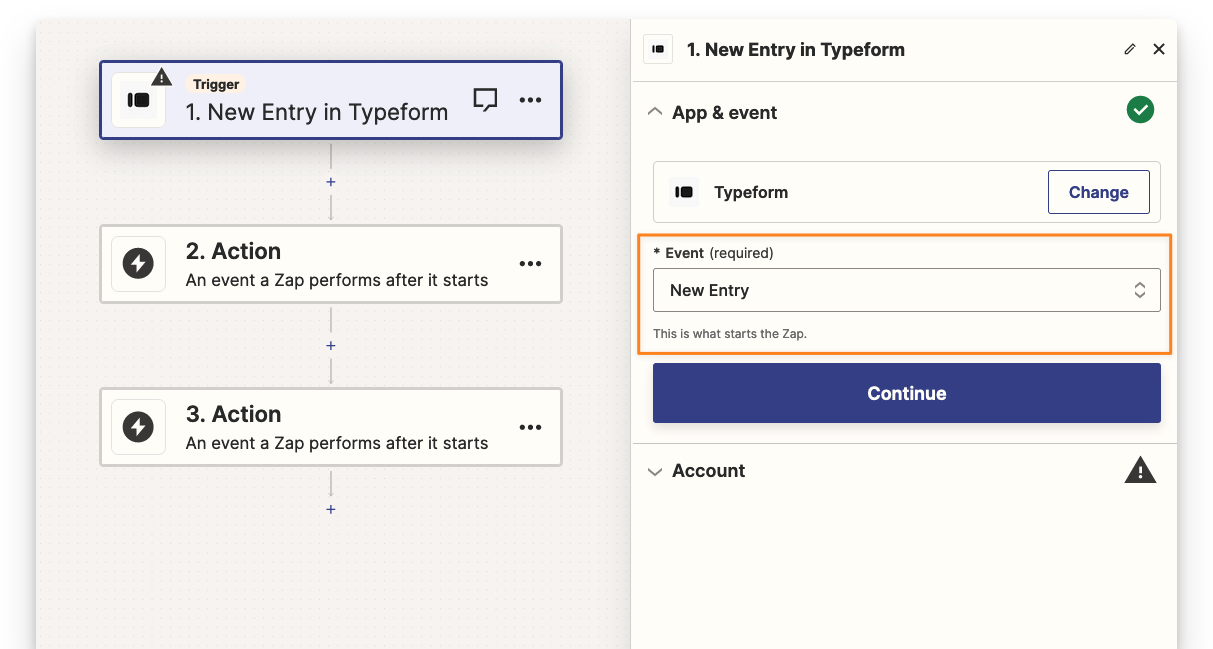
Choose the specific event that will initiate the Zap and click Continue.
Connect the application with Zapier. If you've linked multiple accounts for the same app, choose the relevant account for this Zap.
-
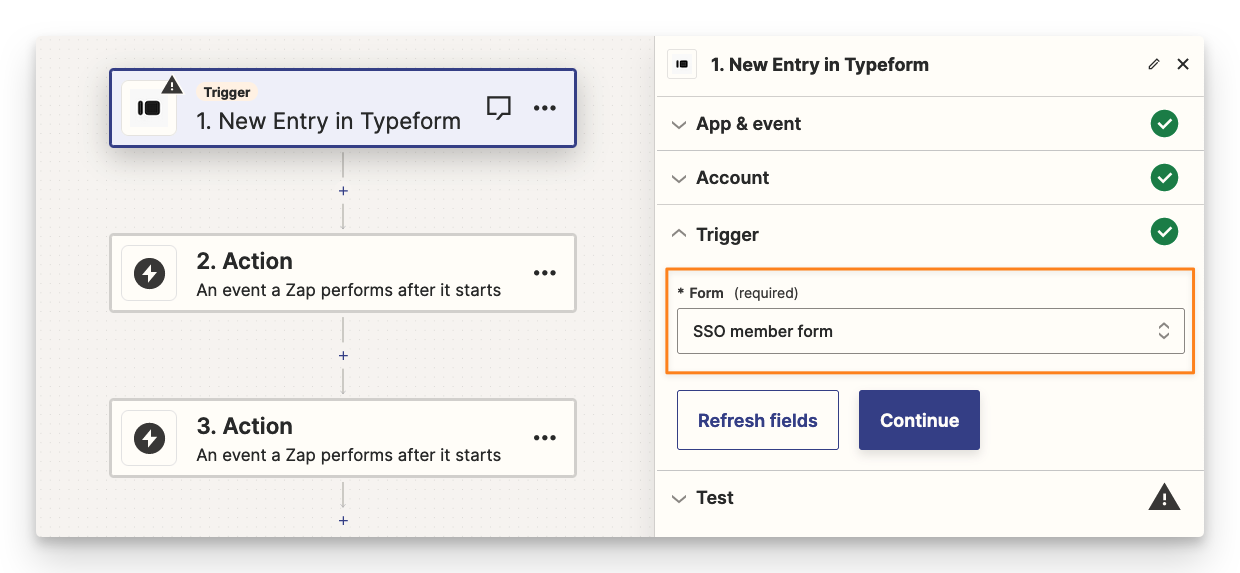
For the trigger, select a specific entity, such as a form. Depending on the chosen app, you may need to choose data for multiple fields.
Test your trigger and proceed once you are satisfied with the test results.
Step 3: Add filter
Within your Zap editor, you can add different types of actions, such as filters, paths, and delays, to your Zaps to customize it according to your requirements. Filters are one of the really effective actions. It allows you to restrict your Zap from running unless certain conditions are met.
💡 Tip: If you are looking to configure multiple filters (rules) and their corresponding actions within a single workflow, consider creating a path in step three. This enables you to branch out with a minimum of two path rules (equivalent to filters) along with their corresponding actions. To learn more, see Zapier’s guide on paths here.
For instance, you can set the filter so that Zap only runs if members respond with Student in the Role field of their Typeform submission.
To add a filter:
-
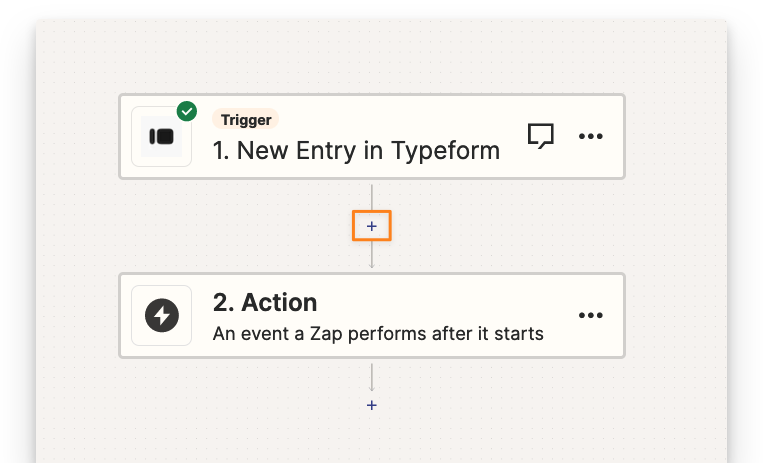
Click the Plus icon after the trigger.
In the Change action dialog, select Filter.
-
In the filter setup, select your filter rules:
In the first dropdown menu, select the field that you want the filter to check.
In the second dropdown menu, select the rule that you want to use.
-
In the third field, type the value that you want to compare the field against.
Click Continue.
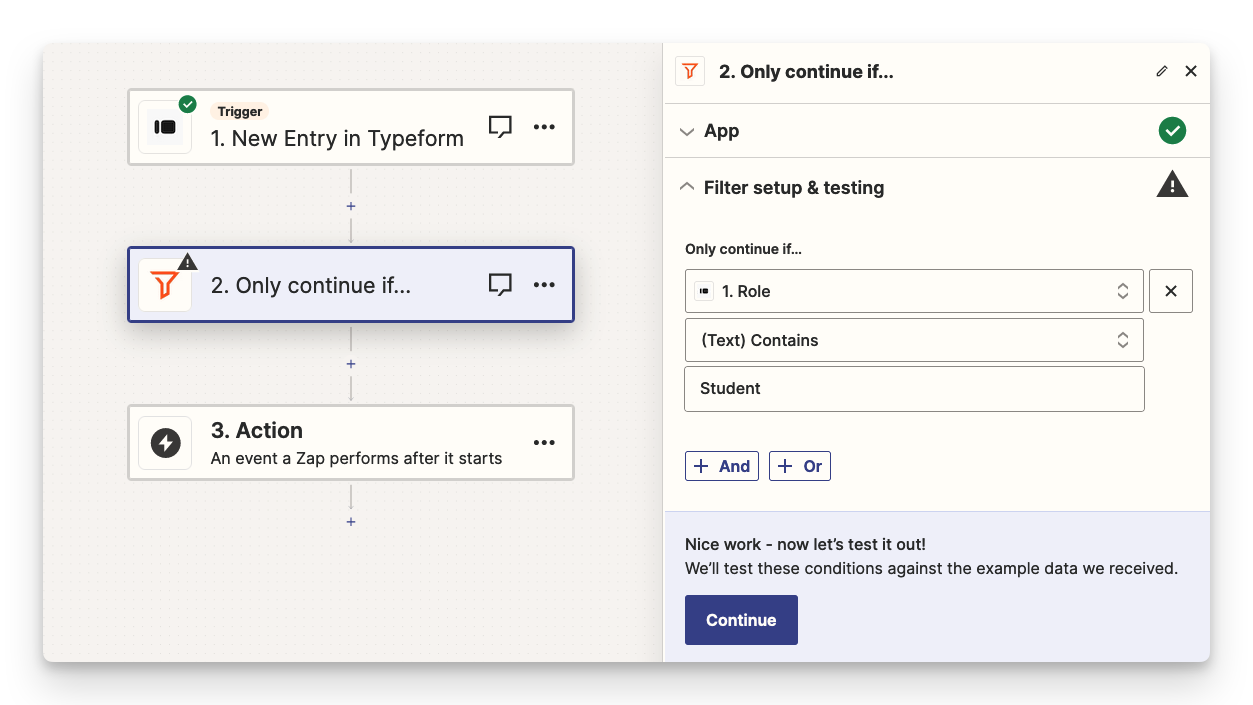
As a result of this setup, the Zap will only continue to execute the action if the filter conditions are met.
Step 4: Add action
For the Circle app on Zapier, the invite member action is available, which has options similar to our built-in invite member method in Circle.
To set up an action:
In the Zap editor, click the Action step.
In the Choose action dialog, search for the Circle app and select it from the results.
-
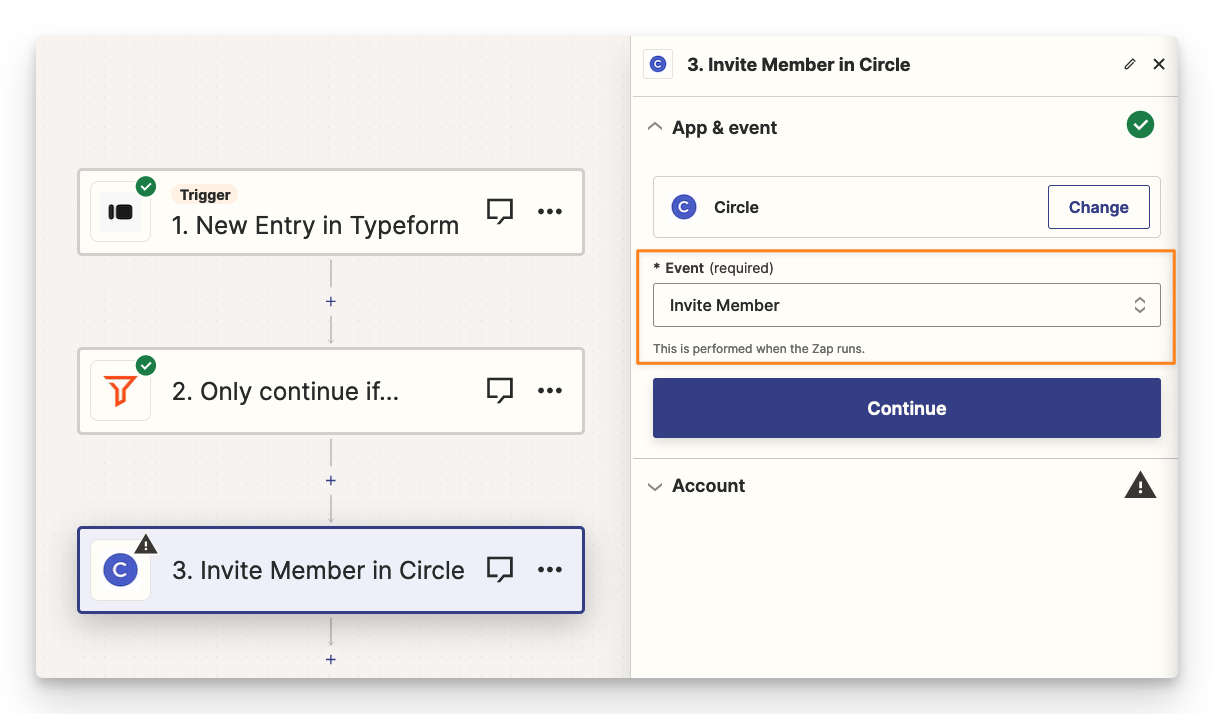
Click the Event dropdown menu, select the Invite member action, and click Continue.
Choose the Circle account you have connected from the account menu.
-
In the Action step, you'll find fields to fill in, with some being mandatory and others optional. In the majority of fields like name, email, and profile fields, please choose the corresponding Typeform field so it auto-fills the information from Typefrom response to invite member configuration. Refer to the list below for available fields when inviting a member.
-
❗Skip invitation email: Since members already have the login credentials from their SSO provider account, we recommend skipping the invitation email. To skip the email, choose True from the dropdown.
-
After reviewing all fields, click Continue and test this step.
After the test is complete, you'll see whether or not Zapier was able to send the data to your app.
Finish setting up the Zap by clicking Publish.
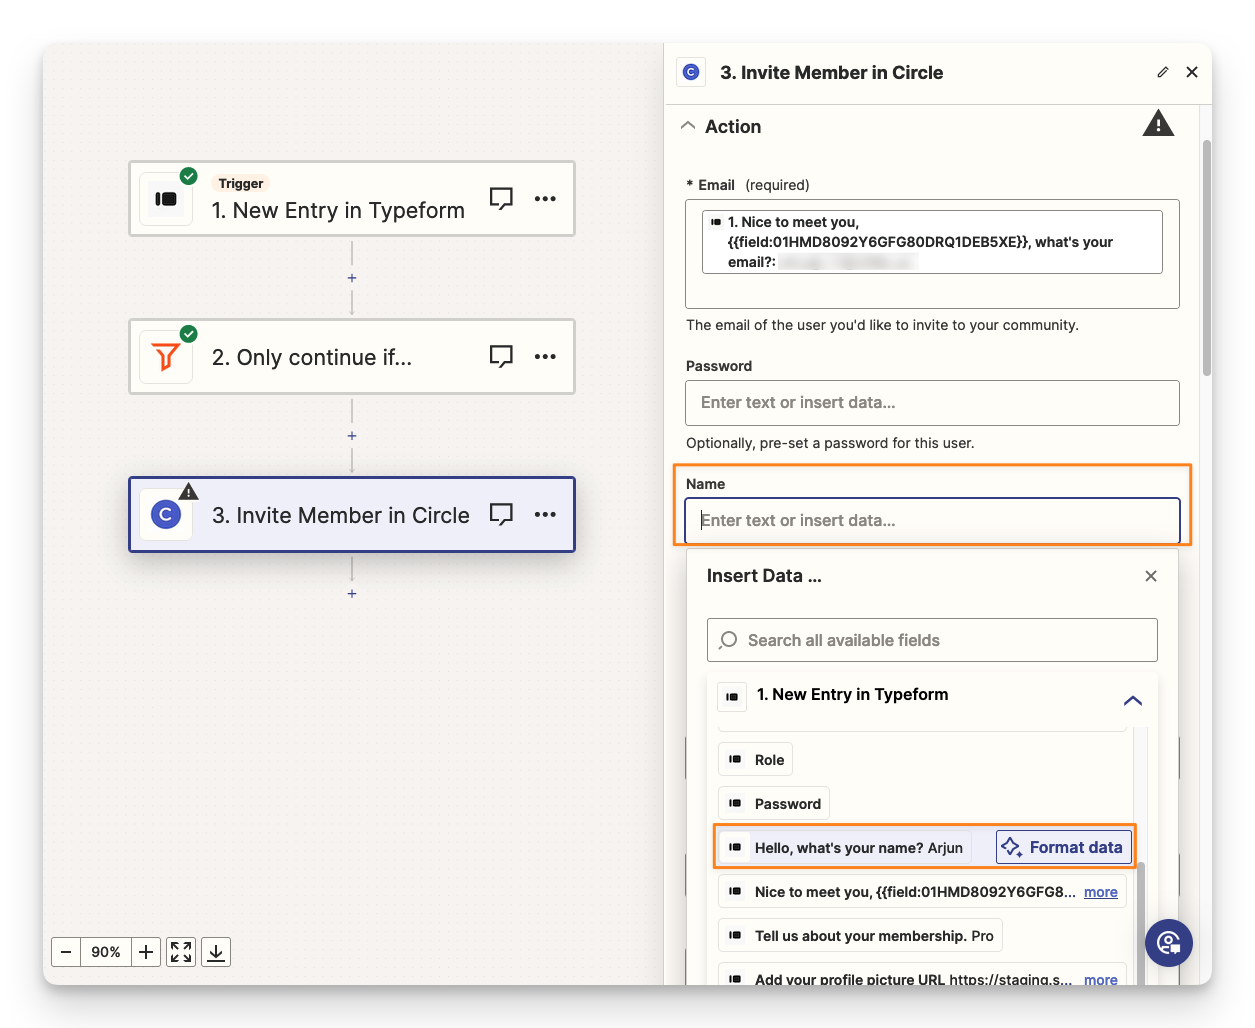
Here are the fields available to you in the invite member action configuration:
Email (Required): Select the Typeform field corresponding to the email address provided by the member in their Typeform submission.
Password: We strongly recommend avoiding this field, as members will have an existing password from their SSO account.
Name: Choose the Typeform response field containing the member's name.
Profile image: Add a member's profile image by choosing a response field with the image URL.
Community (Required): Specify the community to invite members to.
Profile fields: You will find all your profile fields, including custom fields listed in the action configuration. Select relevant Typeform fields to map a member’s community profile fields.
Add to spaces: Select spaces that you’d like the member to be added to via invite access.
Add to space groups: Select space groups that you’d like the member to be added to via invite access. When you add members to any space group, they will also be added to all the spaces inside the group — including secret and private spaces.
Member tags: Apply member tags by selecting them from the dropdown.
Skip invitation email (Required): Since members already have the login credentials from their SSO provider account, we recommend skipping the invitation email. To skip the email, choose True from the dropdown.
Is flagged: To automatically flag the member's posts and comments for moderation review, select True from the dropdown.
Messaging enabled by admin: You have the ability to enable or disable messaging features for members invited by this Zap to prevent them from sending or receiving messages from other members of the community. To keep messaging enabled for members, select True from the dropdown.
You’re all set! After your Zap is published, Zapier will run your action steps each time your trigger event occurs. 🎉
Test your Zap
Now that your Zap is published, conducting a preliminary test to ensure it aligns with your intended outcome is generally a good practice.
To test your Zap, we suggest following the steps you expect the member to take. Use your test email or create an alias by adding "+1" to your email address (e.g., abc+1@gmail.com).
This way, you will get to experience the whole process and see how the automation integrates with the SSO member's profile and community access.
Review Zap history
Zapier records info about each Zap run that occurs. You can access a comprehensive record of all your Zap activities, showcasing the input and output data for each Zap step within your account.
This Zap history will help you review the past Zap runs and troubleshoot any errors encountered during the runs.
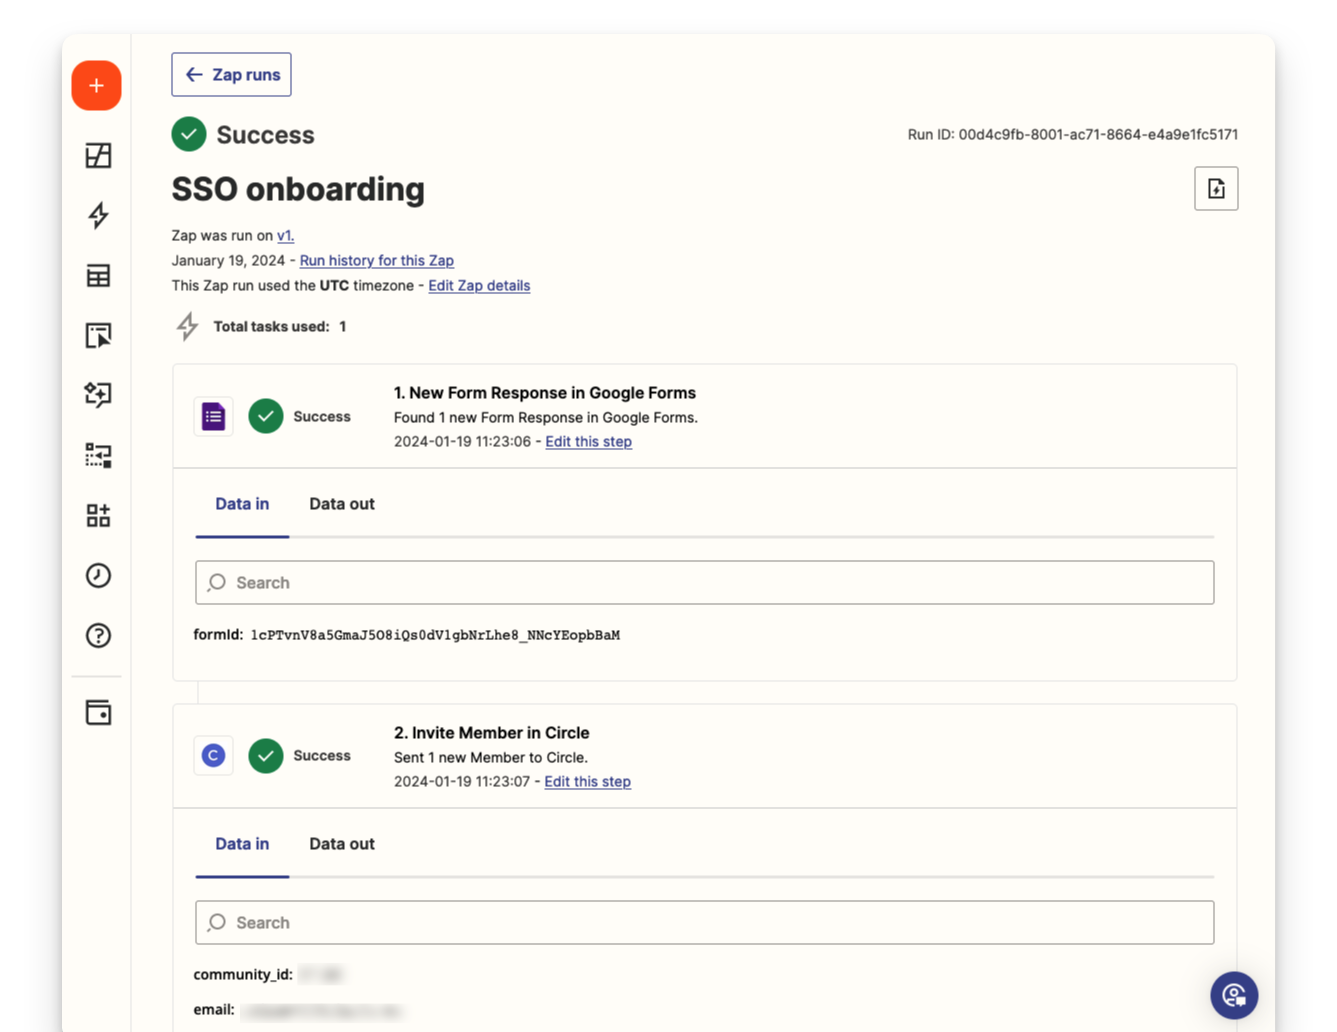
You can review Zap runs in two different ways:
📚 For a detailed guide on reviewing your Zap history, please see Zapier’s guide here.