View all member transactions
Last updated: August, 2026
The transactions page is your central hub for managing payments in your community. From reviewing paywall transactions and event ticket sales to issuing refunds, everything is organized in one place. This article explains how to access and review payment transactions and find the details you need.
Access payment transactions
Click Payments in the left sidebar, then select Transactions to review and search all member payment activity. Here, transactions are organized into the following tabs:
All: Displays every payment transaction.
Paid: Shows only successful payments.
Processing: Show processing payment transactions.
Refunded: Shows refunded payment transactions.
Failed: Shows payments that did not go through.
Each transaction includes key details such as the member’s name, email, payment amount, date, status, and associated paywall or event.
💡 Tip: You can export the transaction data from any tab within the transactions page. Navigate to a specific tab, use filters to narrow down data (optional), and then click Export CSV in the top-right corner. To learn more about these exports, see Export member subscriptions and transactions data.
Filter transactions
If you need to quickly find a specific payment, you can apply one or more filters within any tab of the Transactions page.
Choose one of the default filters visible on the filter bar or click Add filter to access additional filters.
After choosing a filter, enter the search criteria. Some filters use checkboxes so you can select multiple values.
Click Apply to confirm.
Repeat the above steps to apply multiple filters. Note that filters are applied using the "And" condition, meaning all filter criteria must be met.
There are various filters available to help you narrow down transactions, including:
Name and email: Enter a member’s name or email address to see only their transactions.
Member: Find transactions for a specific member. Start typing a member’s name or email, then select them from the list of matching results to filter by their transactions.
Status: Choose one or more transaction statuses, including paid, partially refunded, refunded, or failed, to narrow down your selection.
Paywall: If you have multiple paywalls, you can select a specific paywall name to view only payments tied to it.
Event: Paid events appear in the filter list by title. You can select one or multiple events at a time by checking the boxes next to them. This is useful when reviewing ticket sales for a specific event.
Date: Select from predefined date ranges or define a custom range to focus on transactions within a specific timeframe.
Amount: Set a minimum amount, maximum amount, or both. For example, search for payments above $100 or between $20 and $30.
Subscription ID: Enter the unique subscription ID to quickly pull up all related transactions. This is helpful when troubleshooting issues tied to a specific subscription.
Currency: If your community supports multiple currencies, you can select one or more to only see payments made in those paywall currencies.
Transaction ID: Search for transactions based on their unique identification number.
Invoice ID: Directly search for transactions based on their unique invoice identification number.
Business name: If a member has provided a business name for their billing, you can filter by that field. Useful for tracking company-paid memberships.
Sort results
You can sort the transactions in the table by the column, such as Amount, Date, or Status.
Click a column title to sort by that field. For example, click the Customer column to arrange transactions alphabetically by member name. An arrow will show up to indicate the sorting order. To toggle between sort orders, click the column title again.
View payment details
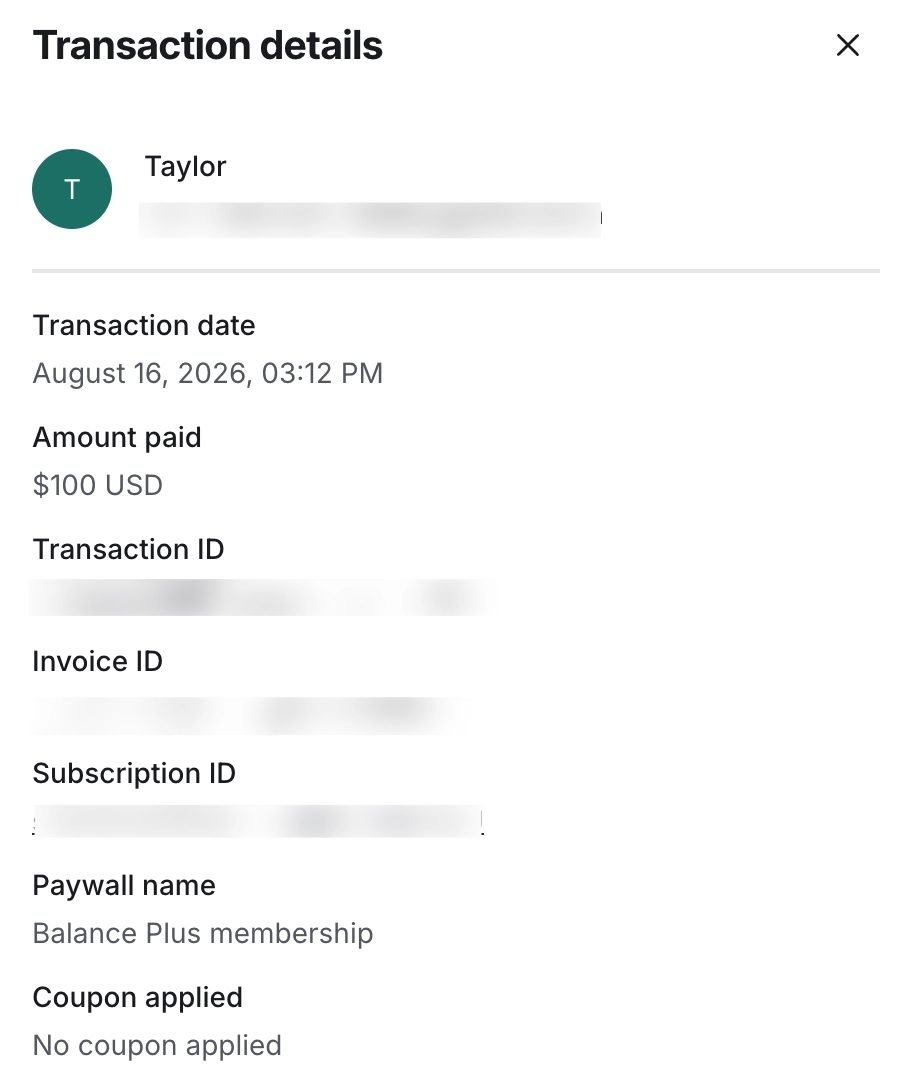
To view a member’s transaction details, click on More actions (three dots) beside the member entry and select Details.
Here, you can view the following information:
Member name and email
Transaction date
Amount paid
Transaction ID
Invoice ID
Subscription ID
Paywall name
Coupons applied
Understand different transaction statuses
Member transactions can have different statuses, each indicating a specific outcome of the payment process. Here are the possible statuses shown on the transactions page and what they mean:
-
Paid: When a member’s payment is successful, you will see the paid status for the transaction.
If a member initiates a free trial for a paywall, you will see a transaction with paid status for a $0 amount.
You can send email notifications to your members with receipts when their payments are successful by enabling this option in your Stripe account’s customer email settings.
Partial refunded: This status means that a member is issued a custom refund amount that is less than the original transaction amount.
-
Refunded: When a member is provided a full payment amount for their transaction, it will be set to the Refunded status.
Please note that you cannot issue a refund exceeding the original payment.
You can choose to send email notifications for refunds by enabling the Refunds toggle in your Stripe account’s customer email settings.
-
Failed: This status means that the member’s recurring payment was likely not processed due to reasons such as a decline by their payment network/bank, insufficient funds in their account, or an expired card.
When a payment fails for a recurring charge, Stripe will retry the charge as per the retry schedule set in your Stripe account. If Stripe fails to charge a member within the retry schedule, their transaction status will remain in Failed status. As a result, members’ subscriptions will be canceled, leading to the removal of their access to paywall content.
To keep your members informed when their payment fails, you can set up automated email notifications from Stripe. Learn more about handling failed payments here.