Add branching in workflows
Last updated: November, 2026
Branching lets you split a workflow into different paths based on conditions. For example, you can send enterprise members to one set of spaces and everyone else to another, all within a single workflow.
This article covers how to add a branch to a workflow and what each path does. If you haven't set up a workflow yet, please see Workflow setup and do so first.
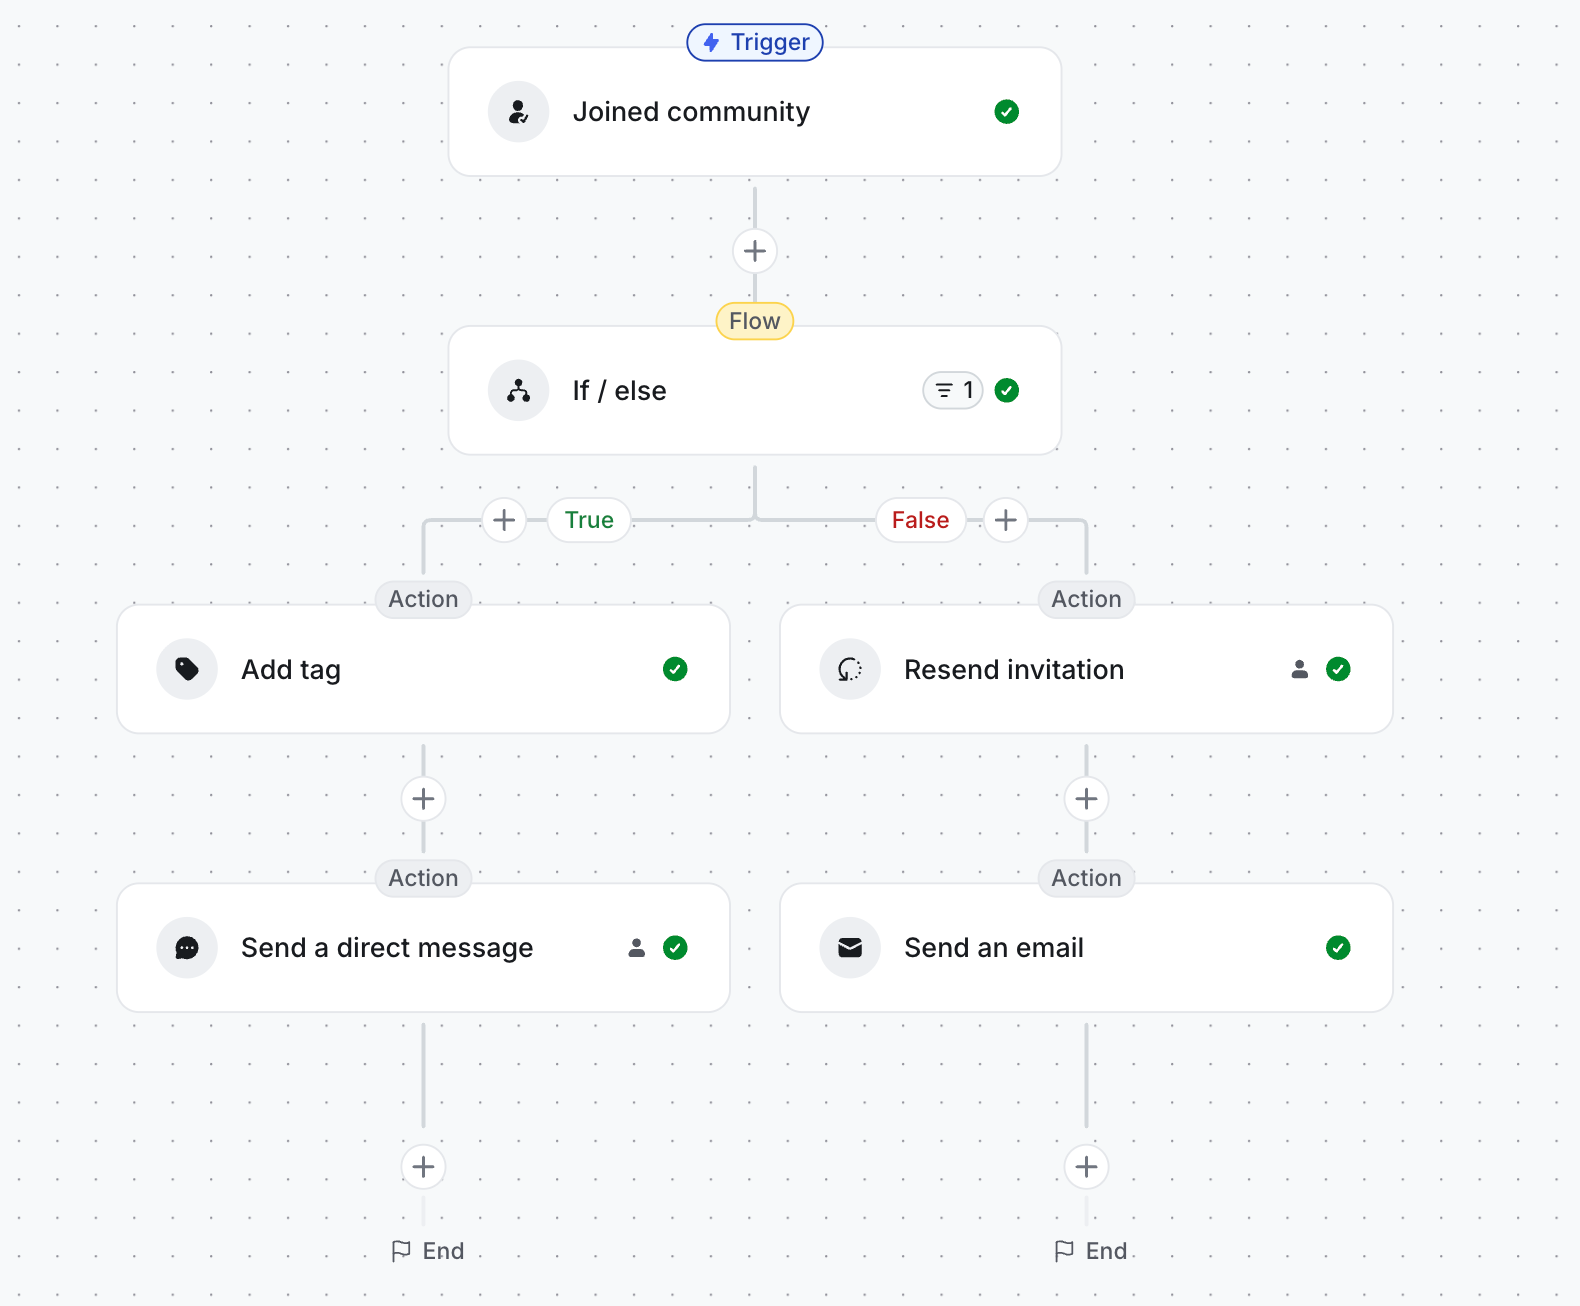
A branch checks a condition for each member and sends them down one of two paths. If the member meets the condition (True path), they follow one set of actions. If they don’t (False path), they follow a different set. Each member follows only one path.
Common ways to use branching:
Targeted onboarding: Not every new member needs the same starting experience. Use a branch to check the member’s type or plan. Add enterprise members to spaces built for their team. Add members on a standard plan to a general welcome space and a community introductions space. Each group gets a relevant first experience without you having to build and maintain separate workflows.
Engagement-based follow-up: Send advanced content to engaged members, such as a link to an in-depth course or an invitation to a members-only event. Send inactive members a re-engagement message, such as a check-in or a highlight of recent community activity. This keeps your messaging relevant and helps bring inactive members back.
Tiered access: Grant or remove access to spaces when a member’s subscription status changes.
Trial and paywall follow-up: Branch on whether a member has converted after a free trial. Send a welcome message to members who subscribed and give them access to paid spaces. Send a reminder to members whose trial is ending, with a link to upgrade.
Profile-based personalization: Use answers from profile fields or signup questions (such as role, interests, or location) to add members to the most relevant spaces and tailor the welcome message.
Event and course follow-up: After an event or lesson, branch on whether the member attended or completed it. Send attendees a recording, a survey, or the next step in the program. Send a reminder to people who missed it, with a link to catch up.
Tag-based segmentation: Branch on whether a member has a specific tag. Enroll members with the tag in a targeted path. Others continue on the default path.
Set up branches in a workflow
When configuring the automation or bulk action workflow, follow these steps:
In the workflow editor, click ➕ (Plus) icon below or above any step where you want to insert the branch.
Click Add a step, then select If / else.
(Optional) In the Conditions section, click Add filter condition, choose a filter, and set the criteria.
-
Add actions to the True branch.
Under True, click the ➕ (Plus) icon.
Click Add a step, then select an action.
Select an action from the Workflow actions and click Continue.
Repeat for each action you want on this path.
-
Add actions to the False branch.
Under False, click the ➕ (Plus) icon.
Click Add a step, then select an action.
Select an action from the Workflow actions and click Continue.
-
Repeat for each action you want on this path.
Click Activate in the top-right corner.
📚 For more details on adding filter conditions, please see: Add filter conditions in workflows.
❗Important: Branches can’t be merged. After a workflow splits, the two paths stay separate. You can’t bring them back together later in the same workflow. If both paths need the same final action, add that action to each path.