RSVP and attend community events
Last updated: October, 2026
Participating in community events is a fantastic way to engage with fellow members and enrich your experience. RSVPing to an event is a breeze! Let’s take a look at how you can RSVP and attend the event in your community.
Confirm your attendance for an event
There are two ways you can confirm your attendance for an event:
RSVP directly to an event
Accept an invitation from the event host
Key details about RSVPing to events
Calendar events: When you RSVP—either by directly confirming or by accepting an invitation—you’ll receive a confirmation email containing a calendar invite (ICS file). You can also download this ICS file from the confirmation email or the event details page to import it to a specific calendar.
Event updates: When the event date, time, or location changes, you’ll automatically receive a notification email with an updated calendar invite.
-
Auto-updating calendar events: Circle's calendar invites follow the standard ICS format, so most calendar apps can automatically add and update your events. This works most seamlessly with Gmail; with other providers, like Outlook and Apple Calendar, you may occasionally need to manually re-import an invite — see Troubleshooting below if that happens.
Sometimes, providers like Gmail display a confirmation banner in the email if you haven’t previously received any event confirmations from the community before. The banner lets you confirm whether you want to automatically add the sender's current future events. This precautionary measure ensures that only trusted events are added to your calendar.
-
Time zones: The time shown for events in your community—whether you're viewing the event or confirming your RSVP—reflects the time zone you've set in your community profile. When displaying event time, it automatically accounts for daylight saving time if your time zone or the host's time zone observes daylight saving time.
Additionally, when you add the event to your calendar, the time will automatically adjust to match the time zone set in your calendar if it differs from the one you’ve selected in your community profile.
RSVP to an event
If you’re a member of the event space, you can easily RSVP to events. Here’s how:
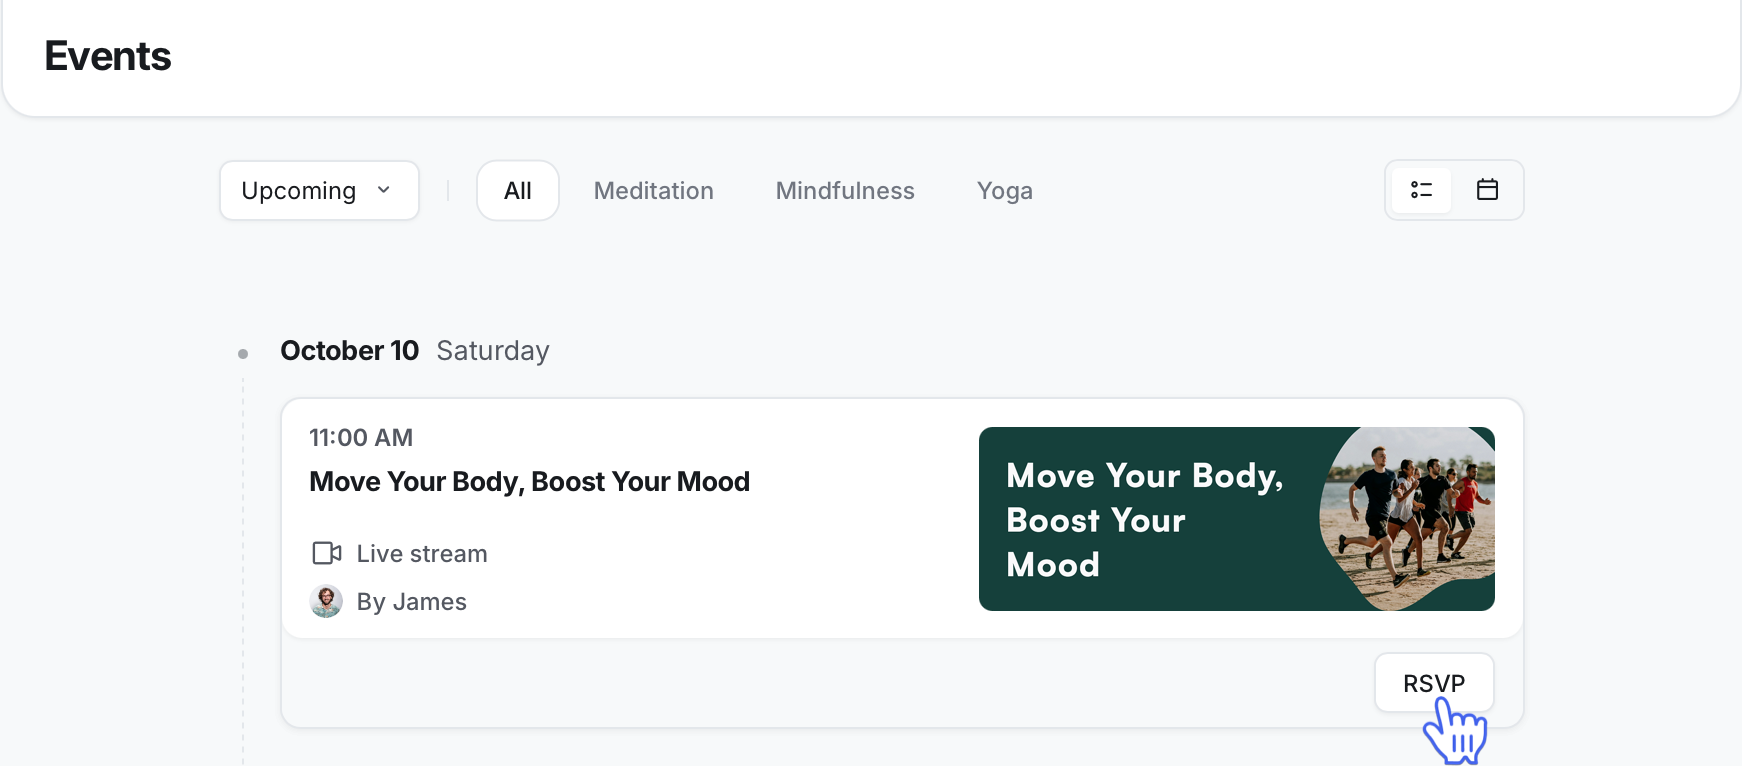
Navigate to the event space within your community and find the event you’re interested in.
-
Click RSVP under the event. Alternatively, you can open the event details page and RSVP from there.
If the event is part of a recurring series, you’ll be prompted to select which specific events within the series you’d like to RSVP for. Use the checkboxes to choose individual events or click Select all to RSVP to all events in the series. Then, click Confirm attendance.
-
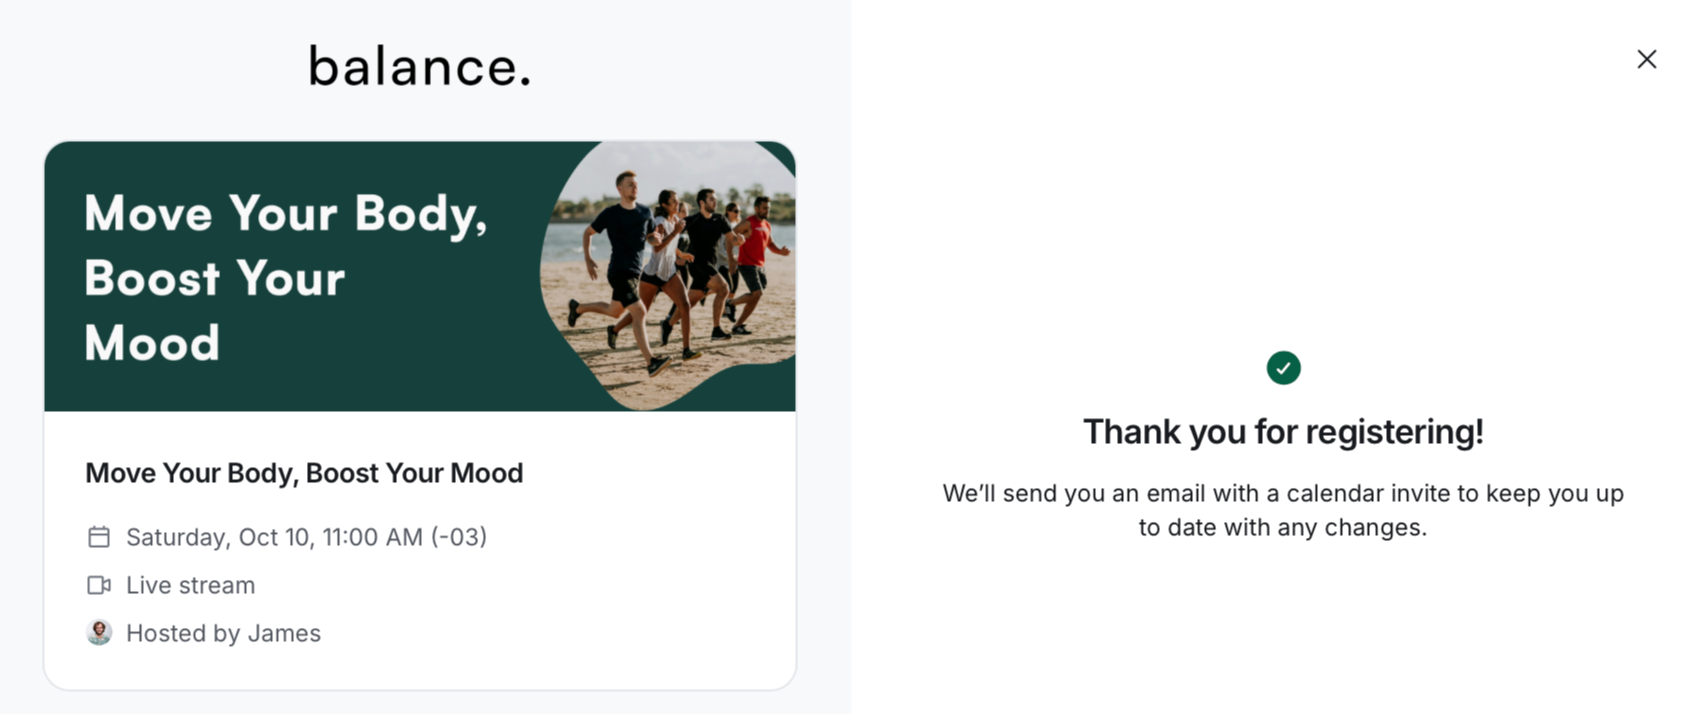
You’ll now see the event confirmation dialog summarizing the event details.
ℹ️ Note: For private or secret event spaces, only members of the space can RSVP. Visitors must join the community and be the member of the event space (if the space is private or secret) to RSVP.
Accept event invite
When the host invites you to attend an event, you will receive an email invitation to confirm your attendance. Additionally, when you visit the event space, you will see a banner above the event title indicating that you have been invited.
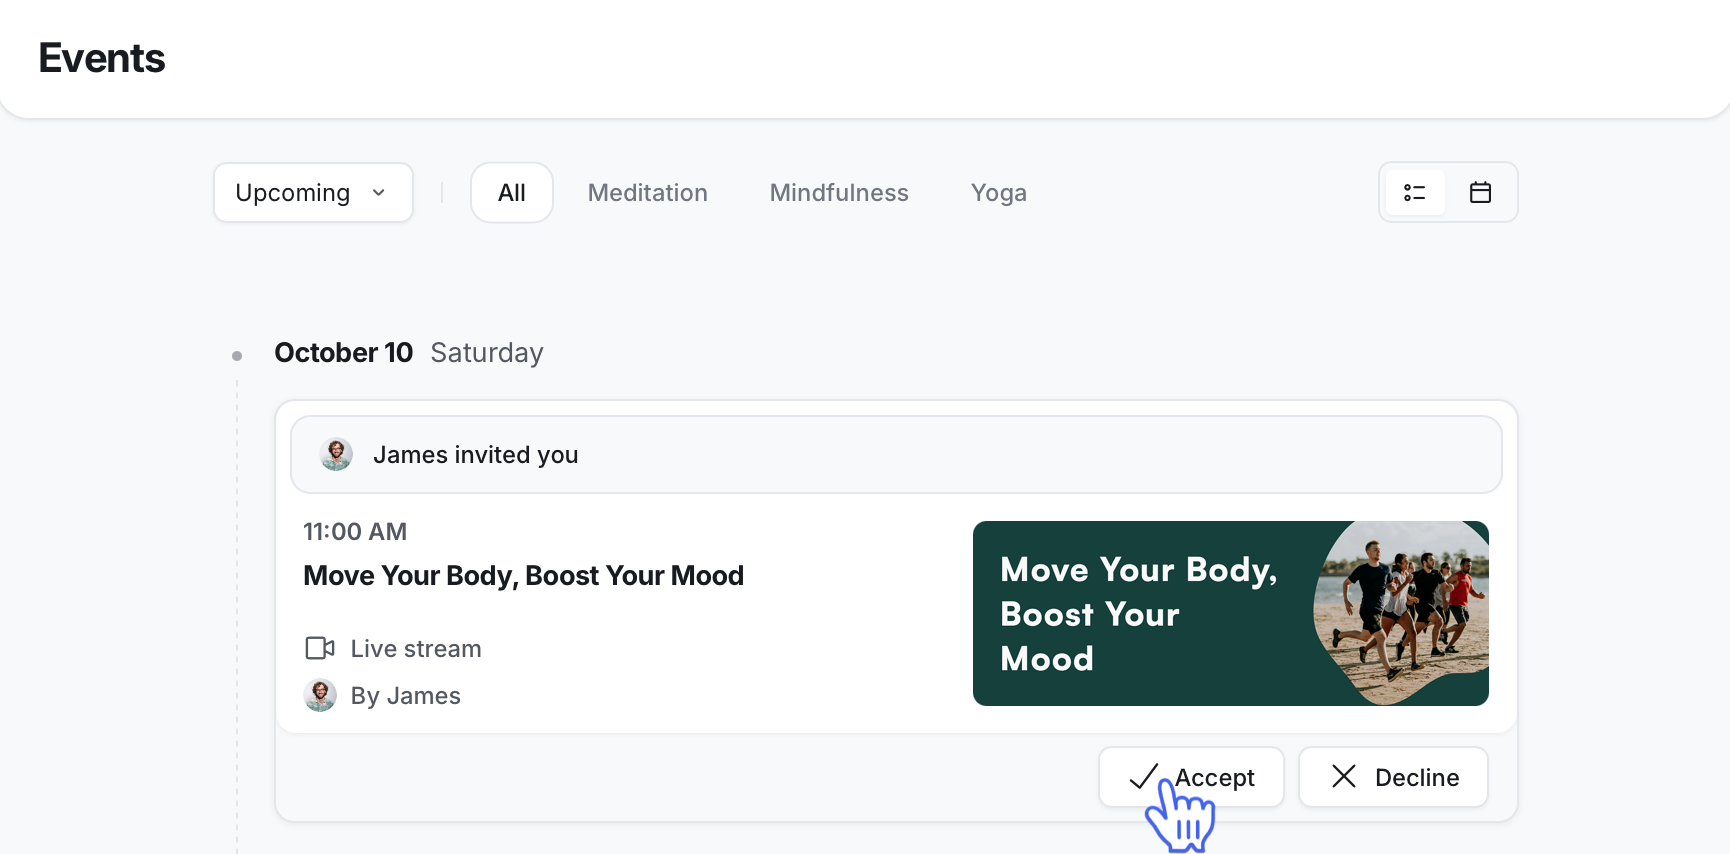
You can confirm your attendance using one of the following methods:
From the invitation email: Open the invitation email and click Accept invite or View event. You’ll be taken to the event details page, where you can accept or decline the invitation.
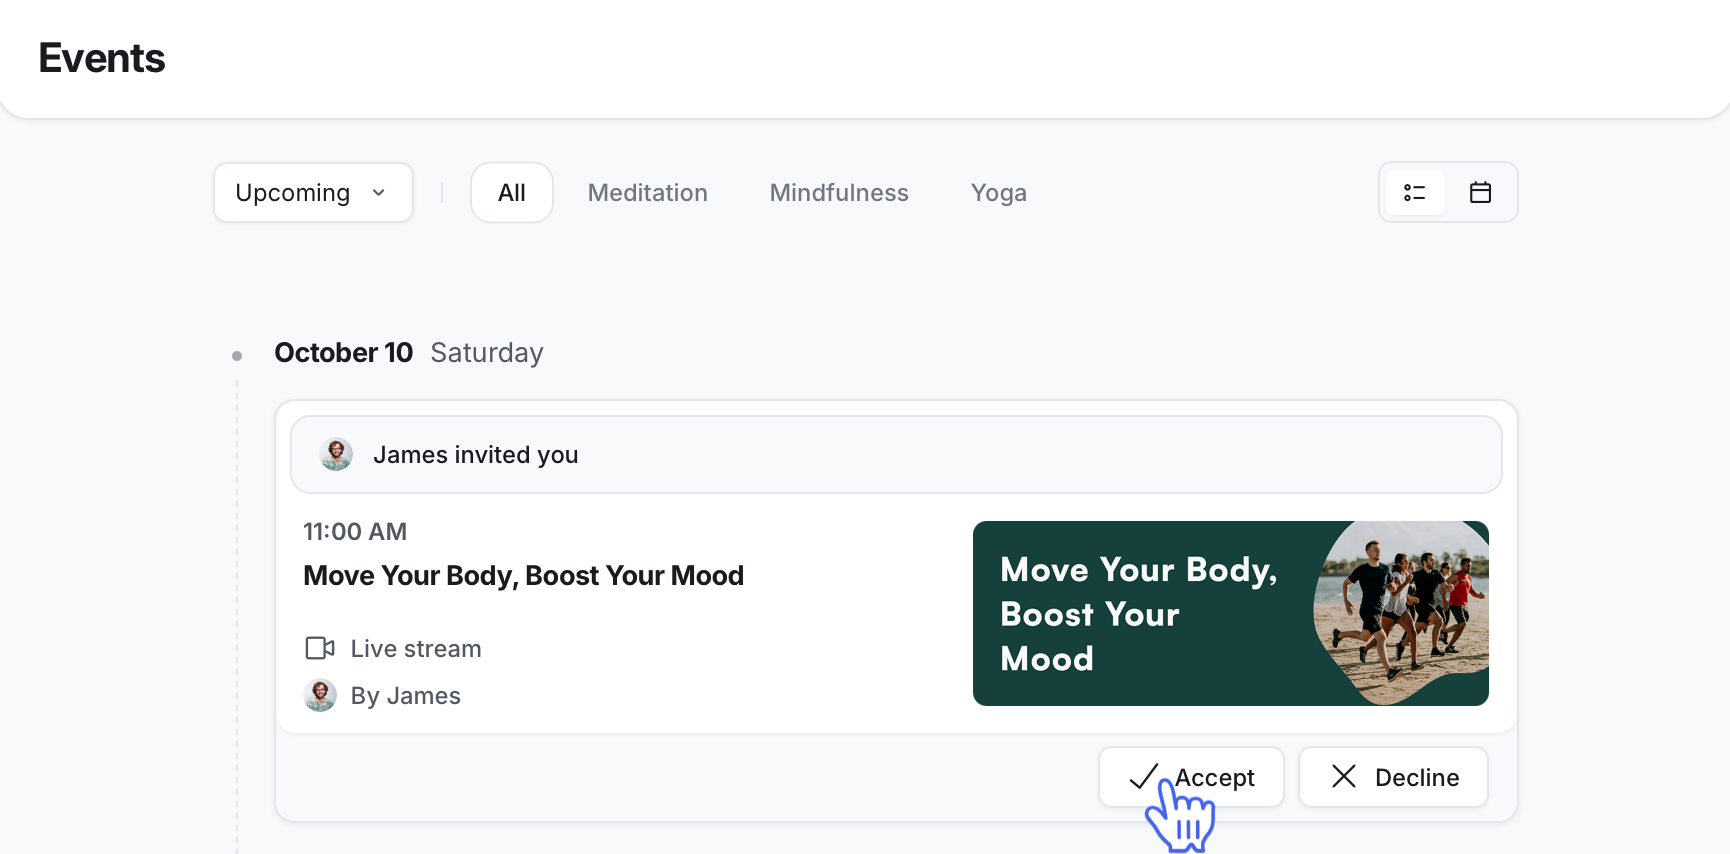
From the event space: Go to the event space. On the event’s listing or event details page, click Accept invite or Decline invite based on your preference.
Once you accept the invite, your RSVP status will be set to Going, and you’ll receive a confirmation email containing the calendar invite (ICS file).
Manage your event attendance
After RSVPing to an event, you can change your RSVP status, resend event confirmation, and manually download a calendar invite. Here’s how you can manage these tasks efficiently.
Resend confirmation email with a calendar invite
If you need a confirmation of the calendar invite, you can easily resend it:
Go to the event space and click the event title to open the event details page.
-
On the event details page, click Add to calendar.
-
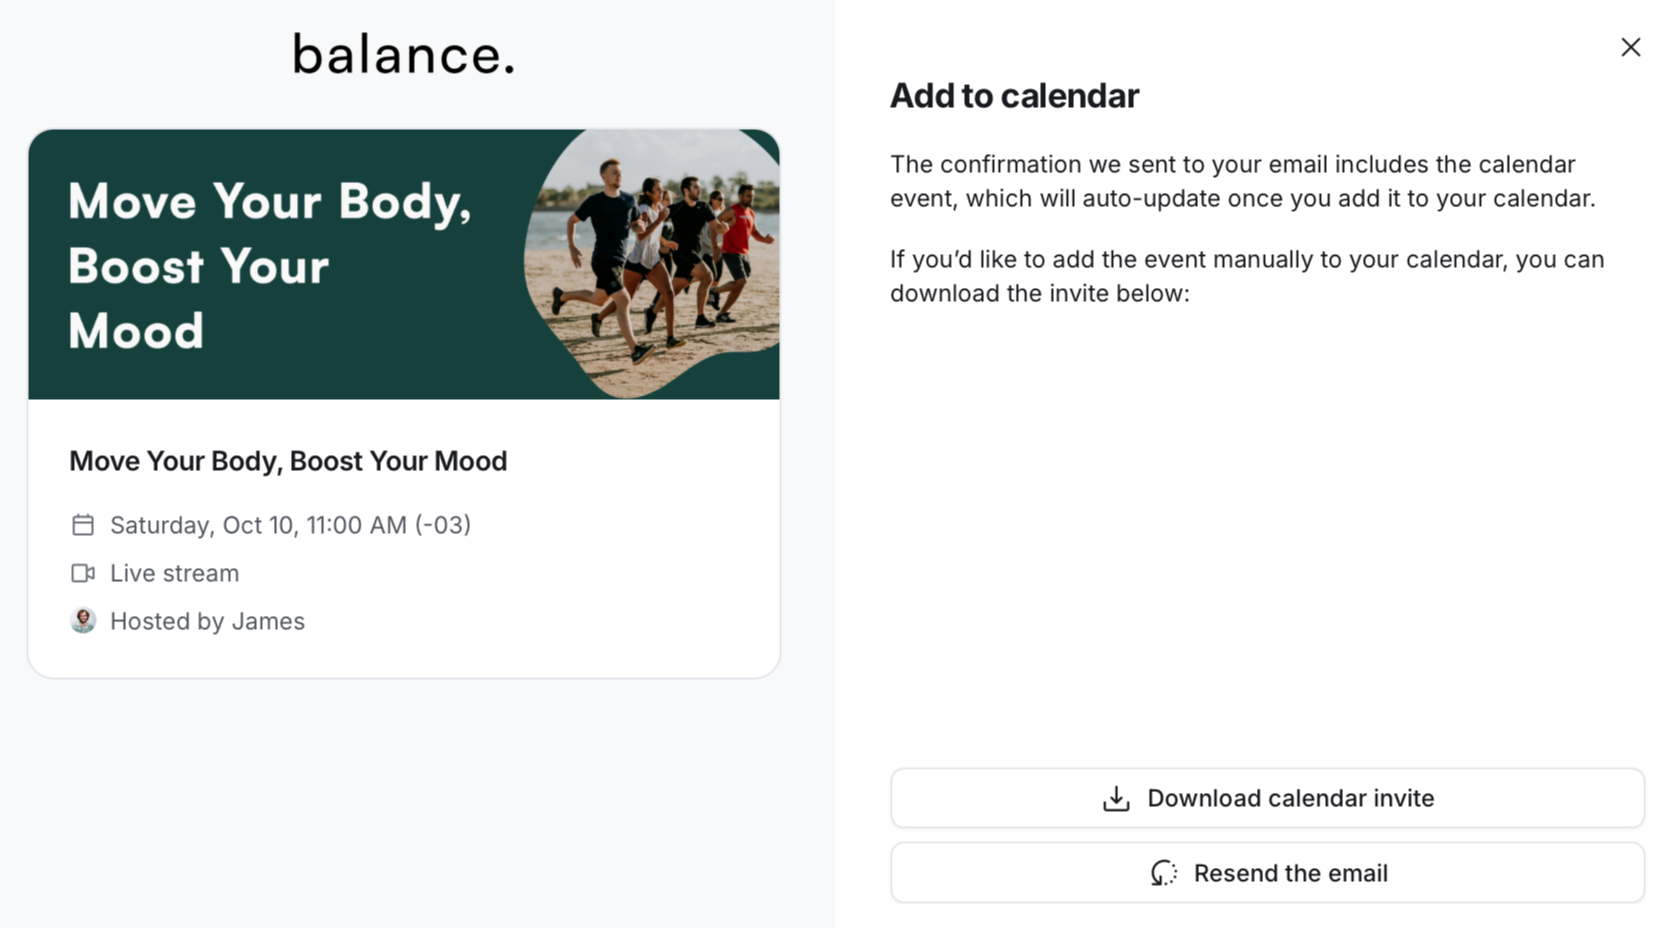
In the Add to calendar dialog, select Resend the email.
-
💡 Tip: If you prefer to manually import the event into your calendar, you can download the ICS file directly from the community. In the Add to calendar dialog, select Download calendar invite. The ICS file will be saved to your device, allowing you to manually import the event to your preferred calendar application.
-
Change your RSVP
If your plans change and you can no longer attend an event, you can update your RSVP status directly from the event space:
Navigate to the event space and locate the event.
-
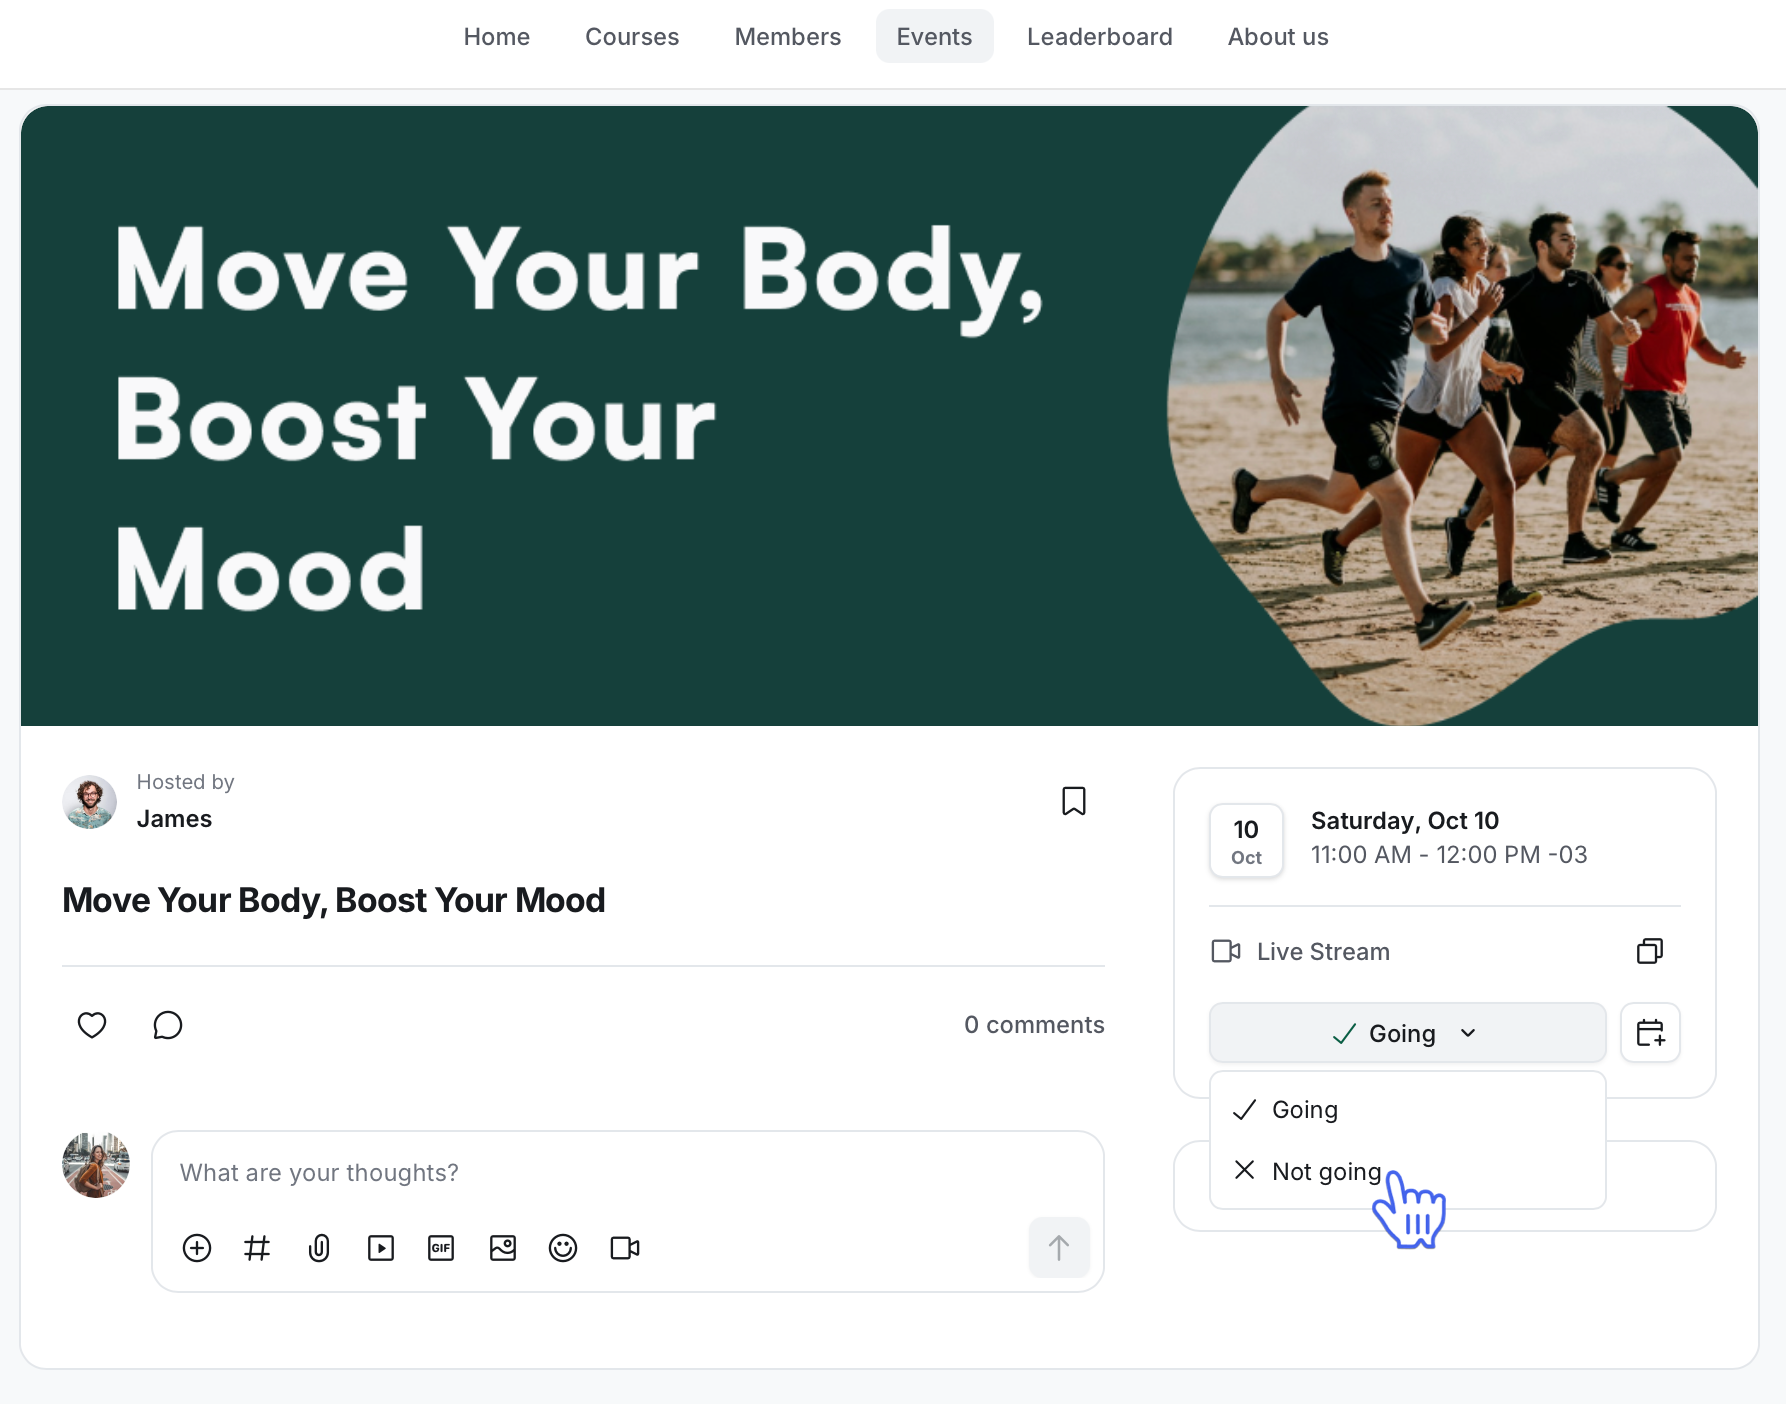
Click Going next to the event title and select Not going.
If the event is part of a recurring series, you’ll be prompted to choose how your changes should apply:
This Event: Apply the change only to the specific event you’re updating.
This and Following Events: Update your RSVP for the selected event and all future events in the series.
All Events: Apply the change to every event in the recurring series.
Please note that you need to change the RSVP status for the event within the community. Updates made directly through your calendar application will not sync back to the community.
Troubleshooting
If Outlook isn't automatically adding your calendar invite → this is expected on New Outlook (Microsoft's redesigned Outlook app — look for a toggle labeled New Outlook in the top-right corner of the window, or check Help > Go to Classic Outlook to see which version you have), which requires you to manually open and import the ICS attachment rather than adding it automatically. Use Resend the email or Download calendar invite from the Add to calendar dialog, then open the downloaded file to add it manually.
If an event you added to Apple Calendar disappears after a short time → this is a known limitation outside of Gmail. Re-add the event using Resend the email or Download calendar invite, and add it directly to your email provider's calendar (for example, by opening the invite in your Outlook or Apple ID account) rather than through a separate calendar app.
If your calendar isn't updating automatically after an event change → automatic updates are only guaranteed for Gmail. For other providers, use Resend the email to get the latest invite and re-add it to your calendar.
Attend your event
To participate in the event via desktop or mobile app, navigate to the event space and click the event title. Depending on the location, you’ll find the necessary information to join the event on the event details page.
In-person event: If the event is happening at a physical location, the event details page will display the venue address. Clicking this location will open a map to help you locate the venue easily.
-
Live event: The event details page will provide an option to join the stream or room directly.
If you have enabled the in-app and push notifications for Live streams/rooms, you’ll receive alerts when the event host goes live in the community.
You can also access the event session directly from the event listing within the space—when the event is about to begin (10 minutes before the start time), a Join live option will appear next to the event title.
Virtual location: For virtual events hosted on external platforms, the event details page will display a join option. This option will also appear directly on the event listing within the space.
💡 Tip: If you are looking for information on how visitors can join your public event, see Join a public live stream as a visitor.
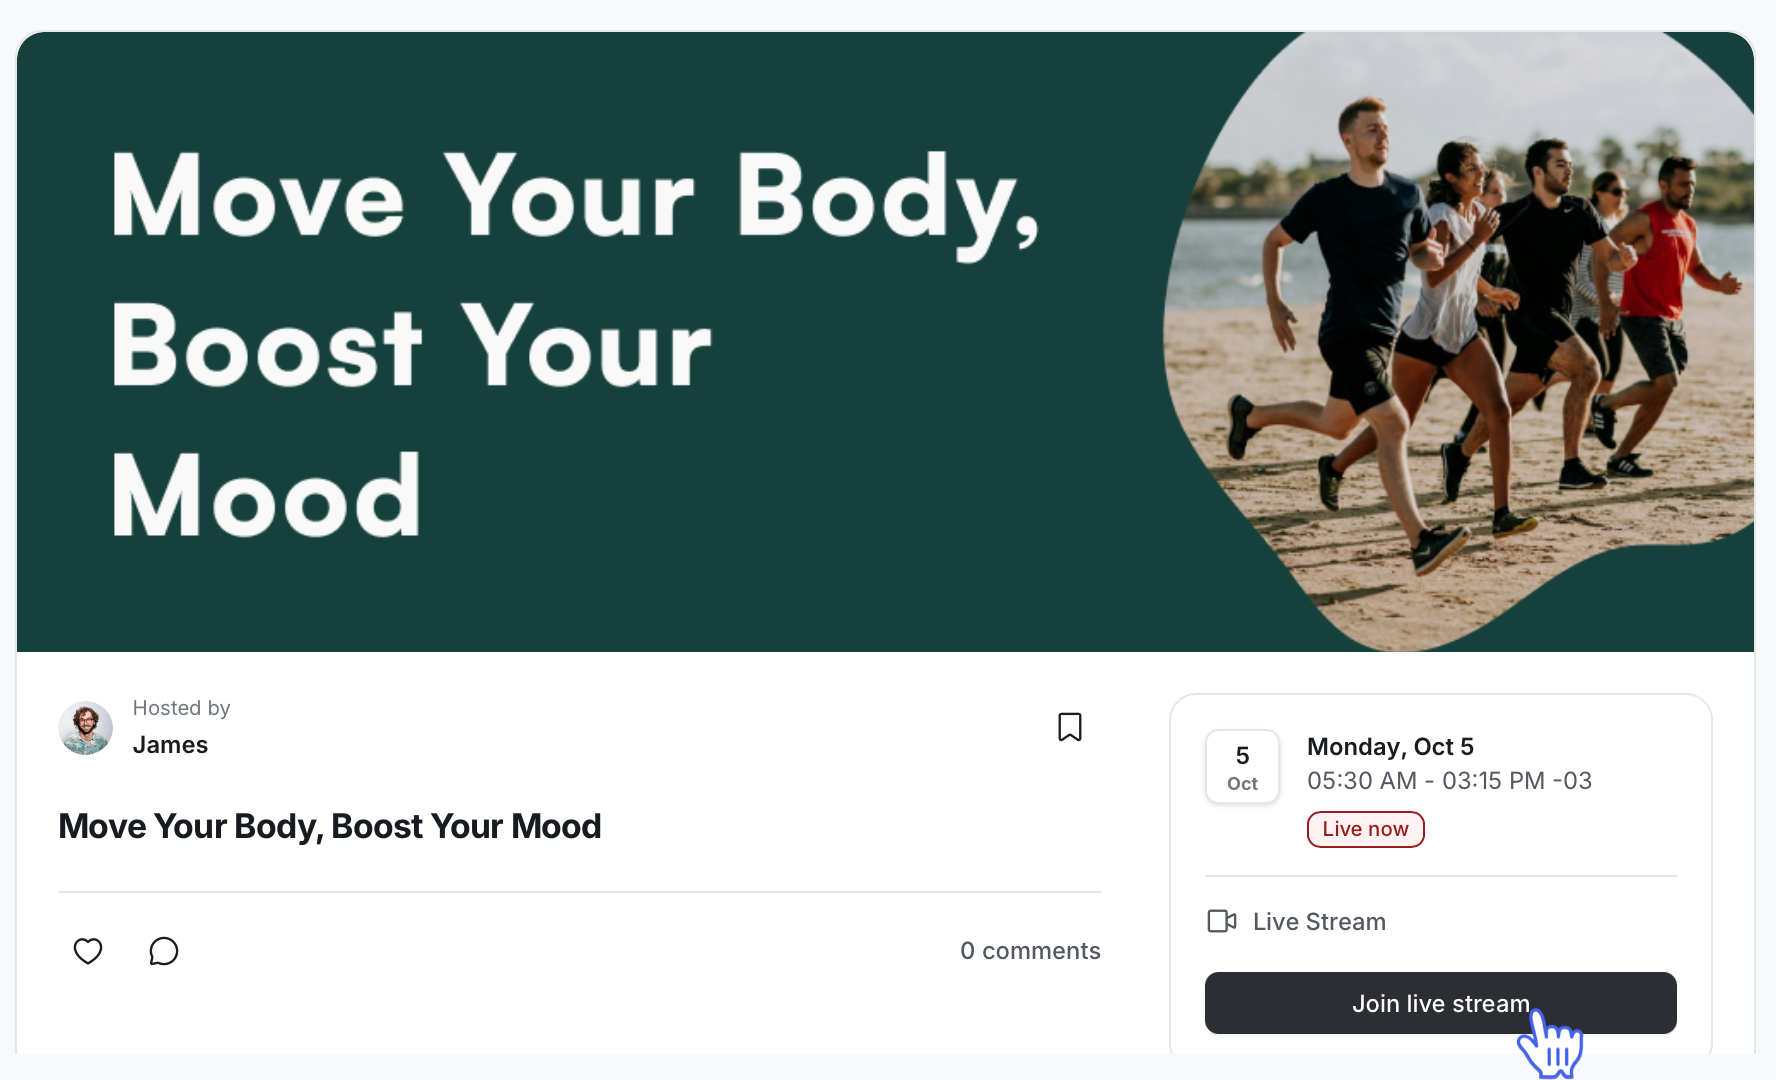
If you’re accessing the event space through a desktop or mobile web browser, you’ll see any events currently in progress will be listed under the Now section. This makes it quick and hassle-free to spot and join the event. For Circle live events, as soon as the event host starts the live session, it will also appear in that section.