Create email broadcasts
Last updated: October, 2026
In this article, you’ll learn everything you need to know to create your first email broadcast, from setting up your sender details to writing your message and scheduling delivery.
About email broadcasts
Broadcasts let you connect with your community in a direct, impactful way, whether you’re sharing an update, announcing an event, or sending exclusive content.
In just a few steps, you can craft a message, choose your audience, and send it right away or schedule it for later.
Who can create broadcasts
Only community admins can create and send broadcasts using the desktop app and web browsers.
Email settings and domains
Before creating your first broadcast, make sure your email settings are configured. These determine how your emails appear in recipients’ inboxes.
You’ll need to set up:
Sender name
Sender email address
Reply-to email address
Postal address
You can also set up your own custom email domain for sending broadcasts and workflow emails through the Email Hub.
Email sending limits
To maintain high deliverability rates and protect our platform from abuse, we apply dynamic sending limits. These limits are designed to grow with your community and shouldn't impact legitimate sending patterns.
To learn more about how these limits work and get help increasing your limit, see Understanding email sending limits.
Create a new broadcast
To get started:
Click Marketing in the left sidebar, then select Broadcasts.
To initiate a new email broadcast, click the New broadcast option at the top-right of the page.
In the dialog, provide the Internal name. This name is only for your reference and will not be visible to recipients.
Once you've provided a name, click Create broadcast. The broadcast editor will now appear on the screen.
Set up your email
The broadcast editor is designed to make setting up your broadcast easy and intuitive.
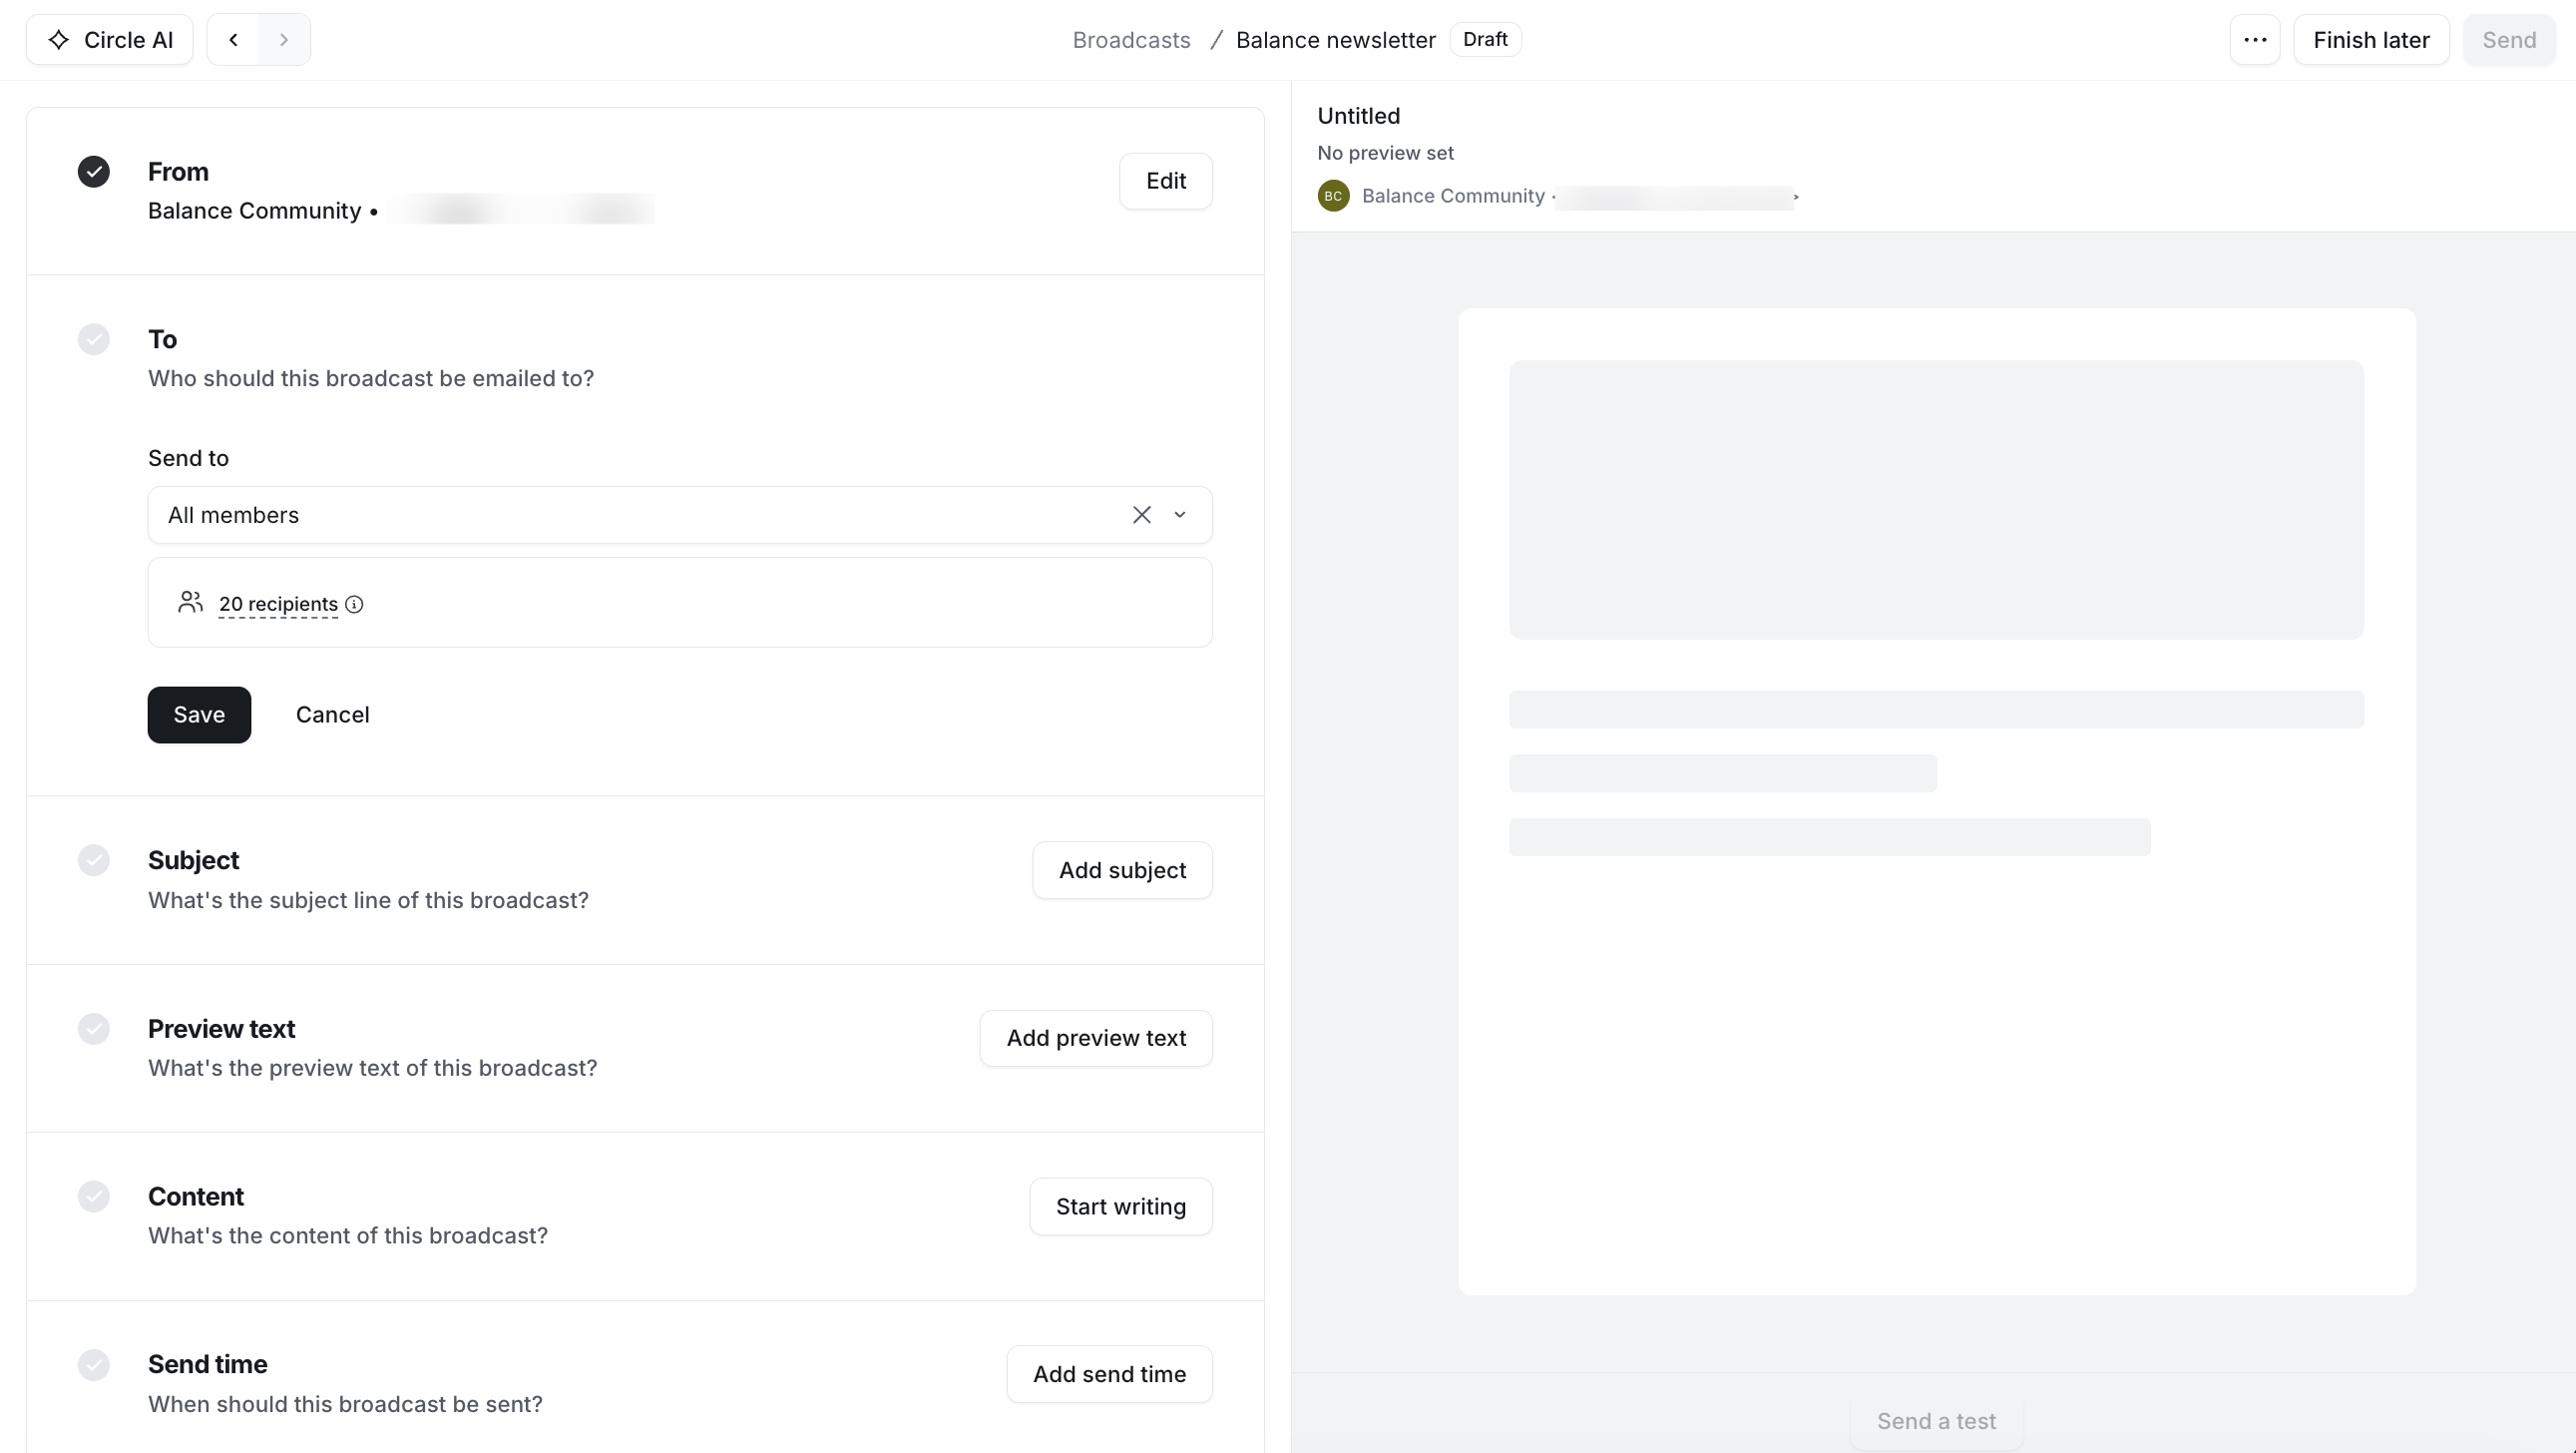
On the left, you’ll see all the sections for setting up your email.
On the right side, you’ll see a real-time preview of your email as you build it.
-
At the top of the editor:
The Actions menu lets you rename, duplicate, or delete the broadcast.
The Back icon or the Finish later option allows you to exit the editor.
The Send or Schedule option lets you finalize the broadcast.
Here’s what you’ll need to configure before you can send the email:
Add recipients
Set the subject line
Add preview text (optional)
Write the email content
-
Choose a send time
Add recipients
In the To section, choose the audience you wish to send the email to.
Click the Send to dropdown and select one of the following:
All contacts: Send the broadcast to all contacts from your community.
All members: Target only community members for this broadcast.
Custom filters: Use this option to send the email to individuals who meet specific criteria. See below for more details on setting up filters.
Key things to know:
Our broadcast audience will include only individuals who have subscribed to your marketing emails.
If your broadcast audience includes multiple email addresses belonging to the same person using aliases (e.g., abc+1@email.com, abc+2@email.com), only a single email will be delivered to that individual. This behavior is controlled by the email client.
Set up custom filters
Custom filters let you send targeted emails to specific groups. You can filter by criteria such as:
Roles
Activity scores
Paywall subscriptions
Member tags
Custom profile fields
And more
To apply custom filters, follow these steps:
-
Select a filter: Click Add filter and select your desired option from the list of filters. You can use various CRM, platform, and profile fields as filters.ℹ️ Note: Filters dedicated to members, such as event, space, or activity scores, will not include non-members in the results.
-
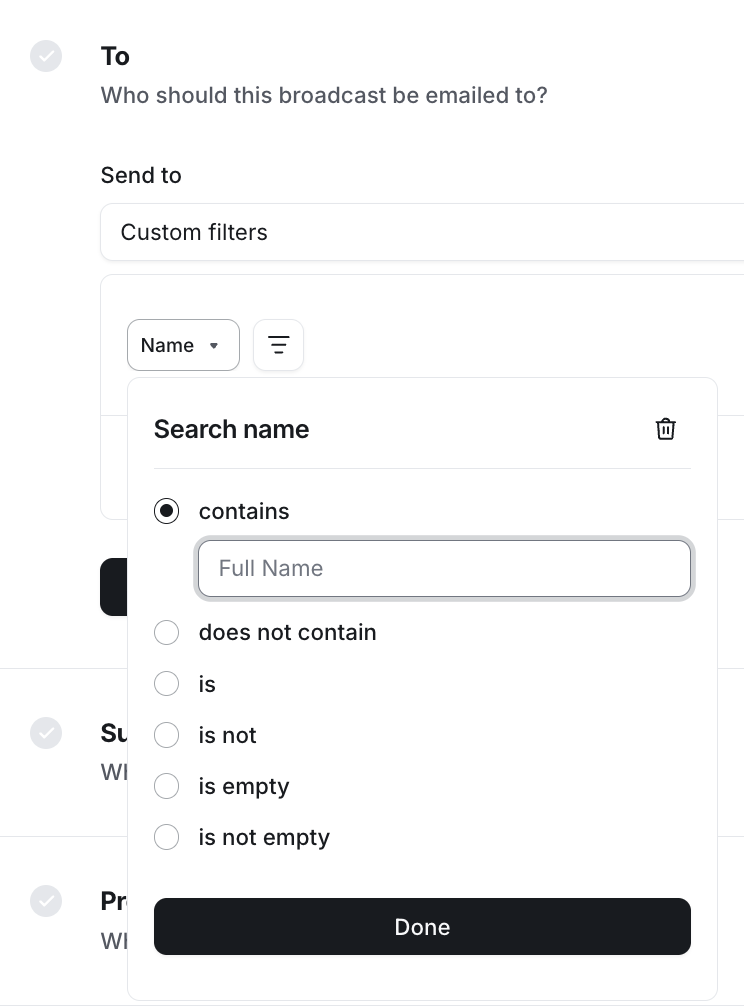
Set your criteria: After selecting a filter, enter the relevant criteria. Certain filters support advanced conditions for more precise filtering.
-
Using conditions: These conditions are available to text-type and list-type filters, such as name, headline, and location (including checkbox and dropdown type profile fields). Depending on the type of field you are using as a filter, you can use one of the following conditions:
Contains (available only to text, link, and number type fields)
Does not contain (available only to text, link, and number type fields)
Is
Is not
Is empty
-
Is not empty
-
-
Apply the filter: Click Apply or Done to finalize your selection.
💡 Tip: As you apply filters, you'll see the number of recipients adjusted in real time. You can click the recipient count to review the list of who will receive the broadcast.
Click Save once your audience is set.
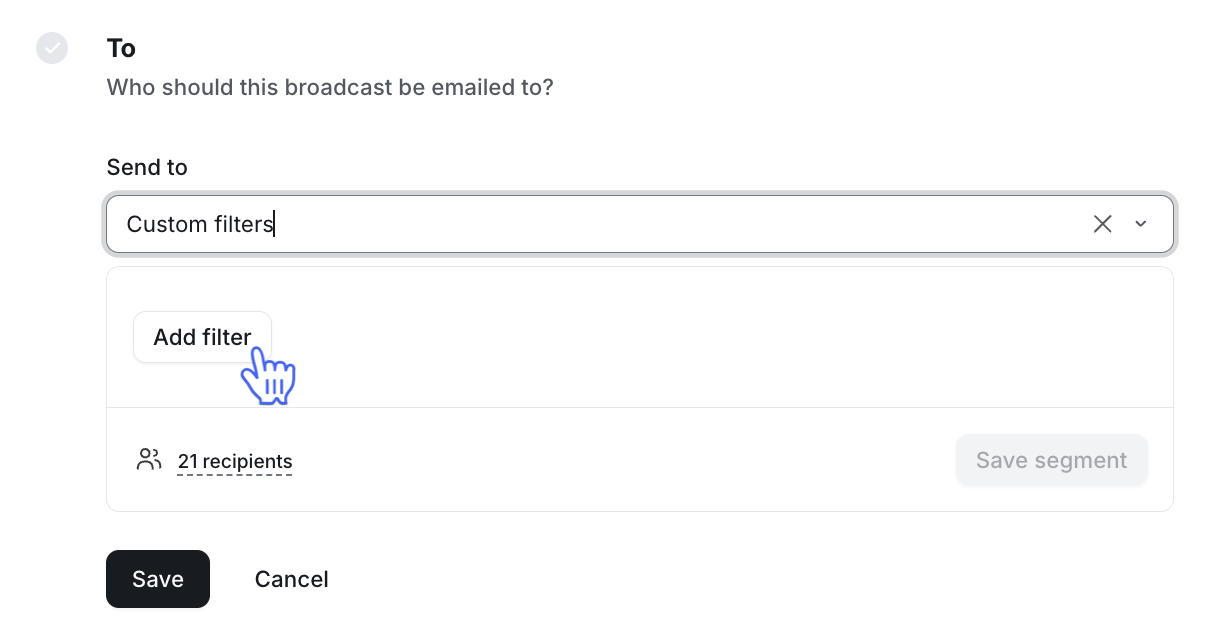
Filters use “AND” logic. This means that only contacts who meet all selected filters are included. For advanced targeting, you can apply the same filter multiple times, creating highly specific combinations for more granular results.
Set the subject line
Craft a clear and concise subject line that reflects the purpose of your email. This is one of the first things your recipients will see, so make sure it accurately represents the content.
Next to the Subject section, click Add subject and enter your subject line up to 140 characters. If you want to add emojis, you can directly paste them into the subject field.
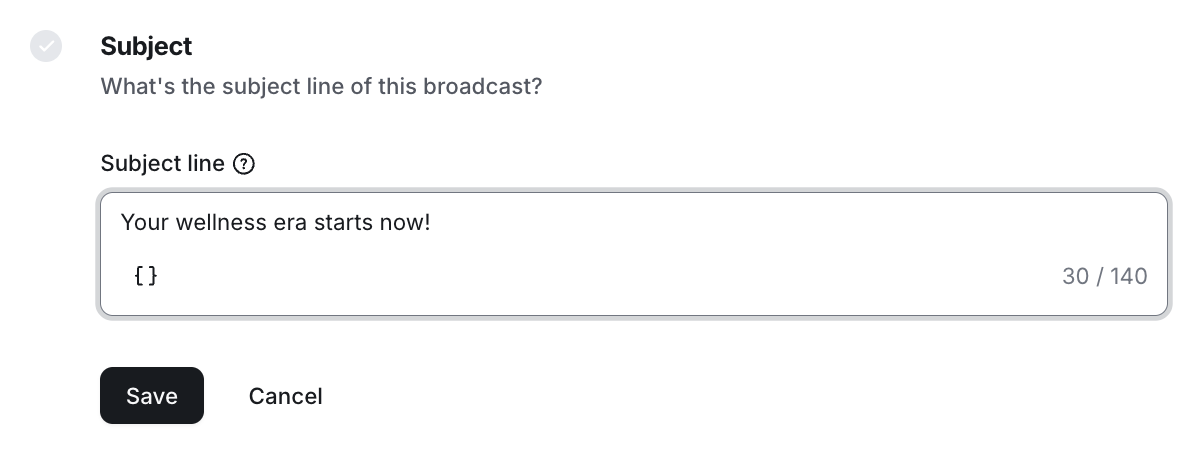
To personalize the subject lines, you can add various dynamic variables. In the Subject line field, type curly brackets {{ or click the Add variable {…} icon in the field, then select a variable from the list. The following variables are available:
{{member.first_name}}
{{member.last_name}}
{{member.name}}
{{member.email}}
{{member.public_uid}}
{{community.name}}
{{community.url}}
After reviewing the subject line, click Save.
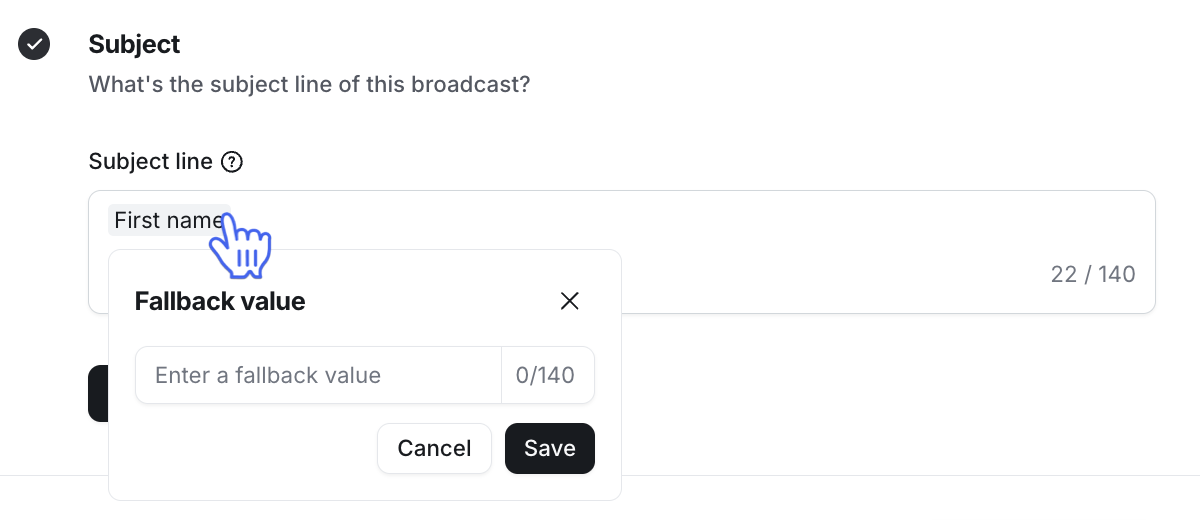
Fallback Value
You can add a default (fallback) value for personalization variables. If a variable, such as a member's last name, has no value, you can specify a default value to use instead
To add a fallback value:
Add a variable in the subject line.
Click the variable and enter a fallback value.
Click Save.
Add preview text (optional)
Preview text appears beside your subject line in inboxes. It’s a quick way to entice readers to open your email.
Click Add preview text next to the Preview text section.
-
You can enter up to 140 characters for preview text. Additionally, similar to the subject line, type curly brackets {{or click the Add variable in the field to add dynamic variables.
(Optional) Add Fallback value for the variable.
After reviewing the preview text, click Save.
If you do not provide the custom preview text, the first few words of the email content will automatically appear as the preview text.
Write the email content
The email builders provide everything you need to create engaging, visually appealing emails. You can add text and images, use buttons to drive calls to action, add pre-built blocks, and more.
To access the email builder, follow these steps:
Next to the Content section, click Start writing.
-
Choose how you want to begin:
Start from scratch: You’ll be asked to pick between the Visual builder (drag-and-drop editor) or the Text builder (a minimal text-based editor).
-
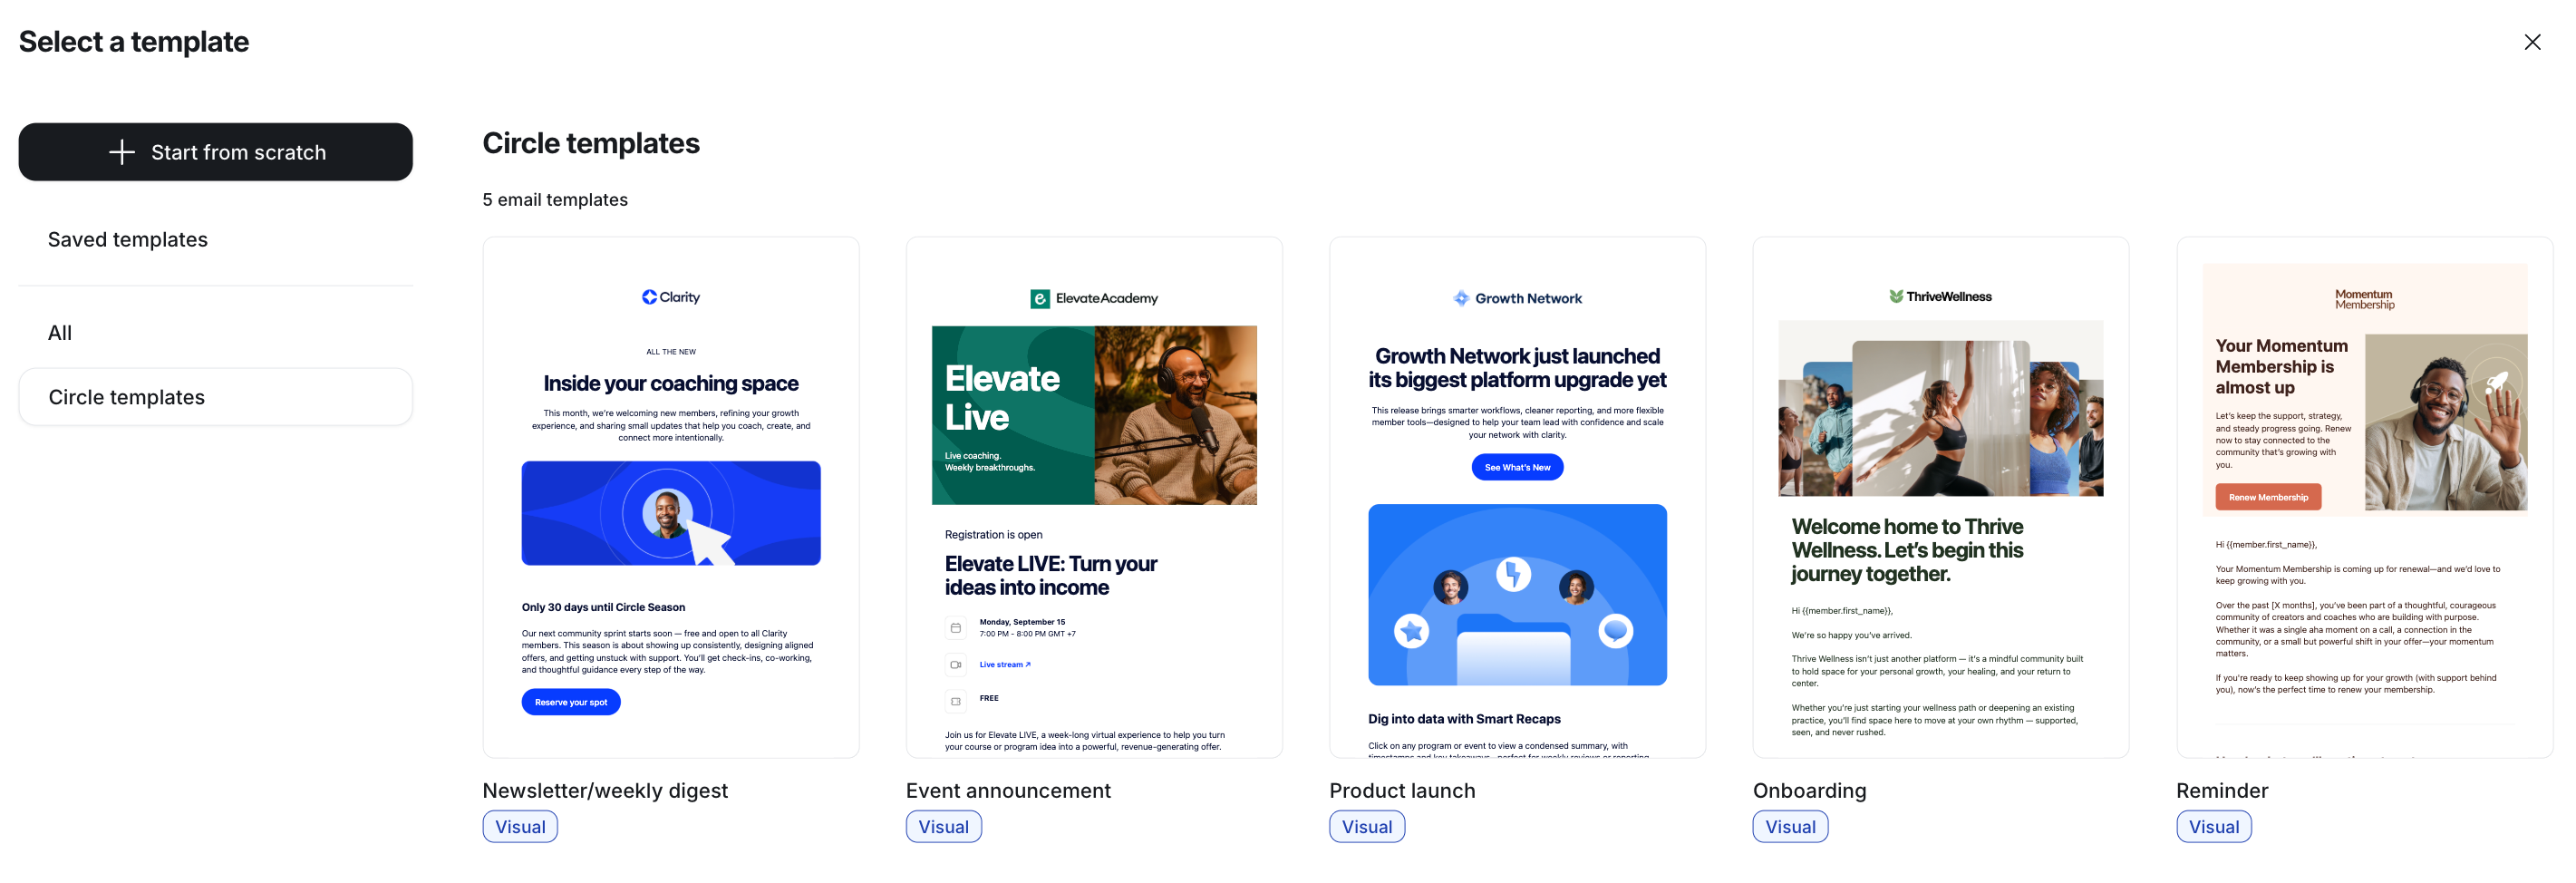
Select a template: Use one of your templates created in either builder, then update it to fit your current email. You can filter templates by type using the Type dropdown menu.
Once you’ve made a choice, the editor will open, and you can start building your content.
💡 Tip: Send a test email anytime by clicking Send a test in the builder. It’ll go to your admin email address and doesn’t affect analytics. This allows you to see exactly how your email will look in an inbox and catch any errors before finalizing and sending the broadcast.
Once you’ve drafted the email content or want to revisit it later, click Save and exit in the top-right to return to the broadcast editor.
Choose a send time
After crafting your email and completing all other sections, it’s time to decide when the email broadcast will be sent.
Next to the Send time section, click Add send time and choose from the following options:
Send now: Select this option if you want the email to be sent immediately. Don’t worry, choosing this won’t send the email right away; it will just save your choice for the send time. Once you are ready, you’ll have the chance to confirm and finalize the send action in the broadcast editor.
-
Schedule for later: Select this if you prefer to send the email at a specific future date and time. Now, click the Date and time field and select your preferred schedule from the calendar.
-
ℹ️ Note: Broadcast schedule times are shown based on your device’s system time zone.
-
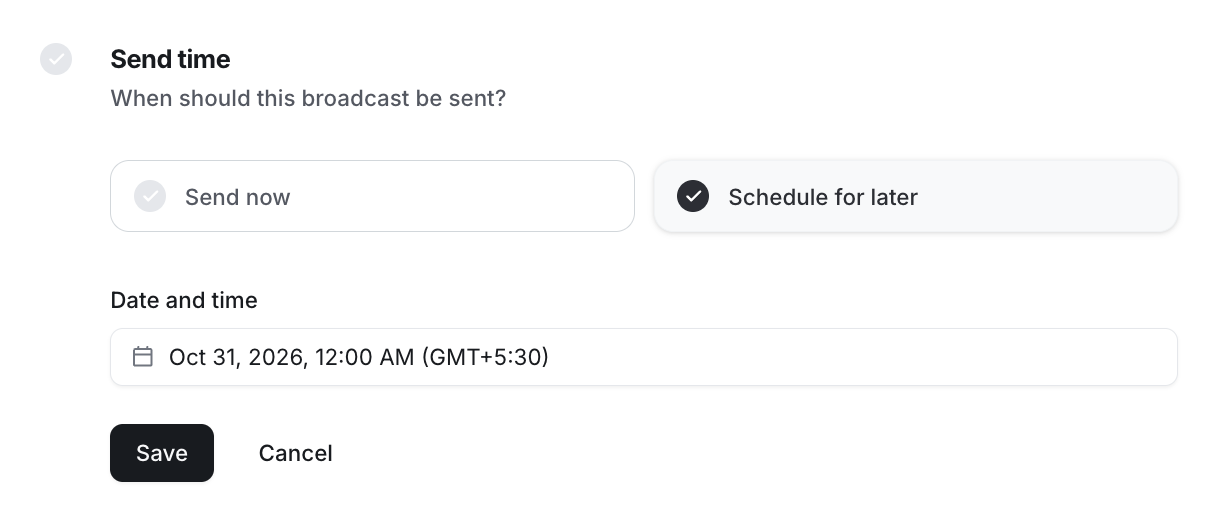
Once you have configured the desired send time, click Save.
Send or schedule your broadcast
Once all the required sections of your email broadcast are set up, you’ll see checkmarks next to the sections indicating that they are complete.
At this point, you can proceed with confirming your broadcast delivery. If any required section is incomplete, please complete it before proceeding.
Send a test email
Before sending your broadcast, you can also send a test email to yourself.
In the broadcast editor, click Send a test at the bottom of the email preview and confirm the action. Please note that test emails do not affect analytics and will not be counted toward recipient metrics.
Send broadcast now
If you’ve chosen the Send now option in the Send time section, you will see the Send option at the top-right of the broadcast editor. Click it and confirm the send action to initiate the broadcast delivery.
Your broadcast will now appear in both the All and Sent tabs on the Broadcasts page.
📚 To learn more about managing broadcasts, see our guide here.
Schedule broadcast
If you’ve set up a schedule for broadcast in the Send time section, the Schedule option will appear at the top-right of the broadcast editor. Click Schedule and confirm the action.
Your scheduled broadcast will now be listed under both the All and Scheduled tabs on the Broadcasts page. You can also edit a scheduled broadcast at any time before the set send time.
📚 To learn more about modifying the broadcast schedule, see our guide here.