Guide to the media manager
Last updated: October, 2026
The media manager is the central hub for all uploaded media across your community. This article will show you how to use it to view and manage media effectively.
About the media manager
As your community grows, so does the amount of media added by members and admins. The media manager gives you a clear view of everything in one place and lets you:
Track the storage used: See how much storage your community is using and how close you are to your plan’s limit. This helps you plan ahead and avoid hitting limits unexpectedly.
Browse and manage media: View and manage media files uploaded by admins, moderators, or members, including images, videos, audio, and documents.
Access video settings and analytics: For uploaded videos and recordings, you can set thumbnails, control download permissions, manage transcriptions, and check analytics to see how videos are performing.
Who can access the media manager
All admins can access the media manager. Members and moderators don’t have access.
The media manager is available to all community plans through the Circle desktop app, web browsers, and mobile browsers.
How to access the media manager
To access the media manager, click Community in the left sidebar, then select Media.
Navigate the media manager
The media manager is designed to make it easy to find, preview, and manage your community’s media.
Browse media by category
At the very top, you’ll see tabs that group files by category:
All: Every media type uploaded to your community.
Videos: Uploaded video files.
Recordings: All the live recordings from Circle live sessions, including live events.
Audio: Audio files including voice messages.
Images: All the images, including JPEG, PNG, and other image formats.
Files: Different types of files, including PDFs, Word files, and more.

Switching between tabs lets you quickly narrow down to the file type you need.
Check your storage usage
At the top of the media manager (visible in every tab), you’ll see a storage summary that helps you understand how much space your community is using.
This section includes information on how much storage is used from the total storage included in your community plan.
A color-coded usage bar showing how much storage is used. Each color corresponds to a media type, so you can quickly see which kinds of files are taking up the most space.
-
Just below the bar, storage is broken down into categories. Each category is paired with a colored dot and the amount of storage it’s taking up:
Video originals - The original video files you’ve uploaded.
Video encodings - The automatically generated encoded versions of your uploaded videos and recordings.
Recordings
Audio
Images
Files
📚 For a detailed guide on storage limits, what is included in the limit, and how overages work, see Understanding and managing your community’s storage.
Filter media
Each tab includes filters, allowing you to narrow down the results. You can filter by:
Name: Enter part of a file name.
Owner: Search by the person who uploaded it.
To do so:
Click Filters in the right corner.
Click the filter you would like to apply from the filters bar.
-
Enter the filter criteria, such as the file name, and click Apply.
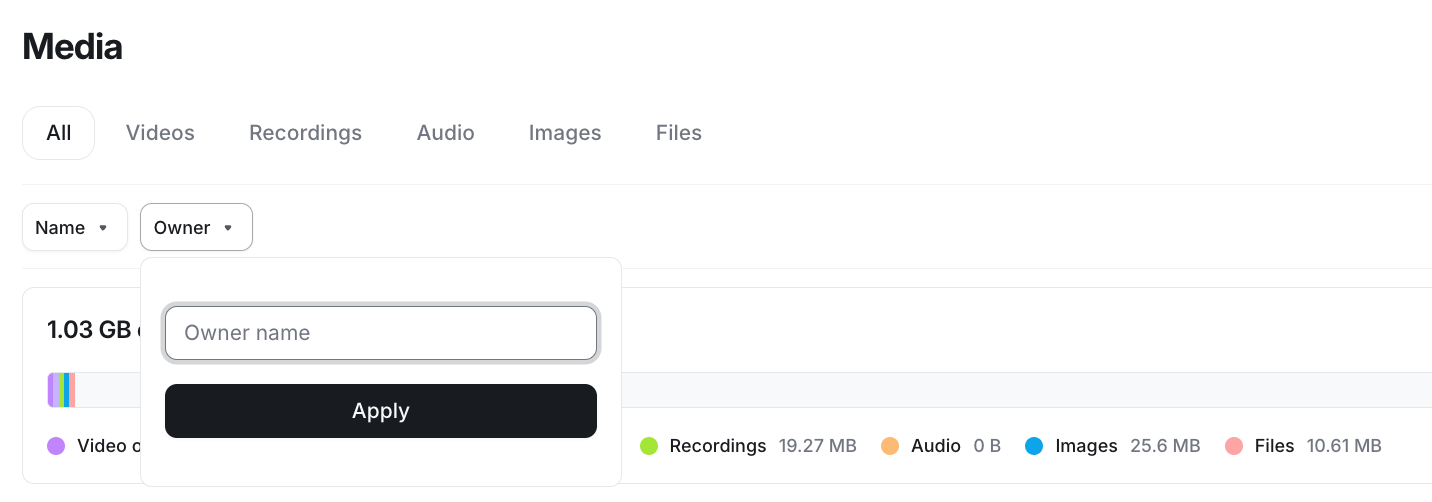
Keep in mind that filters use an AND condition, so if you apply both name and owner filters, results must match both.
Sort media
You can sort the media table in any tab by clicking on sortable column headers, such as name, date added, and file size.
For example, click the File size column to arrange media from largest to smallest and vice versa. An arrow will show up to indicate the sorting order. To toggle between sort orders, click the column title again.
View the media list
Below the storage summary is the main list of media files. Each file shows:
-
File name
Private files will display a Private label beside the file name.
Category
Owner (who uploaded the media)
Date added
File size
❗ Important notes about private media:
Admins can see all media uploaded across the community in the media list, including those shared in DMs.
However, admins cannot preview, download, or delete media from DM conversations. If the video is shared in private DMs, admins cannot customize its settings or access analytics.
If you need to delete the private media, ask the owner of the media file to delete it from their DM conversation.
See media details and previews
You can open the details page for any media file in two ways:
Click the file name directly in the list.
Or hover over the file, click More actions (three dots) and select Details.
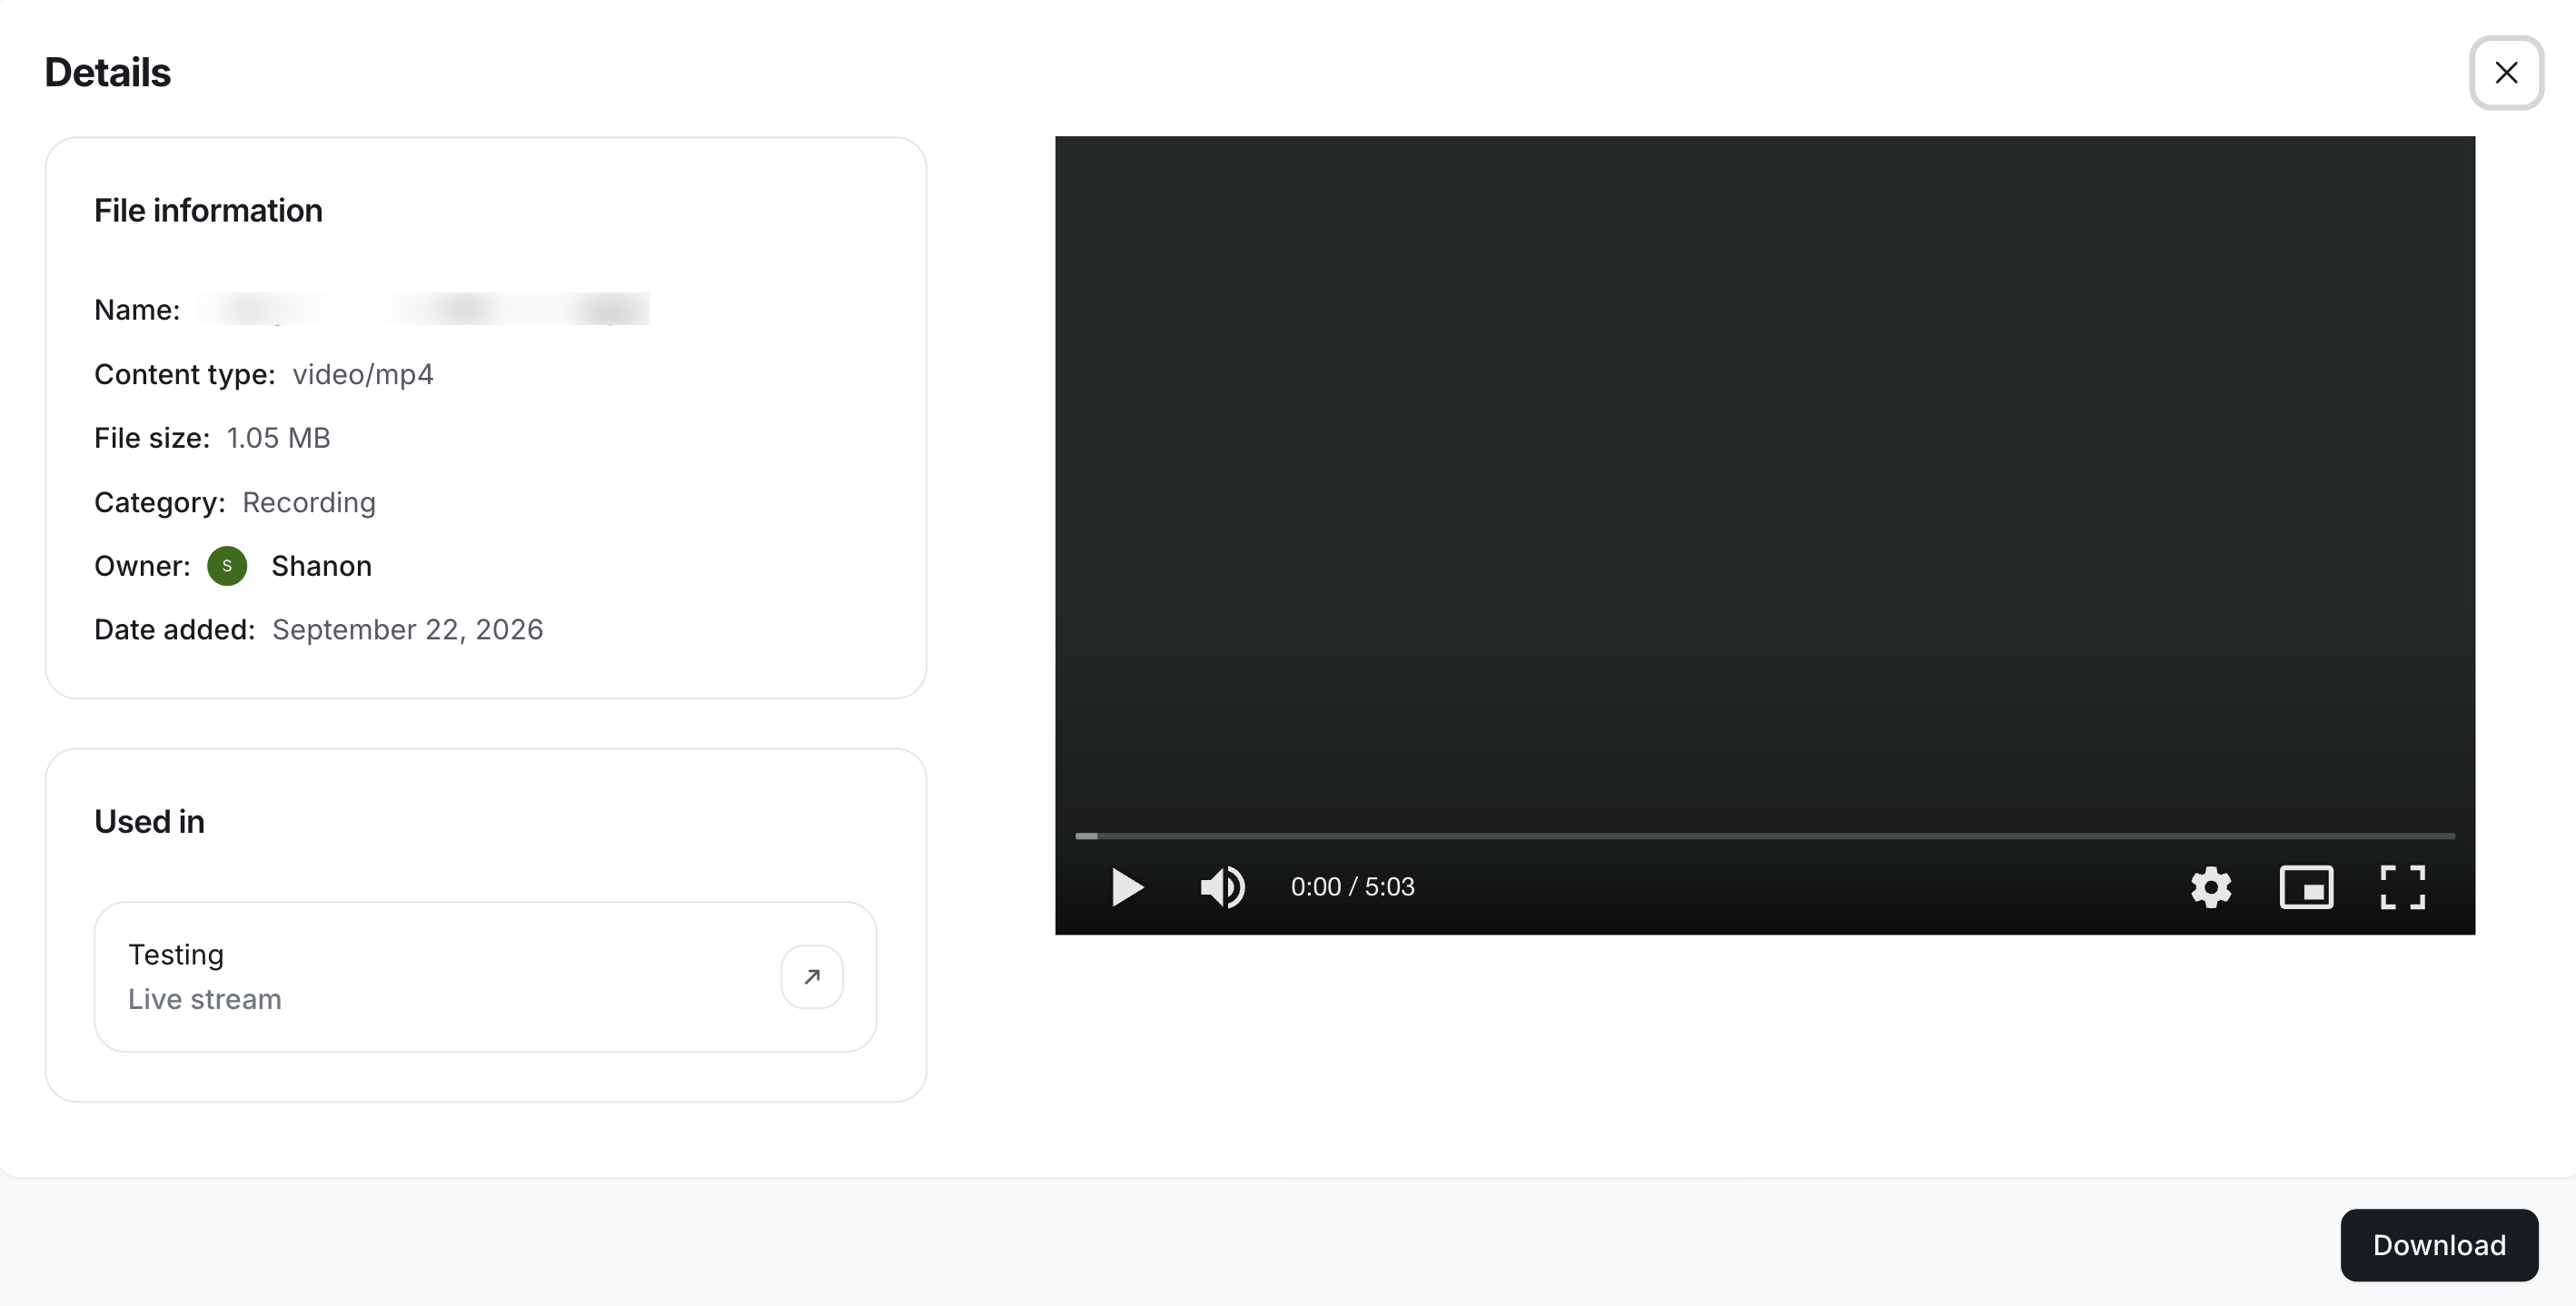
On the left of the details page, you’ll see:
File name
Content type
File size
Category
Owner (click their name to view their profile)
Date added
Used in (view where a file is used)
On the right, you’ll see a file preview (for example, images, PDFs, and videos).
View where a file is used
The Used in section on the file details page shows where a file is added in your community.
In this section, you’ll see a list of all the places where the file is currently added, such as posts, lessons, events and, paywall or upsell checkout pages. Each entry is clickable, allowing you to select it and open the content in a new tab to review how the file is being used.
-
💡 Tip: If you see multiple locations, it usually means the same media file exists in duplicated content. For example:
A post containing the file is duplicated within the same or a different space.
A live recording that is automatically posted to an event and also posted to a post type space from the live dashboard.
ℹ️ Note: Admins cannot see where the file is located if it is shared in DM conversations.
This visibility is especially helpful when you’re cleaning up old media or trying to free up storage space. Instead of guessing whether a file is still in use, you can confirm it right from the details view.
Download media
To download a file:
Hover over a file on the list.
-
Click More actions (three dots) and select Download.
The file will be downloaded to your device.
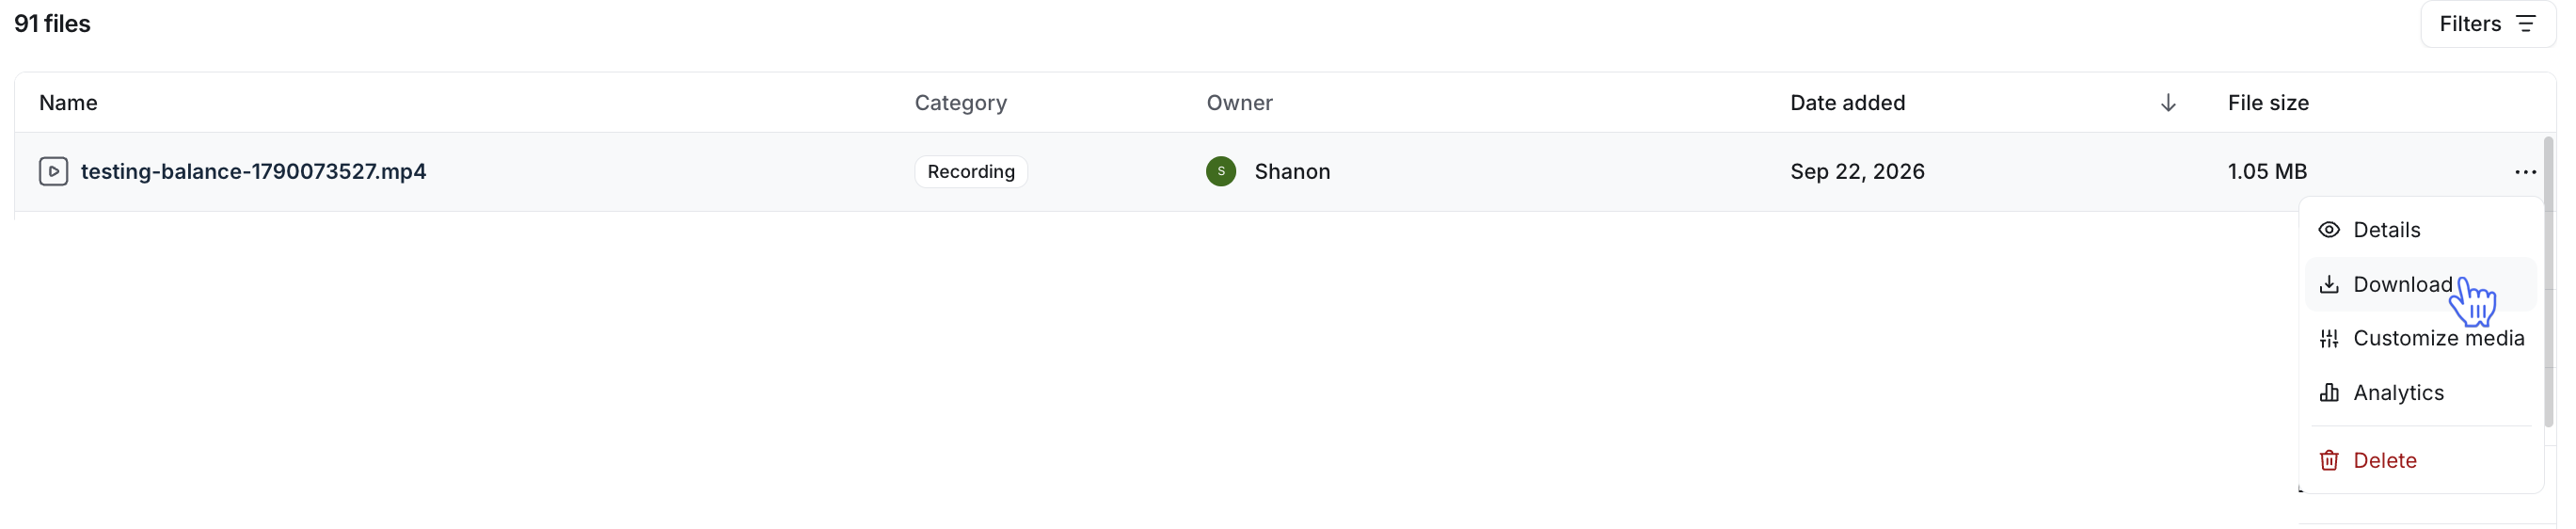
ℹ️ Note: Admins cannot preview, download, or customize media from members’ private DM conversations.
Manage videos
Admins can manage uploaded videos and recordings in the community. Available options include:
Update video thumbnails.
Enable or disable downloads.
Manage transcriptions.
Video analytics, including views and completion rates.
To access these tools:
Hover over a video in the list.
-
Click More actions (three dots) and select Customize media or Analytics. Alternatively, you can hover over the video player while previewing it, and click the Customize media (setup icon) in the top-right corner of the video.
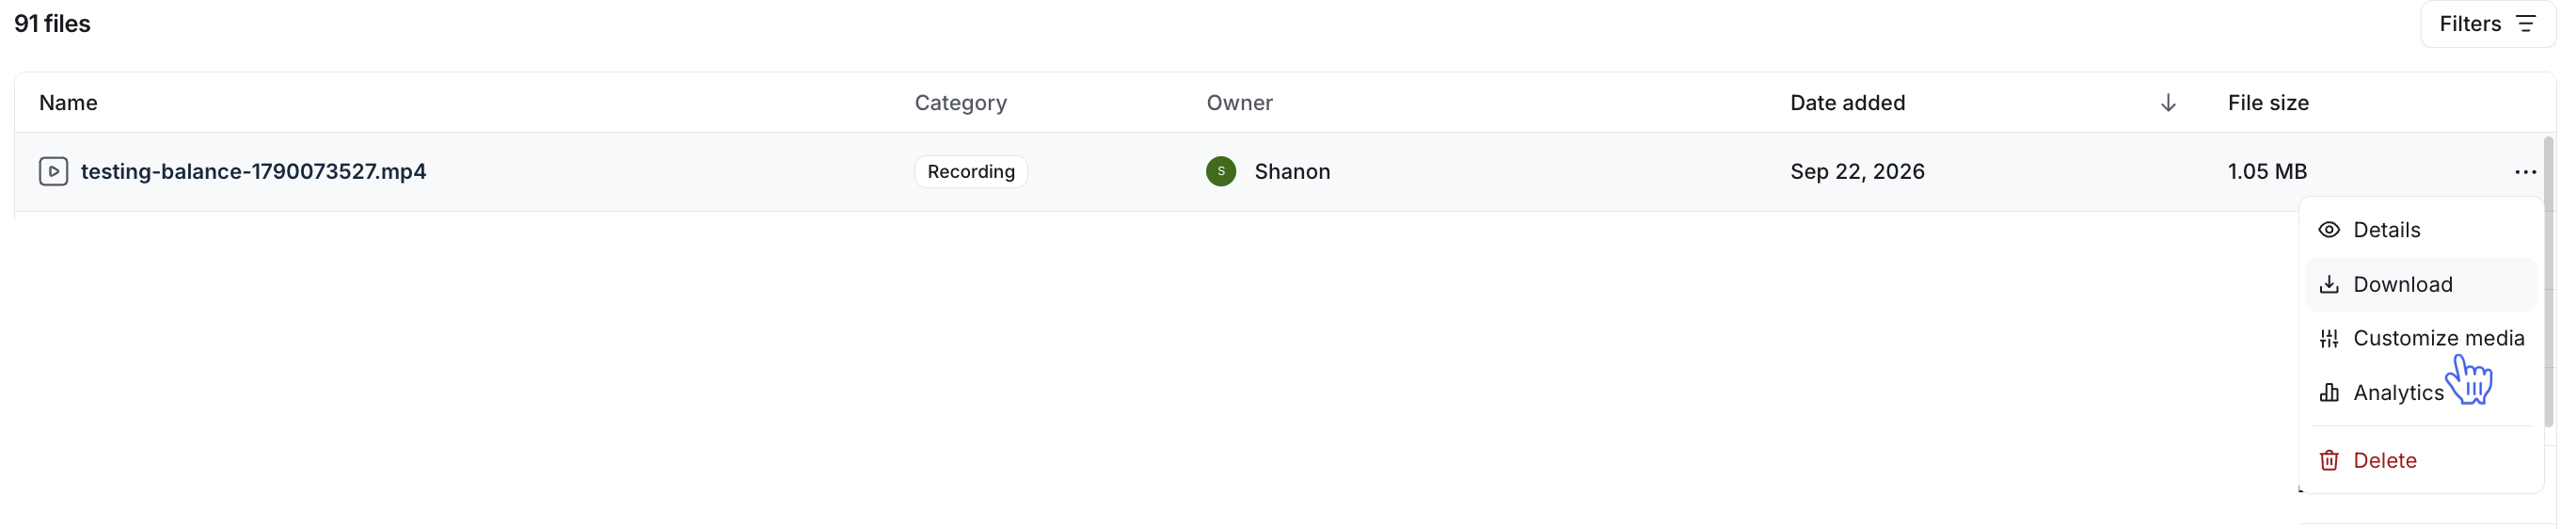
📚 For detailed steps, see Guide to video customizations.
Delete media files
You can delete files you no longer need. When you delete media, only the file itself is removed; the post, lesson, event, or other content where it was uploaded stays in place, just without the media.
To delete a media file:
Go to the relevant tab (such as Videos or Files). Use sort or filter options if needed to find the file.
Hover over the file in the list, click More actions (three dots) and select Delete.
Confirm the deletion in the dialog.
📚 For detailed steps on deleting files, including deletion tips and how it affects storage, see How to free up storage space.
Control how members upload media
As an admin, you can control whether members can upload media files to posts, comments and chat rooms (including DMs), helping you better manage your community’s storage usage.
To find these settings:
Click your community name or logo (or the dropdown beside it) and select Settings.
From the sidebar menu, select General and scroll down to the Defaults section.
From here, you can enable or disable the following settings:
Allow members to upload media: When disabled, members will no longer be able to upload media files such as images, videos, audio files and GIFs to posts, comments, chat spaces, and group or direct messages.
-
Allow members to record voice messages in posts: When disabled, members will no longer be able to upload voice notes in posts or comments.

ℹ️ Note: These settings only apply to members. Admins and Moderators will still have the ability to upload media.