Understanding invited members
Last updated: December 06, 2024
Managing invited members is essential to maintaining an active and engaged community. This article guides you through key aspects, including understanding invited members, tracking their onboarding journey, interpreting invitation statuses, and more.
About invited members
When a new member joins your community, they must complete the onboarding process to activate their community account. This process is essential and applies to new members who join through any of the methods, including:
Circle’s invitation method
API
Integrations such as Zapier
Self sign-up to a public community
Invitation link
Paywall purchase
The onboarding journey may differ depending on how the member signs up, but it typically includes steps like accepting the invitation, creating an account, and confirming their profile. Until members complete the final step—confirming their profile—they remain invited.
Access the invited members' list
To access the list of all individuals who haven’t completed the onboarding journey, follow these steps:
On the top navigation bar, click your community name or logo—or the dropdown icon next to it–and select Audience.
-
On the Manage audience page, go to the Invited tab.
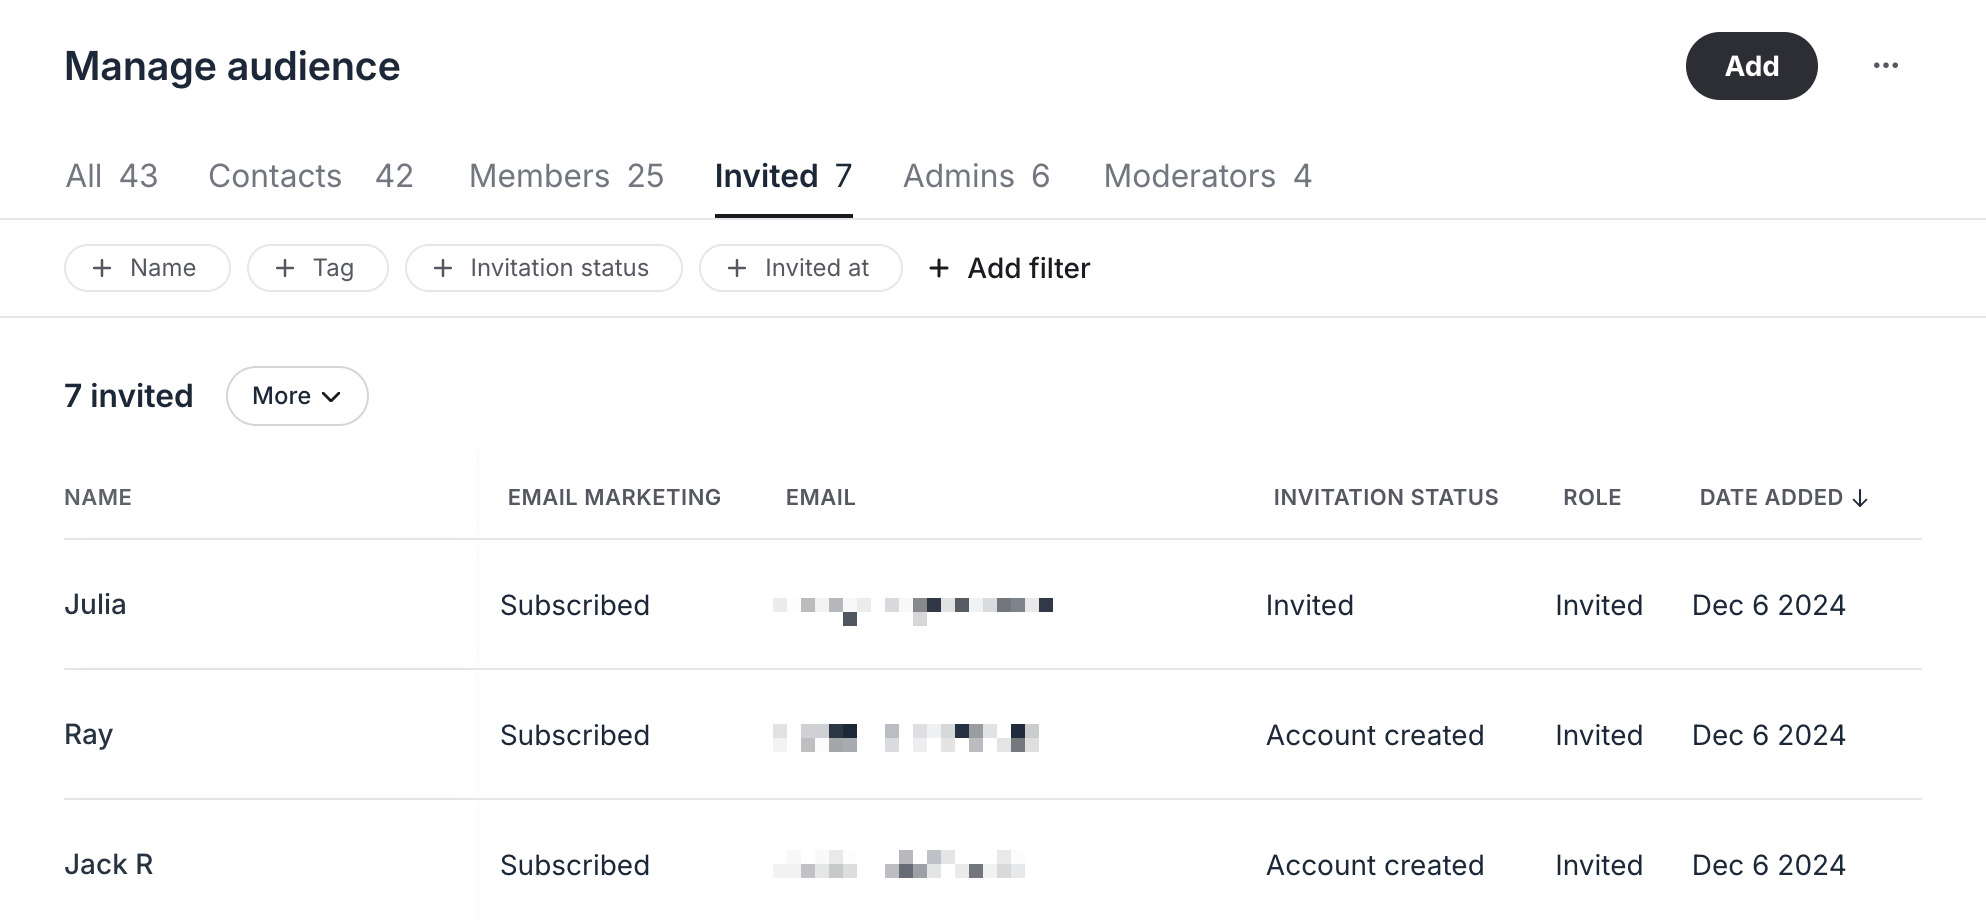
On the Invited tab, you'll see all individuals who have begun the onboarding process but haven't yet finished all the required steps. Here, you have the option to:
You can use various filters to refine the result. For example, you can utilize the Invitation status filter to find members based on their current status.
Export the list as a CSV file.
Manage member accounts with options including editing or deactivating a member's account if necessary.
Key information about invited members
Here are some important details to understand about members in invited status:
-
Visibility in the community:
@Mentions: You cannot @mention invited members within your community.
Member directories: Invited members do not appear in the member directory or the space or space group’s members lists until they complete onboarding.
-
Workflows: If you use Circle workflows, invited members may be included in the workflow run depending on your entry rule configurations.
For instance, if you have an automation workflow set with Tag added entry rule for members, actions like assigning them to a space will run even if the member is still in invited status.
Similarly, if you set up a bulk action workflow with a Role audience filter for members, invited members are also included in the audience. You can refine the audience by utilizing the Invitation status filter as well.
Marketing email subscriptions: If Email Hub is enabled, members are automatically subscribed to marketing emails when they are invited to the community or when they join by themselves. They have the option to unsubscribe any time using the option available in the footer of any marketing email.
Notifications: Translational email notifications, such as event invites from the community, are not sent to invited members.
Tracking invited members
Circle provides features such as invitation timelines and invitation filters to help you track where a member is in their onboarding journey. Members are assigned one of four invitation statuses and displayed with a timeline, depending on how they joined the community:
Invited
Invite opened
Account created
Profile complete
❗Important: Members added before November 29, 2024, may not have their invitation statuses tracked. As a result, the dropdown icon to access the invitation status timeline may either be unavailable or display only information recorded after November 29.
For more information about the visibility of invitation statuses and timelines, see the Understanding invitation statuses section in this article.
Accessing invitation timeline
The invitation timeline provides insights into members’ onboarding journey, showing the statuses (in this context, you can think of them as steps) they’ve completed.
You can view the invitation status timeline for any community member from their profile. To do so, follow these steps:
On the top navigation bar, click your community name or logo—or the dropdown icon next to it–and select Audience.
Go to the appropriate tab and locate the member.
-
Hover over the member’s name, click the More actions (three dots) icon next to the name, and select Edit.
-
In the Overview section, click the dropdown icon next to the Invitation status.


The invitation status dropdown will display up to four statuses, along with the dates each status was completed. This information helps you pinpoint where a member is in their onboarding journey and address any roadblocks.
Invitation status filter
The invitation status filter enables you to identify and target members based on their current onboarding stage. It consists of all four status options.

This filter is available in the following areas of the community:
Manage audience page: You can utilize this filter in the All, Contacts, and Invited tabs of the Manage audience page. You can use it to refine the member list by their current invitation status.
Circle workflows: When setting up a bulk action workflow, the Invitation status audience rule enables you to focus on members in a specific stage of the onboarding journey.
Broadcasts: When preparing a broadcast, you can take advantage of the Invitation status filter to reach out to members at a particular stage in their onboarding journey, allowing you to send them tailored emails.
Key things to know about status visibility
Understanding how invitation statuses are tracked and displayed is essential for effectively monitoring your members' onboarding journeys. Here are the key points to keep in mind:
Status tracking
Invitation statuses are only tracked starting November 29, 2024, when the timeline feature was introduced. For members added before this date, their past statuses or timelines won’t appear. Only the statuses related to their onboarding journey tracked after this release are visible on the timeline.
For example, if a member was invited before November 29 but accepts the invite and confirms their profile after that date, only the statuses from Invite opened onward will show on their timeline.
If a member confirms their profile before November 29, their timeline shows only the most recent status, not the full invitation timeline.
❗Important: When a member's invitation status is not available, a dash (➖) symbol appears instead of a status. See Direct sign-up methods section for more details.
Inviting members by sending an invitation email
The Invited status appears only when an invitation email is sent to a member.
If you invite members without sending an invite email or if they join through other methods (e.g., API, invitation link, or paywall purchase), the Invited and Invite opened statuses will not appear on their timeline.
Direct sign-up methods
When members join through certain direct sign-up methods, their timeline will display a dash (➖) symbol until they confirm their profile. These methods include:
Being invited to the community without an invitation email.
Being added via API.
Signing up to a public community.
Joining via an invitation link.
Joining through paywall purchase.
In this case, after members confirm the profile, you’ll be able to see both the Account created and the Profile complete status with their timeline.
Understanding invitation statuses
Let’s learn about each status in detail:
Invited
This status is assigned to a member when you invite them via Circle’s invitation method or resend the invitation.
Invite opened
If an invitation email was sent to a member, this status is assigned when the member has clicked the Accept invitation button in the invitation email.
Account created
This status is assigned when a member submits a password on the sign-up form to create their account.
For members added via API, this status reflects the date they were added through the API.
If a member already has an account in another Circle community under the same email, this status will display the date when they sign in to your community for the first time.
Profile complete
This is the final status assigned when a member confirms their profile. On the profile creation page, members can add a profile photo, add profile information, and adjust permissions. If there are no required custom profile fields, they can skip this step to fill out profile information later.
Once they take action on the profile creation page and land in the community, their onboarding journey will be complete. This transitions the member from invited to a fully active member.