View and manage your community members
Last updated: March 24, 2025
Effortlessly view your community members and contacts categorized in various roles, invite members, perform bulk actions, and manage members with just a few clicks—all within the Manage audience page!
View members
To access the Manage audience page, click your community name or logo—or the dropdown icon next to it—at the left of the top navigation bar and select Audience.
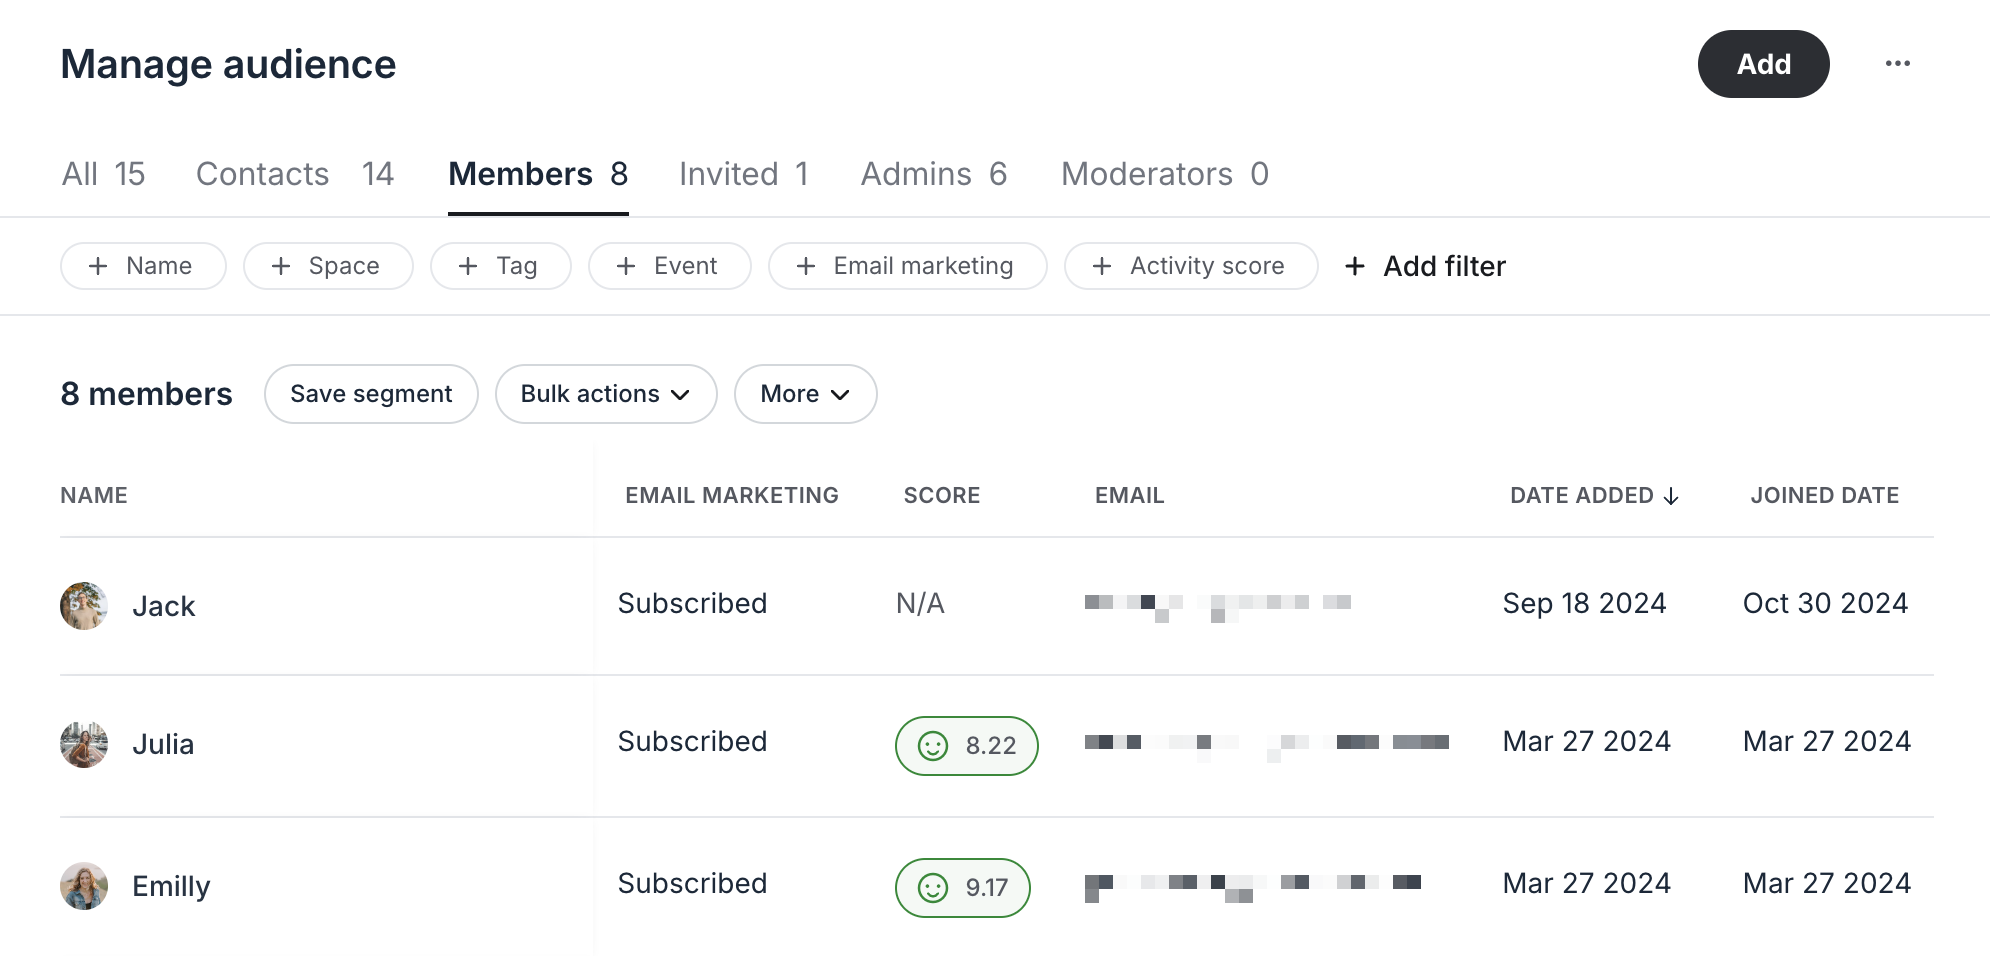
On the Manage audience page, you’ll see the following tabs:
All: This tab displays a comprehensive list of everyone associated with your community, including both members and non-members, regardless of their role or status.
Contacts: Here, you’ll see all contacts (including members and non-members) who have subscribed to receive marketing emails through the Email Hub.
Members: This tab includes a list of all community members who have completed their onboarding process.
Invited: This tab shows all individuals who have been invited or who signed up by themselves but have not yet completed the onboarding process.
Admins: Access a list of all members who hold administrative privileges within the community.
Moderators: View members assigned as moderators, either for specific spaces or space groups.
Depending on what tab you are on, you can see various columns displaying audience information, such as:
Name of the individuals
Whether an individual is subscribed to email marketing
Email
Role
Invitation status
Joined date indicating the date when the member confirmed their profile and completed sign up process
And more
💡 Tip: To edit the profile of any individual from the list, simply click their name or profile photo.
Let’s take a look at how you can filter or sort audience.
Filter
The filters available vary by tab, allowing you to refine your audience and efficiently locate specific members or non-members.
To filter the audience, follow these steps:
-
Select a filter: Choose one of the default filters visible on the filters bar or click Add filter to access additional filters. You’ll be able to use various CRM, platform, and profile fields as filters.
ℹ️ Note: Filters dedicated to members, such as event, space, or activity scores, will not include non-members in the results.
-
Set your criteria: After selecting a filter, enter the relevant criteria. Certain filters support advanced conditions for more precise filtering.
-
Using filter conditions: These conditions are available to text type and list type filters such as name, headline, location, and space access (including checkbox and dropdown type profile fields). Depending on the type of field you are applying as a filter, you can use one of the following conditions:
Contains (available only to text, link, and number type fields)
Does not contain (available only to text, link, and number type fields)
Is
Is not
Is empty
-
Is not empty
💡 Tip: You can also apply these conditions in workflows for audience rules and in broadcasts when applying custom filters to add recipients.
-
Apply the filter: Click Apply or Done to finalize your selection.

Filters are applied using the "And" condition, meaning all selected criteria must be met. To refine your search further, you can apply the same filter multiple times, creating highly specific combinations for more granular results.
The available filters vary based on the tab you are viewing, including:
Segment: Use segments as a filter and choose from your saved segments to quickly filter your audience list.
Tag: Filter individuals by tags assigned to them for segmentation or organization.
Name: Search for members or non-members by their name.
Email: Filter based on email address.
Email marketing: Filter members or non-members by their email marketing subscription status. (Available on all tabs except Contacts, which only shows individuals subscribed to marketing emails.)
Member: Filter list to show individuals based on their membership status. This filter is available on the All and Contacts tabs. When you select the filter option "Yes," the list will show only active members who have completed their profiles. If you choose the filter option "No," the list will include non-members as well as individuals who have been invited but have not yet completed their profiles.
Invitation status: Filter members by the current status of their onboarding journey, such as invited or account created.
Invited at: Narrow down members based on when they were invited to join.
Invitation link: Identify members who joined via a specific invitation link.
Role: The Role filter lets you refine the list by specific roles, such as admin, moderator, or member. It also includes individuals who have been assigned a specific role (e.g., admin) but are still invited and have not yet completed their profiles.
Space access: Narrow down the members list based on whether they are members of a specific space.
Space group access: Narrow down the members list based on whether they are members of a specific space group.
Status: Identify members based on their current online or offline status.
Headline: Filter members by the headline on their profile.
Paywall subscription: Refine the list by members subscribed to a specific paywall.
Event RSVP: Find members who confirmed their RSVPd to a specific event, whether upcoming or past.
Past due subscription: Identify members whose subscriptions are in a past-due status.
Join date: Filter members based on when they joined the community.
Last logged in: Find members according to their most recent log in.
Has profile photo: Filter members based on whether they have uploaded a profile photo.
Activity score: Narrow down members by their engagement level, as indicated by their activity score. You can use the slider to select the score range.
Level: Identify members based on a specific Gamification level within the community.
Access group: Narrow down the members list based on whether they are members of a specific access group.
Profile fields: You can filter members using default profile fields such as location or bio. If you have set up custom profile fields in your community, you can also filter members by custom profile fields.
Sort
You can organize the member list by sorting the information into a specific column. The available columns for sorting include the following:
Name: Sort members alphabetically by their name from A to Z or from Z to A.
Score: Arrange members by their activity score, either from highest to lowest or vice versa.
Joined date: Sort by the date members joined the community, either from the latest to the oldest dates or the reverse.
Date added: Organize members based on when they were invited, starting with either the most recent or the oldest dates.
Click the column title you want to use for sorting. For example, to arrange members by their activity score, click the Score column. An arrow will show up to indicate the sorting order. To toggle between sort order, click the column title again.

Please note that once you navigate away from the tab or Manage audience page, the column will automatically reset to the default arrangement.
Save segments
Segments let you quickly save and access specific audience filter combinations, making it easy to view and manage distinct groups within your community.
On the Manage audience page, you can apply filters and save the combination as a segment for future use by clicking Save segment below the filter bar. This option to save segment is available on all tabs of the page, except for the Invited tab.
📚 To learn more about segments, see our guide here.
Manage members
To manage a member, navigate to the appropriate tab on the Manage audience page and locate the member you wish to manage. You’ll have access to several options, including:
Edit member profile: Update the member's information, such as their profile details, update their access, or view and manage billing.
View profile: View the member’s profile information, content, tags, email address, and Gamification rewards.
View as: Preview community from the member's perspective.
Unsubscribe: Unsubscribe members from email marketing.
Deactivate member: Deactivate a member's account anytime, revoking their access to the community.
To access these options, hover over the member’s name and click the More actions (three dots) icon next to the name.
💡 Tip: If you are looking for information on how you can manage non-member contacts, see our guide here.

Perform bulk actions
If you are on the Business plan or above, you can perform the bulk actions directly from the Members, Admins, or Moderators tab on the Manage audience page using Circle workflows. You can also utilize the filters to narrow down the audience for the bulk actions.
To perform a bulk action, click the Bulk actions option below the filters bar and select your preferred action from the list. This will take you to the bulk action workflow setup, which has audience rules pre-configured. Customize the action setup, add more actions, or make any changes you need, and then run the workflow.
You can perform the following bulk actions directly from the Manage audience page:
Send a direct message
Remove member(s) from community
Send mobile push notifications
Add member tag
Remove member tag
Add member(s) to space
Remove member(s) from space
📚 To learn more about bulk action workflows, see Set up a custom bulk action workflow.
Preview community as a member
To experience your community exactly as a specific member does, you can utilize our “View as” feature.
It allows you to navigate and preview access to spaces without compromising the member's privacy. It can be really helpful when you’d like to validate your community's sidebar visibility by viewing as a member. This helps you experience your visibility configurations as the member would see them.
To preview as a member, hover over the member’s name, click the More actions (three dots) icon next to the name, and select View as.
📚 For more information, see Preview your community as a member.