Get to know Connect (Beta)
Last updated: May 2026
Connect brings authentic human connection to the center of your community. Instead of just posting and commenting, members can now build real relationships and grow their own network, similar to LinkedIn, but fully tailored to your brand and audience.
In this guide, we’ll explore how to enable Connect, navigate the Connections page, send and receive requests, and understand how recommendations work.
About Connect
Connect introduces a new way for members to form direct relationships inside your community. Members can send and receive connection requests, explore recommended people to connect with, and build a personal network over time.
With a redesigned directory built for discovery, Connect makes it easier for members to find people based on shared attributes, location, and engagement across the community. Recommendations help surface relevant connections, while connection requests provide a lightweight way to start one-to-one relationships without initiating a direct message.
ℹ️ Connect is currently in beta and being rolled out to communities in phases.
Availability
Connect is supported across all Circle plans at no additional cost, and is available on web browsers, desktop, and mobile apps.
Key things to know about Connect
-
The member directory must be Public for members to access the Connections page.
ℹ️ Note: If the directory is private, members can still send connection requests, browse recommendations and view their connection lists from the Connect panel.
Users will receive email notifications for incoming connection requests by default. Toggle these on or off from your notification settings.
Once connections are added, they cannot be removed at this time.
Connect is available to admins, members and moderators. Non-members cannot use the feature.
Enable connect
Once your community is eligible, you’ll see a dialog upon signing in to let you know that Connect is now available for your community.
To enable Connect:
On the top navigation bar, click your community name or logo (or the dropdown icon next to it) and select Audience.
From the sidebar menu, go to Connections.
Click Set up Connect.
Using Connect
Connections page
With Connect enabled, the member directory becomes the Connections page, where users discover people, manage connection requests, and grow their network.
To access the Connections page, navigate to the Member directory in the top navigation bar through the Circle desktop app or a web browser. The Connections page is not available for mobile apps.
On the Connections page, you’ll see two tabs:
-
All members: This view combines connection requests, personalized recommendations, and the full member directory in one place. From this page, users can review and respond to incoming requests, discover people they may want to connect with, browse all community members, and use search and filters (such as Near me, Sign-in status, Recently joined, Location and Tags) to find relevant connections.
💡 Tip: The member filters available on the Connections page are set by default. If you'd like to add specific filters such as profile fields, please contact our support team, who can help customize the filters on your Connections page.
My connections: To focus on your existing network of active connections, select My connections at the top of the page.
ℹ️ Note: To allow users to access the connections page, the member directory must be set to Public.
Connect panel
The Connect panel provides quick access to your connection activity through desktop/web browsers and mobile apps.
Desktop/Web browsers
To access the Connect panel on desktop or web browsers, click the Connections button in the top-right corner of the community header.
Mobile apps
To access the Connect panel on iOS, Android or branded apps, tap your profile picture in the top-right corner and select Connections.
In the panel, you’ll see two tabs:
Discover: Here, you can respond to incoming connection requests, as well as view and connect with your personalized recommendations.
My connections: Select this tab to view a list of your active connections.
ℹ️ Note: The Connect panel is available for both Public and Private member directories.
Member map
The member map shows where members are located based on the location set in their profile. It includes members who have added a location (city or town) to their profile and set their profile to visible in the member directory.
Before you start
The member map pulls location data from the Location profile field. For the member map to be visible, the following conditions must be met:
The Location profile field must not be archived.
The Location profile field must have Visible in full profile view enabled.
To open the member map, navigate to the connections page and click Show Map in the top right corner.

How the member map works
Member locations appear as pins on the map based on the location set in their profile.
When multiple members are located in the same area, they appear as a cluster. Selecting the cluster zooms in to reveal the members in that area.
If many members share the same location, they appear in a circle around the cluster, with additional members accessible through the filtered member directory.
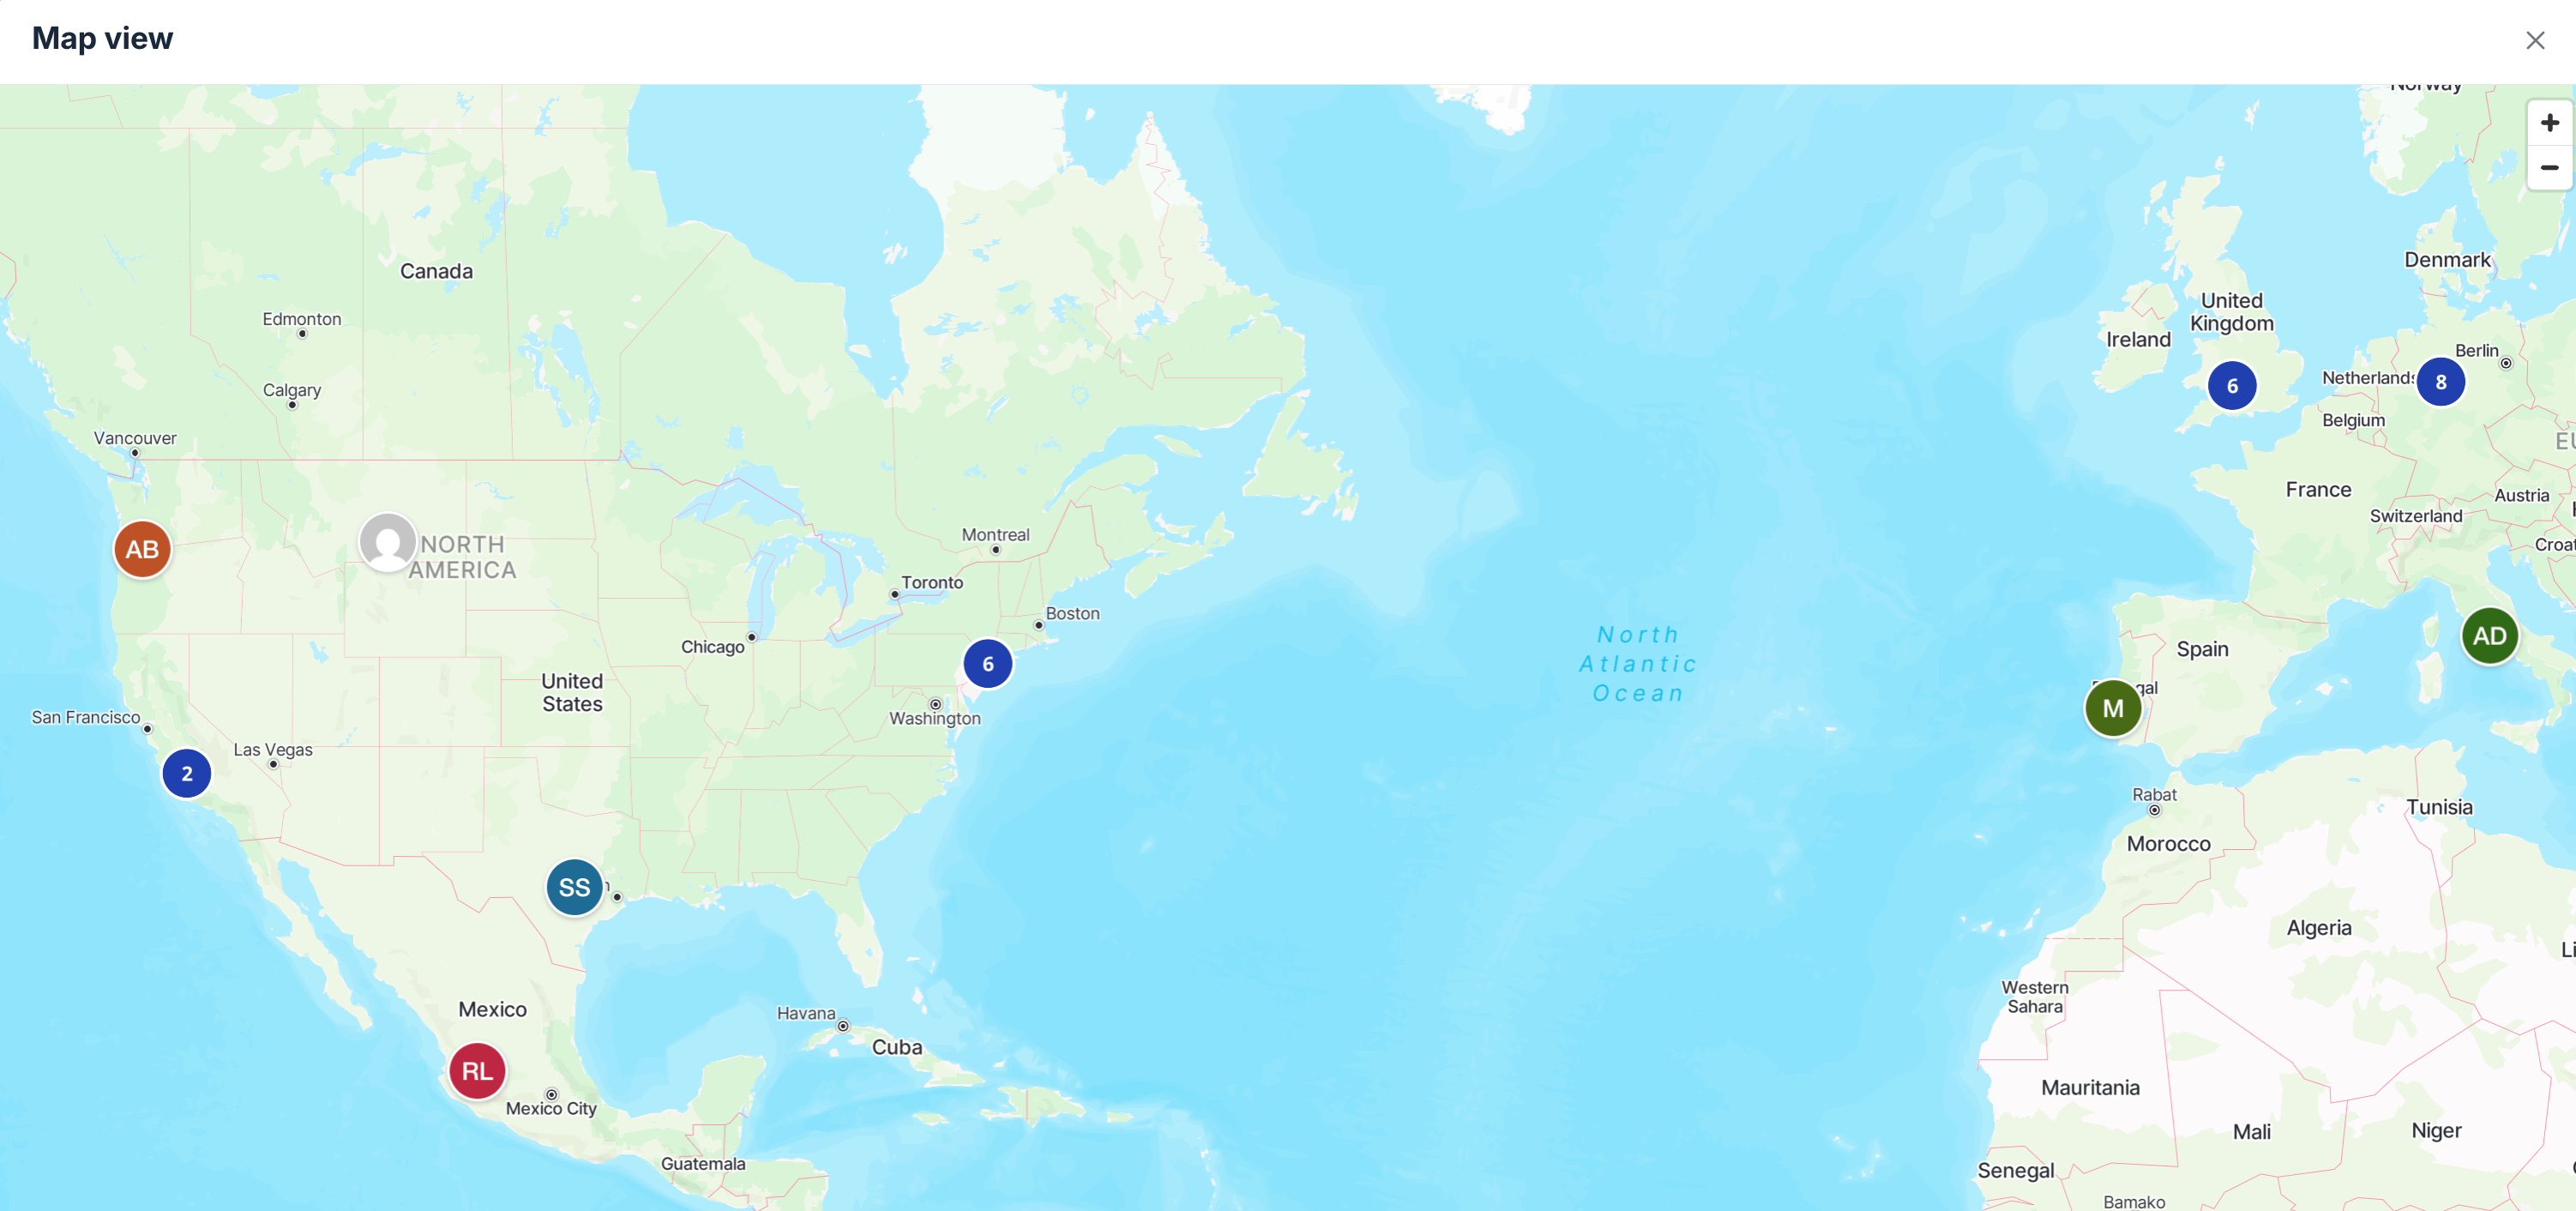
Viewing member details through the member map
Selecting a member on the map opens a profile card where you can:
View their information
Send a connection request
Open their full profile
ℹ️ Note: Location updates may not appear immediately because some map data is cached.
Managing your connections
Sending a connection request
There are a few ways to connect with others through the community via desktop, web browsers and mobile apps:
Connections page (desktop and web browsers): Discover relevant users through recommendations or filters on the connections page. Click the Connect button on a profile to send a connection request.
Profile cards (desktop and web browsers): Hover over a user’s name or avatar in various parts of the community, such as the feed, comments or posts, to open their profile card and click the Connect button to send them a connection request.
Member profiles (all platforms): You also have the option to send a connection request through the Connect button when you open a user’s profile.
Once you’ve sent a connection request, the user’s profile will display a Pending badge.
Manage connection requests
You can accept or ignore requests from the Requests section of the Connections page or through the Discover tab in the Connect panel.
Accepted requests instantly add both users to each other’s My connections page.
View your connections
You can access your full list of connections in two places:
Connections page: Navigate to the connections page and select the My connections tab on the top of the page.
Connect panel: Open the Connect panel and select the My connections tab.
Connect notifications
Email notifications for incoming connection requests are enabled by default. You can disable notifications for Connect in your Notification settings.
Manage Connect for your community
Connect settings
As an admin, you can control whether Connect and Recommendations are available, configure the appearance of the member directory, and manage community-wide messaging settings.
To find your Connect settings:
On the top navigation bar, click your community name or logo (or the dropdown icon next to it) and select Settings.
From the sidebar menu, go to Connect.
Here, you can adjust the following settings:
Enable connections: Toggle Connect on or off for your community.
Recommendations: Toggle recommendations on or off.
-
Manage the member directory: Control how the member directory (Connections page) appears and is organized, including:
Visibility: Choose whether the directory is public or private.
Layout: Select a grid or list view.
Default sort order: Set how members are ordered by default, such as Alphabetical, Oldest, or Latest.
-
Messaging: Manage community-wide messaging controls. From here, you can enable or disable:
Messaging for the entire community
Member-to-member messaging
Group messaging
Voice messaging
You can also quickly adjust the Directory visibility, Default view and Default sort by clicking the Manage button in the top right corner of the Connections page.
Connect analytics
Connect analytics help you understand how members are forming relationships in your community. Use these metrics to track adoption, measure engagement, and understand how connected your community is over time.
To view Connect analytics:
On the top navigation bar, click your community name or logo (or the dropdown icon next to it) and select Audience.
From the sidebar menu, go to Connections.
The admin dashboard provides an overview of useful metrics such as:
Total connections
Average number of connections per member
Total new connections in the past seven days
Connectedness (percentage of members with three or more connections)
Top connectors
Recent connections
Frequently asked questions (FAQs)
Why don’t I see the option to enable Connect?
We’re rolling out the Connect beta in phases. Once your community is eligible, you’ll see a dialog upon signing in to be informed, as well as the option to enable Connect under Settings → Audience → Connections.
How does the Connections page differ from the Member directory?
Connect redesigns the member directory and adds relationship features on top. Members can now send connection requests, see personalized recommendations, and message their connections privately.
How do recommendations work?
Recommendations are based on profile attributes such as tags, shared engagement (mutual spaces or courses), and your existing connections.
Why don’t I see the connections page?
The connections page is only available when the member directory is set to Public. If the directory is Private, users will still have access to the Connect panel and can send connection requests from member profiles.
Can I limit Connect to specific member tiers or segments?
Not yet. When you enable Connect, it's visible to all members. We're considering adding this in the future.
How do I give feedback or report a bug?
You can report a bug or provide feedback on the beta by contacting our Support team or by posting in the Connect beta space.