Customizing SEO information
Last updated: October, 2026
Enhancing your community's online presence is vital for attracting and engaging users effectively. By customizing Search Engine Optimization (SEO), you can significantly improve your community's visibility in search engines and create more appealing link previews on social networks. In this article, we’ll walk you through all the options available when customizing SEO for your community.
Manage sitewide SEO settings
You can manage global SEO settings that affect how your entire community appears in search results. These settings control whether your site is indexed, how search engines crawl your pages, and how your domain is recognized by Google.
To update these settings:
Click the community name or logo (or the dropdown icon next to it) in the top-left corner and select Settings.
Scroll down to the Website section and select SEO.
Indexing
Allow search engines to index your site: Turn this setting on to make your community appear in search engine results.
robots.txt: Use this field to control how search engines crawl your community. You can add rules to allow or block specific paths or pages. If the field is blank, Circle uses a safe default configuration.
Google site verification
Add your Google site verification ID to connect your community to Google Search Console. This verifies ownership and lets you access search performance data, request indexing, and submit sitemaps.
📚 To learn more about how to verify your site, please see Verify your site with Google Search Console.
Global canonical tag URL
Set a global canonical URL for your community. The canonical URL tells search engines which version of your site to index and helps prevent duplicate content issues.
Allow search engines to index user profiles
You can allow member profiles to be indexed by search engines for your public community. This means that when someone uses a search engine to find information about your community or its members, those user profiles will appear in search results.
It’s important to note that your community can only be indexed when it is set to public. If your community is set to private and you’ve enabled the indexing for user profiles, individuals won’t be able to view profiles without logging in to the community first.
💡 Tip: If you are looking to get a sitemap for your public community, see Accessing the sitemap of your public community.
To enable this option:
Click the community name or logo (or the dropdown icon next to it) in the top-left corner and select Settings.
Scroll down to the Website section and select SEO.
-
Turn on the Let search engines index your sites toggle.

Add a default Open Graph image
By adding a default Open Graph image for your community, you can ensure that your community link is always presented in the best light on social media. This image will automatically be used as the default when no specific Open Graph image is assigned to the content. This image will also appear when you share sign in or sign up URLs on social media.
ℹ️ Note: If the default Open Graph image is not added, a default Circle image will be used instead.
To add the default image:
Click the community name or logo (or the dropdown icon next to it) in the top-left corner and select Settings.
Scroll down to the Website section and select General.
In the Branding section, click Select image next to the Default Open Graph Image.
📷 Recommended Open Graph image dimension: 1200x630 px with a 1.91:1 aspect ratio.

Add SEO information to your community
When it comes to SEO, you can add meta tags and Open Graph information to various parts of your community, including the Feed, spaces, posts, and events.
Meta tags play a pivotal role in your SEO strategy. They are behind the scenes, but their impact on how your community's links rank and appear in search engines is significant.
Open Graph tags, on the other hand, aren't just about SEO; they're your ticket to creating richer, more compelling link previews when your community is shared on social networks. This can result in substantial improvements in click-through rates (CTR), as a compelling preview is more likely to entice users to click and engage with your content.
ℹ️ Note: This will only work properly for public spaces and posts. If you share a community URL to a private space or post, visitors will only see a message prompting them to log in.
Here’s a breakdown of the information you can add to SEO in these areas:
Meta title: The meta title is the title that appears in search engine results. It should be concise and accurately represent the content.
Meta description: A brief summary of the content that appears in search engine results. Make it engaging and informative to entice users to click on your link in search results.
Open Graph title: This title is used when sharing your content on social media platforms. Craft it to be captivating and relevant.
Open Graph description: Similar to the Meta Description, the Open Graph description is essential for social media sharing. Make it compelling to encourage more shares.
-
Open Graph image: The Open Graph image is the visual representation of your content when shared on social media. We recommend an Open Graph image dimension of 1200x630 px with a 1.91:1 aspect ratio for optimal results.
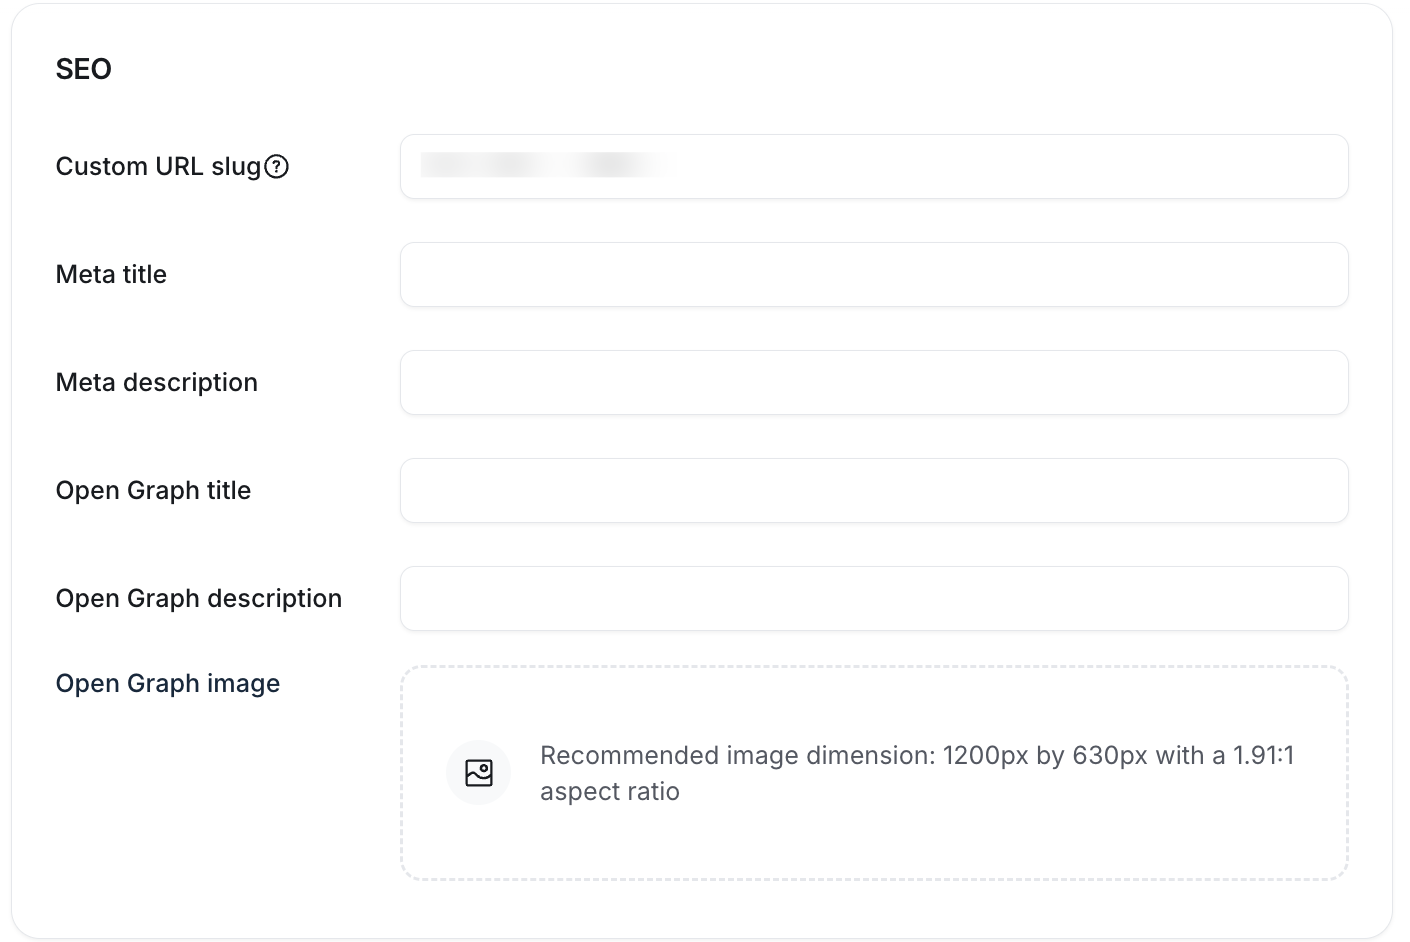
Let’s take a look at how you can add this information for SEO in your community.
Feed
Click the community name or logo (or the dropdown icon next to it) in the top-left corner and select Back to community.
Go to Feed from the sidebar.
Click the Feed settings (three dots) at the top-right, select Settings, then select Options.
In the SEO section, add your meta tags and Open Graph details.
Click Save.
Spaces
Click Community in the left sidebar, then select Spaces.
Click on the space name where you'd like to add SEO information.
Click Space settings (three dots) at the top-right, select Settings, then select Options.
Go to the SEO section and add meta tags and Open Graph details.
Click Save changes.
Posts
You can add SEO details to a post after saving it as a draft or after publishing it. To do so:
-
Click Community in the left sidebar, then select Posts.
If you want to add SEO information to a draft, navigate to the Drafts tab.
Click More actions (three dots) next to the post, and select Edit post.
In the post editor, click Settings (⚙️).
Scroll to the Sharing section and add the meta tags and Open Graph details.
Click Done and save the post.
Events
You can add SEO information to the event after it has been saved as a draft or published in the space.
Click Events in the left sidebar.
Click More actions (three dots) next to the event and select Edit event.
Navigate to the Advanced tab.
In the SEO section, add the meta tags and Open Graph details.
Click Save changes.