Add custom links to the top navigation bar
Last updated: October, 2026
The top navigation bar plays a vital role in guiding your community members to important areas within your community, as well as external and custom pages. In this article, we will guide you through the steps of adding a custom link to the navigation bar.
About links on the top navigation bar
You can add multiple custom links to the navigation bar located at the top, where they will appear as tabs. By strategically adding these links, you can create a more integrated and user-friendly community experience.
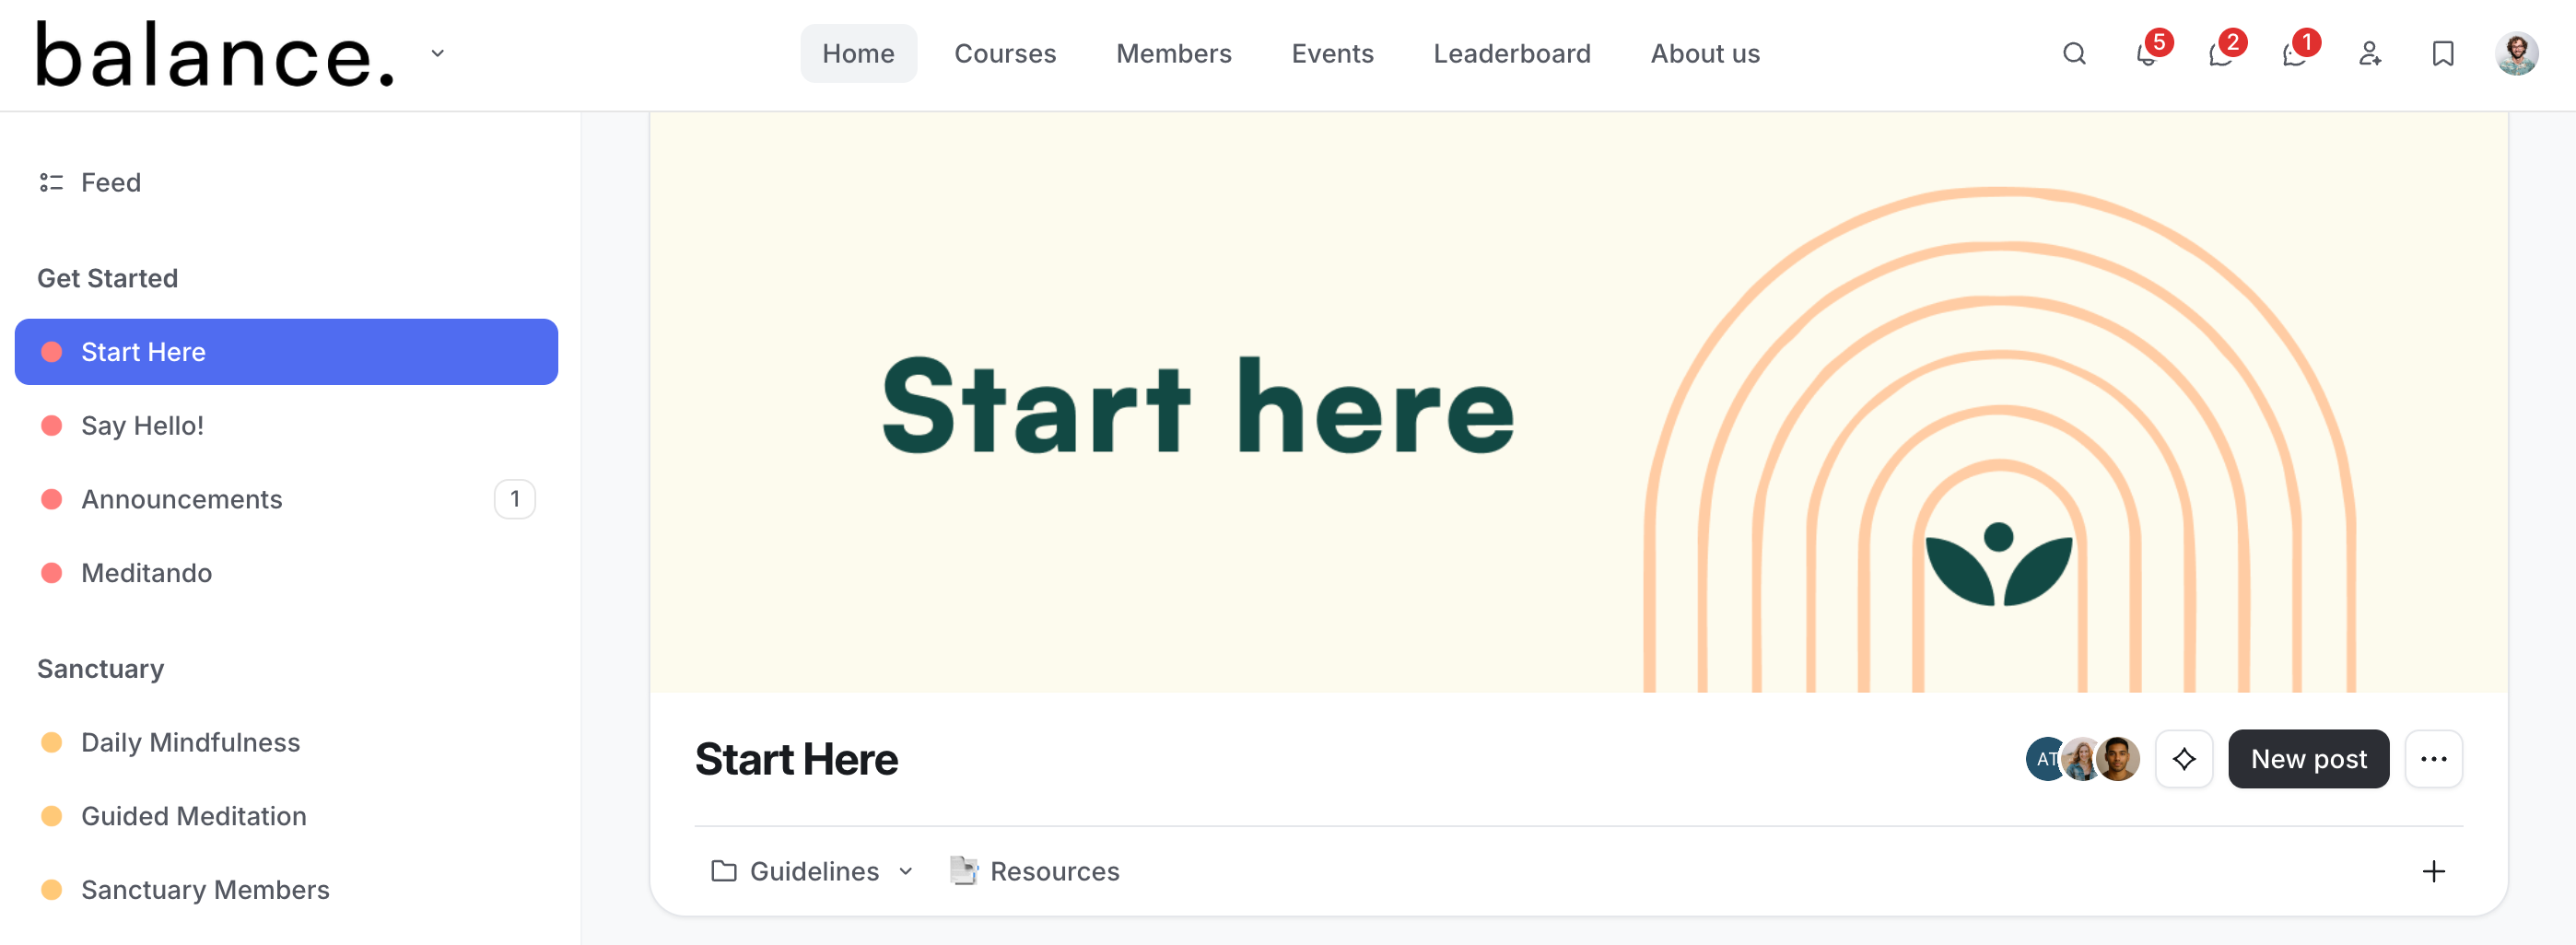
Here are some ideas for adding custom links to the navigation bar:
Websites: Add a link to your pages so your audience can access your blog, sales page, about us page or testimonials.
Community areas: You can add links to a specific area or content within the community, such as an important post, event, course, and more.
Membership offers: Add a link to a page where members can view all available offerings and purchase memberships via a paywall checkout URL, streamlining access to your community’s premium content.
Store: If you sell physical products or merchandise via an external store, you can include a link to your store, making it easy for members to browse and buy items.
Link availability
The header navigation settings and custom links are available exclusively for your community on the desktop app and web browsers. On mobile browsers, these links will appear in the sidebar.
It's important to note that any custom links added to the navigation bar or changes made to the header navigation will not be reflected in the mobile apps. Circle mobile apps only display system navigation tabs. However, you have the option to customize the names of the system tabs and reorder them specifically for mobile apps.
📚 To learn more about customizing navigation tabs for mobile apps, see our guide here.
Add custom link
To get started, click Website in the left sidebar, then select Navigation.
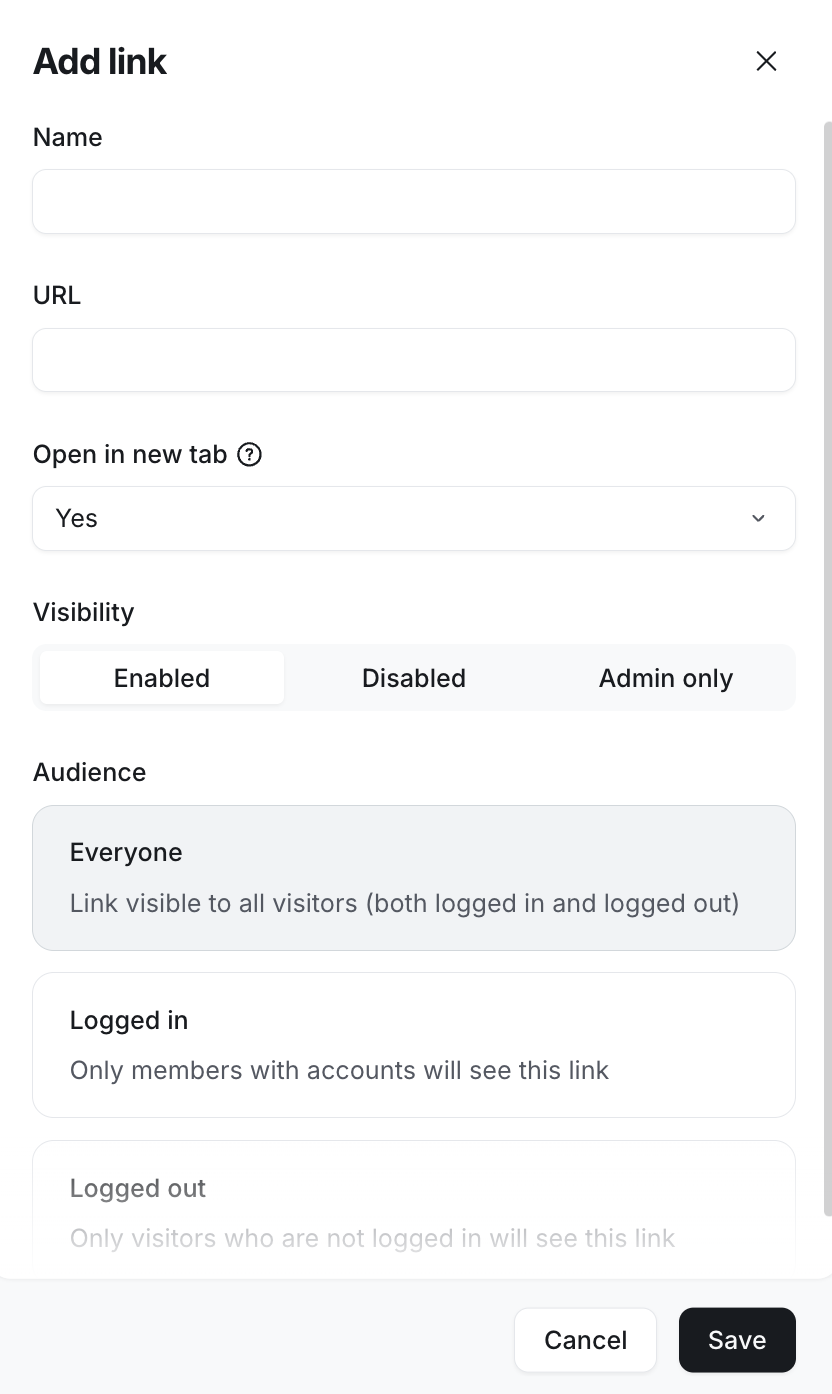
To create a new link, click Add link in the top-right corner. In the add link dialog, provide the following information:
Name: Add a short display name to the link that clearly indicates its purpose, helping members understand where it will lead them.
-
URL: Provide the URL where you want members to be directed when they click the link. This could be a custom page or even a specific area within your community that you want to appear as a link in the navigation bar.
📚 Learn more about how to copy the link to a page.
Open in new tab: Decide how the link should behave when clicked. Depending on how you want users to navigate the content, you can choose to open it in a new tab, keeping the community open in the current tab, or in the same tab.
-
Visibility: Set the link's visibility to control who can see it in the navigation bar. You can choose from three options:
Enabled: The link will be visible to all community members, including admins.
Disabled: The link will not appear on the navigation bar for anyone. As an admin, however, you can always go to navigation settings to manage this link.
Admin only: This link will be visible and accessible only to admins, keeping it hidden from all members.
-
Audience: Choose who can see this navigation link based on their login status.
Everyone: Both logged-in and logged-out visitors
Logged in: Only members logged in to their accounts will see the link.
-
Logged out: Only visitors who are not logged out will see this link.
❗️Important: Your page’s access control settings will affect how users can access link in the header navigation bar. For example, if your page is set to members only, logged out visitors will see a restricted access message when they click the link.
Once you’ve updated the fields, click Save.