Create a redirect if your root domain is inaccessible without using WWW
Last updated: September, 2026
This article will guide you through setting up redirect from non-www to www domain URL in Cloudflare if your domain hosting platform does not support domain redirect natively.
❗Important: If you are looking to set up a custom root domain hosted by Cloudflare in your community, see Set up a custom root domain hosted by Cloudflare.
💡 Tip: Before following this guide, we recommend checking your domain hosting documentation or contacting their support team to see if the option for domain redirect is available to you in your DNS settings.
ℹ️ Note: You don’t have to move your records to Cloudflare. You’ll only need to create an account and set up the redirect.
Step 1: Sign up for Cloudflare
To get started, register an account with Cloudflare here: dash.cloudflare.com/sign-up.
Step 2: Add Site
Add your domain as a site to manage your domain on Cloudflare.
-
Add Site
Click Websites in the sidebar menu.
Click Add site.
Enter your root domain (e.g., domain.com) and then click Add site.
-
Choose plan
Select your plan level (we suggest choosing a Free plan) and click Continue.
-
Review DNS records
Cloudflare will scan for DNS records from your domain hosting platform to import them into your Cloudflare account.
-
Review the records and click Continue.
-
Change nameservers
Navigate to your domain hosting platform’s DNS settings.
Add Cloudflare’s nameservers to your DNS.
Once the records are added, navigate back to Cloudflare and click Done, check nameservers.
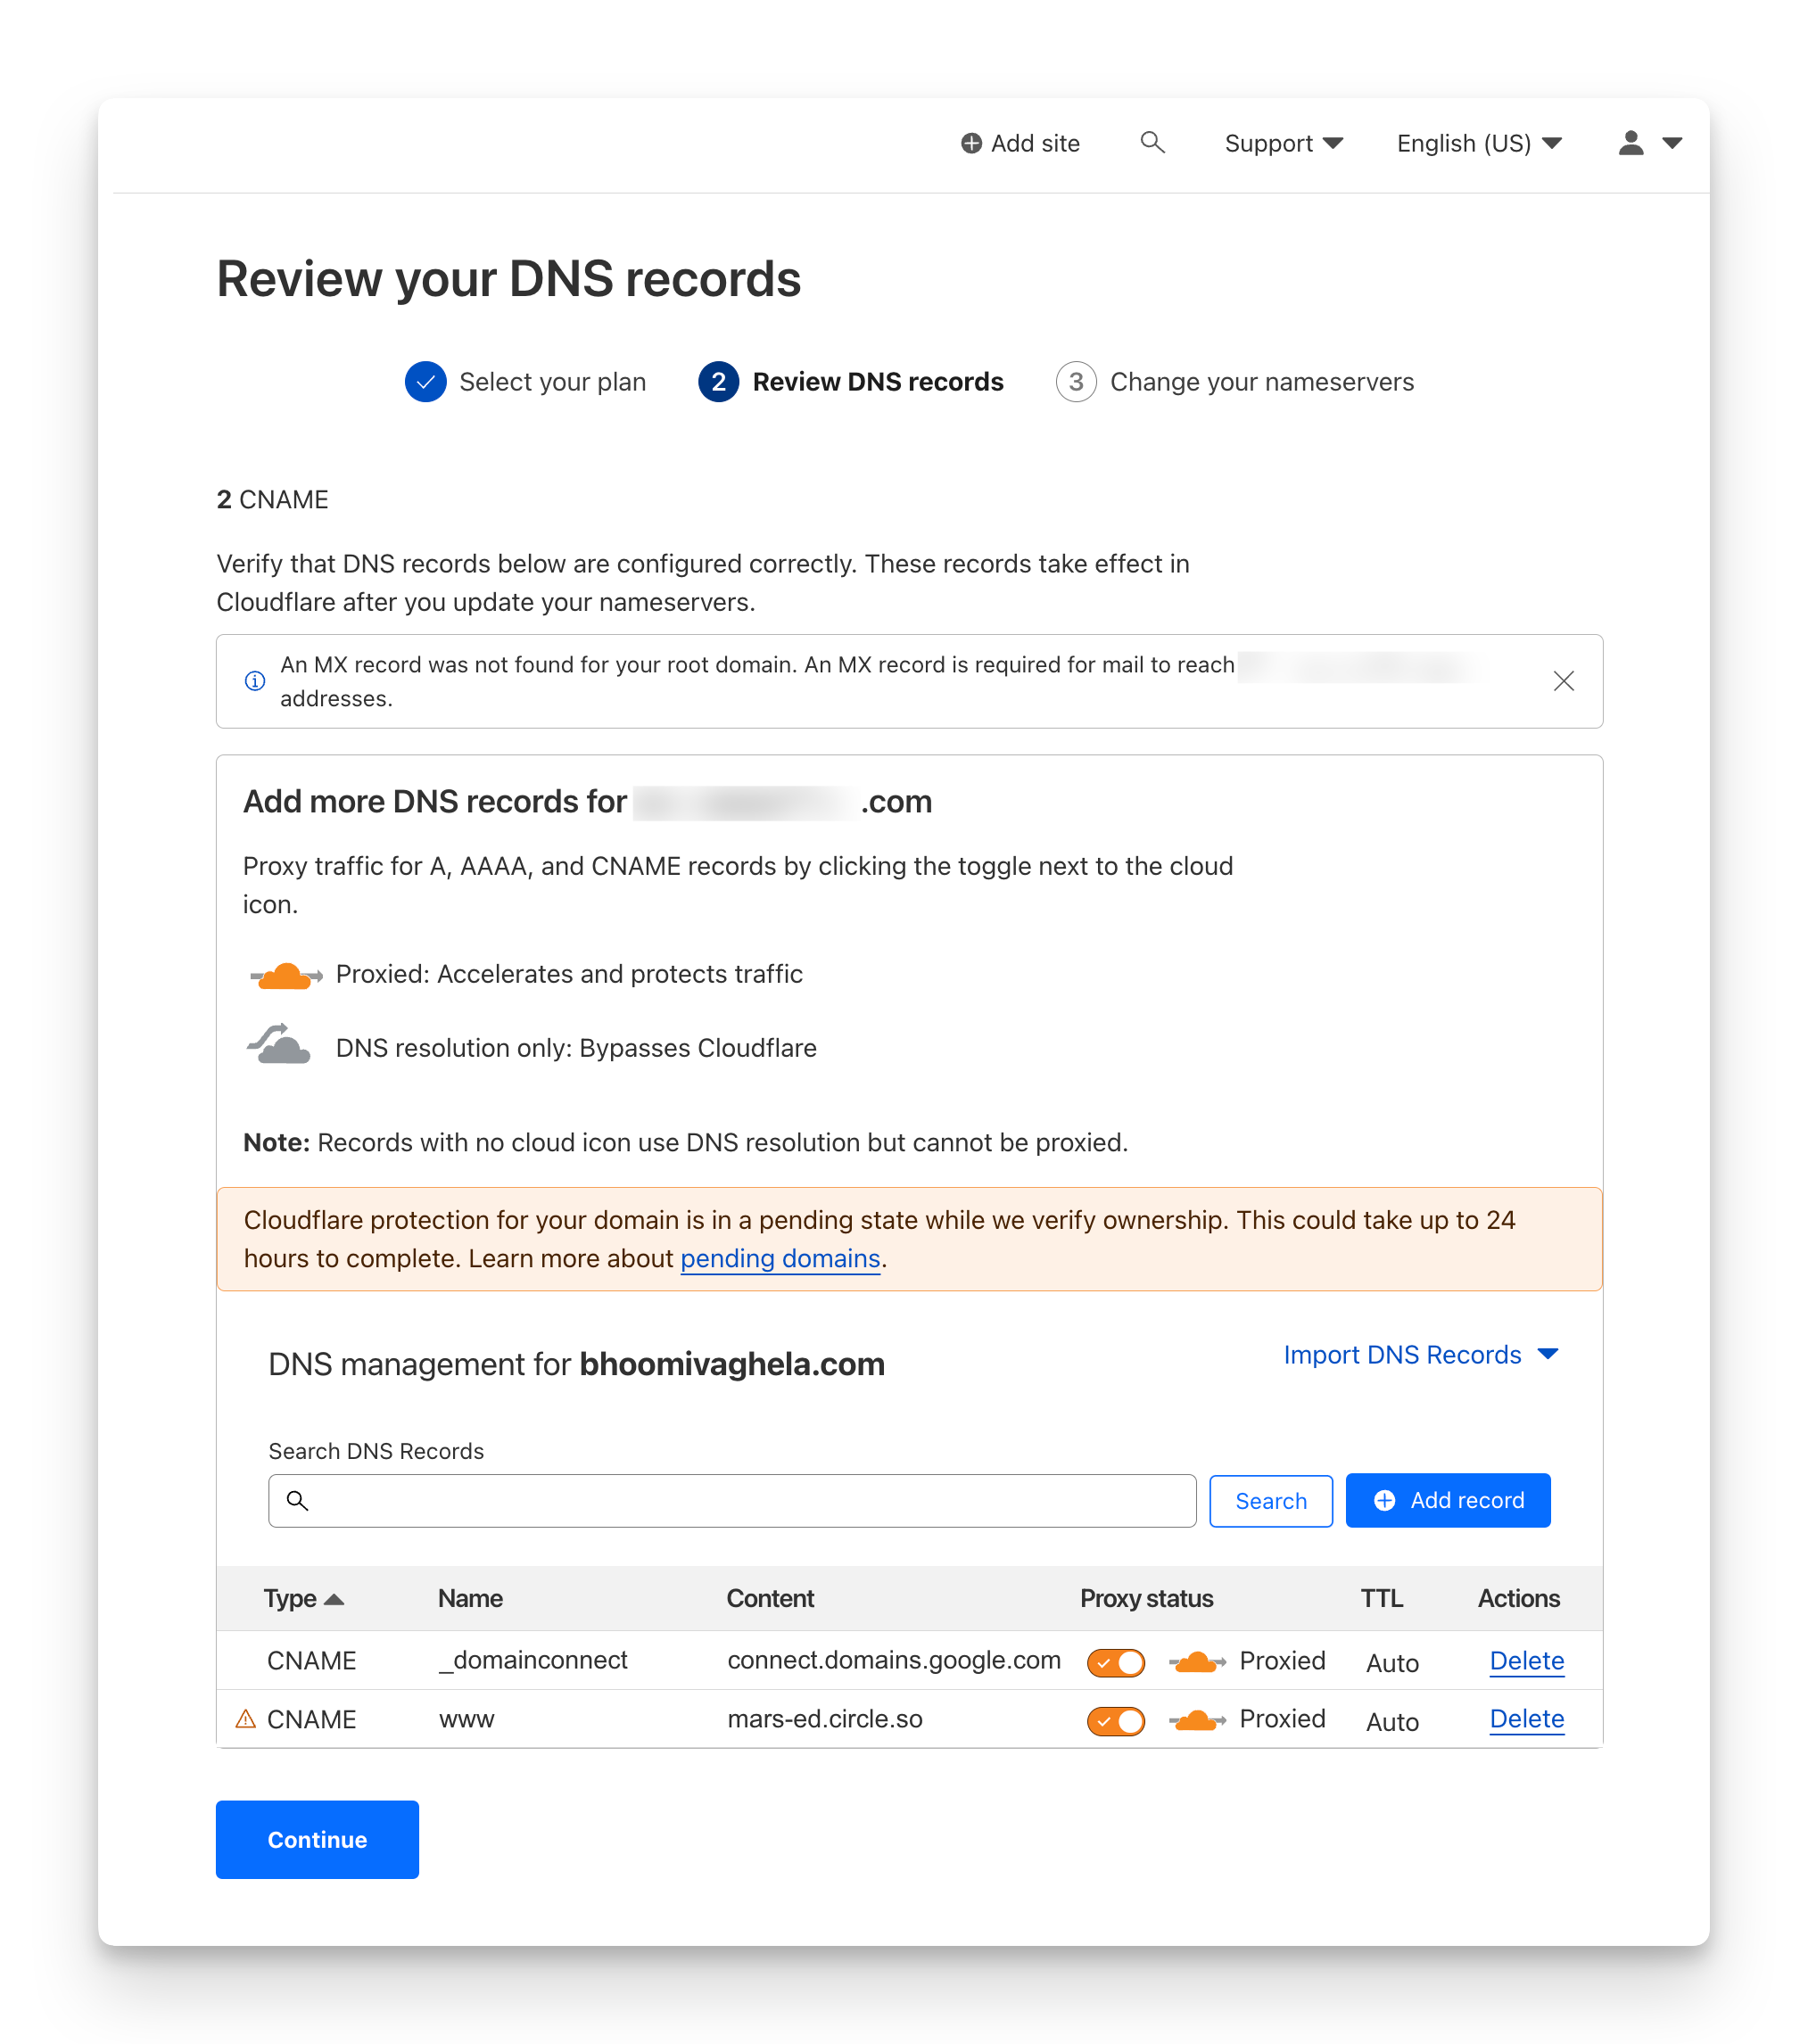
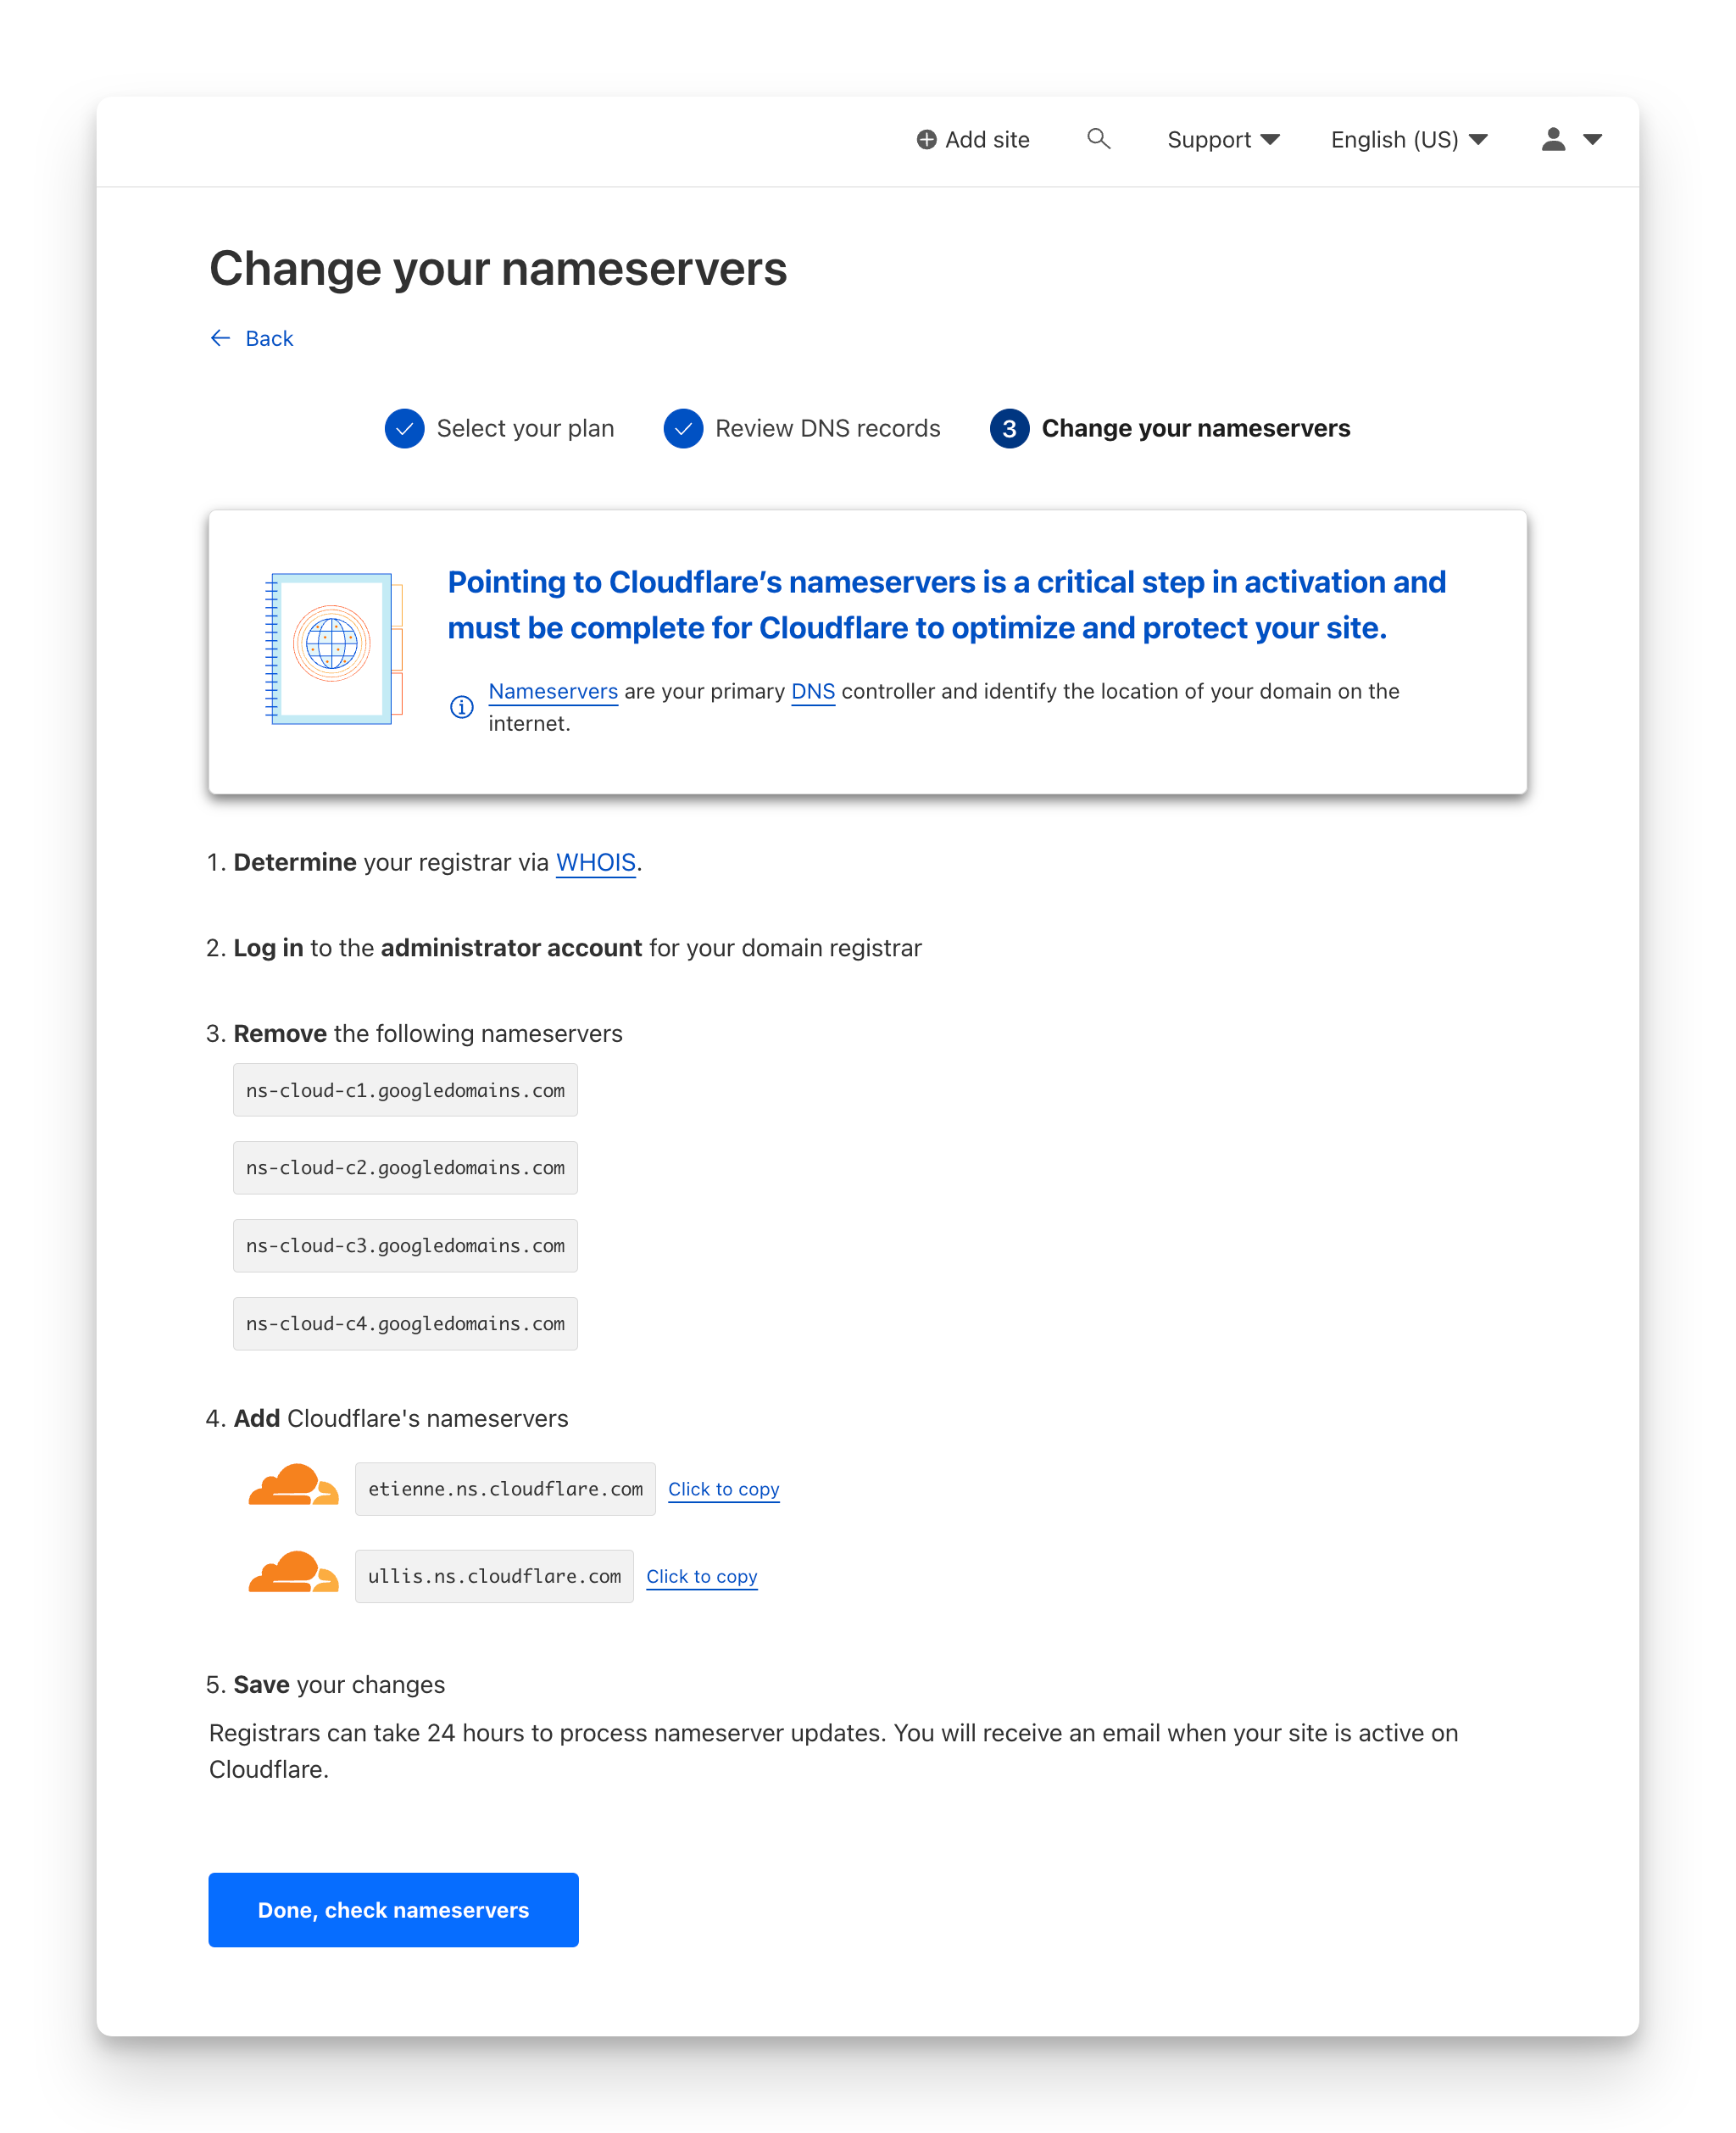
❗Important: Please note that updating your domain hosting platform’s nameservers with nameservers provided by Cloudflare is required to enable this setup. Please follow the steps as shown in the Change your nameservers step (below image) to update it.
Depending on your host provider, the name server updates can occur almost immediately or take 24 to 48 hours.
Step 3: Set up records
As mentioned in Step 2 of this article, Cloudflare will scan for DNS records from your domain hosting platform when you are adding a site to Cloudflare. Please review them once the site has been added. If any record is missing or not imported from your domain hosting platform, add them to the Cloudflare DNS as shown below.
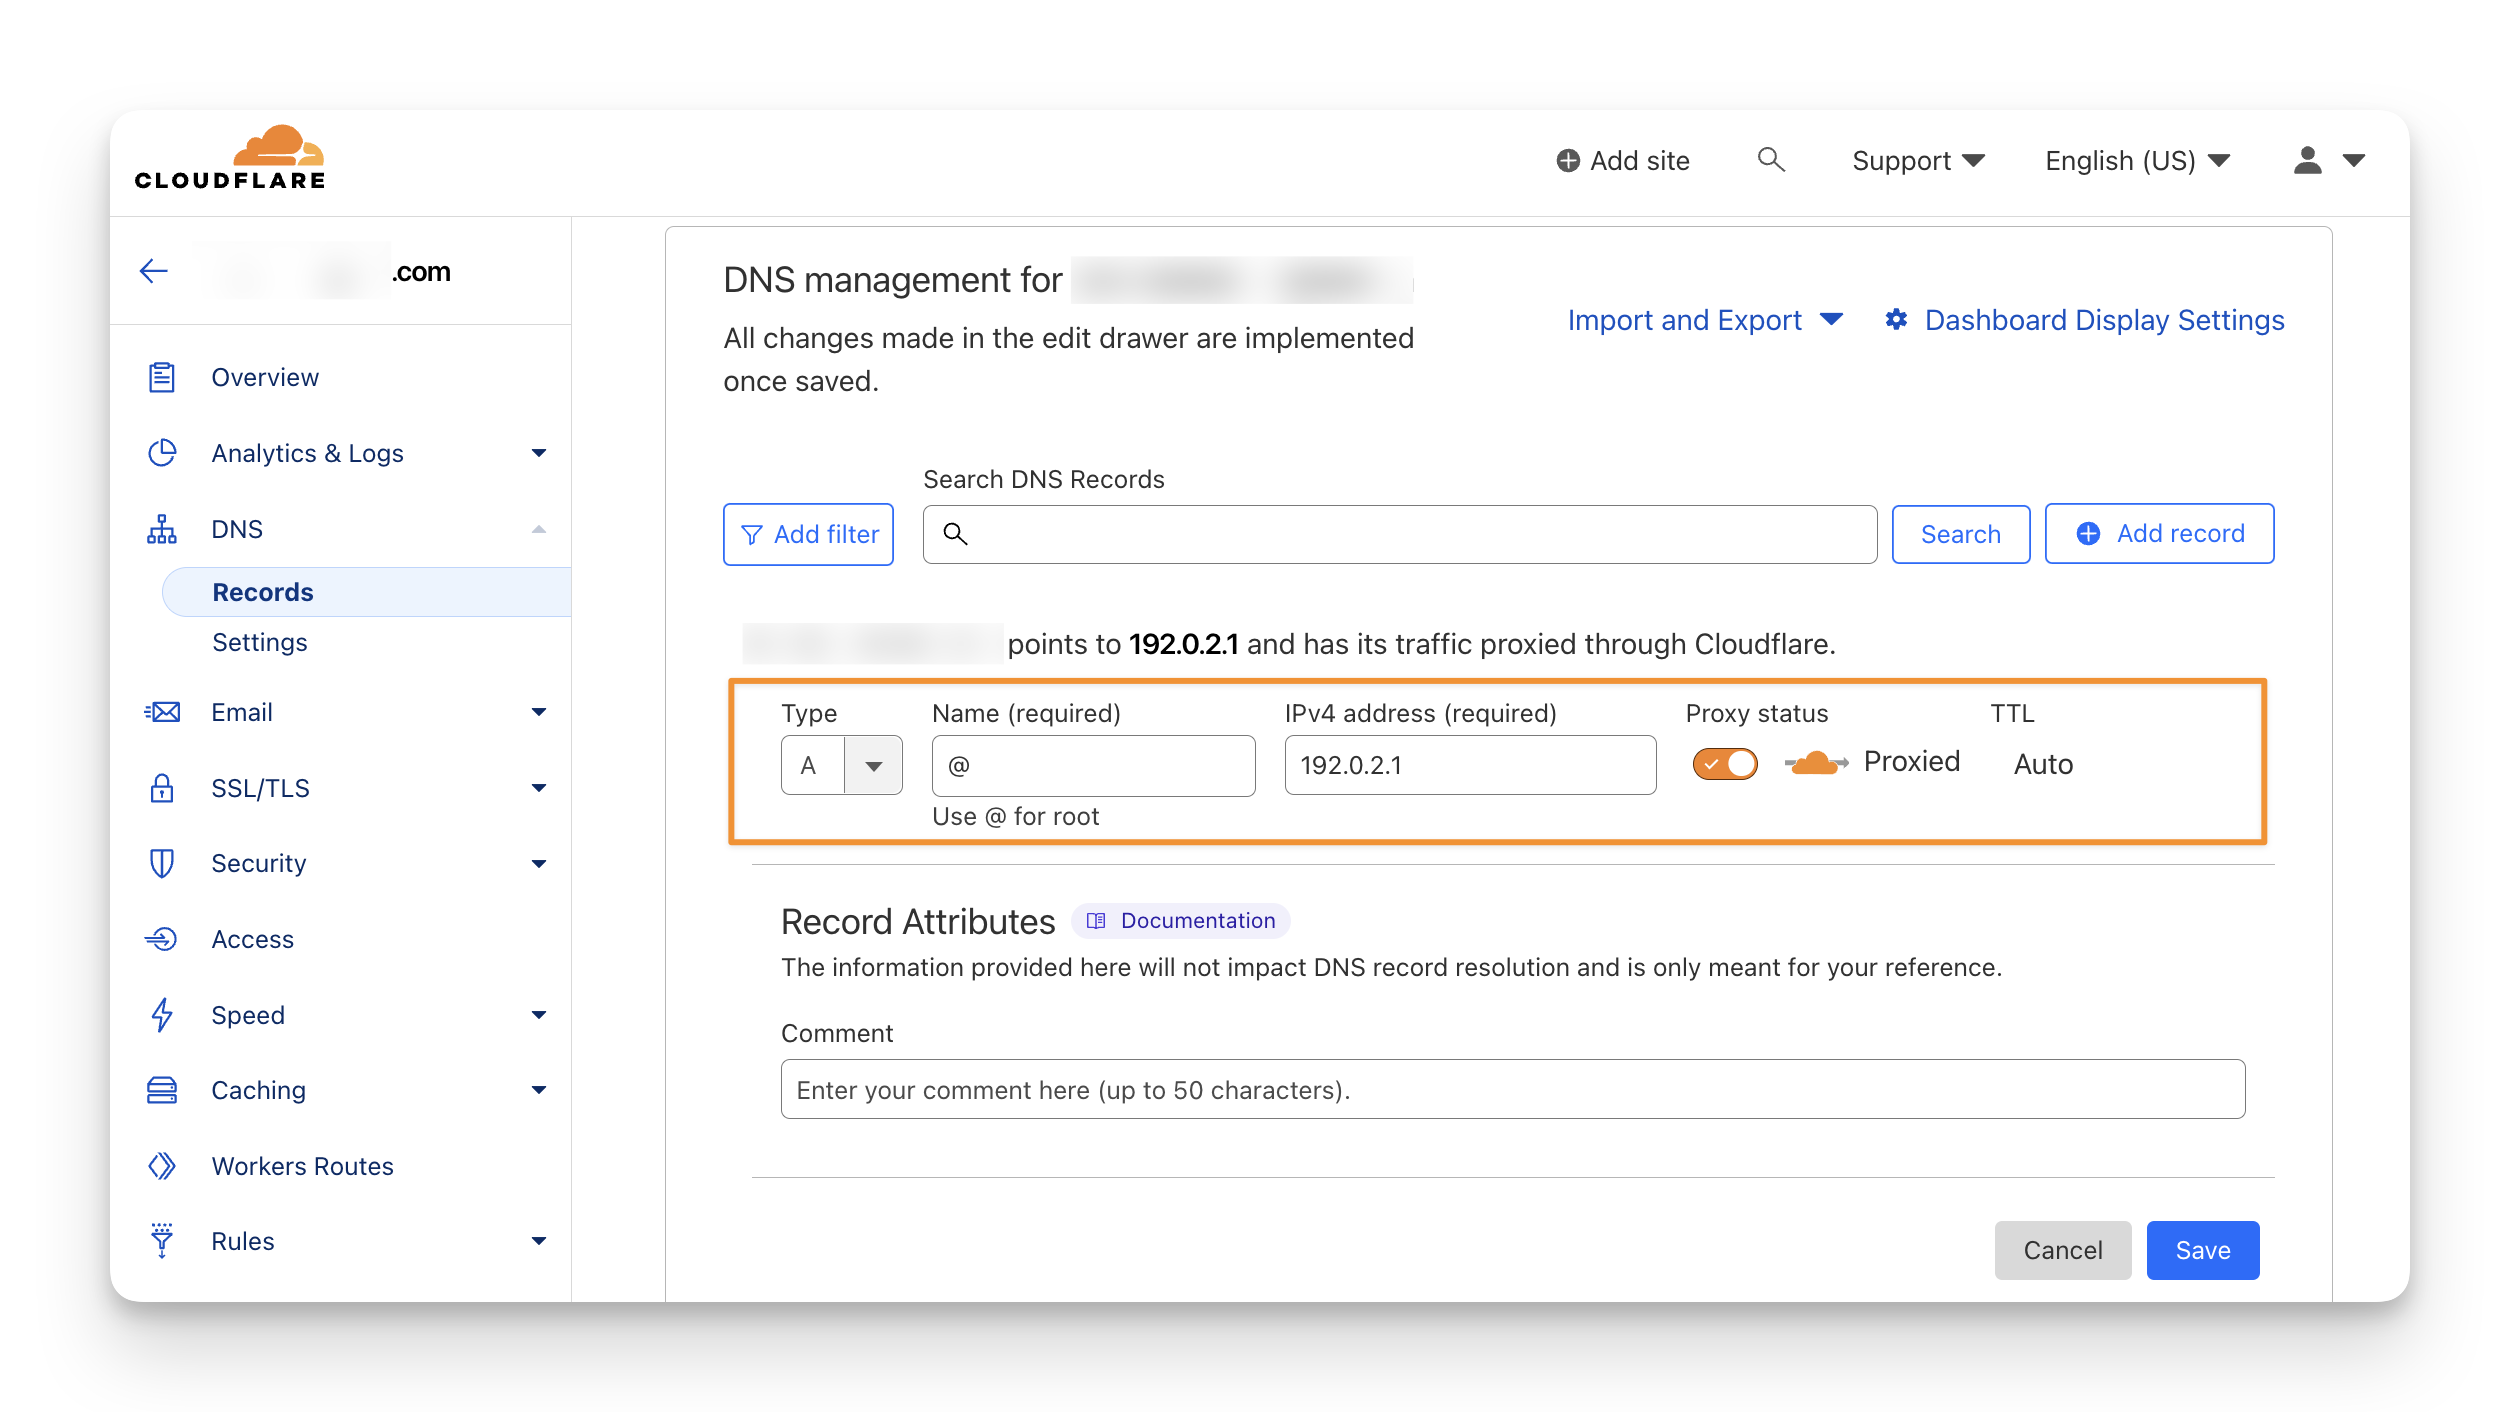
A record
❗Important: Make sure you have the proxy status enabled for the A record.
Here is an example of A record in Cloudflare for your root domain:
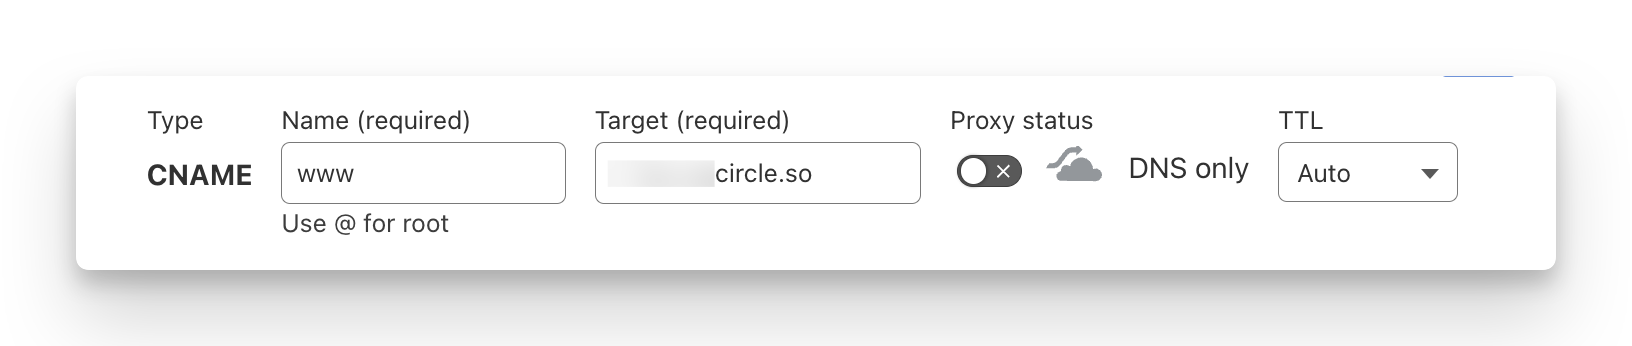
CNAME record
❗Important: Disable the proxy status and ensure it says DNS only when setting up or verifying CNAME record.
Here is an example of a CNAME record for your custom domain setup in Cloudflare:
Step 4: Update SSL settings
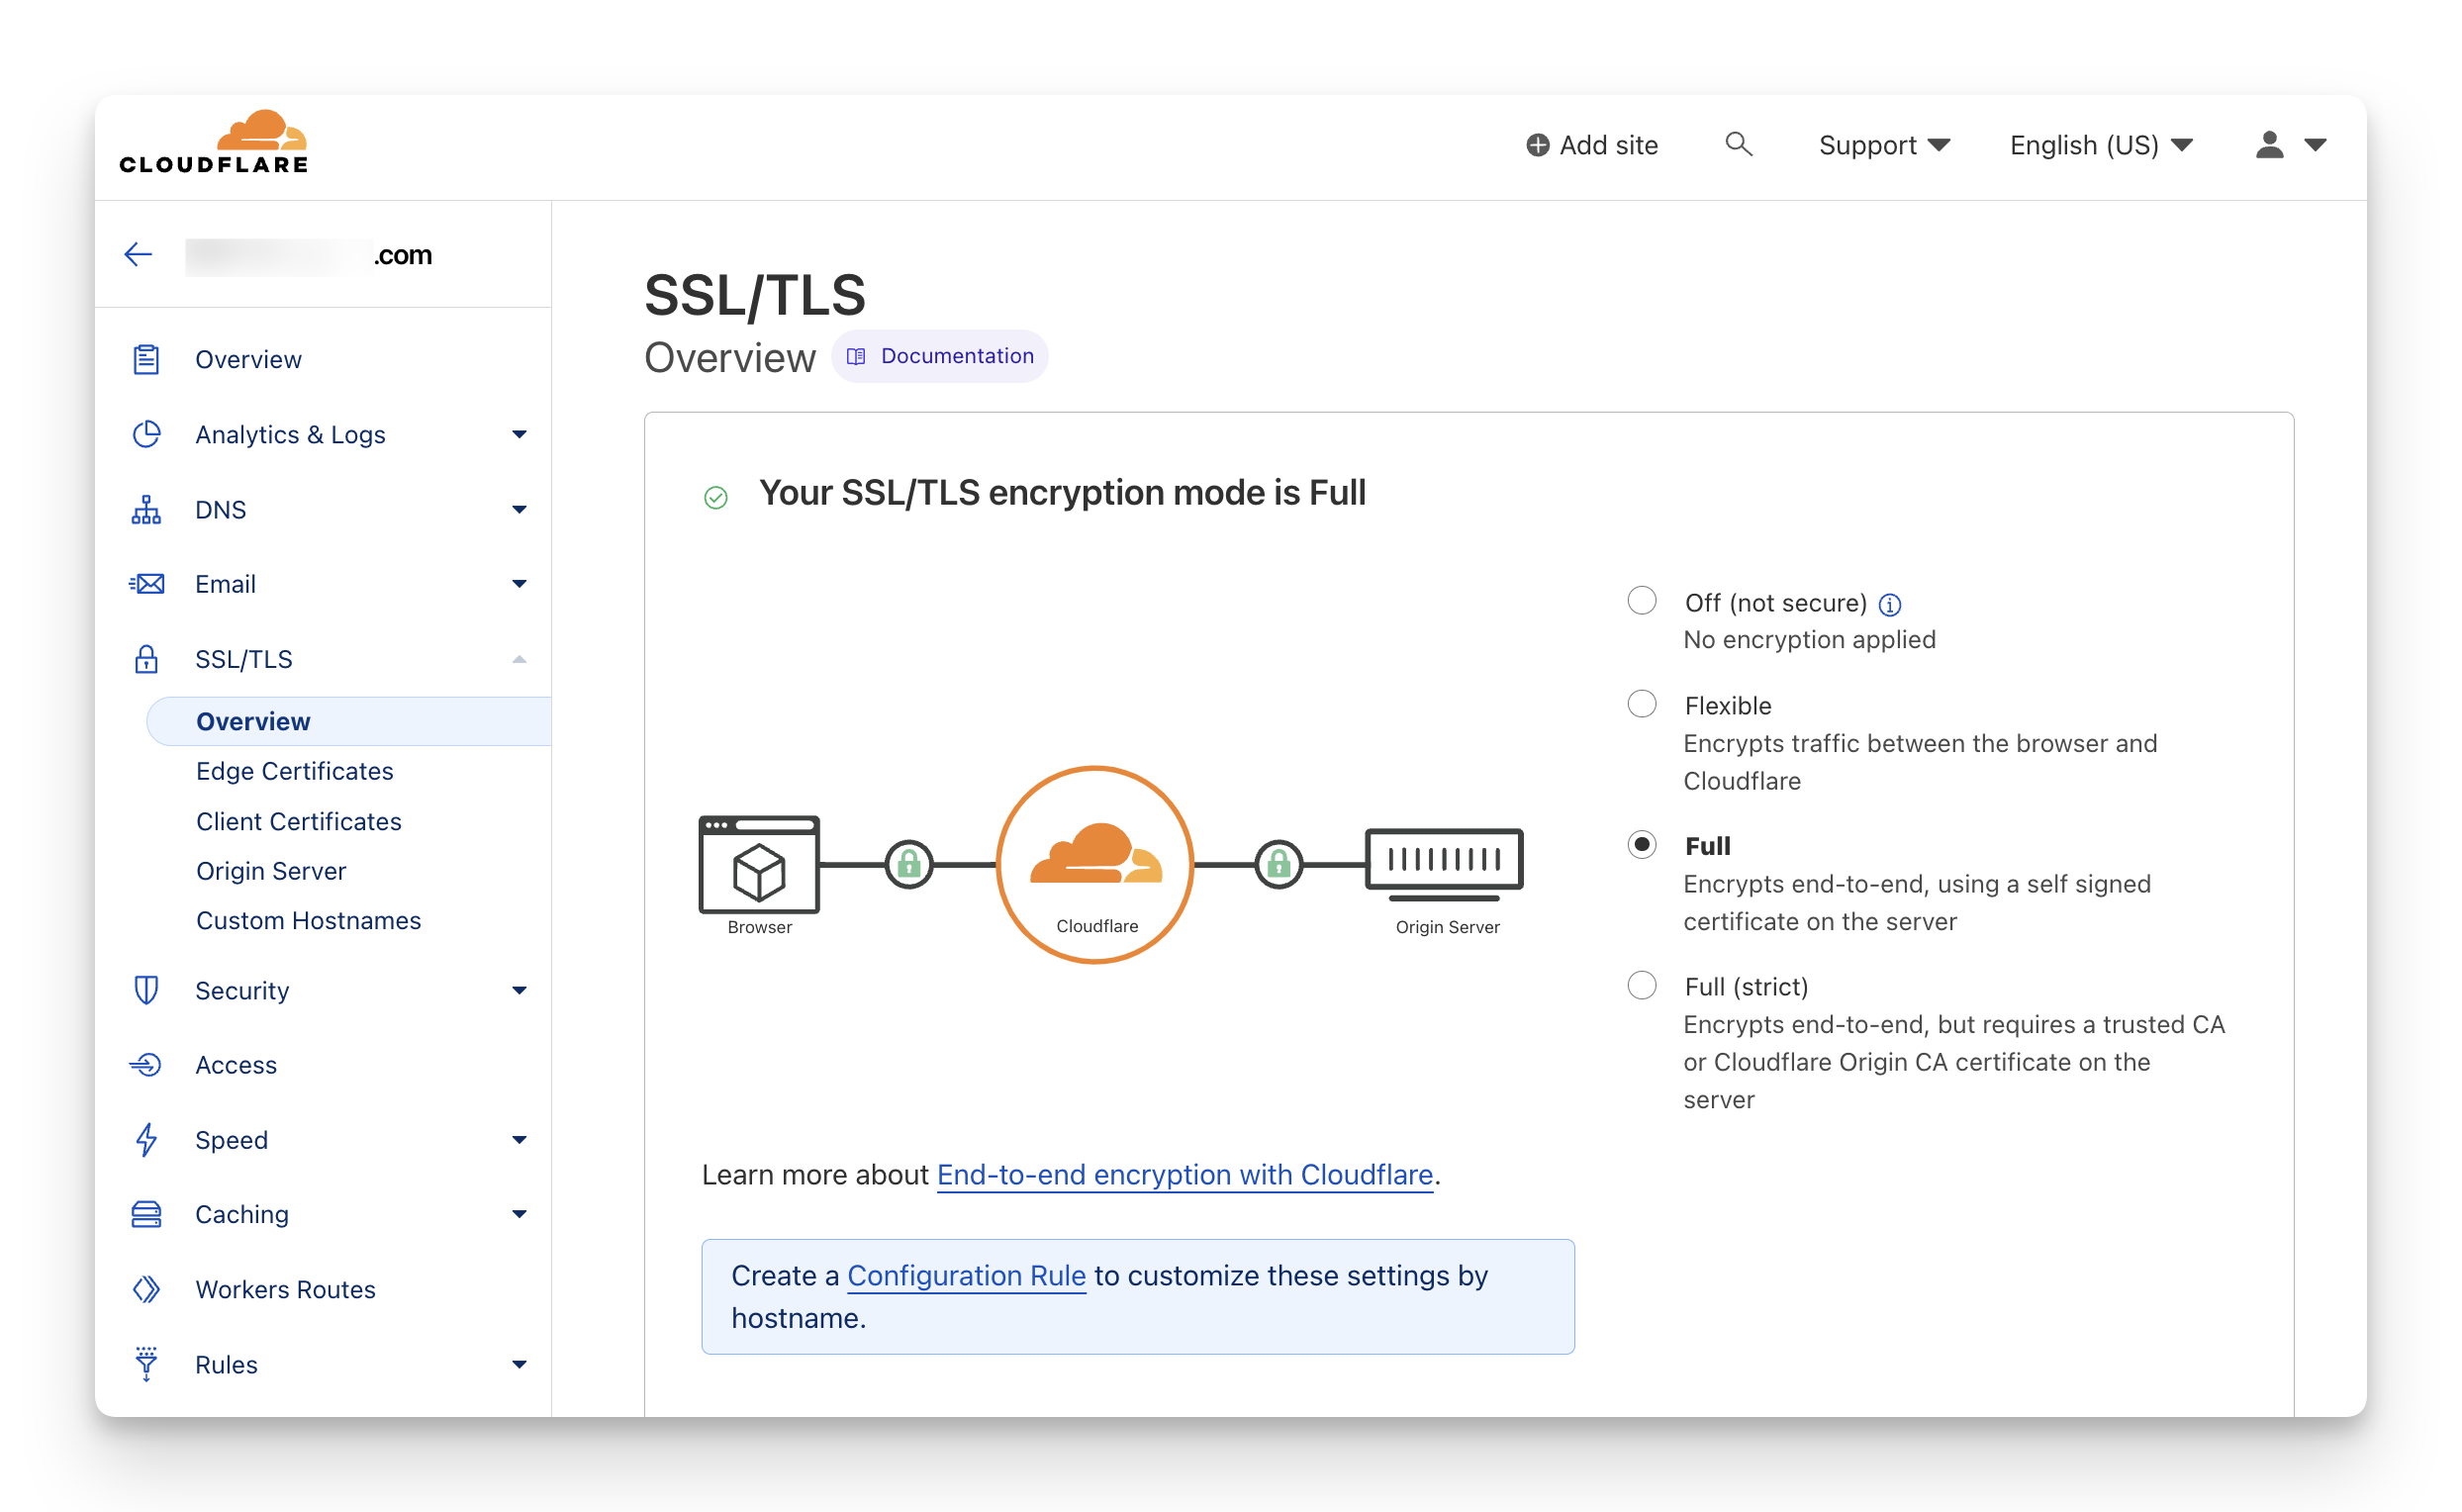
Click SSL/TSL in the sidebar menu.
Ensure the SSL/TLS encryption mode is set to Full.
Step 5: Add page rules
Page rule allows you to create redirect rules for your root domain to redirect non-www domain URL to www domain URL.
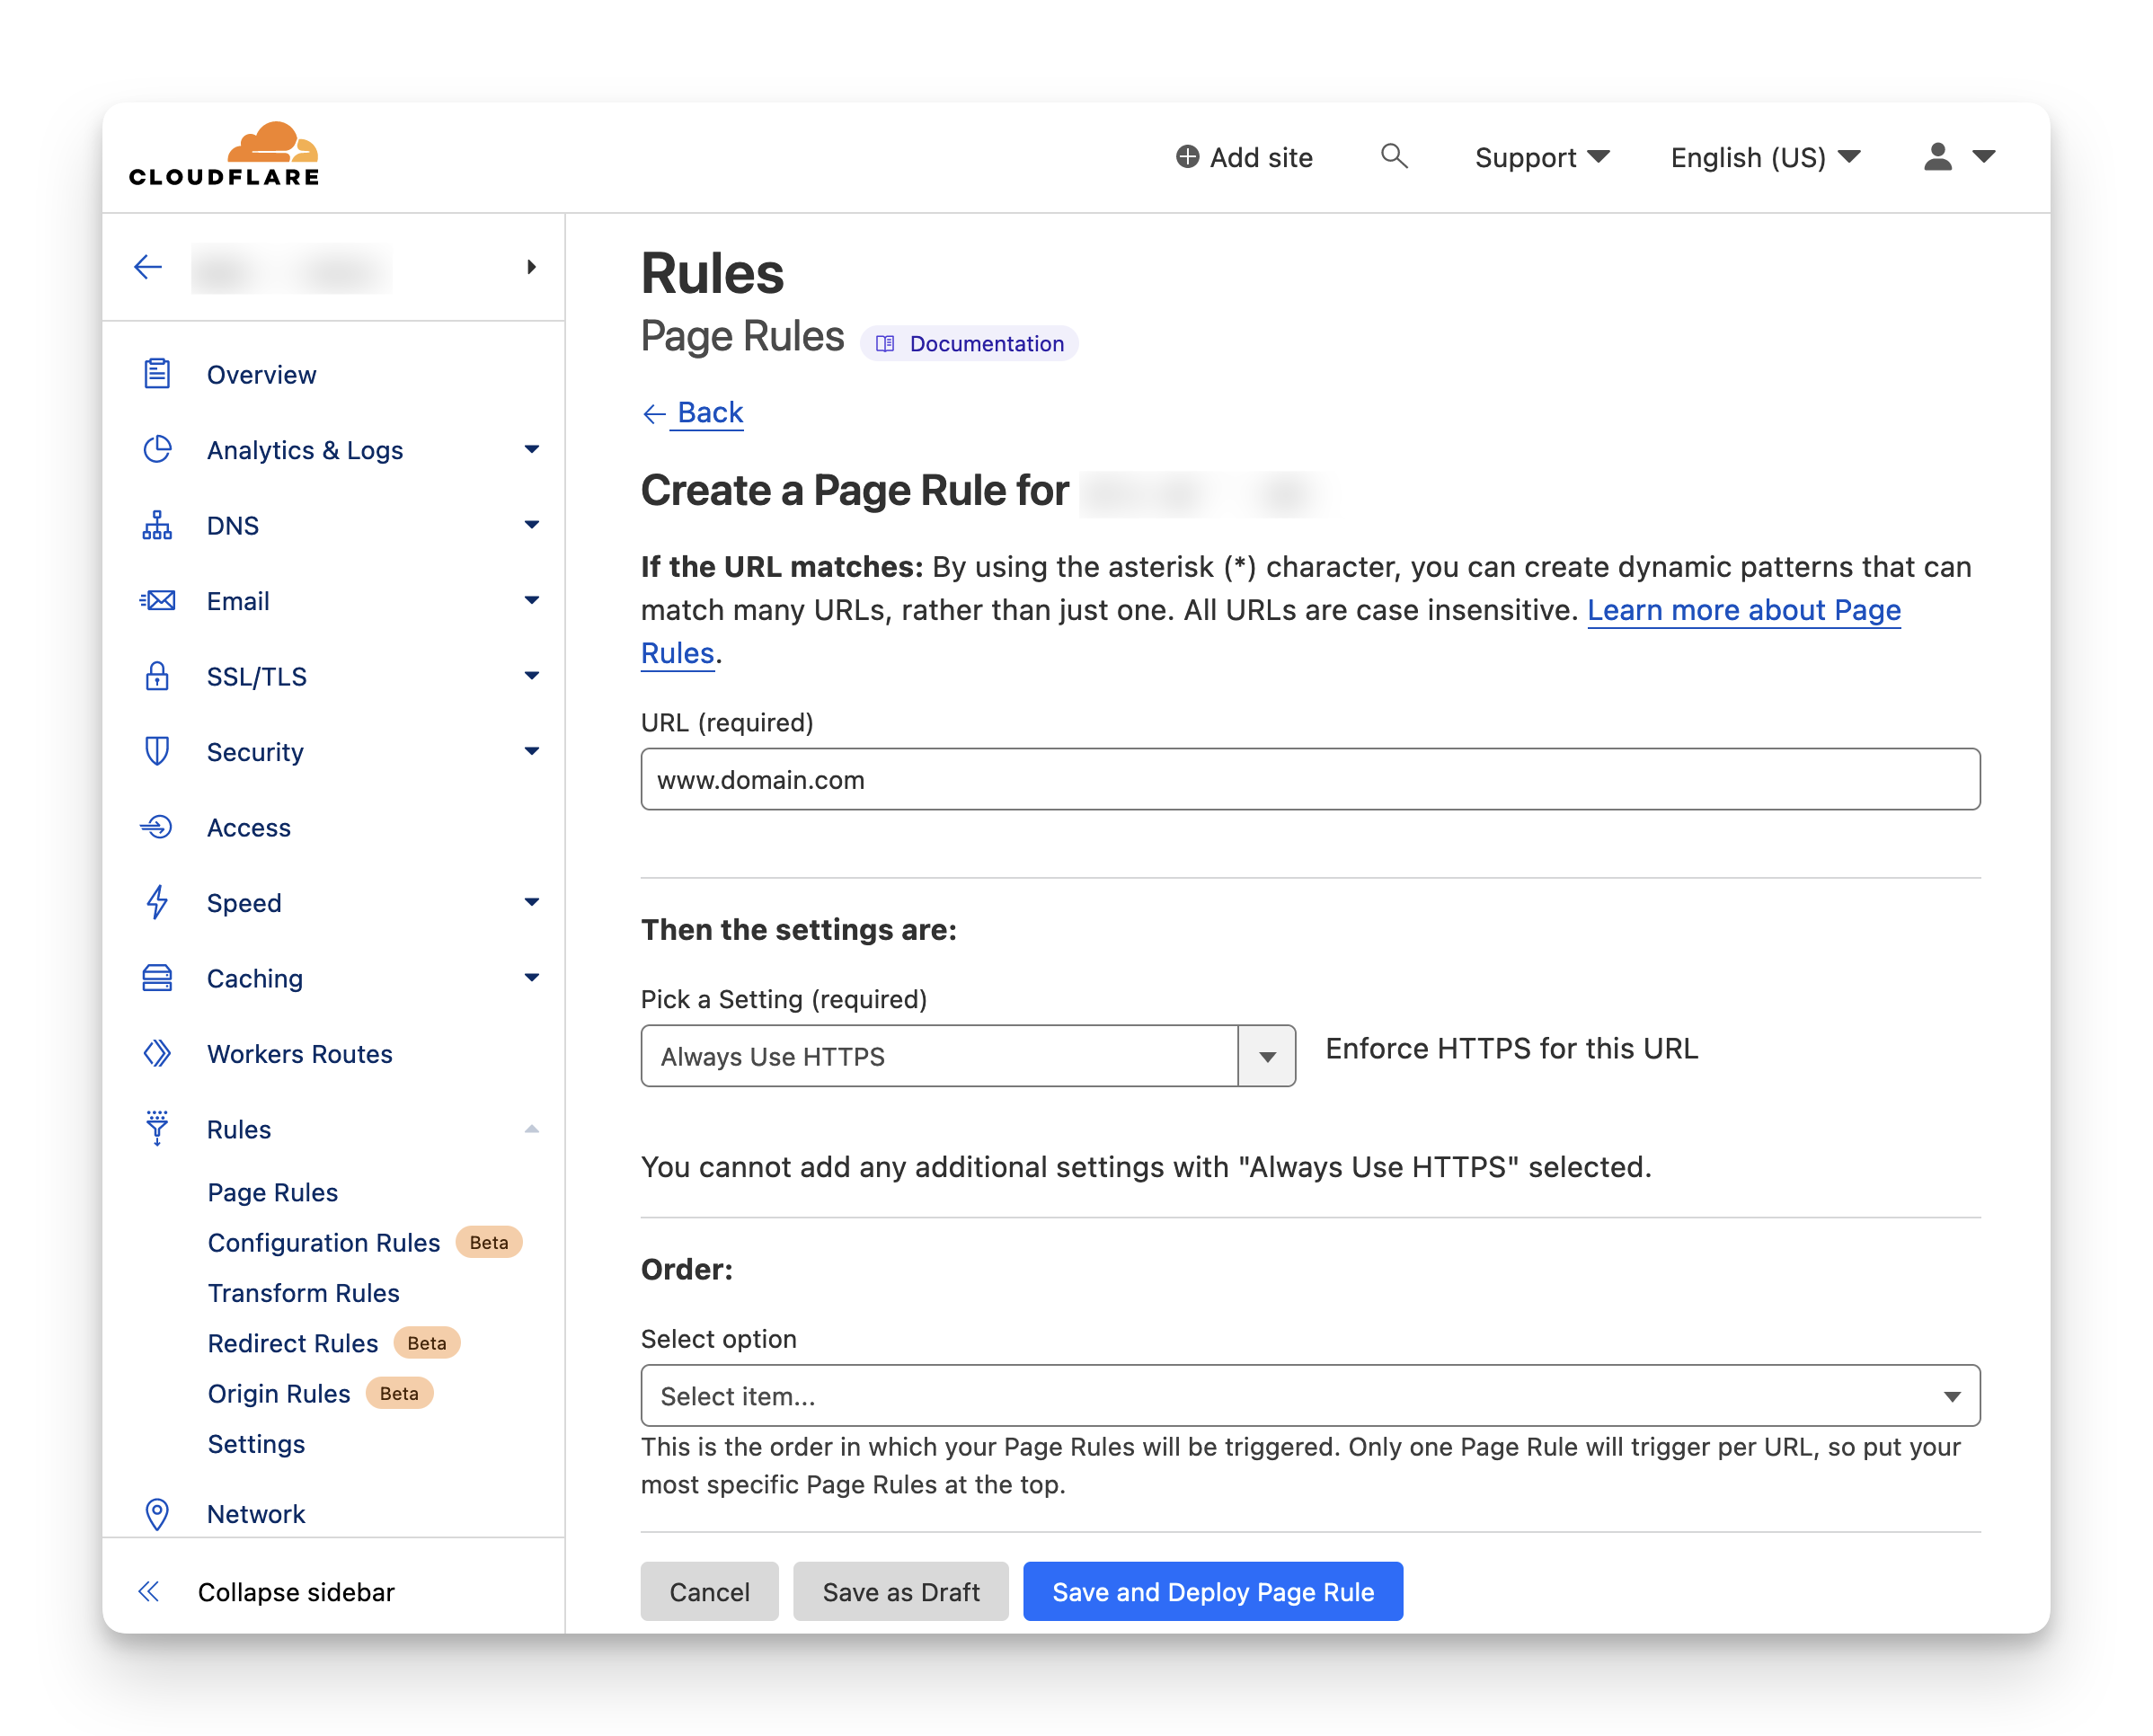
Add page rule to always use HTTPS
In the sidebar menu, click Rules → Page rules.
Click Create Page Rule.
Enter your domain (e.g., www.domain.com) in the URL field.
Choose Always Use HTTPS from the dropdown under the Pick a setting option.
Click Save and Deploy Page Rule.
Add page rule to forward URL
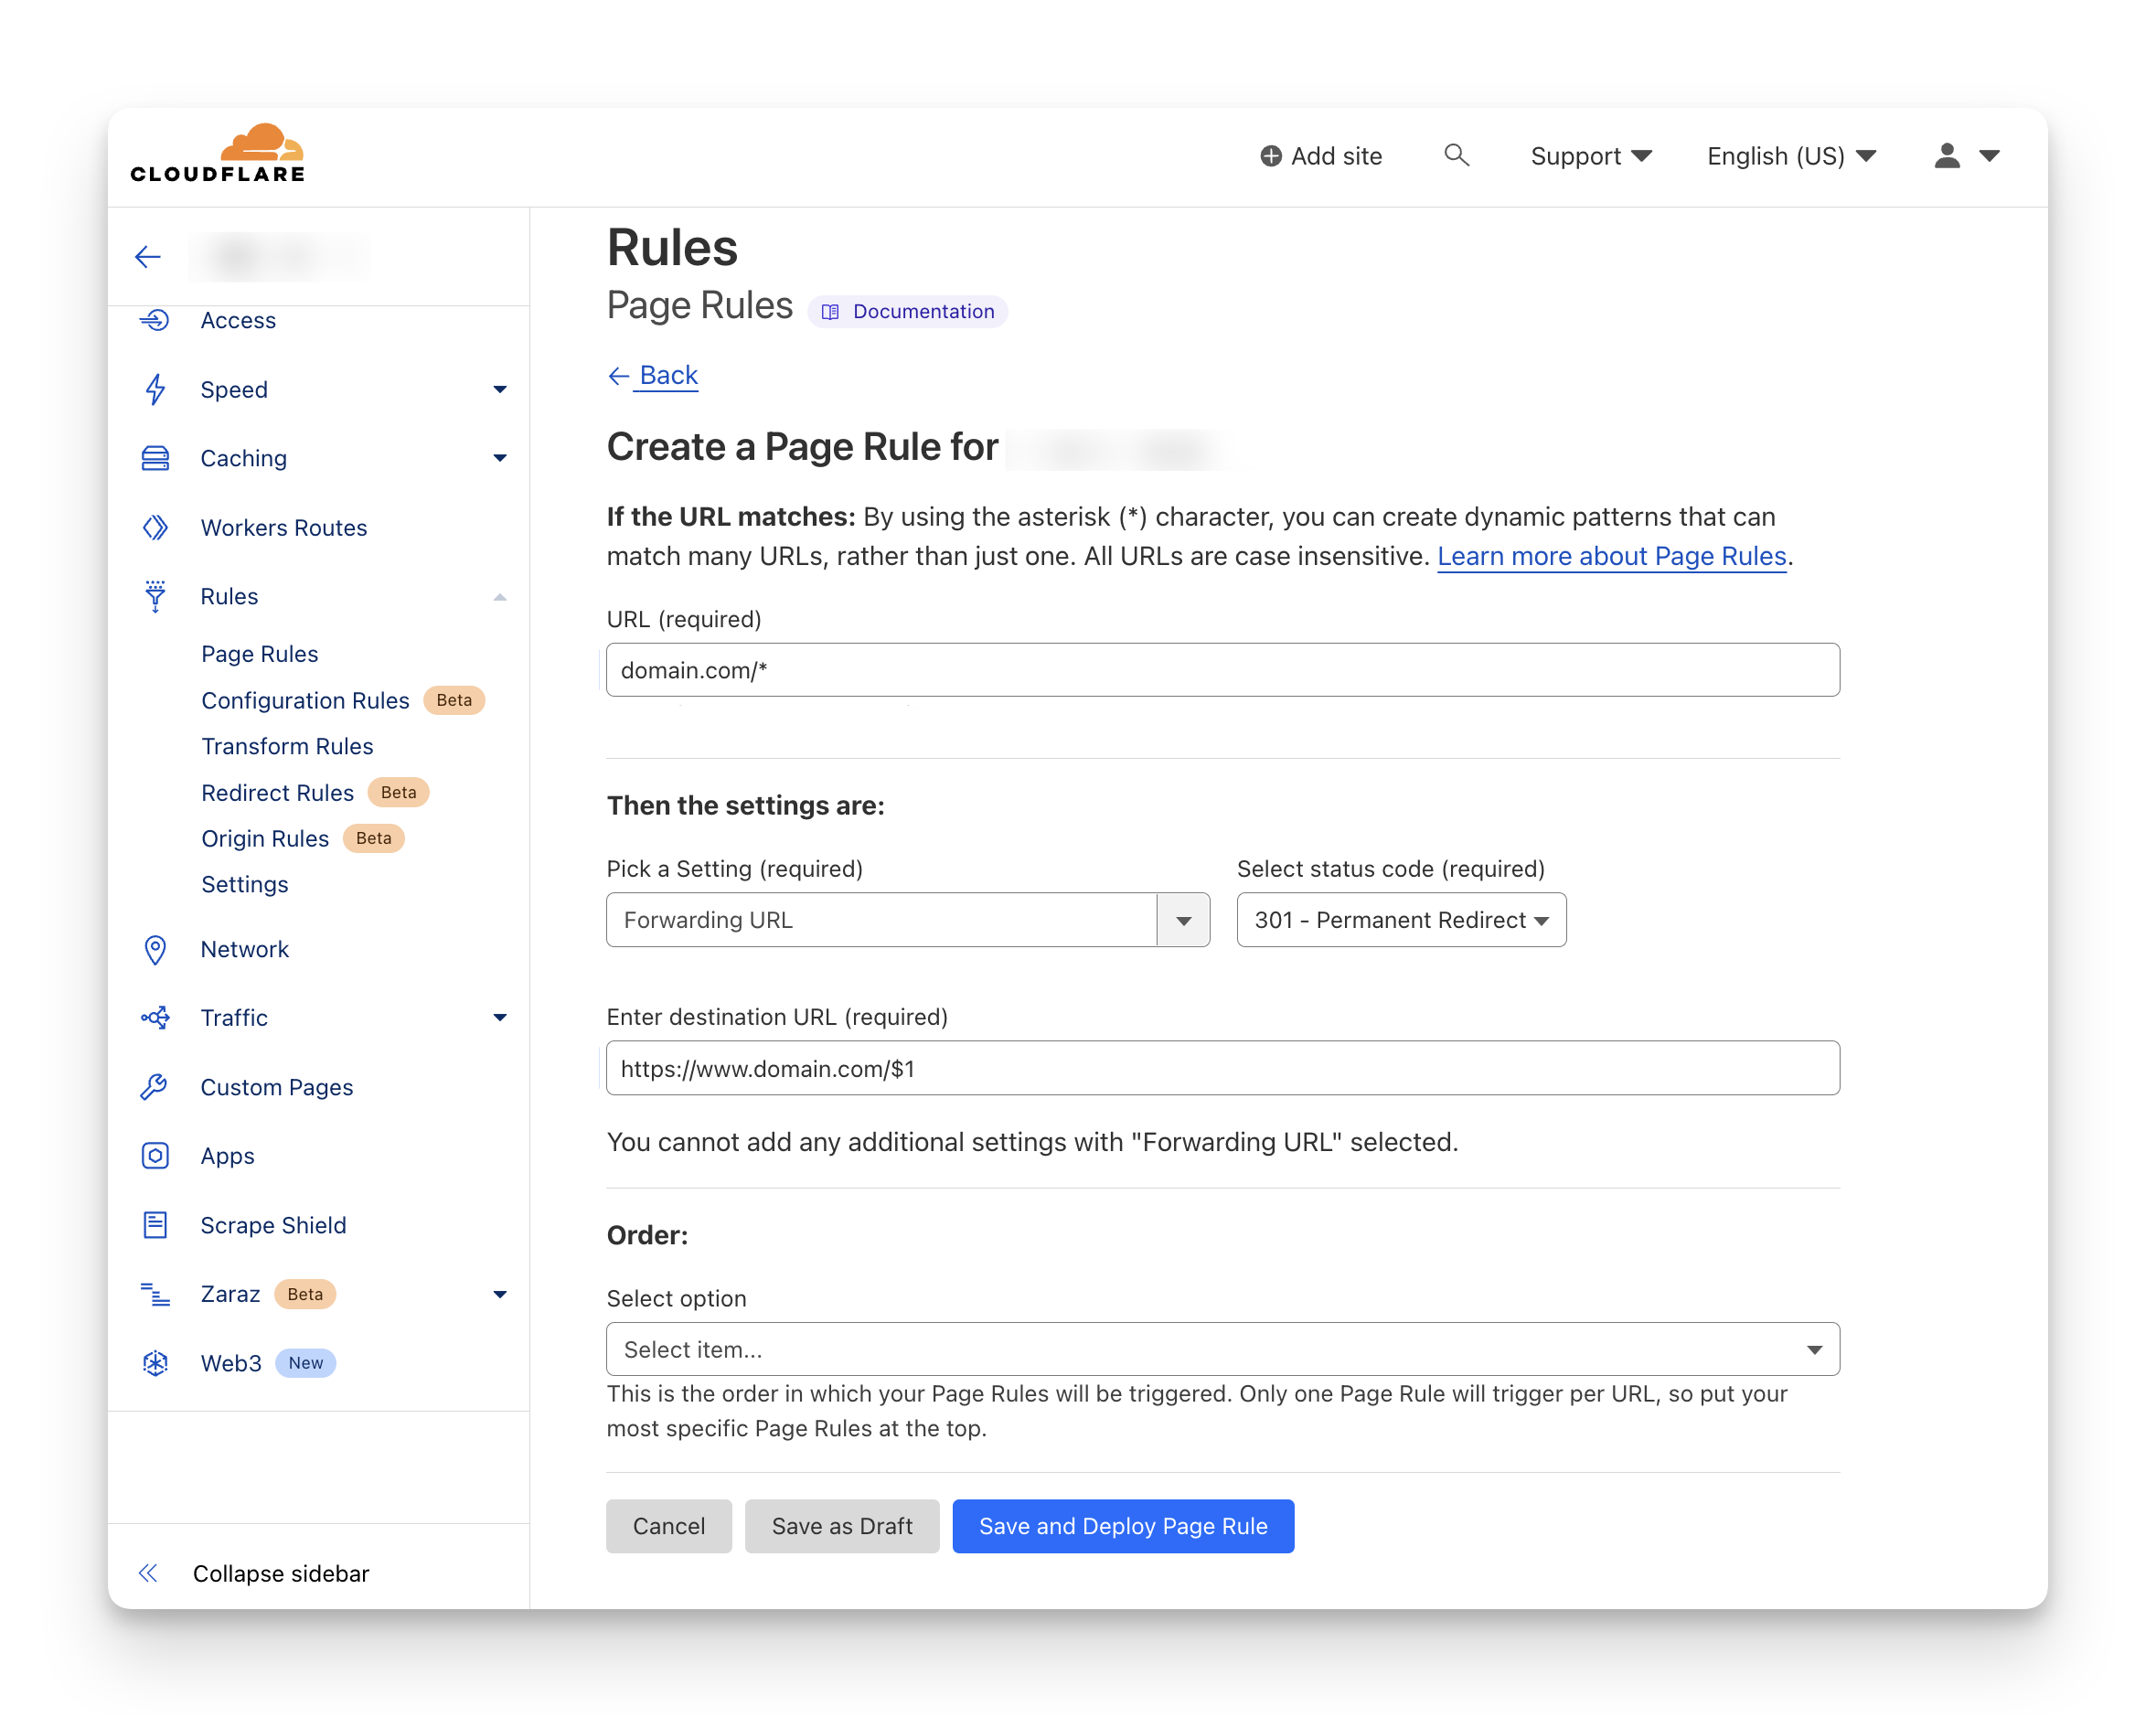
In the sidebar menu, click Rules → Page rules.
Click Create Page Rule.
Enter your domain without www and use “/*” at the end (e.g., domain.com/) in the URL field.
Choose Forwarding URL from the dropdown and select 301 - Permanent Redirect under the Pick a setting option.
Enter your domain starting with "https://www" and ending with “/$1” as shown in the example below.
Click Save and Deploy Page Rule.
Step 6: Test redirect
Once you have set the page rules, test this out in an incognito browser session using your domain URL without www, which should now automatically redirect it to your root domain URL with www.