Set up a custom subdomain
Last updated: September, 2026
This article will guide you through setting up a custom subdomain in your community.
❗Important: Please note that by setting up a custom subdomain, you will lose Google, Facebook, and Twitter sign-in/sign-up options with Circle. Members using those sign-in methods can log in only if they have set a password for their Circle account.
If your members do not have a Circle account password, they can request a new one using this link: login.circle.so/users/password/new
Step 1: Enter your subdomain
To set up a custom subdomain in your community, it is important to ensure that the CNAME records are correctly added to your domain host’s DNS settings.
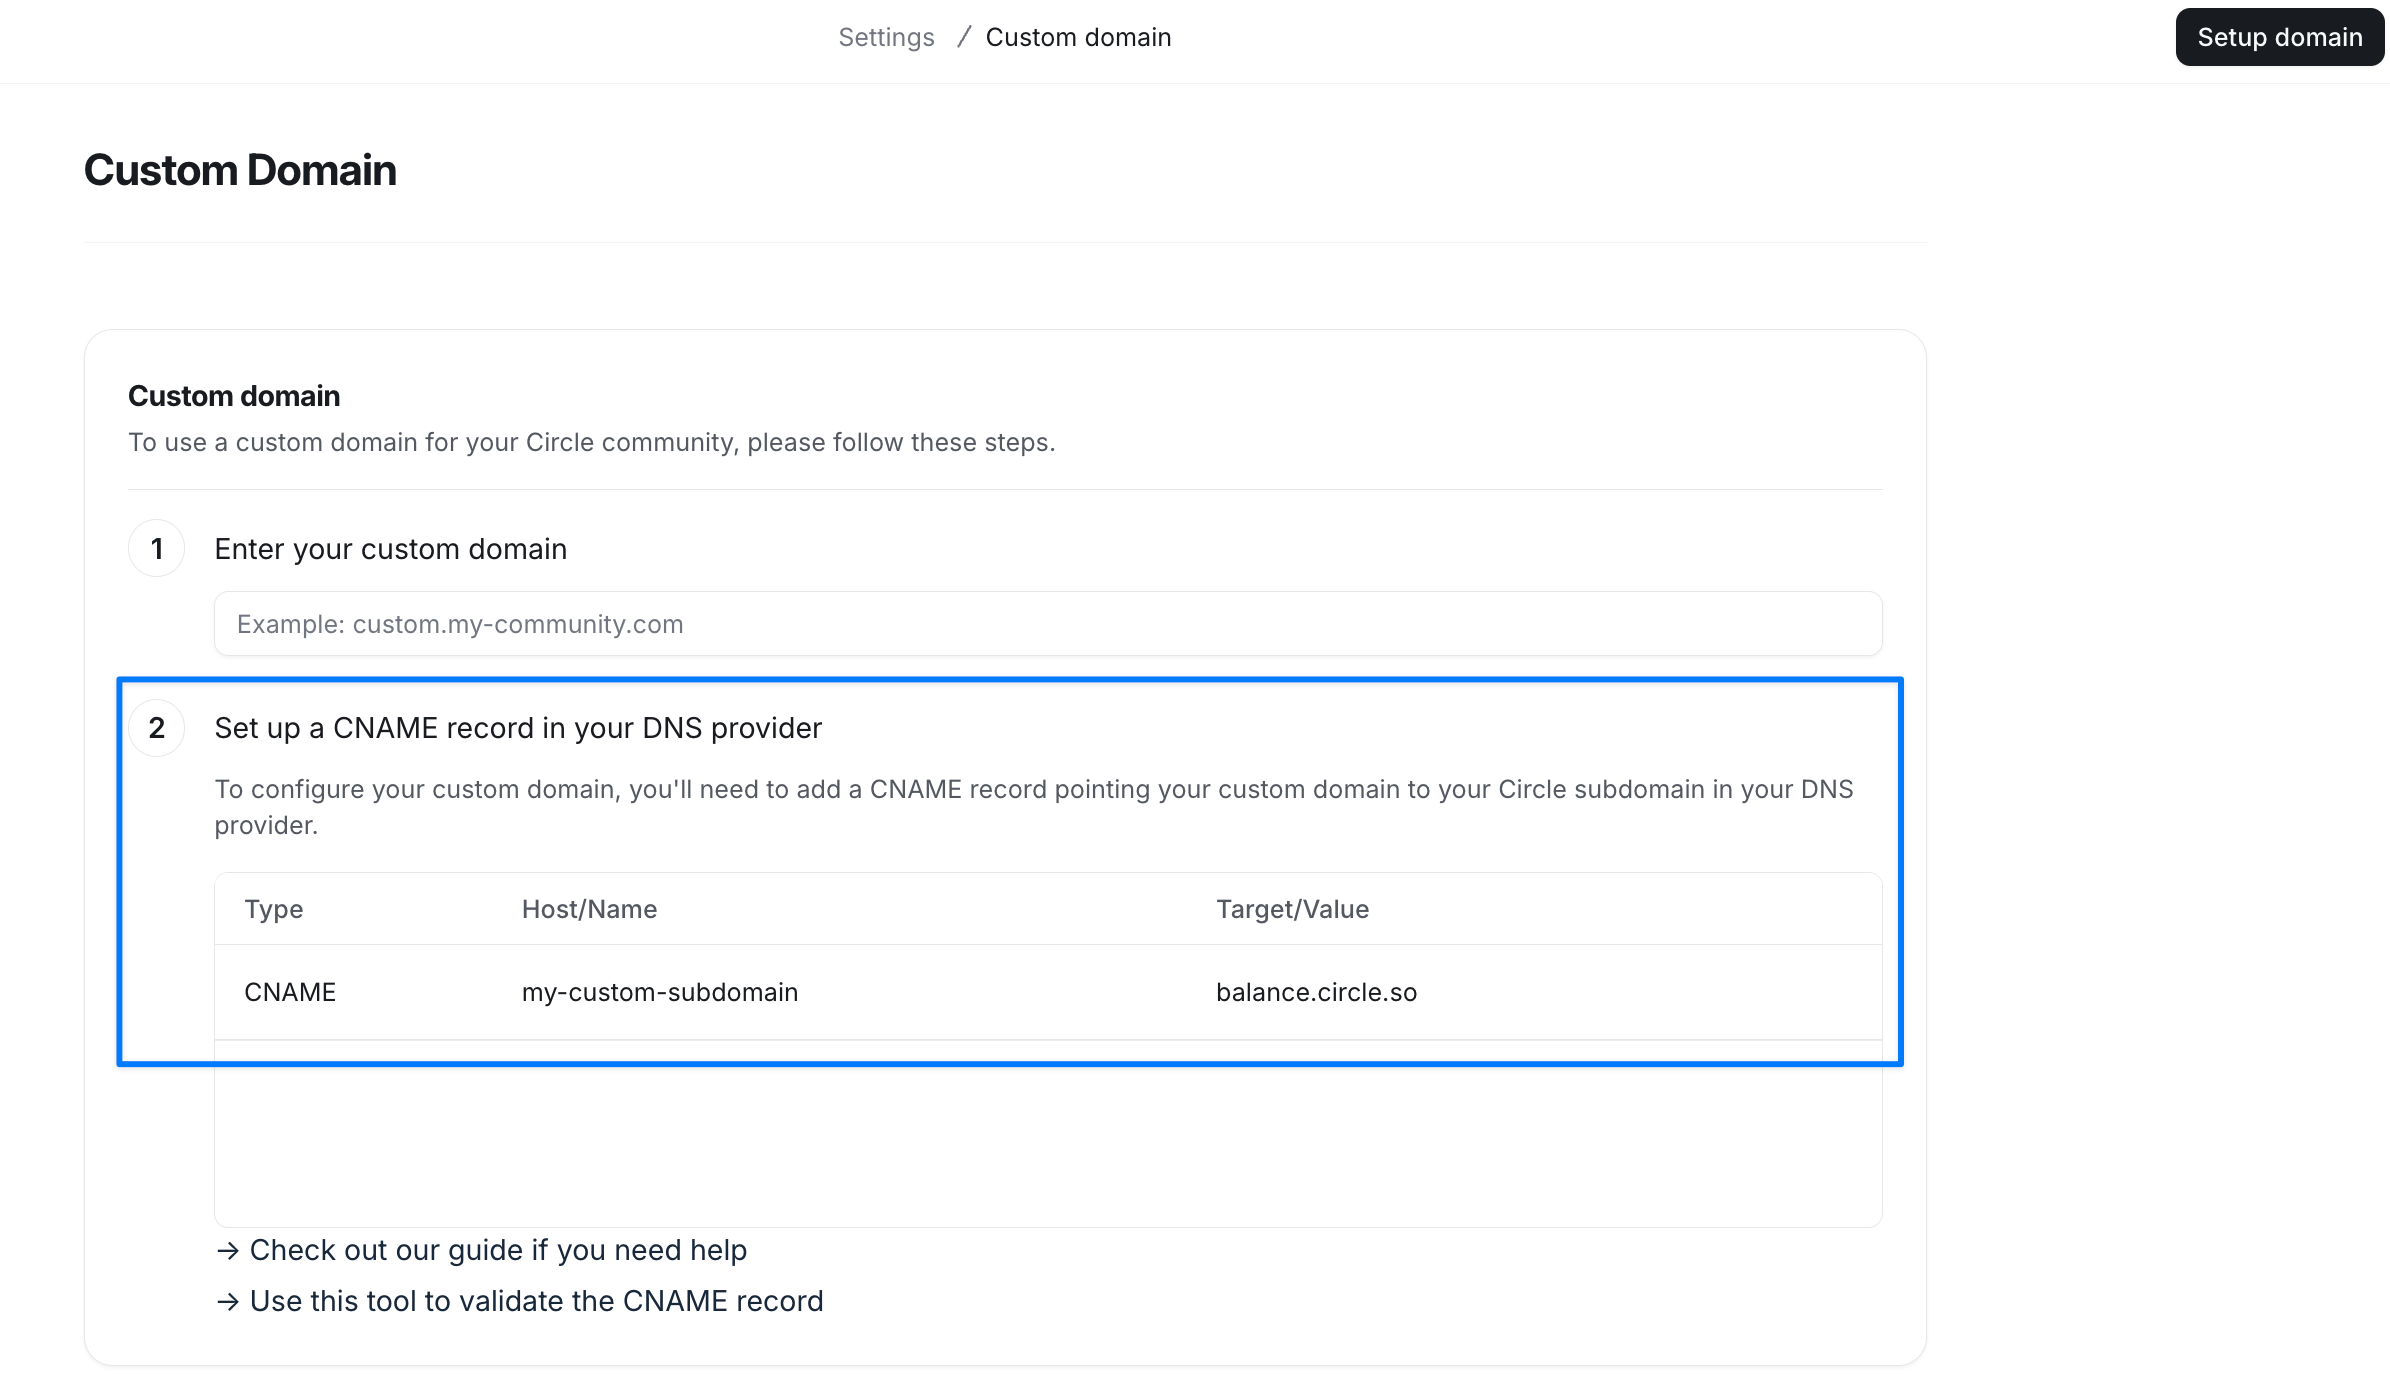
When you enter your subdomain in your community’s custom domain settings, we display the CNAME record information you need to enter when adding a CNAME record in your domain host’s DNS settings.
To get your CNAME record details:
Click the community name or logo (or the dropdown icon next to it) in the top-left corner and select Settings.
Scroll down to the Website section and select Custom domain.
In the Enter your custom domain field, add your subdomain.
Copy Host/Name and Target/Value information displayed in the Set up a CNAME record in your DNS provider field.
-
See Step 2: Set up CNAME records in this article for the next steps.
Step 2: Set up CNAME records
In a separate browser window or on a browser tab, go to your domain host’s platform and set up a CNAME record.
Add CNAME record
When adding a CNAME record, transfer the exact Host/Name and Target/Value information copied from your community’s custom domain settings and paste it into the CNAME record editor to avoid errors.
💡 Tip: When you are adding a Host/Name for a CNAME record, most domain hosting platforms assume the domain link. Hence, you should only enter the prefix that you have chosen for the subdomain in the field unless it is required by your domain host to use the whole URL.
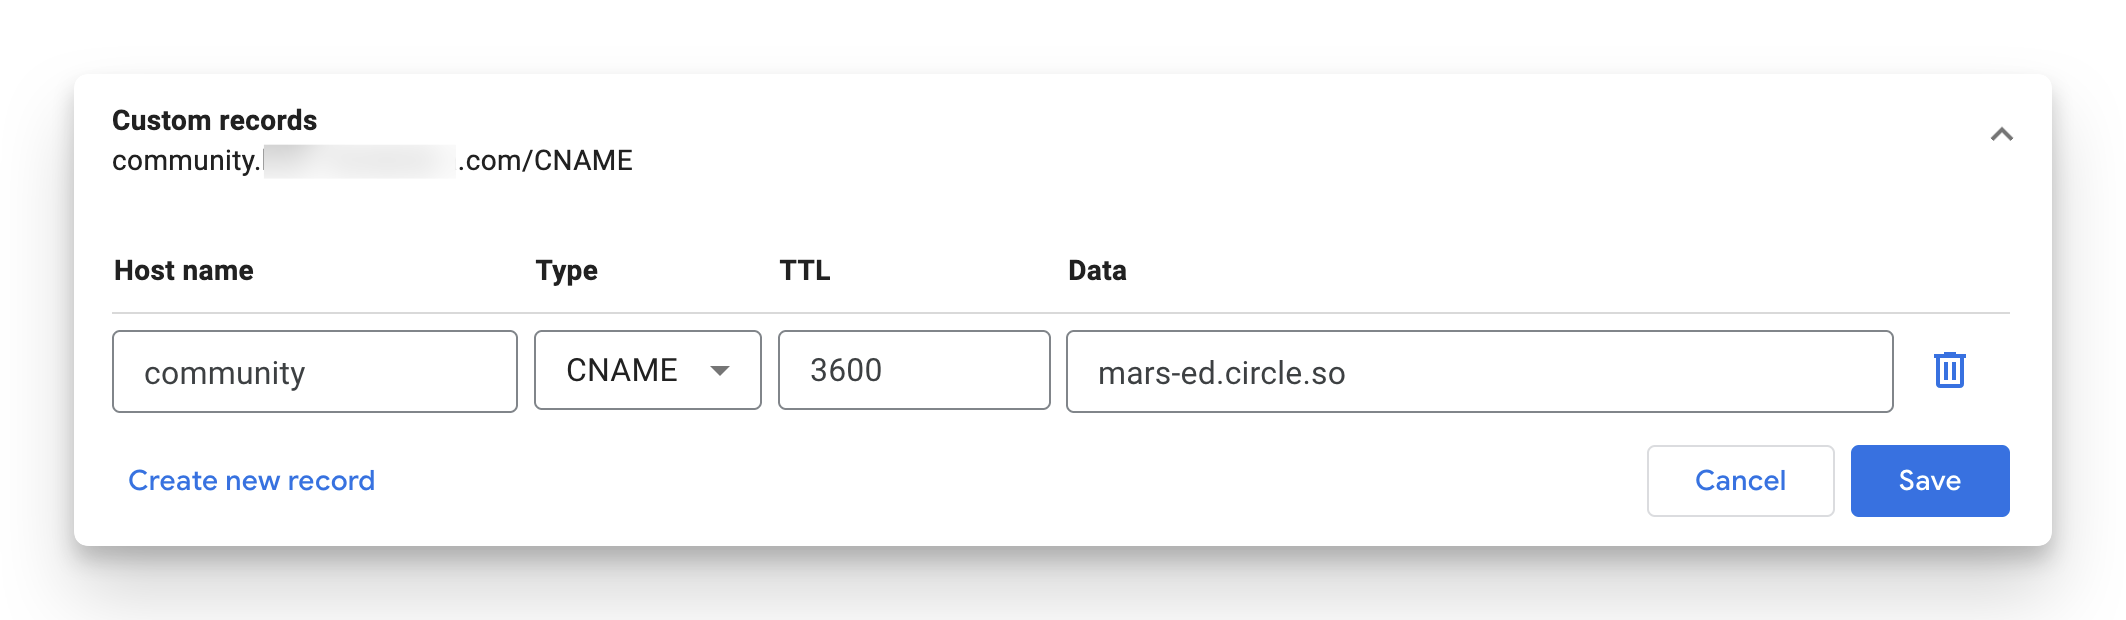
For example, if you would like to set up community.domain.com as a subdomain, you should only enter community in the Host/Name field when adding a CNAME record.
Please see the example of the properly set CNAME record in Google Domains:
Below are links to popular hosting platforms, along with guides for setting up a CNAME. If you don't see yours below, searching your platform along with the keyword CNAME should point you in the right direction.
Cloudflare (please ensure that the Proxy status toggle is turned off for CNAME record)
Test CNAME record
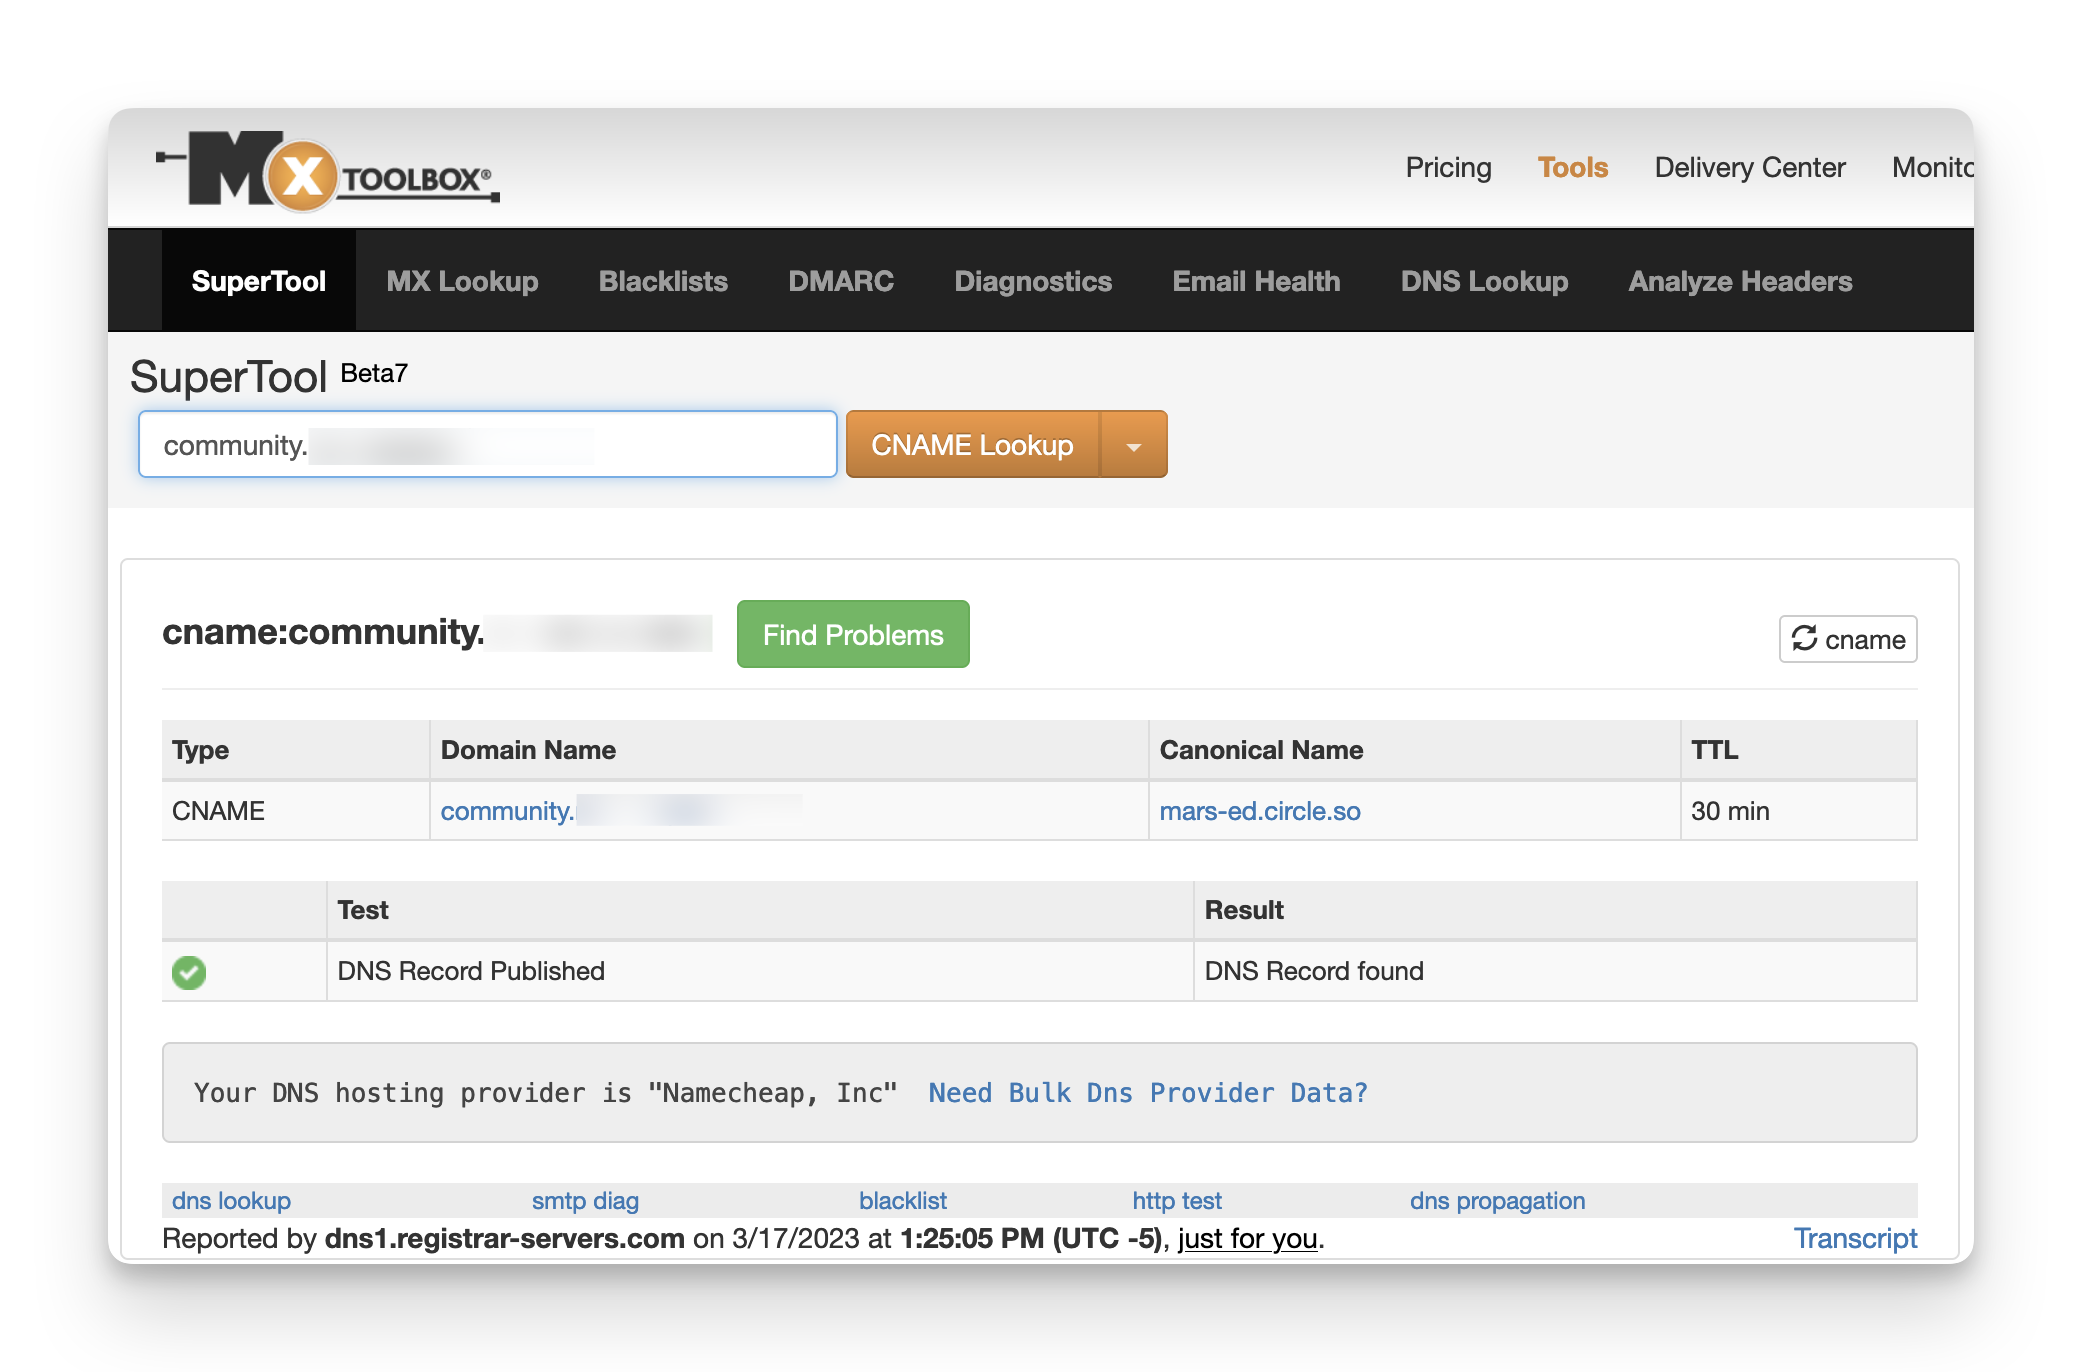
You can use CNAME lookup tools such as Mxtoolbox to test the CNAME record you just added. Successful CNAME setup shows a result (DNS Record found) similar to the one shown below. Once you confirm this, please follow the next step for the final setup.
💡 Tip: If your test shows a result DNS record not found, please go back to your CNAME record setup in the domain host’s DNS settings and ensure there are no typos. You can also reach out to your domain host’s support to get help in adding the record.
Step 3: Confirm the setup
To confirm the custom subdomain set up in your community:
Click the community name or logo (or the dropdown icon next to it) in the top-left corner and select Settings.
Scroll down to the Website section and select Custom domain.
Make sure you have entered the subdomain in the Enter your custom domain field.
Click Setup domain in the top-right corner.
Important: If your DNS already has CAA records, you will also need to add a new CAA record to successfully set up the custom subdomain in your community. Once you click Setup domain, it will automatically check for this and prompt you with an additional step if a new CAA record needs to be added to your DNS. For a detailed guide, see the section below.
Add CAA records if required
If your DNS has Certification Authority Authorization (CAA) records set for any purpose, you will need to add a new CAA record entry to ensure the proper setup of the custom subdomain in your community.
As per the details given in step 3 of your community’s custom domain page, add a new CAA record in your DNS:
Head to your DNS provider account and navigate to the area where you manage your DNS records.
Create a new DNS record and select CAA as the record type.
-
In the record editor, enter @ in the Host/Name field.
ℹ️ If your DNS provider doesn't support the use of @ in the Host/Name field, you can leave it empty.
-
In the Target/Value field, select issue and then enter the following value: “pki.goog”
ℹ️ If your DNS provider doesn't offer the option to choose issue, simply paste the entire value into the field: 0 issue “pki.goog”
Save the record.
Here is an example of adding a CAA record in Namecheap.
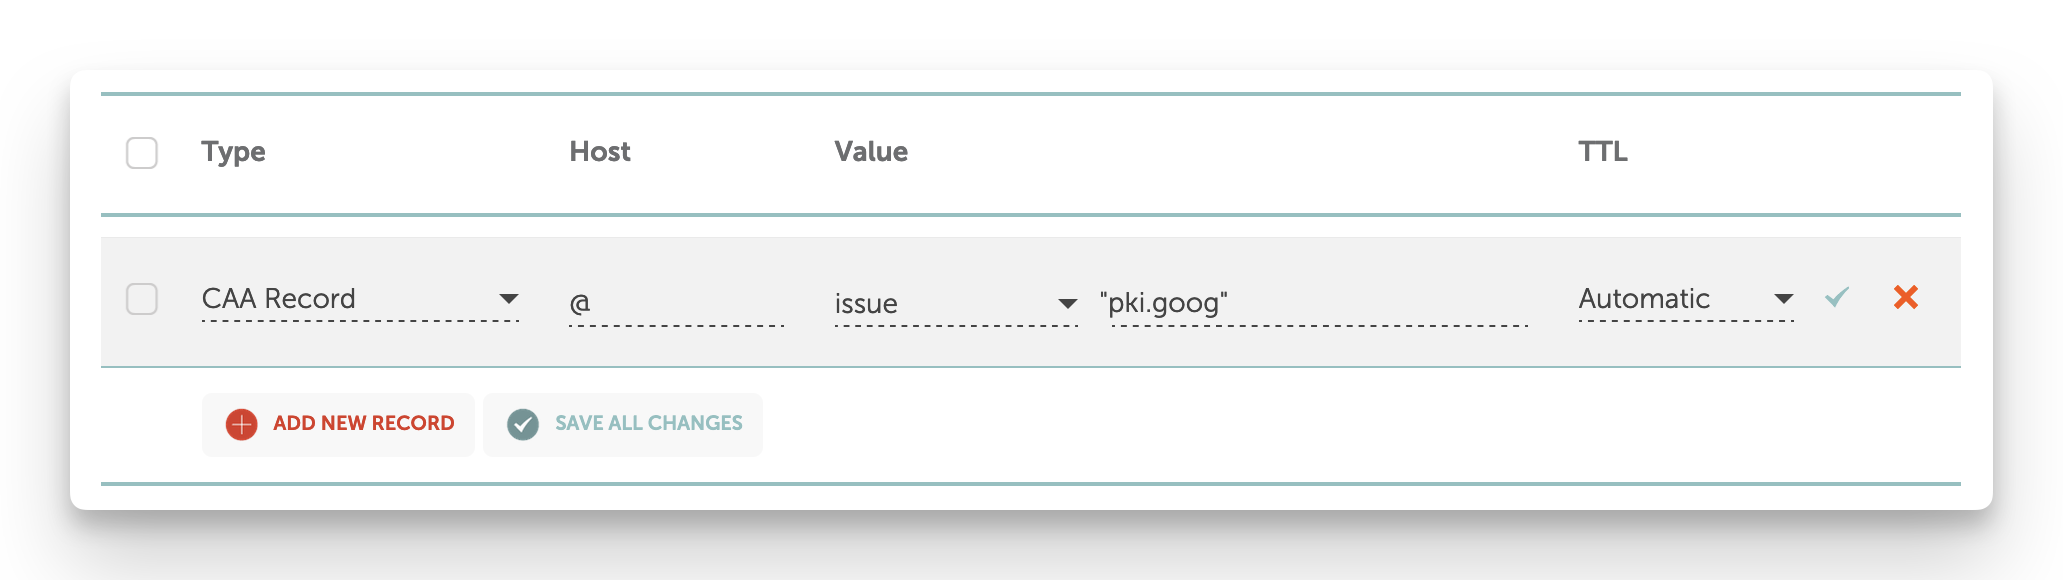
Here is an example of adding a CAA record in Google Domains.
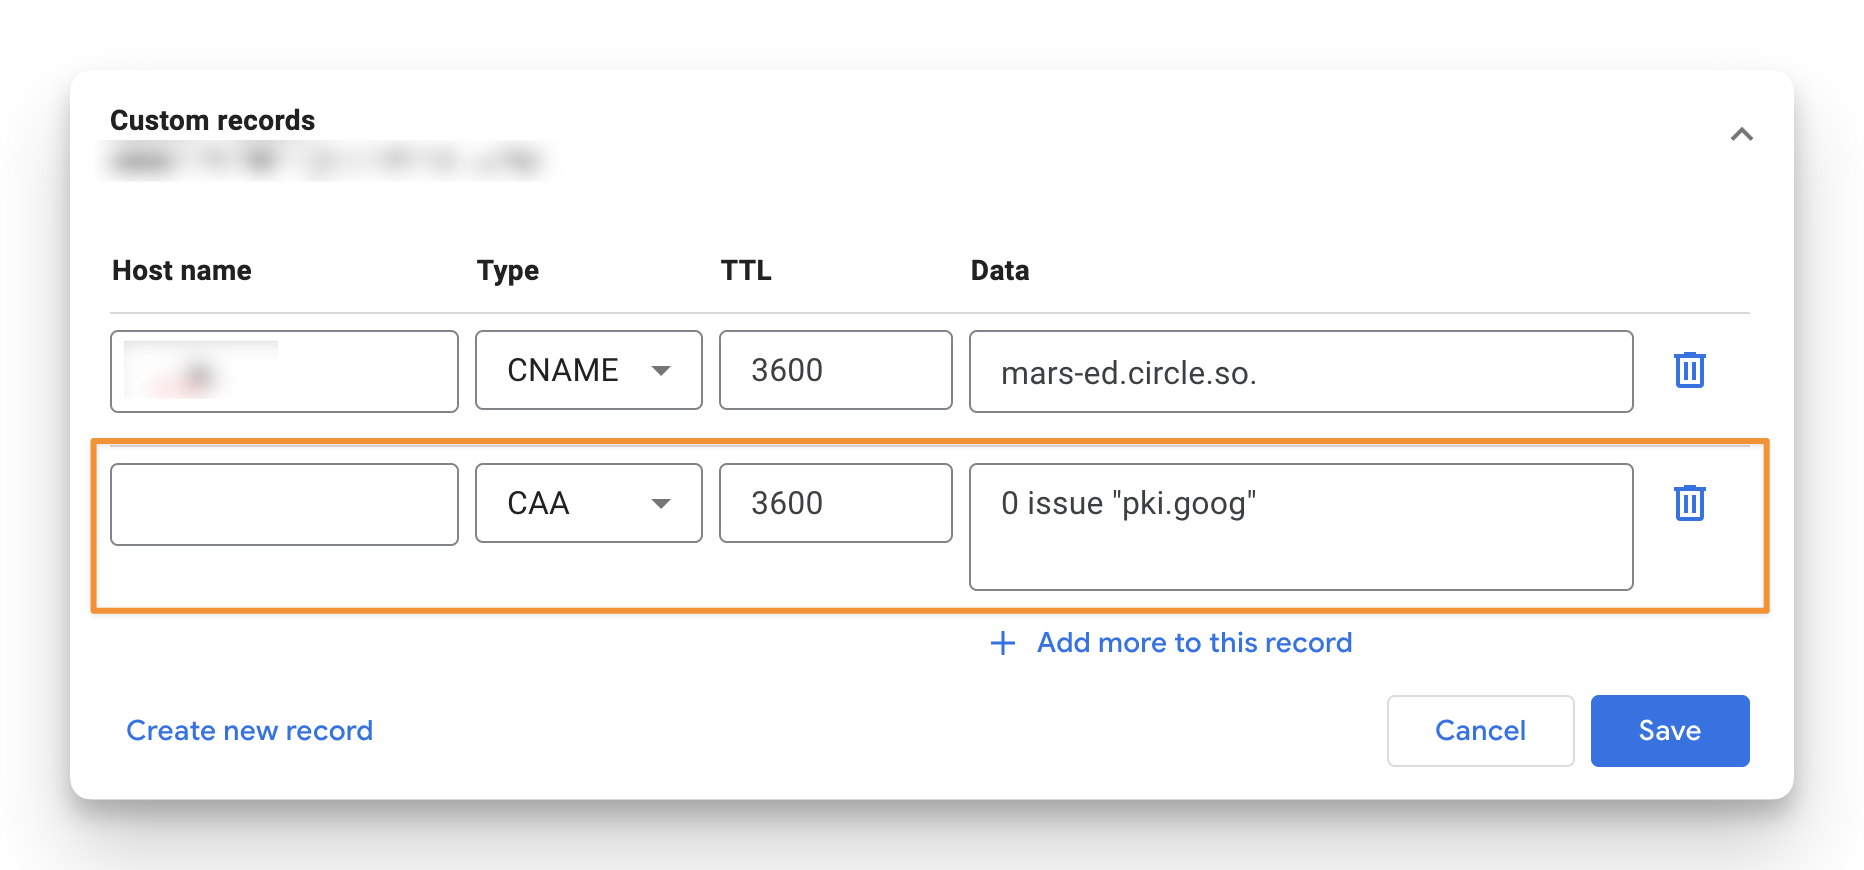
Once the CAA records are added, navigate back to your community’s custom domain page, enter your subdomain, and click Setup domain again. Your subdomain will now appear in pending status while we verify it on our end.
After your subdomain is verified, your custom domain status will become active, and all default community links will automatically redirect to the new subdomain.
Step 4: Test the subdomain setup
Once your subdomain is active in the community, when you browse through your settings, spaces, and posts, all of those URLs will match the new subdomain URL 🎉
You can also test the redirect from your default community URL to your new subdomain by navigating to your community using the community URL.
For example, let’s assume:
Your custom subdomain is community.domain.com.
Your default community URL (Circle domain) is community.circle.so.
When you use community.circle.so to access your community content, it will automatically redirect you to your new custom subdomain (community.domain.com).