Setting up Stripe Tax
Last updated: August, 2026
Welcome to our step-by-step guide on setting up Stripe Tax integration with Circle paywalls. Using this integration, you can automatically calculate and collect taxes for membership transactions in your community.
📚 If you haven't already, we suggest reviewing the following guide to learn about this integration before proceeding with the setup: Understanding Stripe Tax integration with Circle paywalls.
Step 1: Set up Stripe Tax
To get started, set up Stripe Tax in your Stripe business that you have integrated with Circle Paywalls.
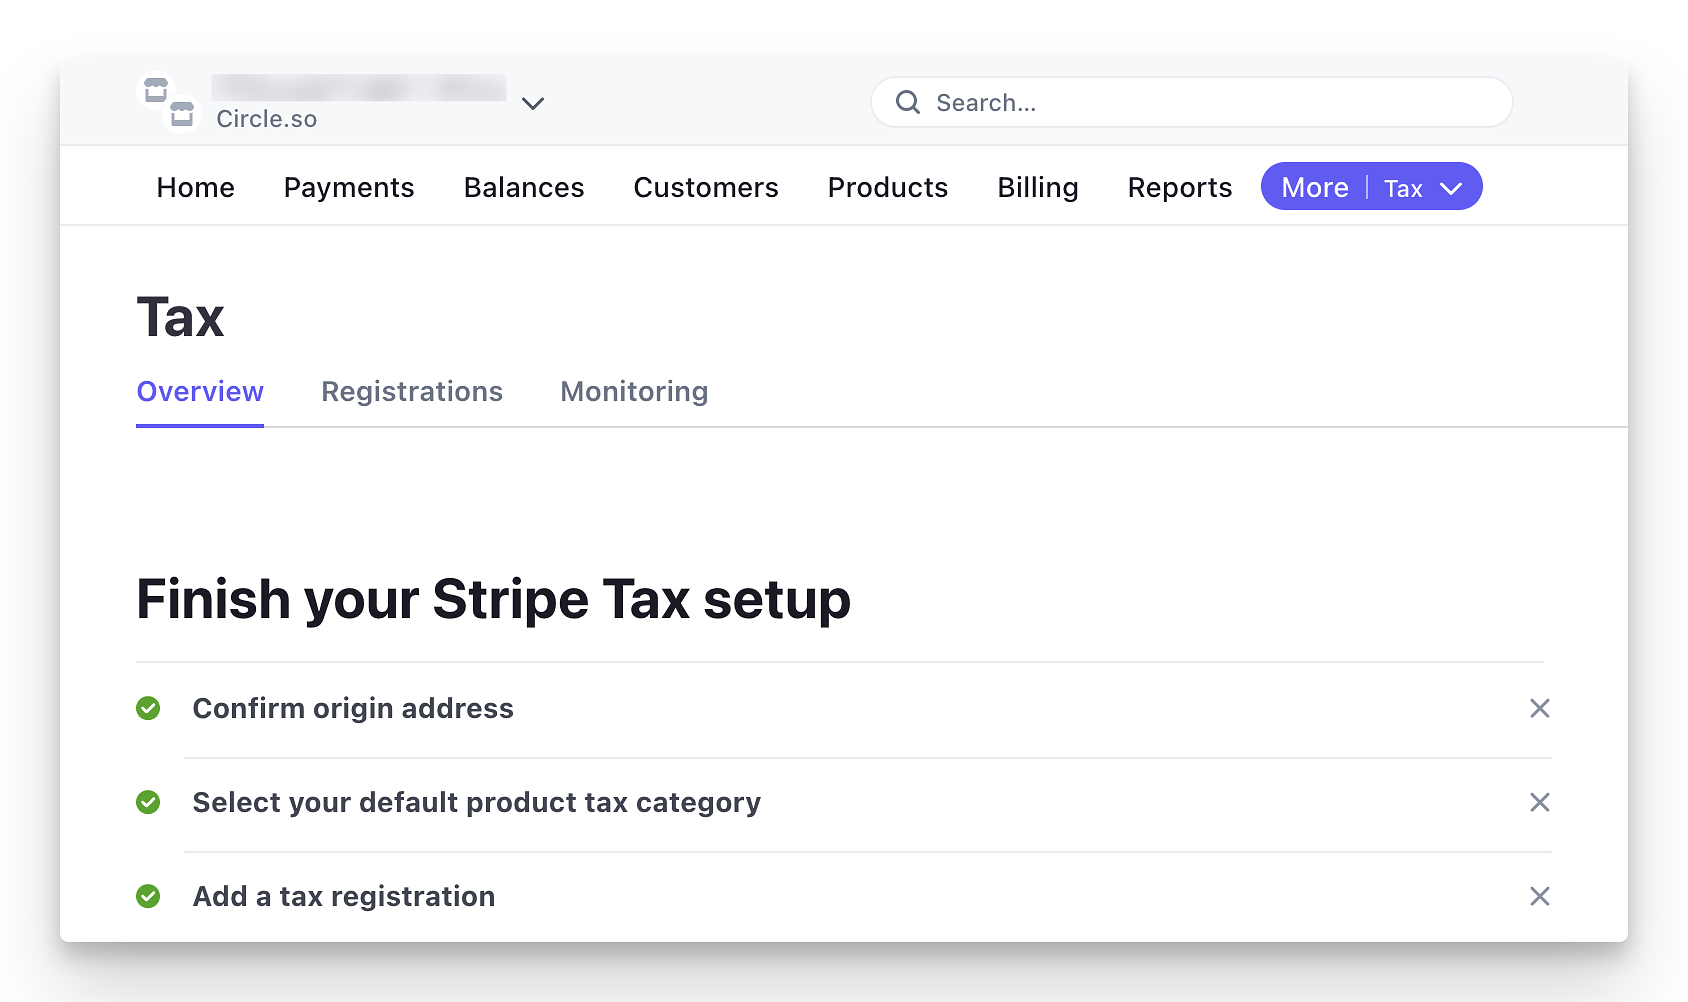
If you have multiple businesses under your Stripe account, ensure you are on the correct business connected to paywalls. To switch between your businesses, click the business name in the upper-left corner and choose the correct business, as shown below.

While logged in to the Stripe account, go to this link: https://dashboard.stripe.com/tax.
On the tax page, provide the following details to complete the setup:
Your origin address: This is usually your business address.
Default product tax category: Select your default Product Tax Category that best matches the products or services you offer in the community.
-
Add a tax registration: To begin collecting taxes for your business, add tax registrations for the locations where you intend to collect taxes. If you haven't obtained a tax registration yet, you can skip this step for now.
❗Important: Please note that you must add a tax registration for each location from which you want to calculate and collect taxes from your members. Stripe won't automatically collect taxes from a location if you haven't added the tax registration for the relevant state, province, or country.
If your members are located in different countries or provinces where you have tax obligations, you can add multiple tax registrations for these locations to automatically calculate and collect taxes.
If you need assistance in determining which locations you have tax obligations for your business that require tax collection, we strongly recommend seeking guidance from a tax expert. For more information, see Understanding Stripe Tax integration with Circle paywalls.
To add new tax registrations in the future, return to the Stripe Tax page in your Stripe account, go to the Registrations tab, and click Add registration.
After finishing the three steps above, proceed with the remaining setup in your community by following the guidelines provided in the Enable tax collection section below.
💡 Tip: You can update your tax details, such as origin address or product tax category, by navigating to Tax settings in your Stripe account.
Step 2: Enable tax collection
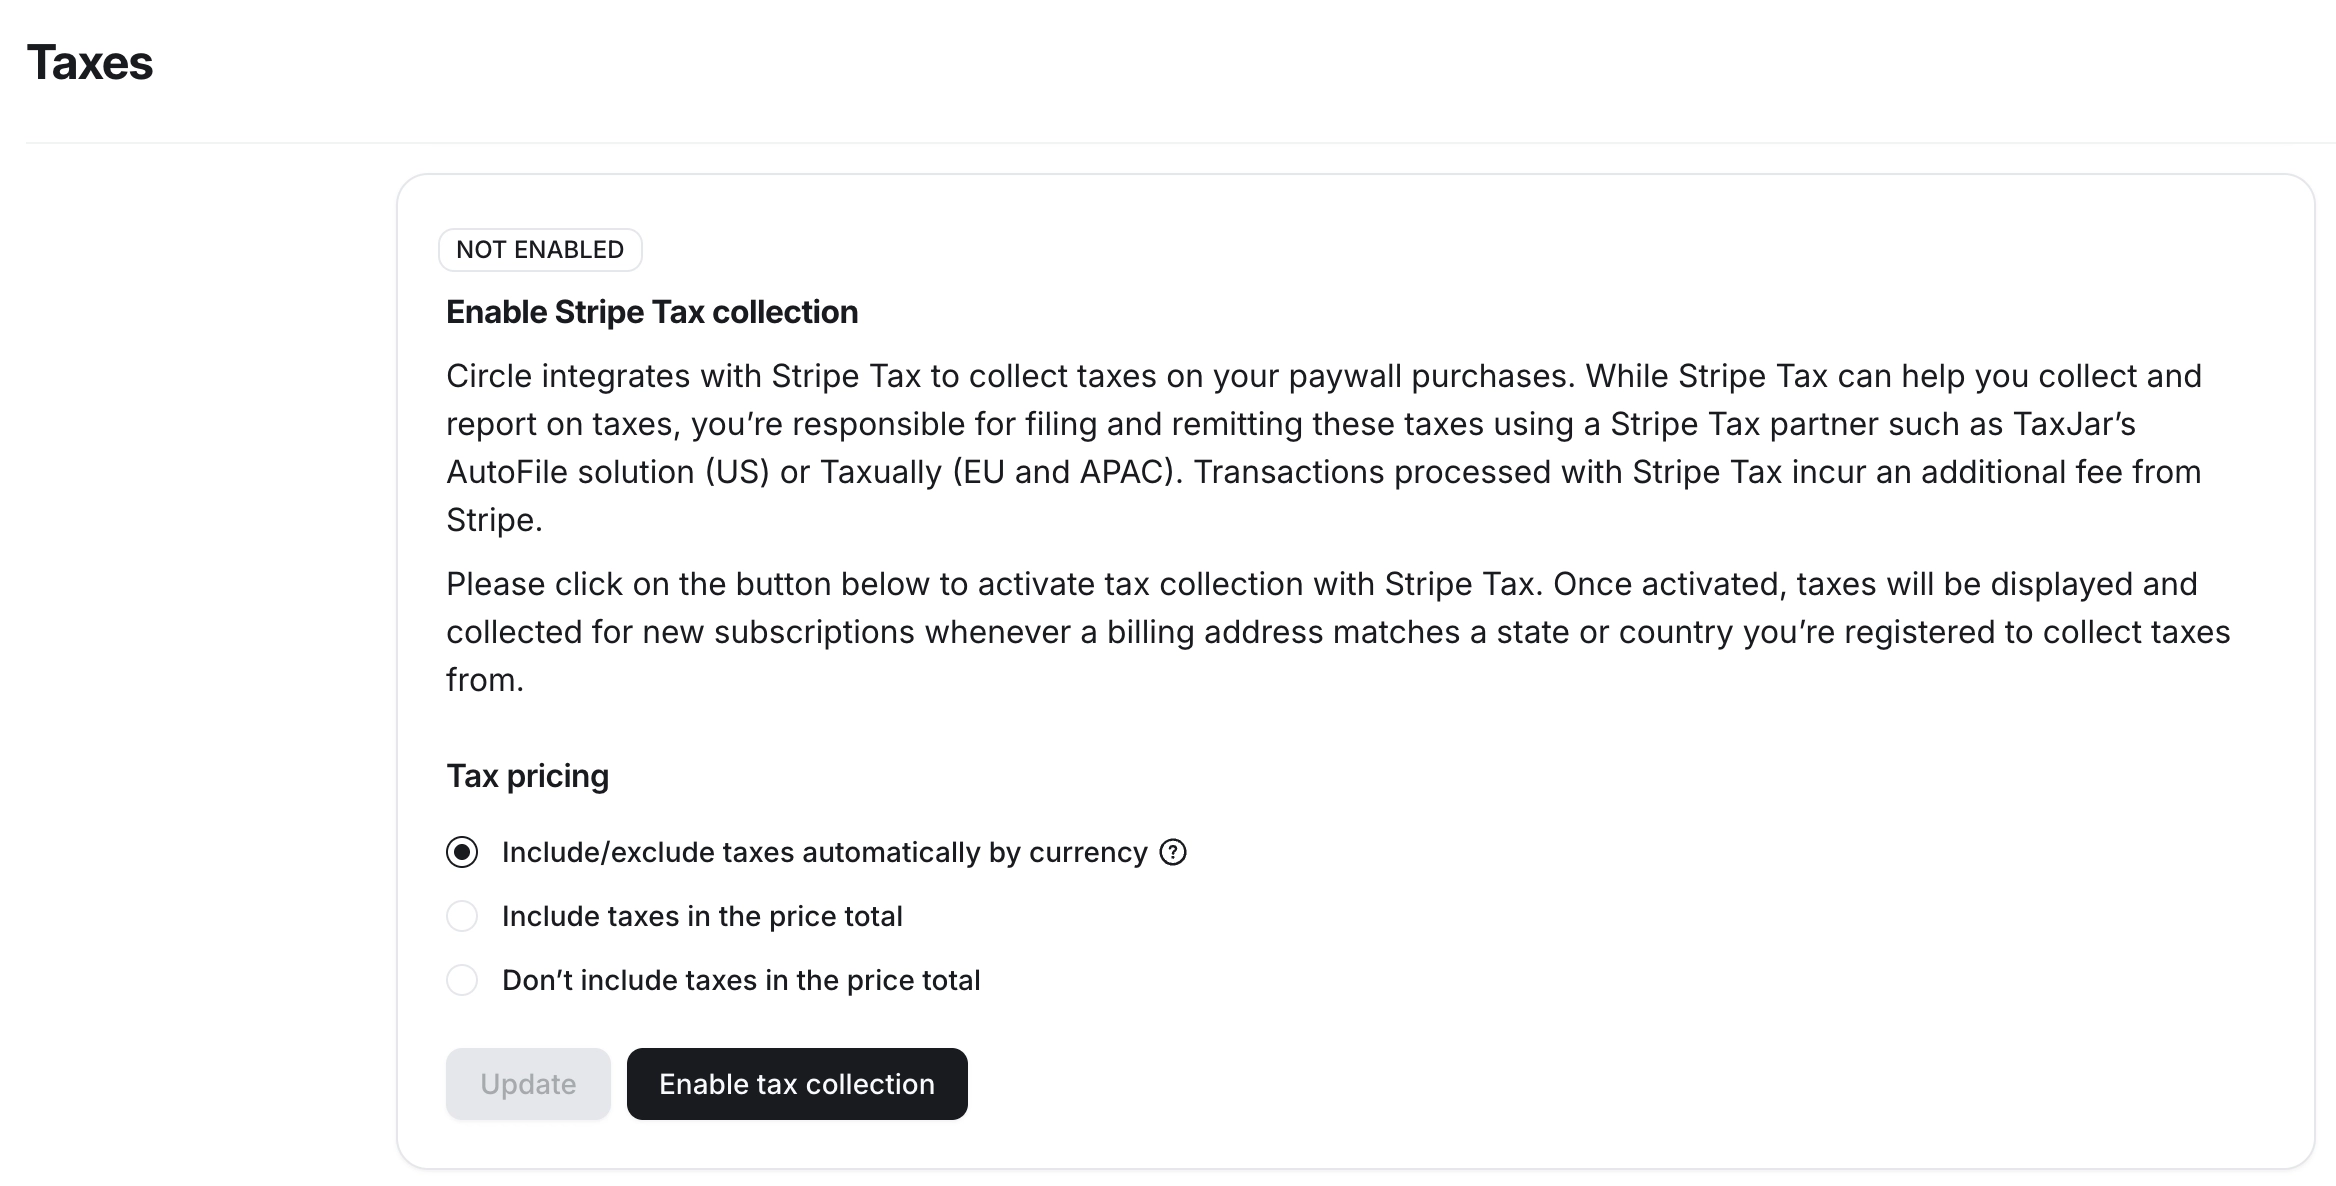
Once you have set up the Stripe Tax in your Stripe account, return to your community to enable the tax collection. If you already have the Taxes tab open in your community, please refresh the page to proceed with the remaining setup.
To enable tax collection:
Click the community name or logo (or the dropdown icon next to it) in the top-left corner and select Settings.
Scroll down to the Payments section and select Taxes.
-
Choose a tax pricing method (see example below):
Include/exclude taxes automatically by currency: For USD and CAD, tax will be excluded from the price. For all other currencies, tax will be included in the price.
Include taxes in the price total: Taxes will be included in the paywall price you've set.
Don’t include taxes in the total price: Taxes will be charged on top of the paywall price.
Click Enable tax collection.
💡 Tip: You can navigate to the Taxes tab anytime to update your pricing preferences. For more information, see Manage tax collection settings for paywalls.
Tax pricing example
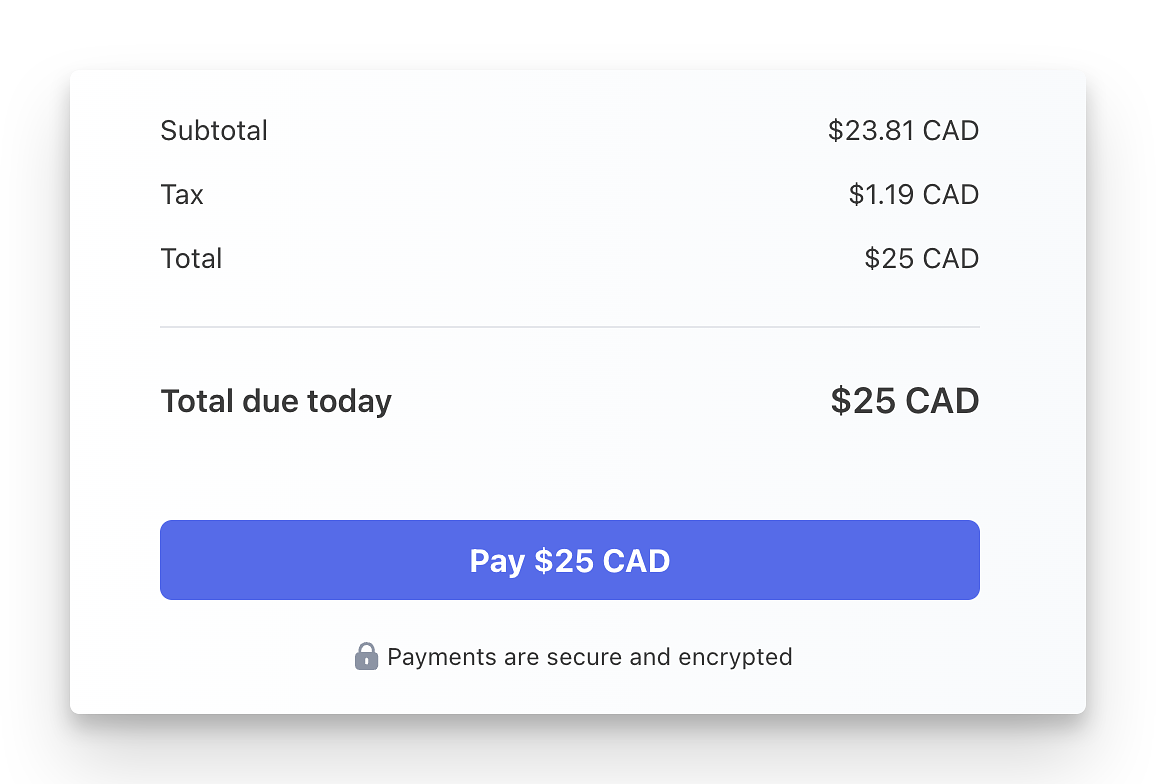
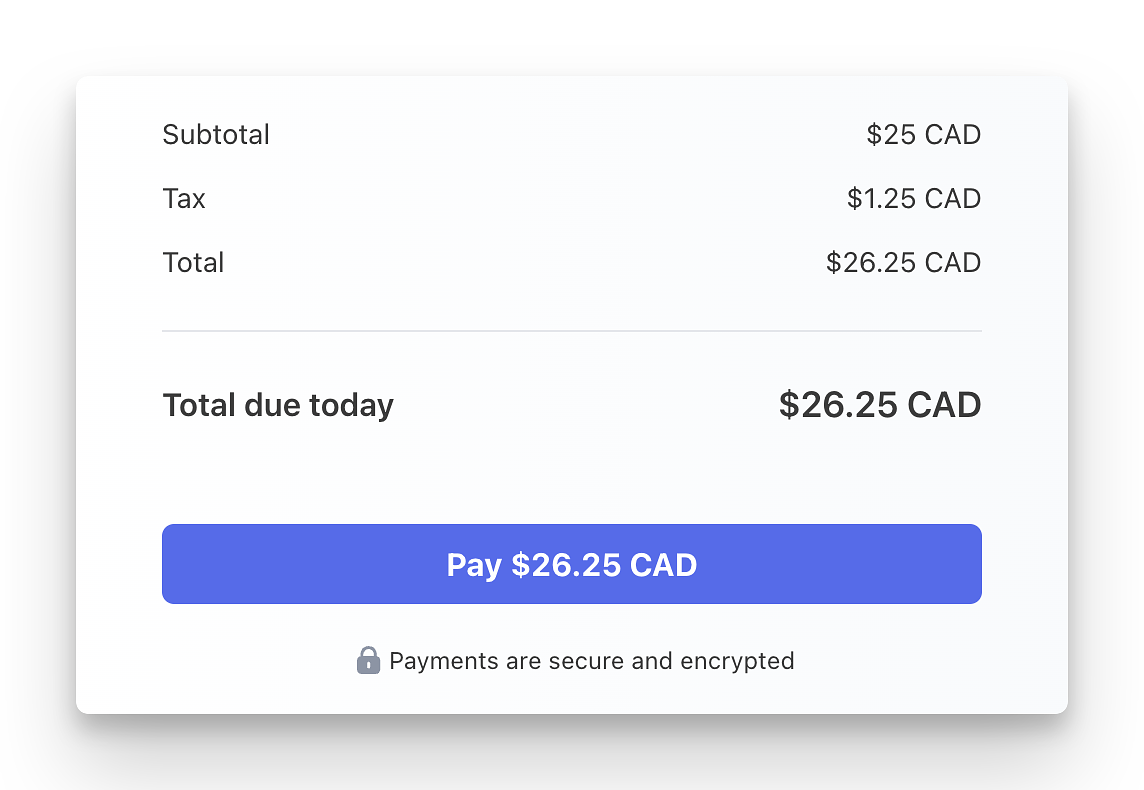
Let’s assume that you have a paywall priced at $25,
If you choose the Include taxes in the price total option, Stripe will calculate taxes while keeping the total the same as your paywall price. If you are using this option, you may want to factor in taxes when determining the price for your paywall.
If you select the Don’t include taxes in the price total option, Stripe will calculate taxes on top of your paywall price.
You're all set! To test it out, enter your paywall checkout URL in the incognito browser and add your payment and address details to view the applicable taxes. Additionally, you can add a Tax ID on the checkout page using the Add Tax ID option located below the address section. This Tax ID will appear on the invoices.
ℹ️ Note: While Stripe Tax can help you collect and report on taxes, you'll be responsible for filing and remitting these taxes using a Stripe Tax partner such as TaxJar’s AutoFile solution (US) or Taxually (EU and APAC).
📚 To familiarize yourself with Stripe tax, please see these helpful guides: