Understanding the paywall checkout flow
Last updated: January 22, 2026
Once you’ve set up paywalls in your Circle community, users can purchase memberships to unlock exclusive offerings. This guide covers how the checkout page works and the purchase flow for users in different scenarios.
About the checkout process
Circle paywalls let you share a unique checkout URL with your audience so they can purchase a membership for your community.
When someone clicks your paywall checkout link, they’re taken to a streamlined checkout page. Here’s what they’ll experience:
View the membership offer: The checkout page displays the membership name, pricing options (such as monthly or annual), and a description. This helps users understand exactly what they’re purchasing before continuing.
Enter their account information: Our system reviews the email a user enters and prompts them to create a password or enter a One time passcode (OTP) depending on their account status.
Enter payment information: They’ll add payment details and agree to your community’s terms and privacy policy.
Complete the purchase: After confirming payment, the purchase is processed, and access is granted automatically based on your paywall settings.
-
What happens next: After checkout, what the user sees depends on your paywall setup and their account status. They may:
See an upsells page offering an add-on to their primary purchase.
See a standard thank you page.
Be redirected to a custom URL you’ve set.
Be asked to complete their profile before proceeding.
The checkout experience varies based on two main factors:
Whether the user already has a Circle account.
Whether your community has single sign-on (SSO) enabled.
We’ll walk through each scenario below, starting with what the user sees on the checkout page.
Page layout and user experience
The checkout page is designed to be clear, focused, and user-friendly. It’s split into two main sections:
Left side: Displays the membership name, description, benefits, testimonials, pricing options, and a summary of the order.
Right side: Includes sections for the community account along with payment details.
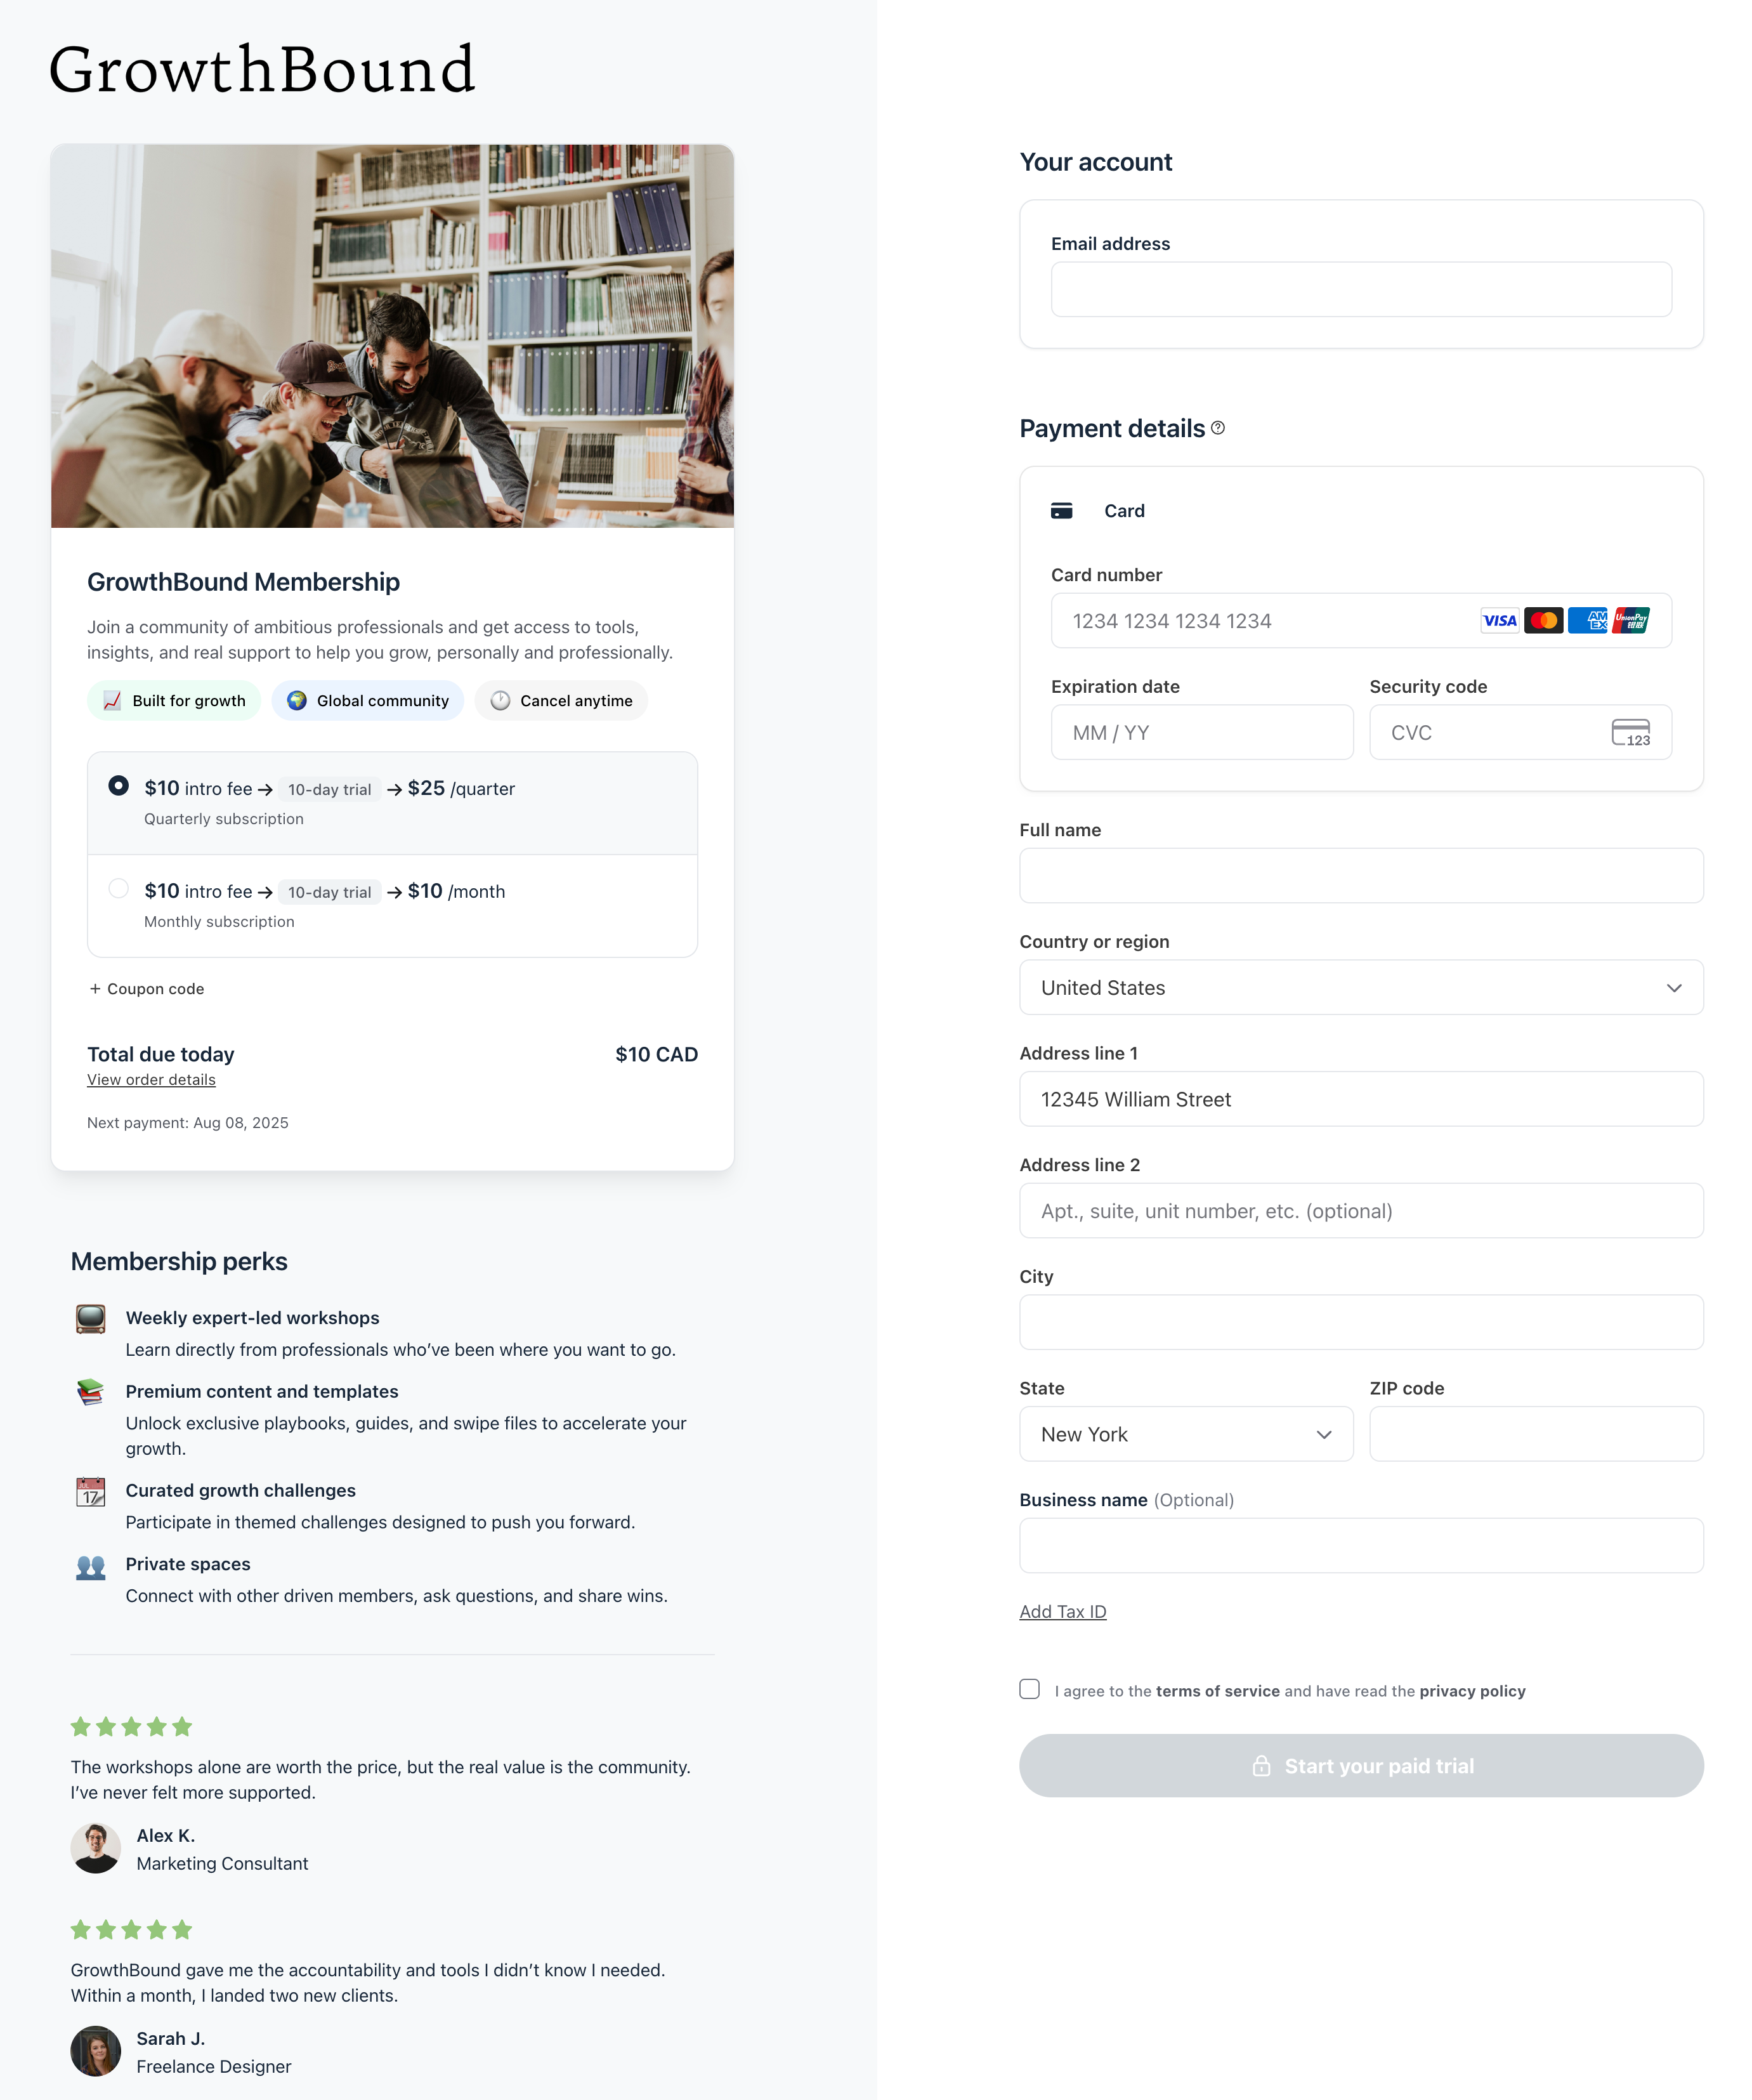
Below is a breakdown of what users see and interact with on the page.
Paywall description and pricing options
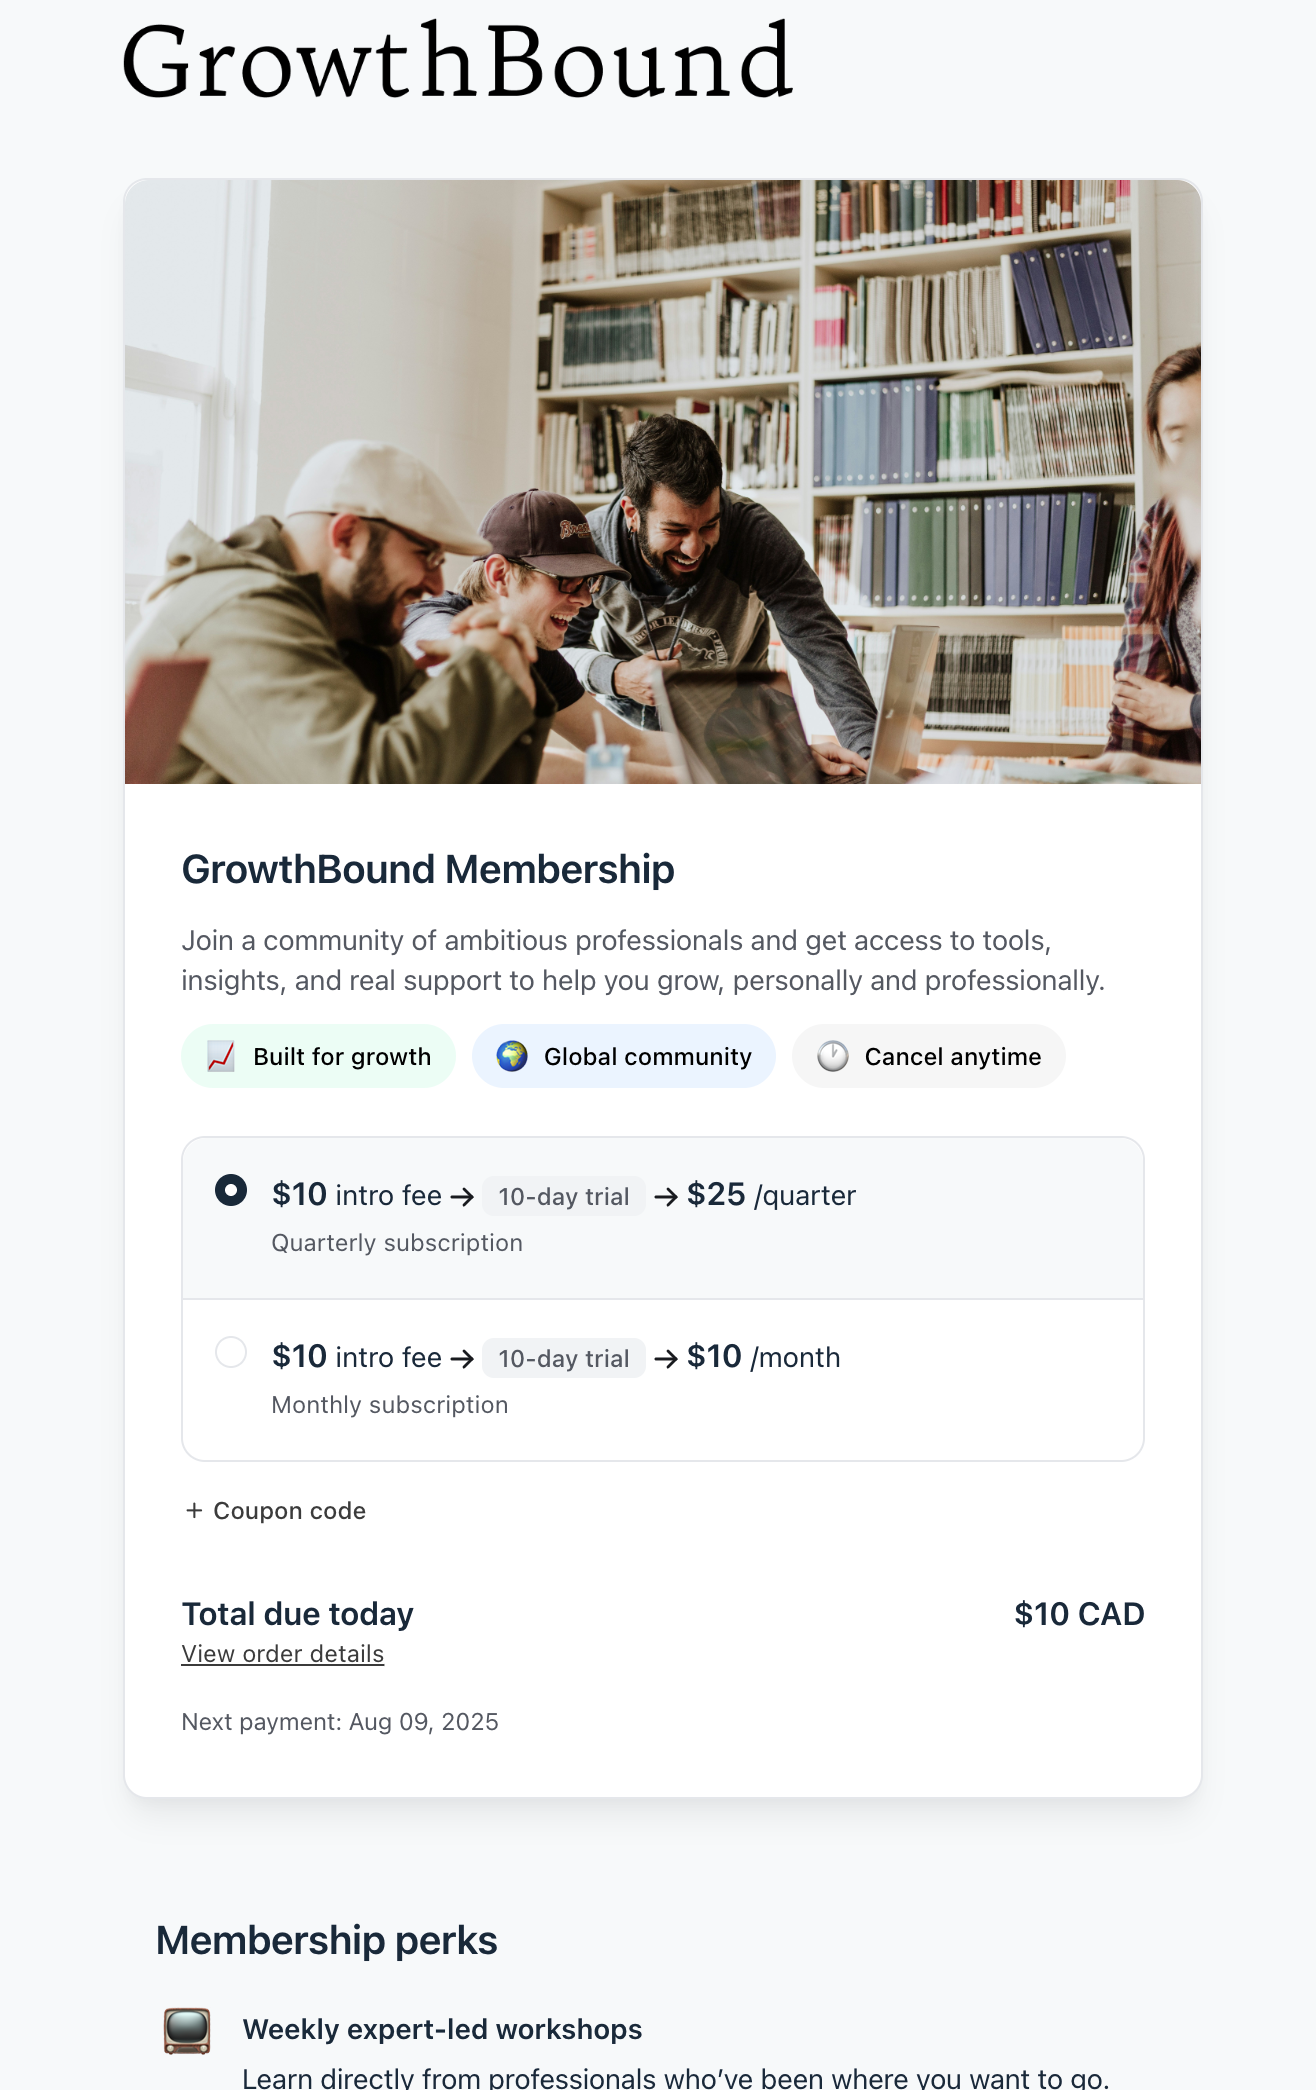
At the top of the left section, users see a card with your paywall description, badges, and available pricing plans.
Each plan clearly outlines the following details:
Plan type: Whether it’s a subscription, installment, or one-time fee.
Trial period: Shown only if a trial is included in the plan.
-
Payment: Shows the plan pricing, including upfront payment if any (labeled as an intro fee). It also indicates the payment frequency if it's a subscription or installments. For example:
$10 intro fee.
$10/month for a subscription plan.
5 x $15/month for an installment plan.
Payment sequence: The plan shows charges in the same order they'll occur. If the plan includes a trial, followed by an intro fee, then a recurring subscription, the display reflects that exact sequence.
This format helps users quickly compare their options and select the plan that works best for them.
Coupons
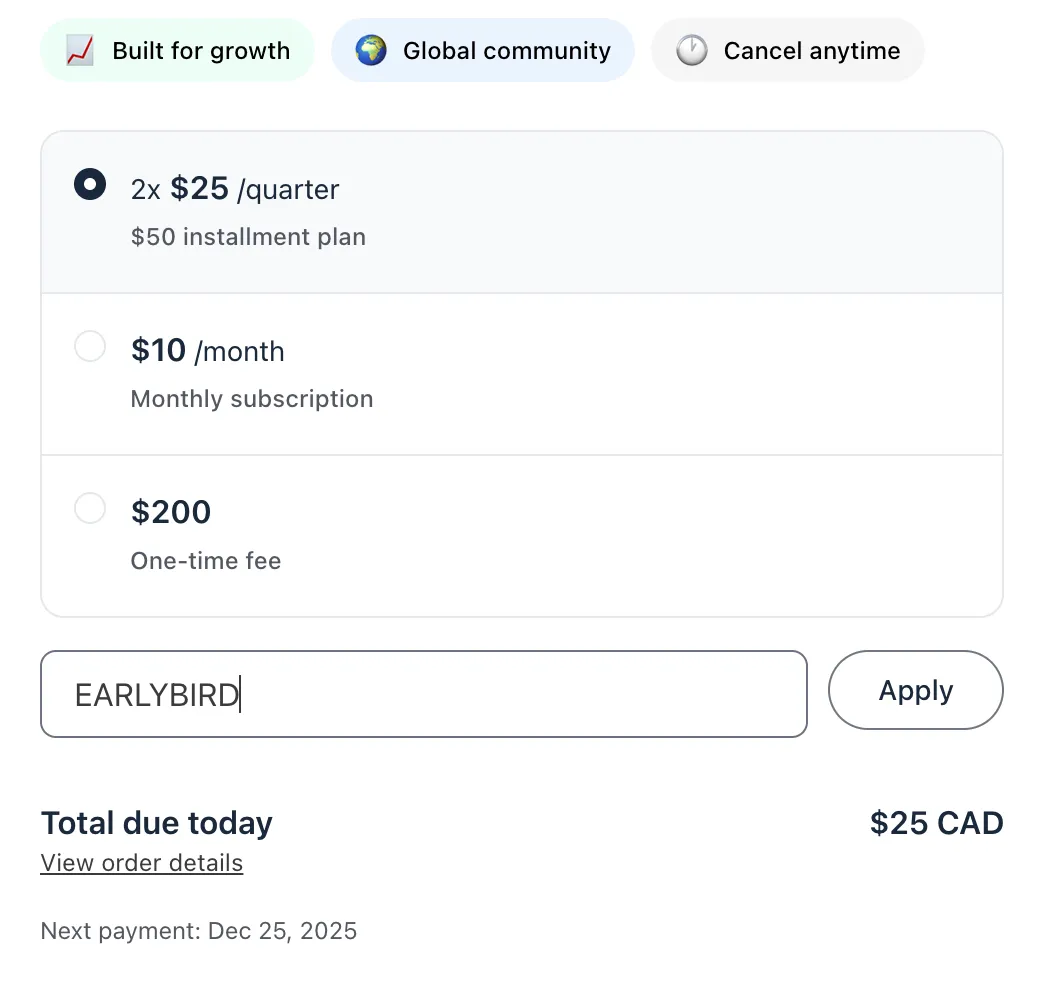
Below the pricing options, users can apply a coupon code to receive a discount on their membership purchase.
To use a coupon, users need to:
Click the Coupon code option.
-
Enter the code in the text field.
-
Click Apply or press the Enter key to apply it.
💡 Tip: If a wrong code is applied accidentally, they can remove it by clicking X next to the code and applying a different one.
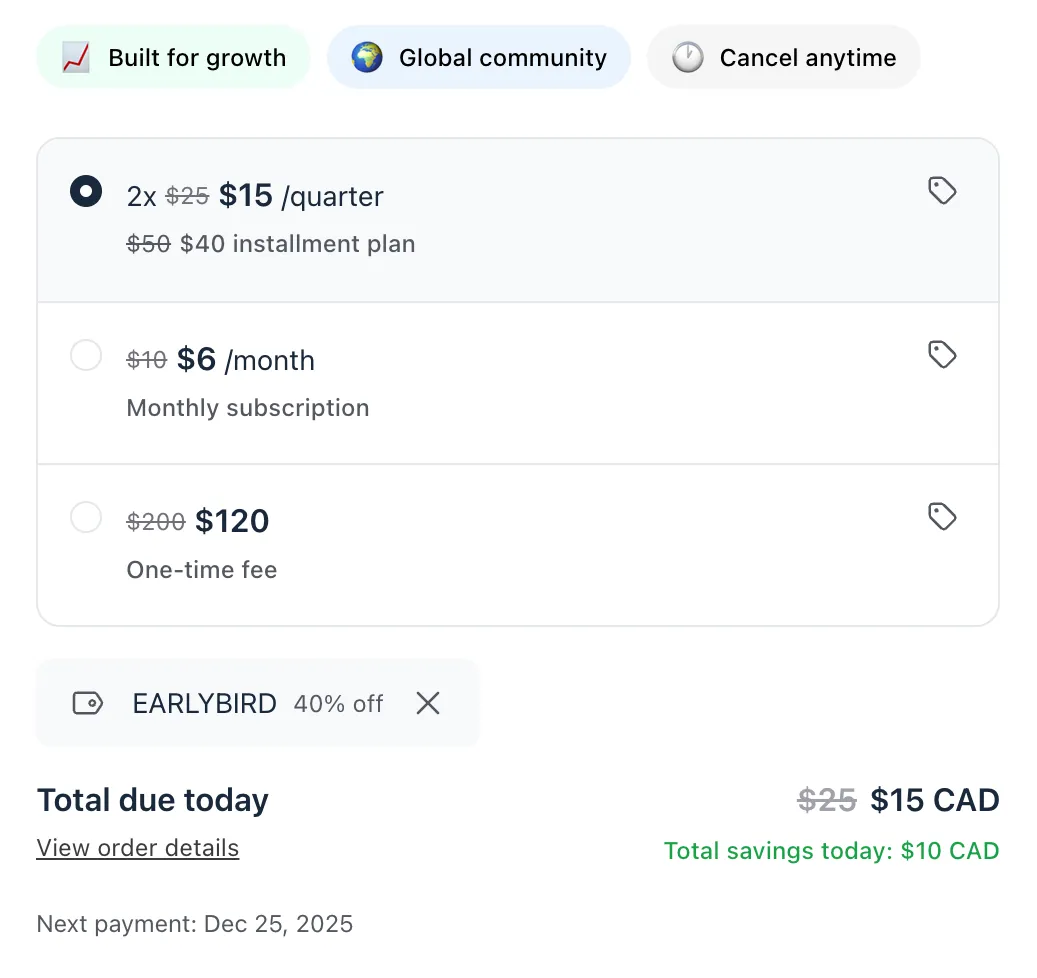
Once successfully applied, users will see the savings reflected on all pricing options and in the total due amount.
💡 Tip: If you have provided the checkout URL appended with a coupon code, it will automatically be applied to their purchase and be visible in the coupon code field when they click the checkout link.
Order details
Once a user selects their preferred pricing plan and applies a coupon (if any), the order detail automatically updates to reflect the total payment due.
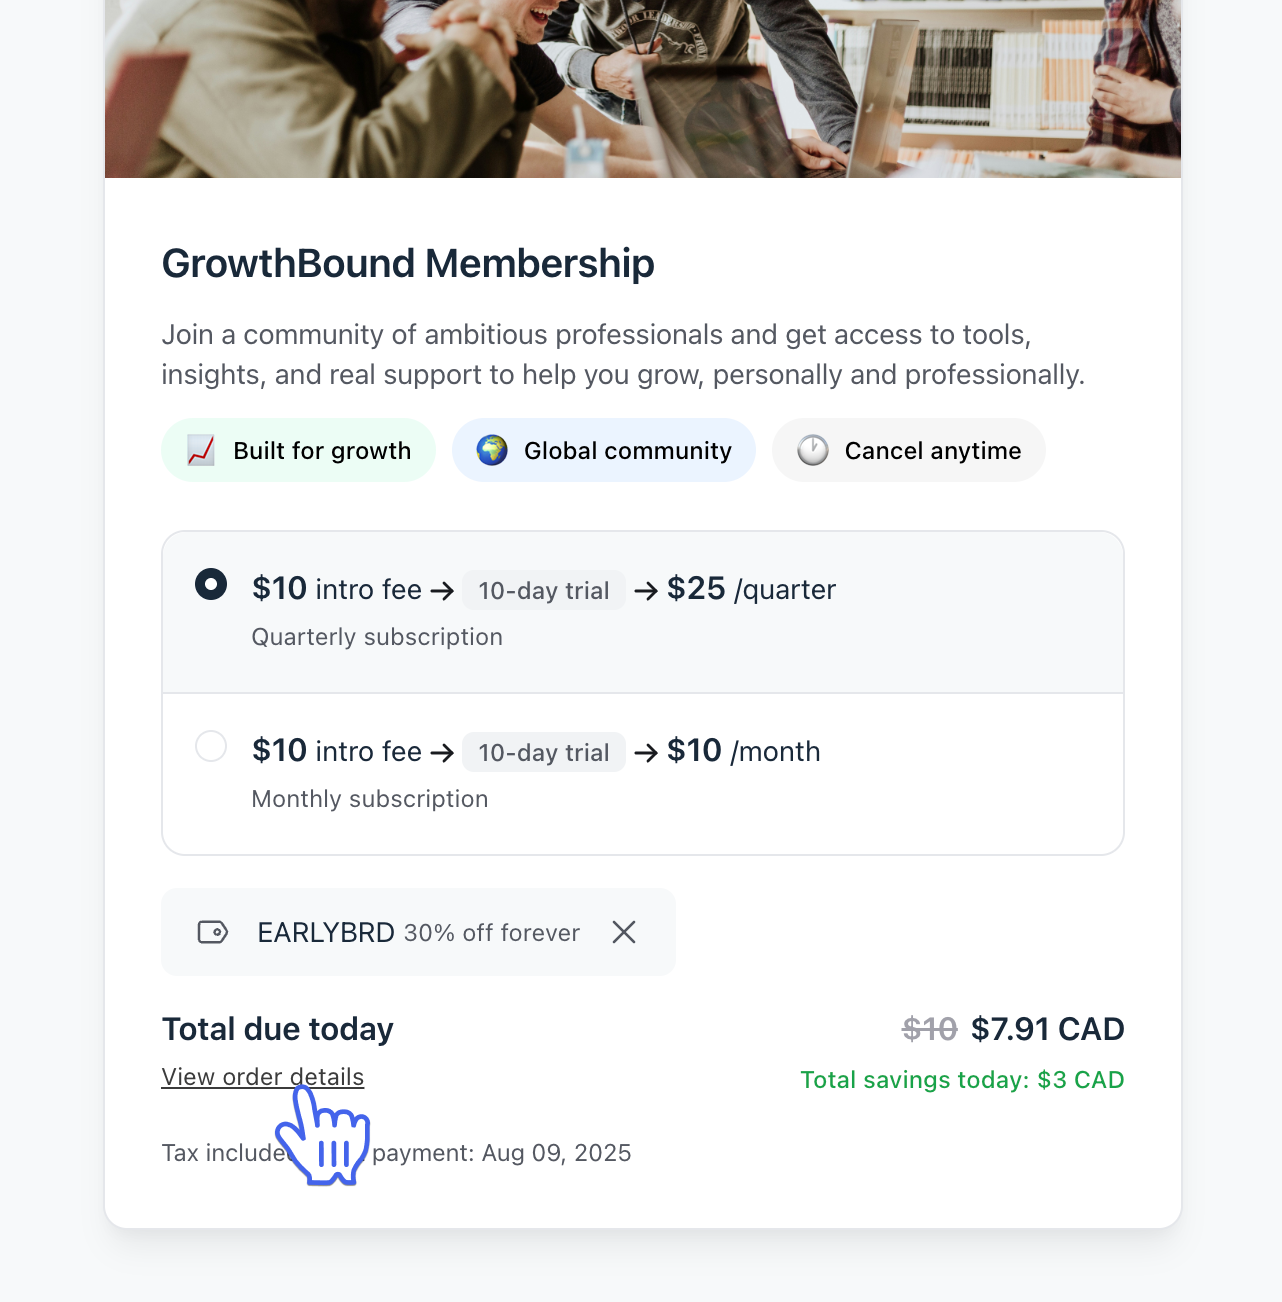
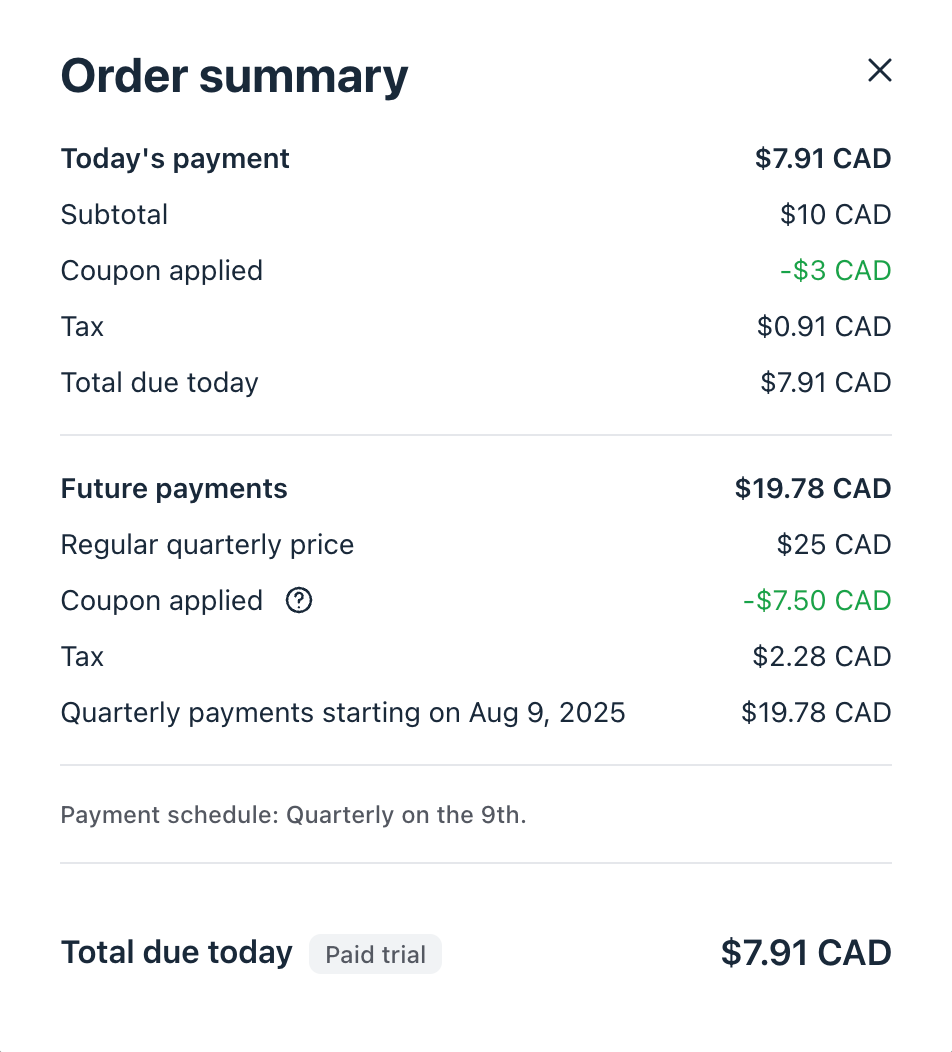
Users can click View order details to expand the summary that includes:
Total amount due at the time of purchase.
Trial period (if the plan includes one).
Intro fee (upfront payment) if applicable.
Upcoming payments if the user buys a subscription or an installment plan.
Discount from any applied coupon.
Tax amount, if Stripe Tax has calculated tax based on the user’s address.
Payment schedule for future billing cycles in case of subscription or installment plan.
Benefits and testimonials
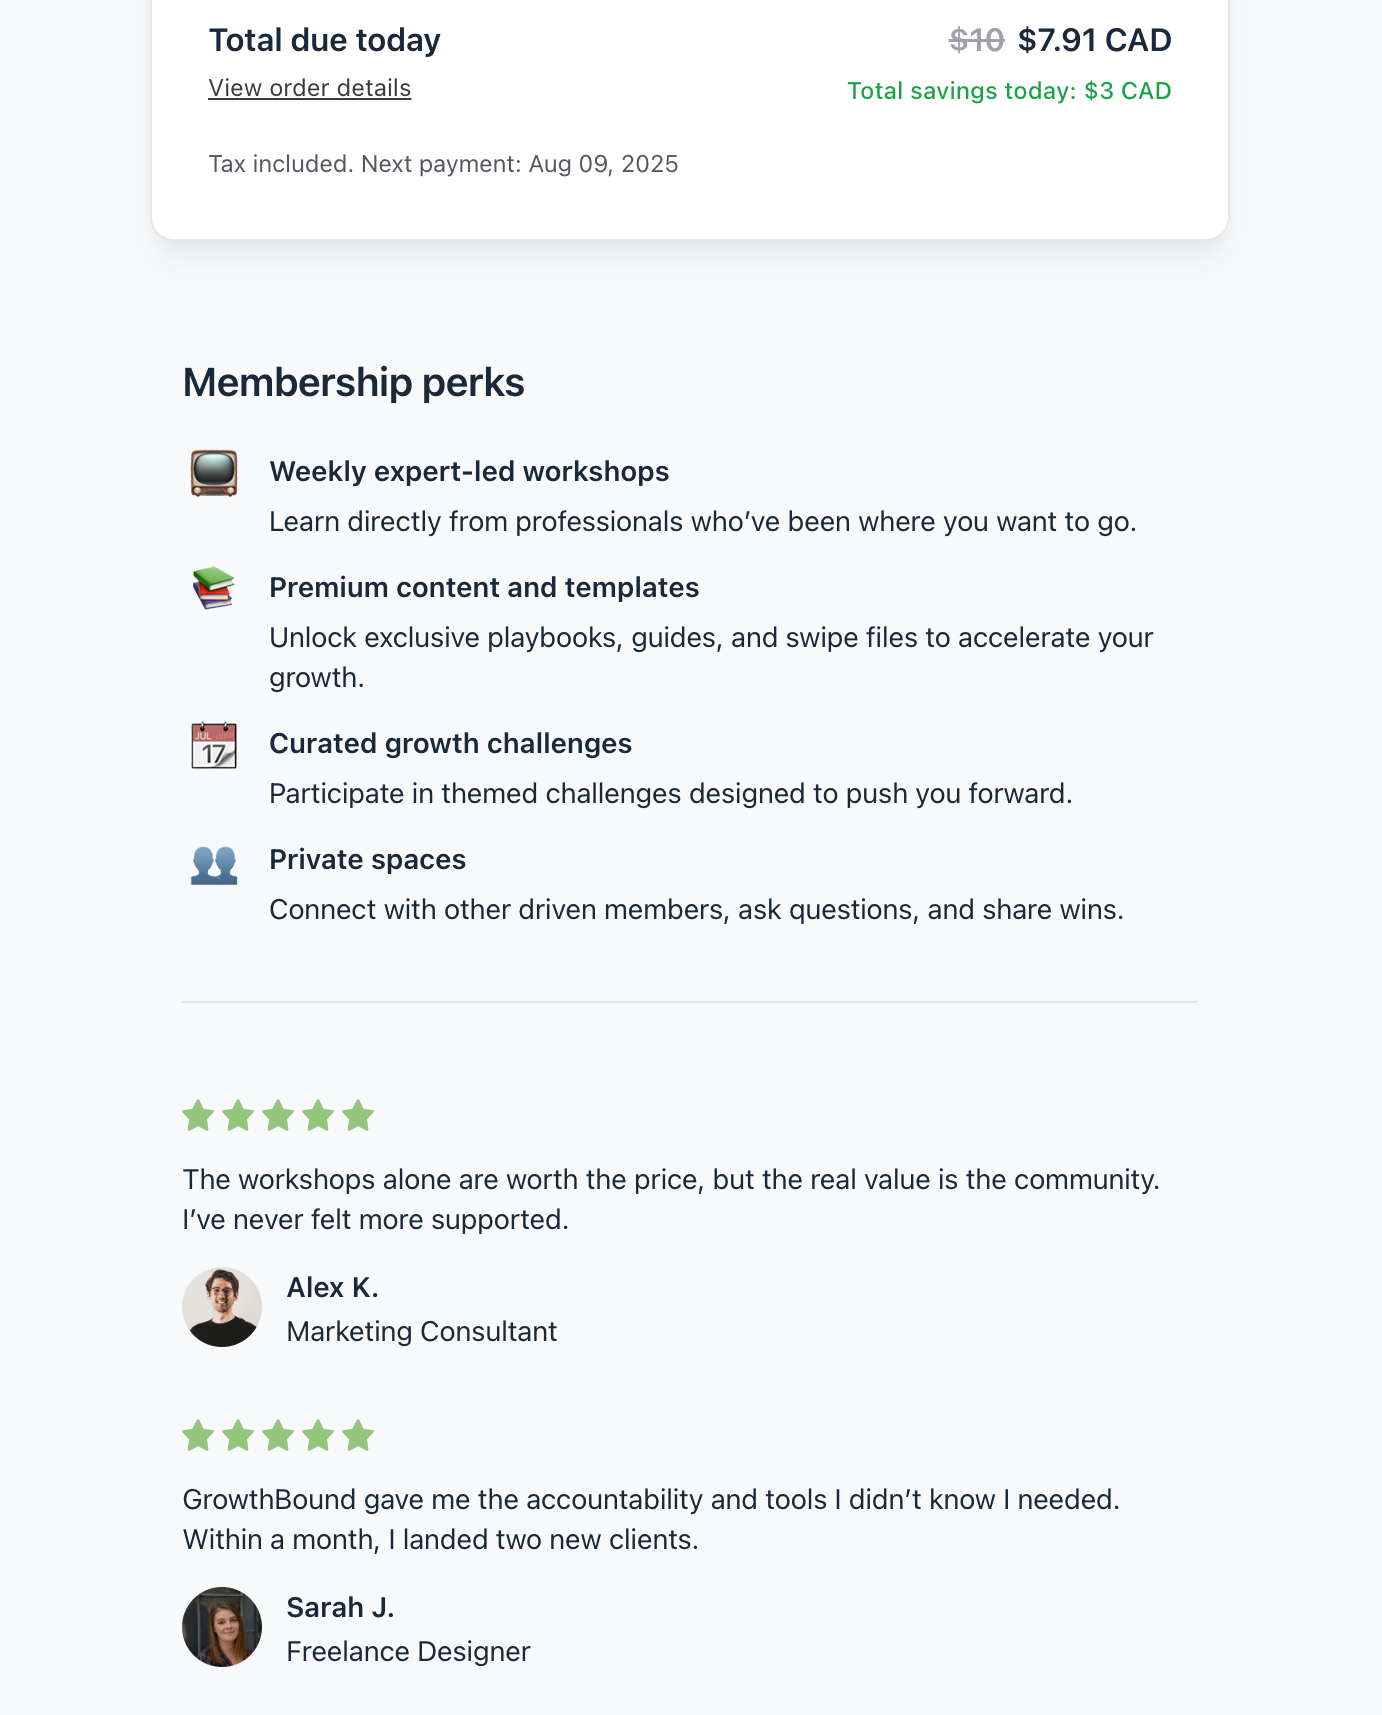
If you've added benefits and custom testimonials during the checkout page setup, they will be displayed below the order details. Benefits help users understand what they’ll get by joining, while testimonials provide social proof and build trust with potential members.
Account details
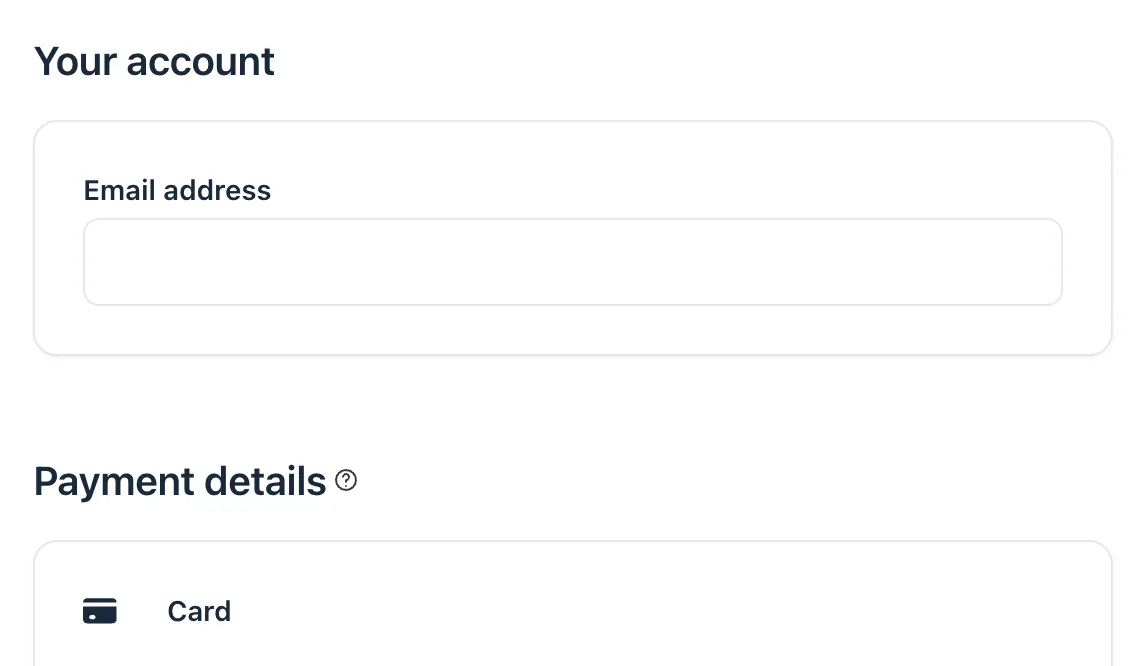
At the top right, users will see one of the following sections depending on whether they are signed in or not:
-
Your account: If the user is not signed in to any Circle community in their browser, an email field appears. The user can enter an email to create a new account or sign in with an OTP if an account exists with that email.
-
ℹ️ Note: If your community uses SSO and Circle sign in is disabled, the user experience might be different. For more details, refer to authentication Scenarios 3 and 4 in the article below.
-
-
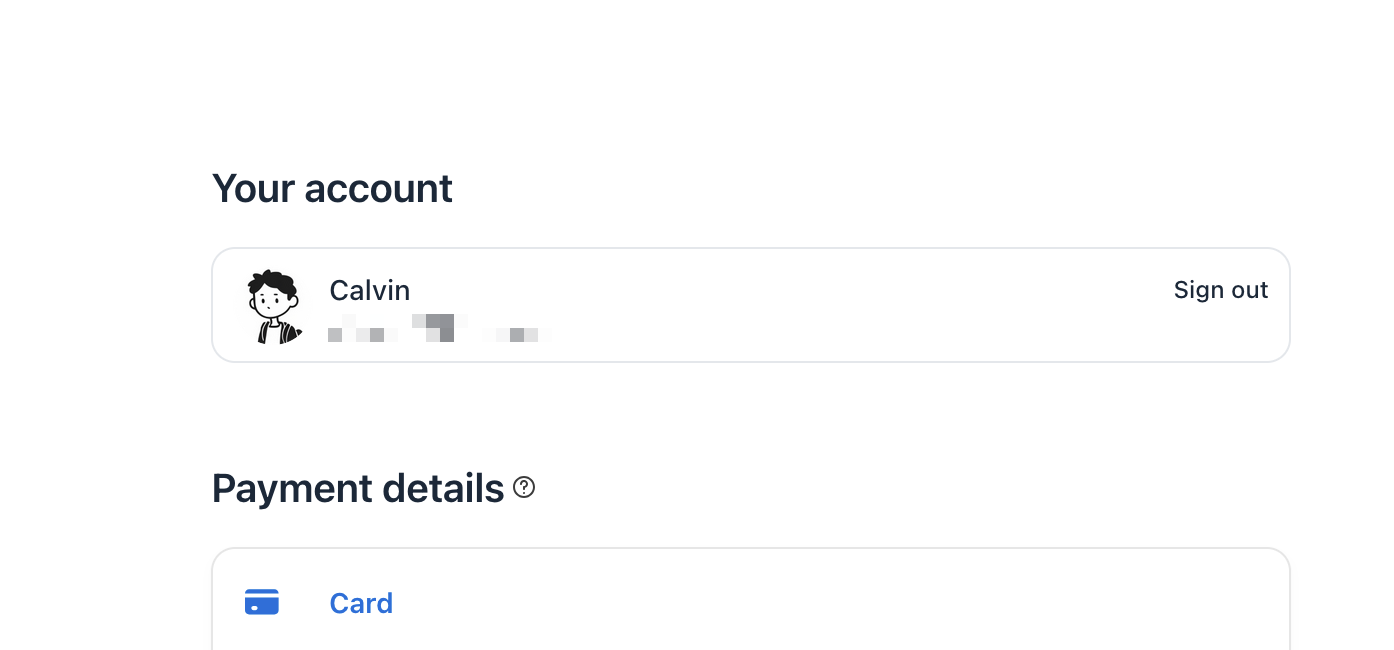
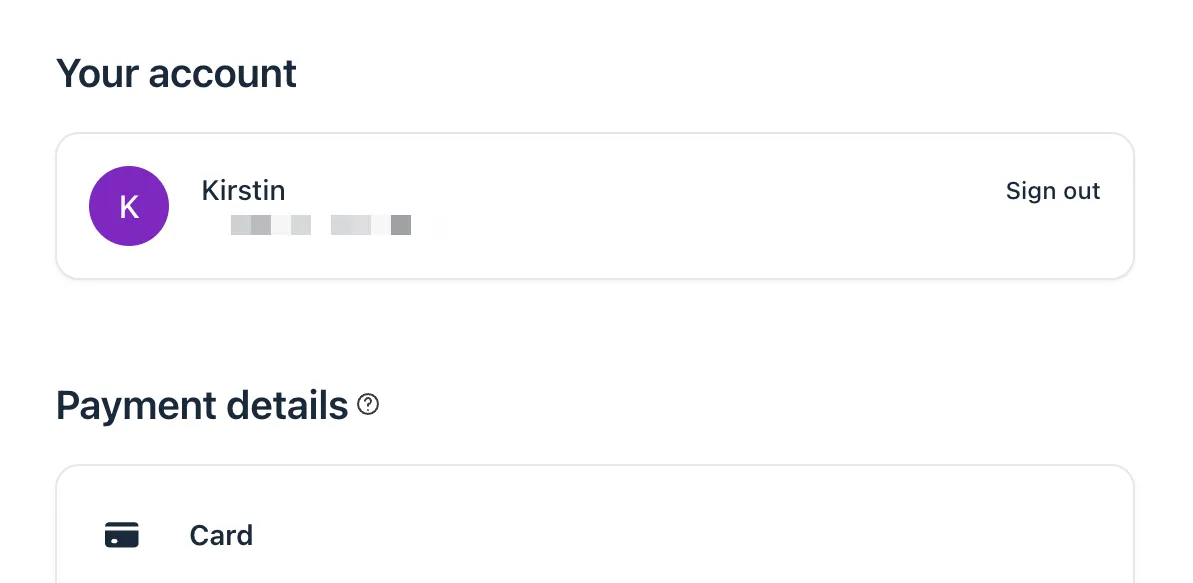
Profile information: If they are already signed in, this section will contain their account info and an option to sign out.
Payment details
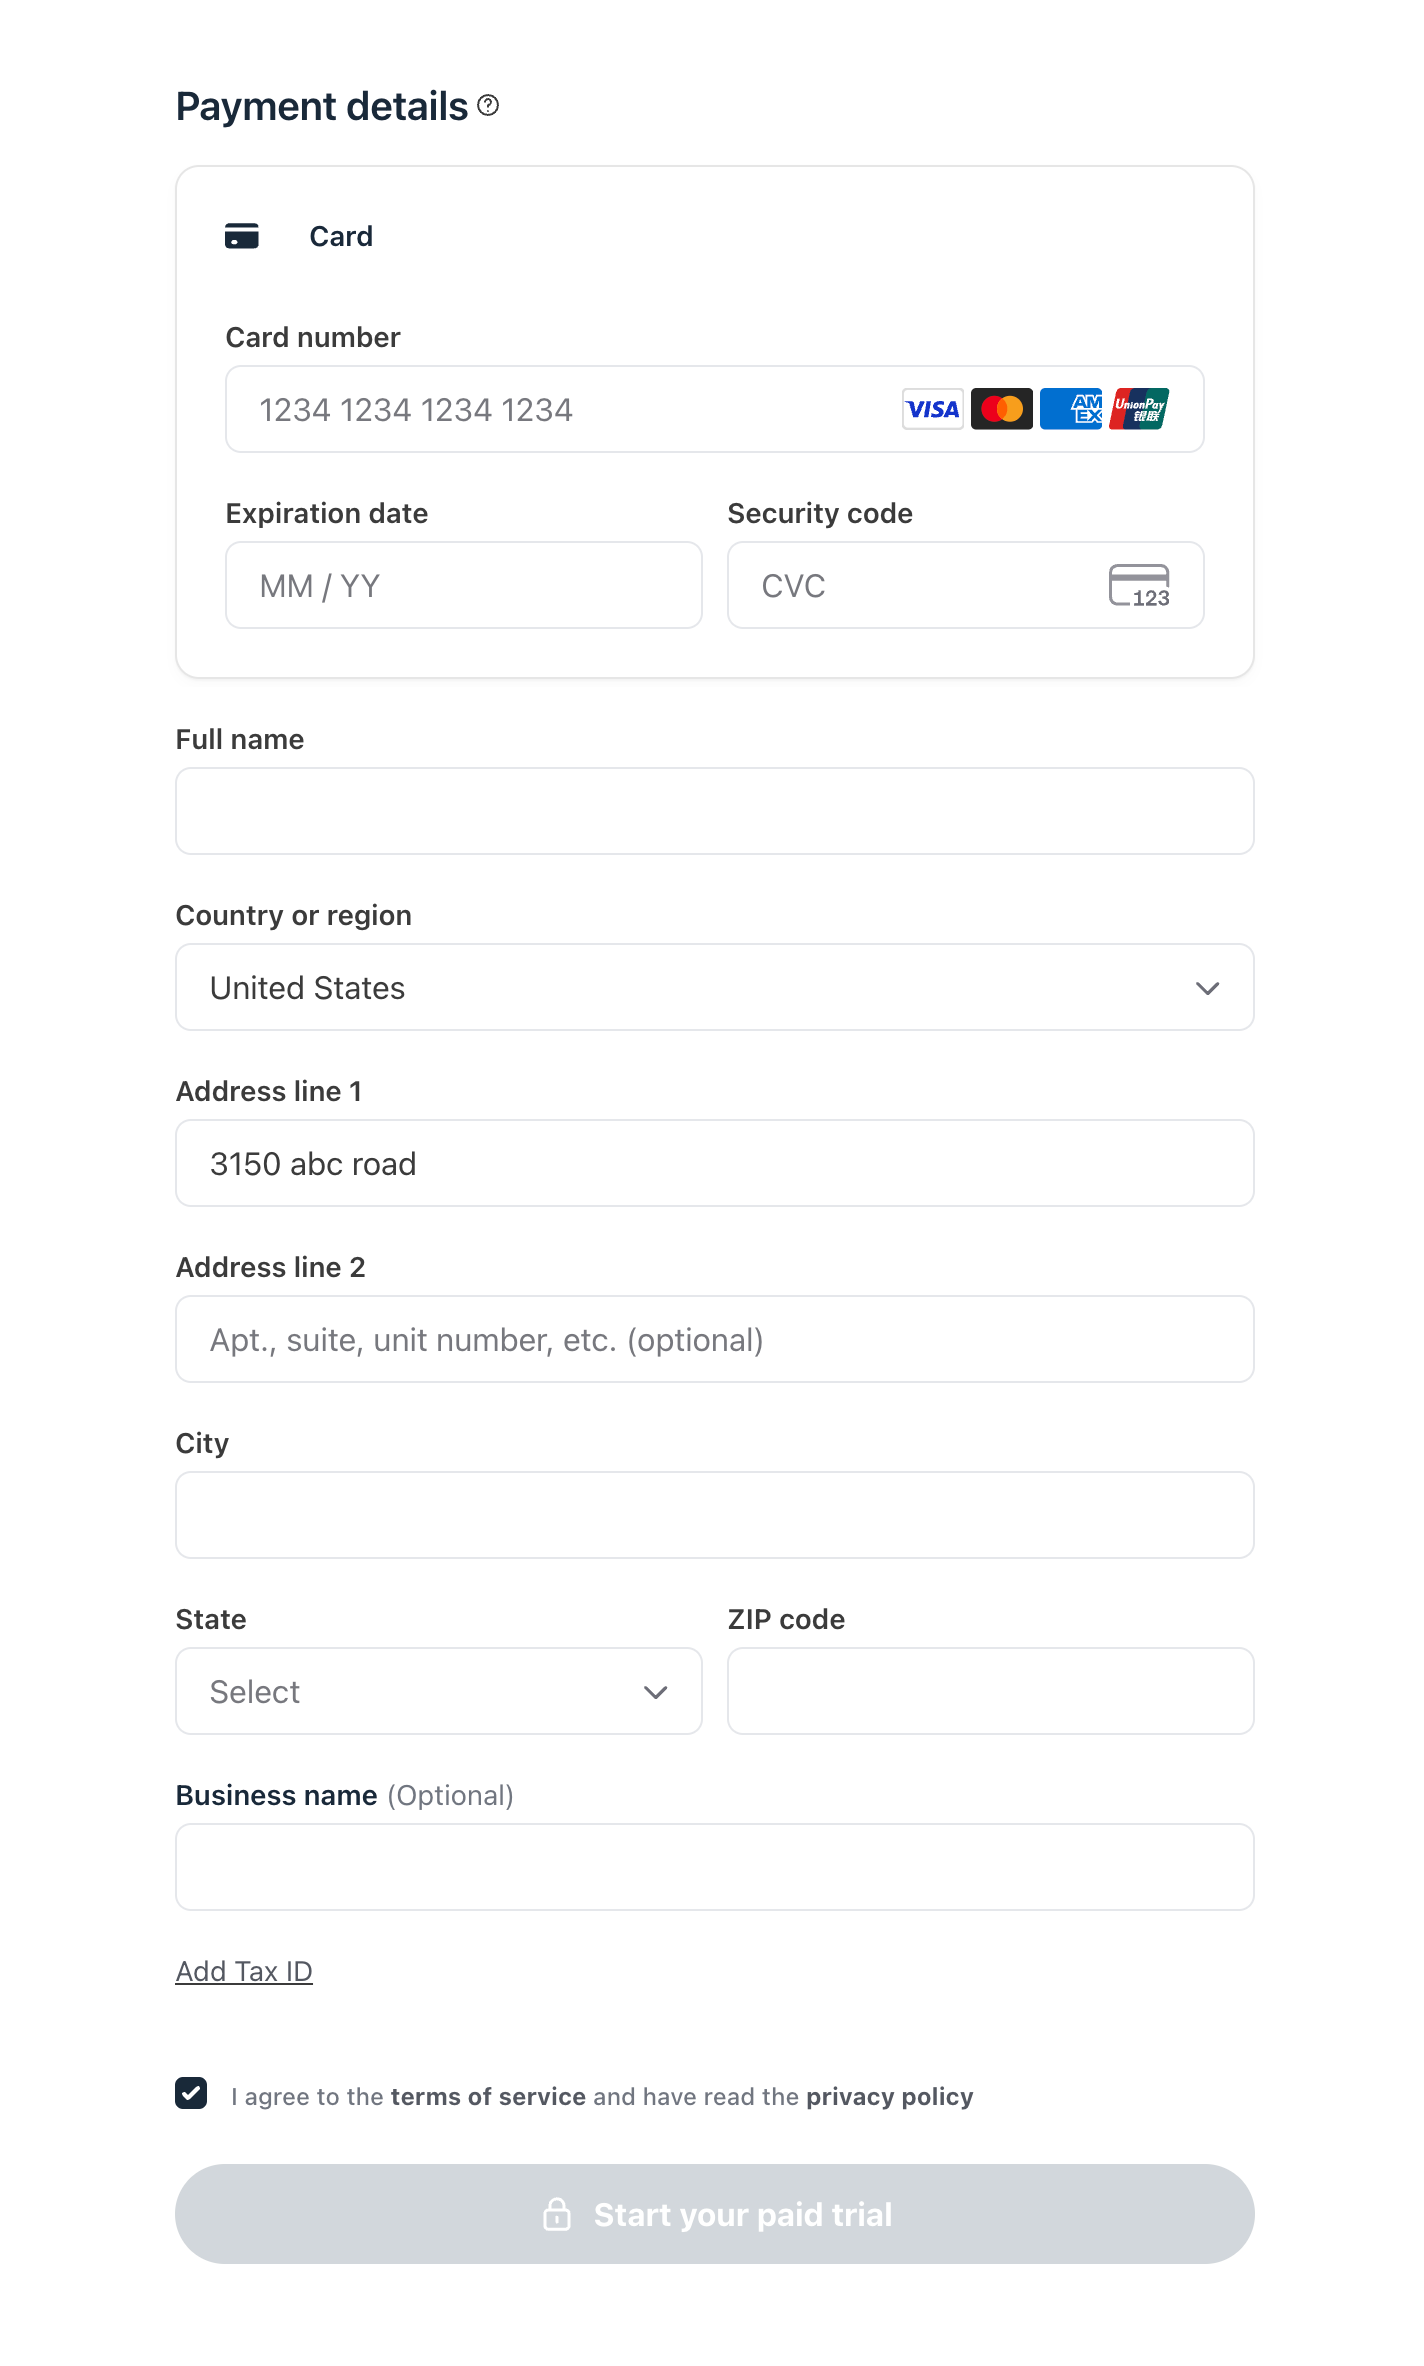
Below the account section, users enter their payment information to complete the purchase. This section includes:
-
Payment method: The checkout shows only the payment methods you’ve enabled and that are compatible with the currency, the transaction amount, and the user’s browser. Users can choose from the available options and enter the payment information.
ℹ️ Note: If your paywall includes a free trial period, payment info is only required if you have enabled the Require debit/credit card option in your paywall settings.
💡 Tip: If a member previously purchased a membership in your community, their saved payment method will be pre-filled for a faster checkout experience. They can easily update these details or choose a different method if needed before proceeding.
Full name: The name entered here becomes the user's member account name.
-
Address and tax ID: If Stripe Tax is enabled for paywalls, users are required to provide their address and can optionally add a tax ID. Once they select their country and add the street address, the other fields will appear to add more details, including city and postal code.
ℹ️ Note: If your community is connected with a Brazilian Stripe account and the paywall currency is BRL, users are required to enter the relevant tax ID (CPF or CNPJ) during the paywall purchase process.
-
Business name: Users can optionally enter a business name during checkout, even if taxes are not enabled. If provided, the business name will appear on their invoice.
💡 Tip: If the business name is provided, the business name will show as the customer name, instead of the member’s full name in your Stripe dashboard. Their full name will still appear in the description section of their Stripe customer profile. As an admin, in your Circle community, you can view or edit a member’s business name anytime from their member profile (Billing tab > Address).
Terms of service and privacy policy agreement
Users must check a box agreeing to your terms and privacy policy before they can proceed to pay. If existing members purchase the paywall, they must also agree to your terms and privacy policy again.
Above the payment confirmation button, users will see a checkbox with a consent statement linked to your terms of service and privacy policy. Once checked, they can pay or start a trial if no payment is required upfront.
❗Important: When users click to pay the paywall amount, they may need to go through the 3D Secure authentication process, depending on the bank and Stripe requirements. For more information, see our guide here.
Sign up and sign in scenarios (SSO vs. non-SSO communities)
The checkout process changes depending on whether they have a Circle account and if your community uses SSO. Here are the scenarios:
Scenario 1: The user does not have a Circle account (non-SSO community)
If the user doesn’t have an account with your community or any other Circle community, they can create one directly during the checkout process.
Here’s how:
-
On the checkout page, under Your account, they’ll add the following:
Email: Enter the email address the user wants to use to create an account. The email field has an automatic validation to check for correct formatting and to prevent invalid or fake addresses, helping you maintain a clean and verified member list.
-
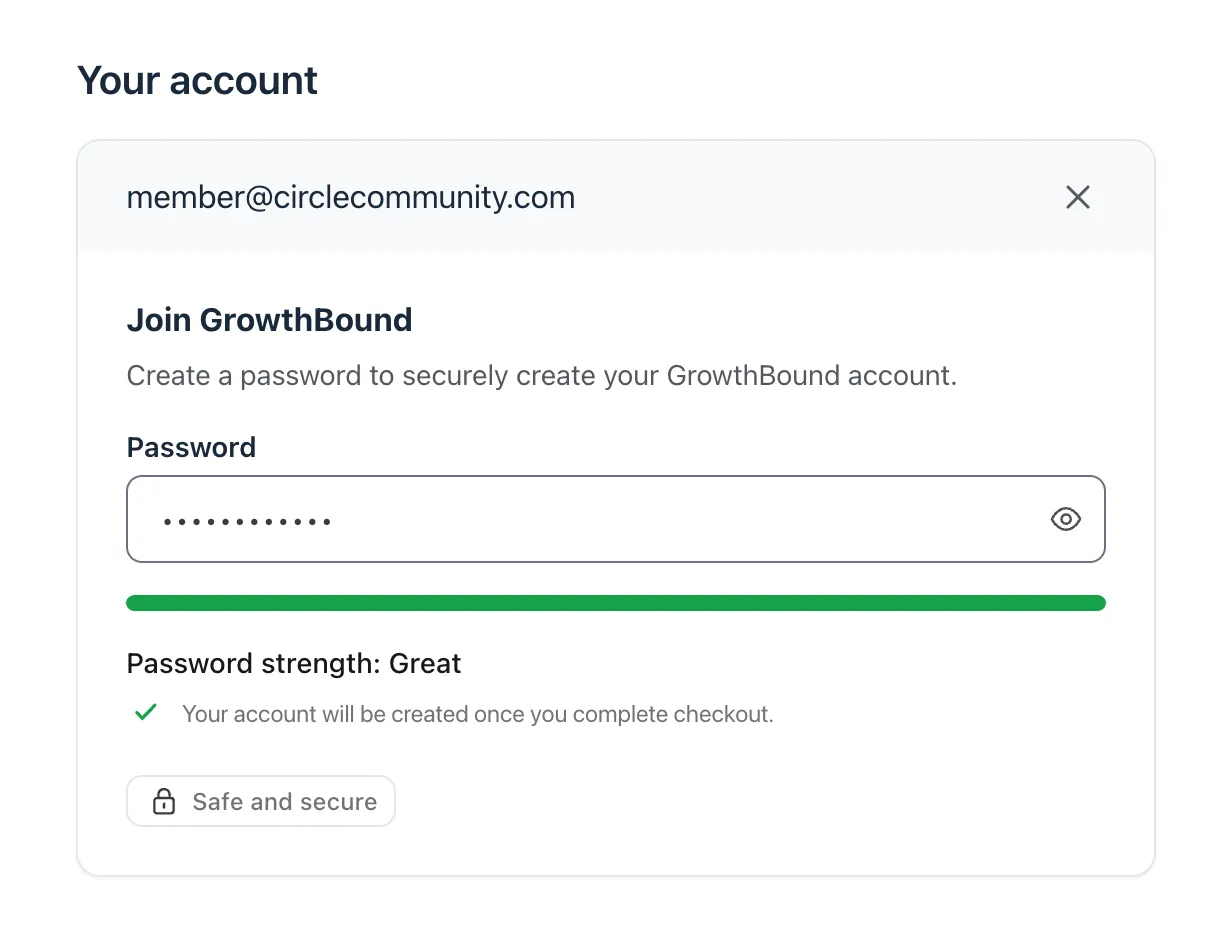
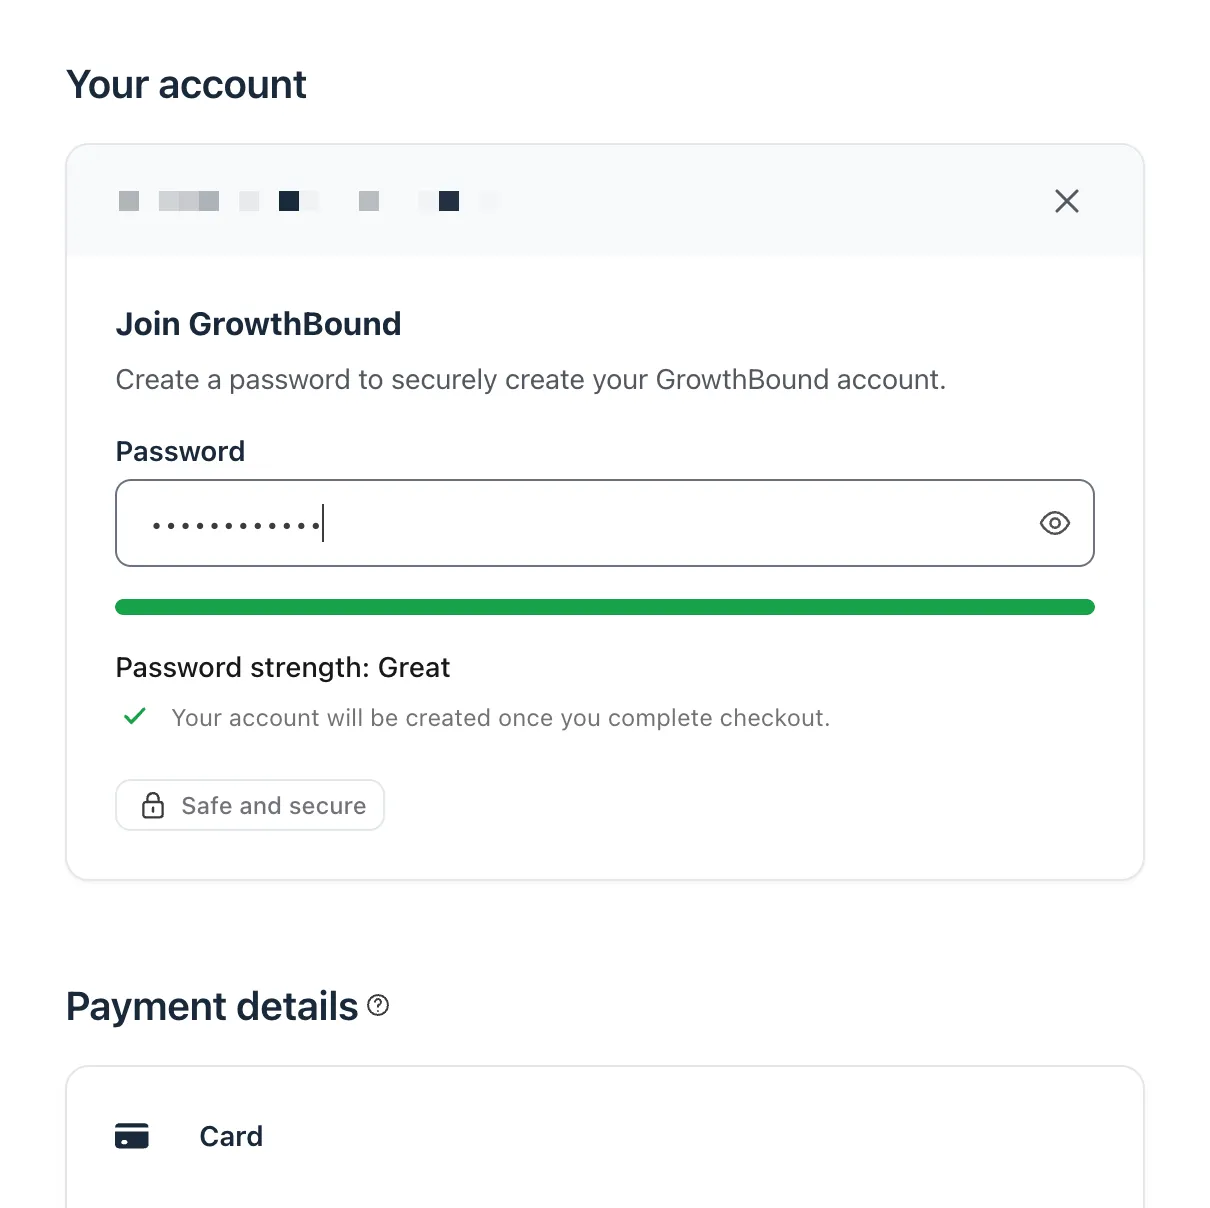
Password: Enter the new password, which is at least six characters long and includes at least one uppercase letter, one number, and one special character (e.g., !, $, @, *). A progress bar will also appear showing password strength to help users create a strong password.
After filling this out, they proceed with payment information and complete the purchase.
Scenario 2: User has a Circle account (non-SSO community)
This scenario varies based on the user’s account status. Lets break this down further to explore those options:
User has a Circle account and is already signed in
If the user is already signed in to their Circle account during their browsing session, their account details will automatically populate on the checkout page, no additional sign in required. They can proceed with adding their payment information and complete the purchase.
Here’s how the checkout flow works if a user is not signed in:
User has a Circle account but is not part of your community
The user enters their email in the Your account section.
-
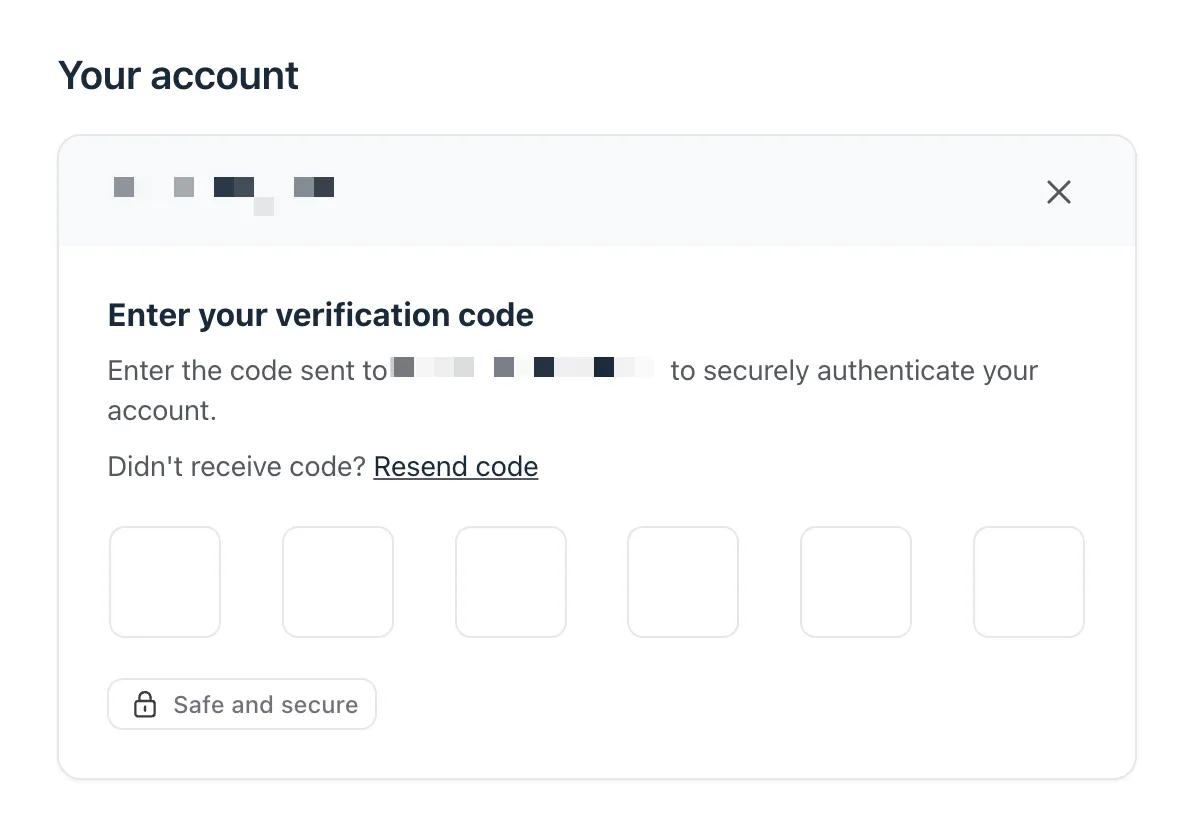
Our system identifies that the email exists in our database and sends a verification code to their email.
-
ℹ️ Note: If their account is from another Circle community, those credentials work to join yours; they’ll just get a new account profile in your community. This way, they can sign in to your community using the same Circle credentials but have separate profiles for each community.
-
-
Once they enter the verification code, they’ll be signed in and can proceed with filling in their payment information to complete the checkout.
Existing community members
When a community member navigates to a checkout page while signed out:
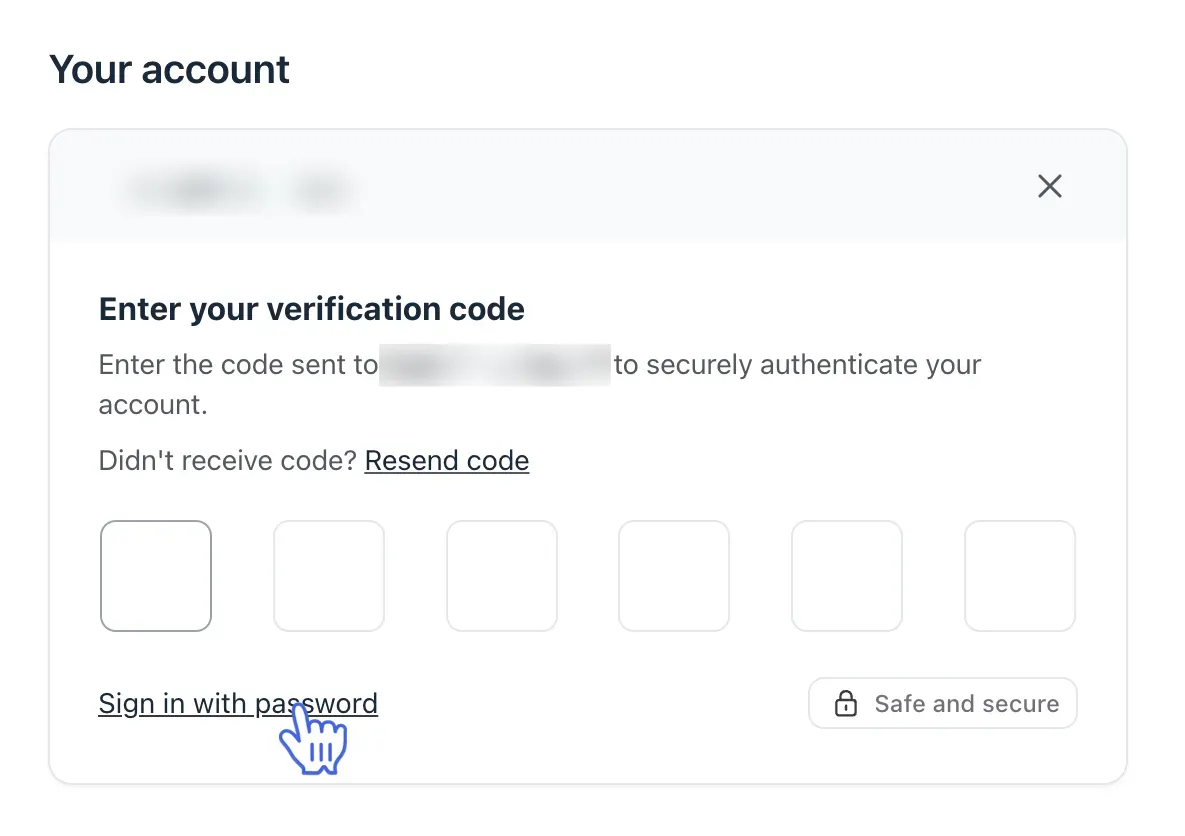
They’ll enter their email in the Your account section.
-
Our system identifies that the email exists in our database, is a member of the community and sends them a verification code.
-
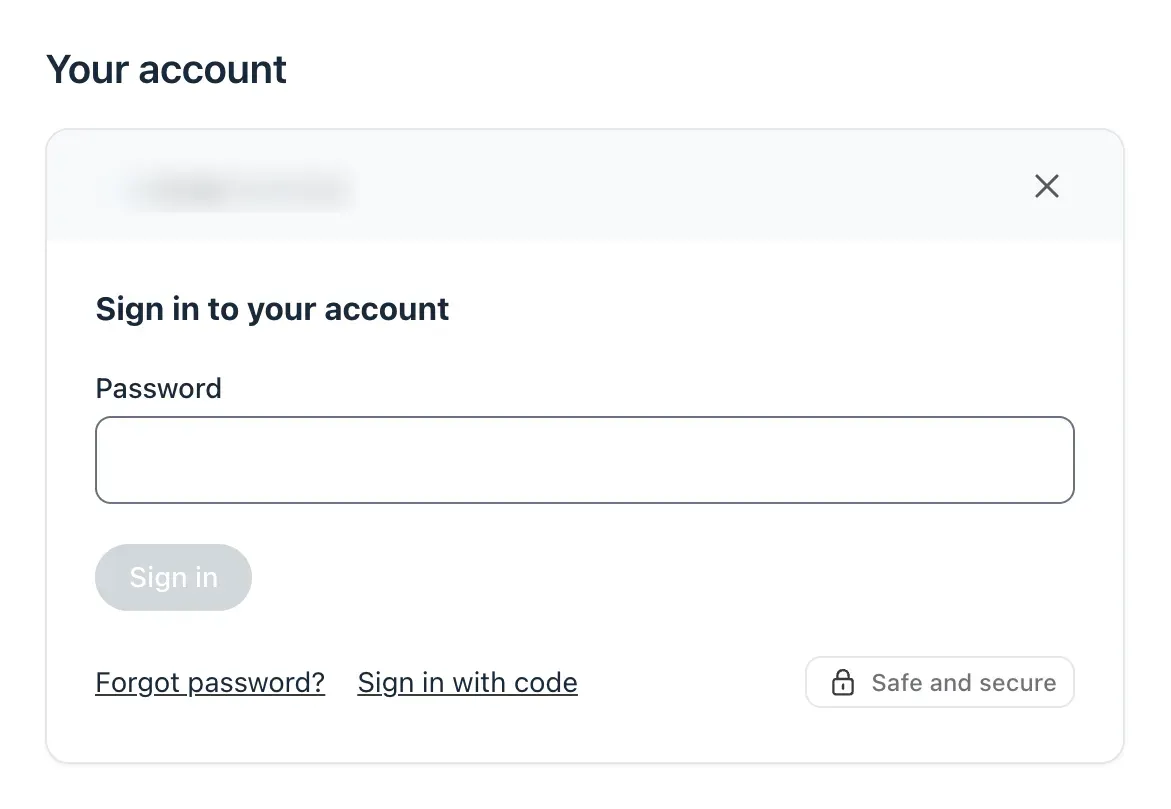
ℹ️ Note: Existing community members may choose to sign in with their password instead of an OTP by clicking Sign in with password below the verification code field.
-
-
Once they enter the verification code or their password, they’ll be signed in and can proceed with filling in their payment information to complete the checkout.
Invited members
Invited members are those who have been sent an invitation to a community but have not created a password and confirmed their profile.
ℹ️ Note: If a user has an active Circle account and is part of other communities on Circle, the checkout process mirrors the experience to users who have a Circle account but are not part of your community.
If the user has only been invited to your community, the checkout flow will look similar to those who do not have a Circle account:
The user enters their email in the Your account section.
The system will identify that they’ve been invited to the community and send them a verification code.
-
When they enter the verification code, they’ll be prompted to create a password.
-
💡 Tip: The password must be a minimum of six characters long and includes at least one uppercase letter, one number, and one special character (e.g., !, $, @, *).
-
Once they input their password, they can add their payment information and complete the checkout flow.
Scenario 3: Your community uses SSO and Circle sign in is disabled
If your community uses SSO and you’ve turned off the Allow members with a Circle account to sign in toggle in SSO settings, we streamline the checkout page with an SSO call-to-action.
This ensures that users who aren't signed in are directed to your SSO provider first. This clear process helps users understand that they must sign in or sign up through SSO before completing their purchase.
💡 Tip: If the user is already signed in to your community in their browser, the SSO call-to-action won’t appear. Instead, their signed in information will be automatically displayed on the checkout page. They can proceed with adding their payment information and complete the purchase.
Here’s what the SSO authentication process looks like for users who aren’t signed in:
-
When users arrive at the checkout page, they'll be prompted to authenticate via your SSO provider with a clear call-to-action (like a “Continue with {your SSO provider}” button).
Once authenticated, they'll be seamlessly redirected to the paywall checkout page to add payment details and complete the purchase.
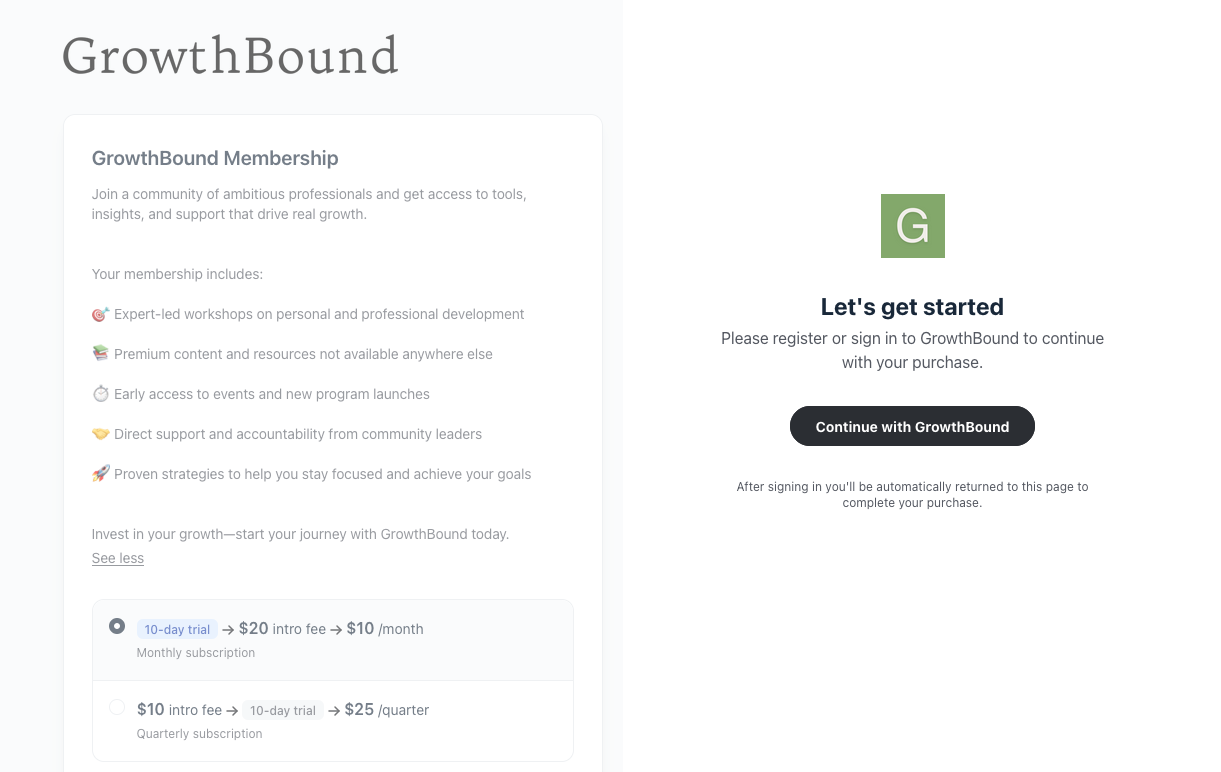
Scenario 4: Your community uses SSO and Circle sign in is enabled
If the Allow members with a Circle account to sign in toggle is enabled in the SSO settings, the checkout flow skips the SSO call-to-action. Instead, the checkout page mirrors the experience of communities without SSO.
❗Important: If users aren’t already signed in, we strongly recommend encouraging them to use the "Sign in" option on the checkout page, rather than creating a new account, to ensure they purchase the membership with their SSO account.
💡 Tip: If the user is already signed in to your community in their browser, they won’t need to sign in again. Their signed in information will appear on the checkout page. They can proceed with adding their payment information and complete the purchase.
Here’s what the process looks like for users who aren’t signed in:
If not signed in, users can select the Sign in option (found in the Create your account section) on the checkout page.
This directs them to your SSO provider for authentication.
Once signed in, they’ll automatically be redirected to the checkout page.
Completing a purchase
After reviewing the checkout details and logging in or adding details to create a new account, users can complete their purchase by clicking the Pay or Start your free/paid trial button, depending on the type of plan they have chosen.
3D Secure authentication (3DS)
When the user proceeds to pay for the paywall, they may need to go through the 3D Secure (3DS) authentication process, depending on the bank and Stripe requirements.
This check might involve verifying a transaction amount, performing two-factor authentication, or an automated check to confirm the member's identity as the genuine cardholder making the payment. The specific process varies among banks and is determined by their policies. Once the member successfully completes this verification, they will be charged the original payment amount for the paywall subscription.
❗Important: If you have potential members from India, please make sure to enable the Send a Stripe-hosted link for customers to confirm their payments when required toggle in your Stripe billing settings. This helps members who are using India cards complete the necessary authentication steps in compliance with RBI e-mandates.
After checkout
Once the purchase is complete, users are directed to the following pages depending on the paywall configuration and whether users already have an account or not:
Upsell page: If the paywall includes an upsell, users see an additional offer immediately after checkout and before the thank you page. From here, they can add the offer to their purchase or continue without it.
Thank you page: If you’ve enabled this for the paywall, users will see a default thank you page with brief purchase details. Note that you cannot customize this page at the moment.
Custom redirect: If you’ve set a custom redirect URL for the paywall, users will be redirected there after their purchase, or after the thank you page if both are enabled.
-
Profile confirmation: If the user is a new member of your community, they need to create a new profile for your community to fully activate their account. Similarly, if the user has an account with your community but has not confirmed their profile yet, they will need to go through this step. Otherwise, this step will be skipped for them.
If users were redirected to a custom page (custom redirect URL) post-purchase, this step will appear the next time they access the community.
Once these steps are complete, users will land on the default community page, as set in your community settings.
💡 Tip: After a successful purchase or trial start, users receive a thank-you email if this option is enabled for the paywall. For paid purchases, you can also activate successful payment emails via your Stripe account, which includes invoices and receipts. For more information, see Understanding paywall notifications.