Creating and managing posts as a member
🟡 Member-focused article | Last updated: October, 2026
Sharing your thoughts, ideas, and experiences helps you engage with other members and contribute to your community. In this guide, we'll walk you through the simple steps to create, edit, and manage your posts effectively.
Create a post
To get started with post creation, head to the post space from the sidebar and click New post.
💡 Tip: If you want to create a post using a Circle mobile app, tap ➕ icon on the control bar. In the post editor, you can add a post title, select a post location, format text using basic formatting options, and add images, videos, or files from the device. Please note that you can only edit post through a browser.
Step 1: Get to know the post editor
The post editor has everything you need to craft content. Let’s familiarize yourself with its features to make the most of your creative process.
At the top-right of the post editor, you'll find options, such as:
Add cover: Choose a visually appealing cover image to make your post stand out. This image will be featured at the top of your post, helping to draw readers in.
Full-screen mode: Maximize your editor window for a distraction-free, immersive writing experience, allowing you to focus entirely on your content.
-
Close editor: Quickly exit the editor if you decide not to proceed with the post creation. This option cancels your draft without saving it.
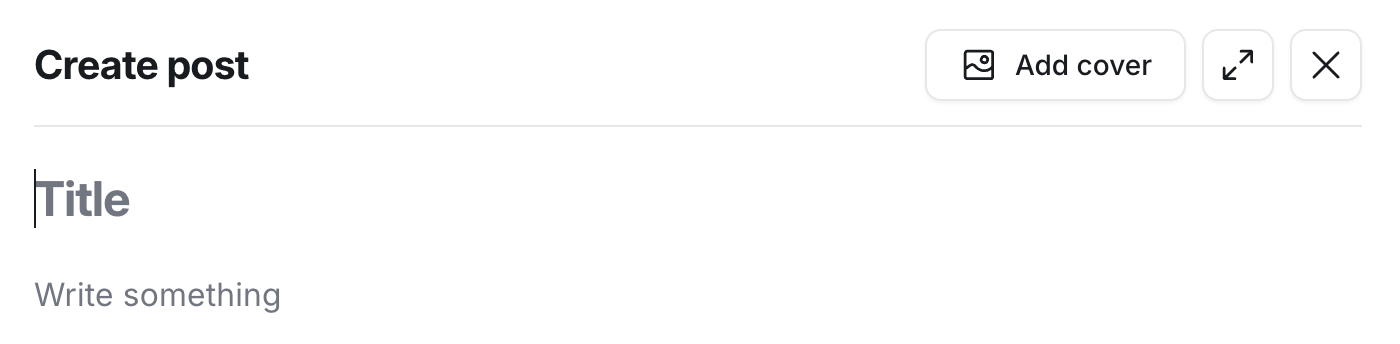
The bottom of the post editor contains features to help customize your content.
Assign topics: If available, select relevant topics that align with your post.
Post location: Specify or update the location of your post.
Toolbar: Enhance your content using the toolbar, which offers a variety of options for attaching media, formatting your text, embedding content, and much more.
Step 2: Add a title
Every great post starts with a compelling title. Click the Title field to craft a title for your post.
Step 3: Compose your content
To start writing in the post, click anywhere in the body of the post editor. To access basic text formatting options, type the forward-slash (/) command to open the menu within the editor.
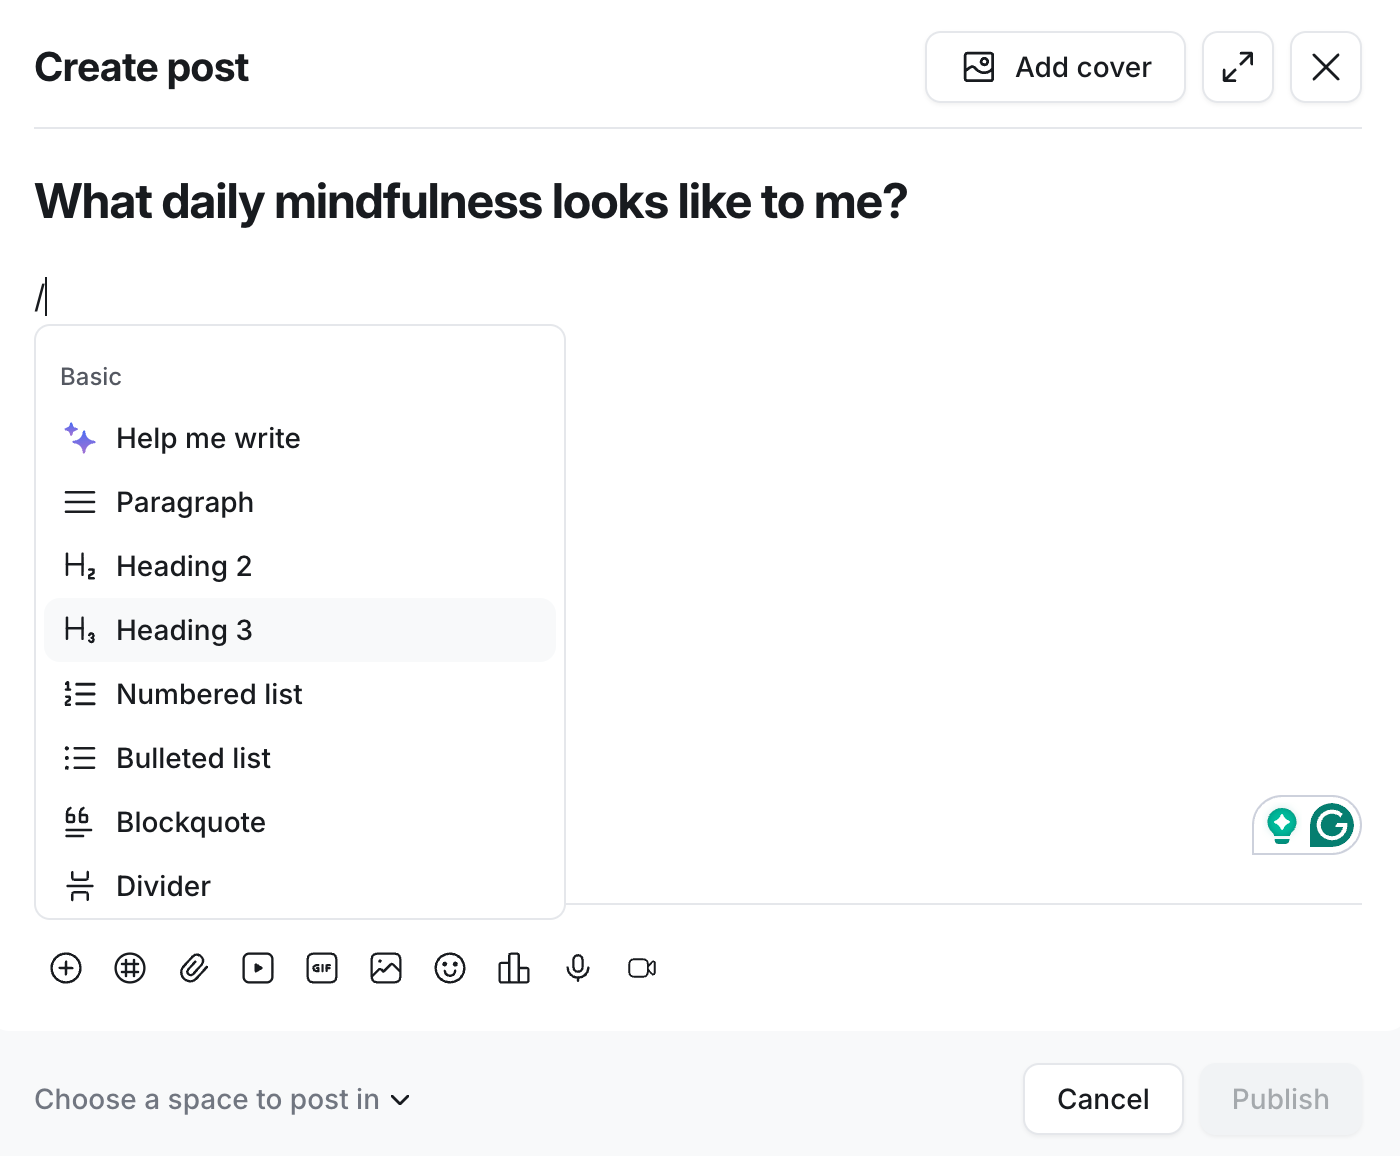
From the menu, choose from a variety of options to style your content:
Help me write: Utilize the AI content writer to draft your post's content. It helps simplify the writing process by generating content ideas, writing intros and sections, and shaping the content in a natural, conversational tone.
Paragraph: Create standard text blocks for your content.
H2 and H3 headings: Use different heading styles to structure your text effectively.
Numbered and bulleted lists: Organize information within the post using lists.
Blockquote: Highlight and emphasize specific text with a distinct block quote style.
Divider: Add a horizontal divider to separate different sections of your content. Dividers improve visual flow, making your post easier to scan and visually organizing different topics within a single post.
-
Code: Showcase programming or technical content, such as code snippets, in a format better suited to your audience.
ℹ️ Note: While code blocks are excellent for sharing code snippets with readers, they're not designed to incorporate custom scripts or active code into your posts.
Emoji: Incorporate emojis to add personality and expression to your posts.
-
Mention: Tag other members in your post.
ℹ️ Note: If your post space is set to private or secret, you can only mention members that are part of the space.
-
Button: To add a button to your post:
Type the forward-slash (/) command in the editor and select Button from the menu.
-
In the button editor, enter the following details:
Enter the button label–this is the text that appears on the button (e.g., "Learn More”).
Add the URL or link where the button should direct members when clicked.
Customize the button color to match your branding. You can either enter the desired HEX code or click the current color to open the palette and choose a color visually.Click Save to add the button.
Click Save to add the button.
You can also control how your button is aligned within the post to optimize its visual impact:
Align the button left, center, or right.
Make the button more prominent by centering it with an extended-width display.
To adjust the alignment, hover over the button and click the icon corresponding to the alignment style at the top right.
💡 Tip: To embed a link with a preview directly within a post, press Enter after pasting the link in the editor. However, if you want to insert it as a clickable hyperlink, please press the Spacebar first after pasting the link.
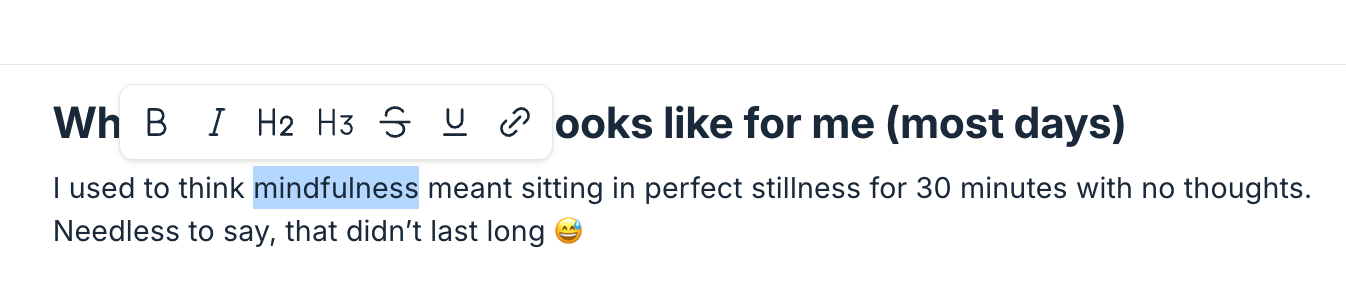
To edit written text in the editor, you can also highlight the text by selecting it. A formatting bar will appear with options such as:
Bold: Emphasize important words or phrases by making them bold.
Italic: Use italics to add subtle emphasis, such as for quotes, titles, or unique terms.
H2 and H3 headings: Apply H2 or H3 headings within highlighted text to create structured sub-sections in your content.
Strikethrough: Cross out text using the strikethrough option to show edits, corrections, or retired ideas in your post.
Underline: Underline text to add emphasis or highlight particular points.
-
Hyperlink: Turn highlighted text into a clickable link by adding a URL. Hyperlinks are ideal for referencing additional resources and related content or directing readers to specific pages within or outside your community platform.
Link to community content
Within your post, you can link to various community content, such as other posts, spaces, events, and lessons. To link community content, click the # icon at the bottom toolbar or simply type the Hashtag # followed by the content title, such as the space name. As you type, suggestions will pop up. Then select the content you want to link from the results.
Step 4: Add media, embeds, and attachments
To insert media within your text, place your cursor where you want to add it and click the respective icon from the toolbar. Alternatively, type the forward-slash (/) command to open the commands menu and select the preferred option from the menu.
You can add the following to your post:
-
Images and GIFs (powered by Giphy)
When including images in your post, you have three options: Upload from your device, choose an image from the Unsplash library, or embed a link.
Supported file formats for image uploads are JPG, PNG, and GIF.
You also have the flexibility to adjust image alignment. To do this, hover over the uploaded image/GIF and select the alignment icon - choose between Left or Center alignment to suit your preference.
-
File and PDF
You have the flexibility to share various types of files or PDF documents as attachments within your text. When a PDF is uploaded to a post, members can view it directly within the post.
-
Audio
You can upload audio files in MP3, WAV, and OGG format.
ℹ️ Note: Only admins can download the audio files from the post using a web browser.
-
Video clip and video
You can enhance your posts by adding videos in a variety of formats, such as MP4 and MOV. Videos uploaded here are transcoded for smoother playback and a uniform streaming experience across all platforms.
-
Voice messages
You can now record voice messages in posts. Type the forward-slash (/) command and select Voice messagefrom the command menu or click the microphone icon in the toolbar to start recording your message.
-
Embed
You can embed rich media directly into the post, helping you create a more engaging and informative experience for readers. This is a great way to showcase videos, images, or interactive content from supported platforms. For more information about embeds, see Guide to embedding media in your community.
Step 5: Publish post
Click Publish to make your post live in the space right away.
Edit a post
After the post is published, you can edit the post content to make updates or improvements.
To edit a post, click More actions (three dots) next to the post title and select Edit post.
You'll find yourself in the familiar post editor where you initially created your post. Here, make changes, format your text, insert new content, or correct any errors. You can use the forward-slash (/) command for basic text formatting or highlight text to access the formatting bar.
Delete a post
If you ever need to remove a post permanently from the community. It’s important to note that once the post is deleted, you cannot retrieve or view it in your community.
To delete a post using a browser on a desktop or mobile:
Locate the post within the space.
Click More actions (three dots) next to the post title and select Delete post.
Click Confirm to delete the post.
To delete a post using the Circle mobile app:
Head to space and tap the post title.
Tap More actions (three dots) next to the post title and select Delete post.