Managing members' access to spaces from their account
Last updated: February 07, 2025
As an admin, you have full control over a member’s access to community spaces (or whole space groups) within your community. This guide walks you through the steps to view and manage member access from their account.
Navigate to a member’s account
You can view and modify a member's account anytime to update their permissions, access, and more. To navigate to a member’s account, follow these steps:
Click the community name or logo in the top-left corner and select Audience.
On the Manage audience page, navigate to the preferred tab and use the filters to search for a member.
Click the member's name to open the edit account page. Alternatively, hover over the member entry, click the More actions (three dots icon), and select Edit.
To view and manage members' access to various spaces and space groups, go to the Access tab.
Member’s access overview
The Access tab provides a detailed view of the spaces a member can access. Under the Access overview section, you can see which spaces the member has access to through access groups and manual space grants (the Manually added section).

Access groups
At the top of the Access overview section, you’ll see access groups that the member is part of. Each access group card displays the spaces granted through that group.
Manually added
The Manually added section appears when the member has at least one space granted manually. It lists all spaces the member has been granted access to outside of access groups. A member may receive manual access through:
Workflows: Access to space granted through workflow actions.
Direct manual grants by admins: Spaces assigned directly from the spaces and space groups.
Admin-assigned spaces in the member’s account: Spaces manually added from the Access tab within the member’s account.
Legacy space access options: Legacy space access granted via entry points and/or onboarding settings. These legacy space access options are only available to communities created before January 29, 2025.
Self-joined open spaces: Open spaces the member voluntarily joined without admin intervention.
Key things to consider when adding or removing member’s access
If you grant access to any space or space group via access groups or manual space grants directly to the member’s account, they will receive invite-type access (free access) to those spaces.
When you remove access to any space group or manual space grant that is part of a member's paywall subscription, the member will lose access to it. If you provide access to that paywalled space again manually from the member account, they will receive invite-type access (free access) to the space instead of paywall-type access.
If you want to change access for members who are subscribed to a paywall, we recommend using the paywall's access tab and applying changes to all subscribed members of the paywall. For more information, see Ensuring consistent access for subscribed members of a paywall.
💡 If the member does not have access to any spaces
If a member does not have access to any spaces yet, you can assign access through access groups and manual space grants.
-
Access groups: If access groups are already created in your community, you can add a member to one. If no access groups exist, you will have the option to create one instead.
-
Manual space grants: Grant the member to individual spaces and/or space groups separate from access groups. Once you manually add spaces, it will appear under the Manually added section.
-
To manually assign spaces, click More actions (three dots icon) at the top-right of the page and select Manually add spaces. An access form will appear where you can add individual spaces and/or entire space groups.
-


Manage member’s access through access groups
Directly from the member’s account, you can add or remove the member’s access to access groups.
Add to access group
To add a member to an access group, click the dropdown menu under the Access groups section and select your preferred access group from the list.
You’ll be prompted with information about a number of spaces you are about to add the member to using the access group. Click Confirm and save to finalize your action.
You’ll now see the new access group listed under the Access overview section.
Remove from access group
To remove the member from the access group, click the More actions (three dots icon) at the top-right of the access group card and select Remove from access group.
💡 Tip: To update the access group, you can also click the More actions (three dots icon) at the top-right of the access group card and select Manage access group.
Manage member’s access to spaces in the Manually added section
To manage member access in the Manually added section, click the More actions (three dots icon) at the top-right of the section and select Manage spaces.
💡 Tip: If the member has no manual space grants yet, the Manually added section will not be visible. To assign spaces manually, click More actions (three dots icon) at the top-right of the page and select Manually add spaces. Once added, the Manually added section will appear. Going forward, you can add or remove directly from the Manually added section as described below.
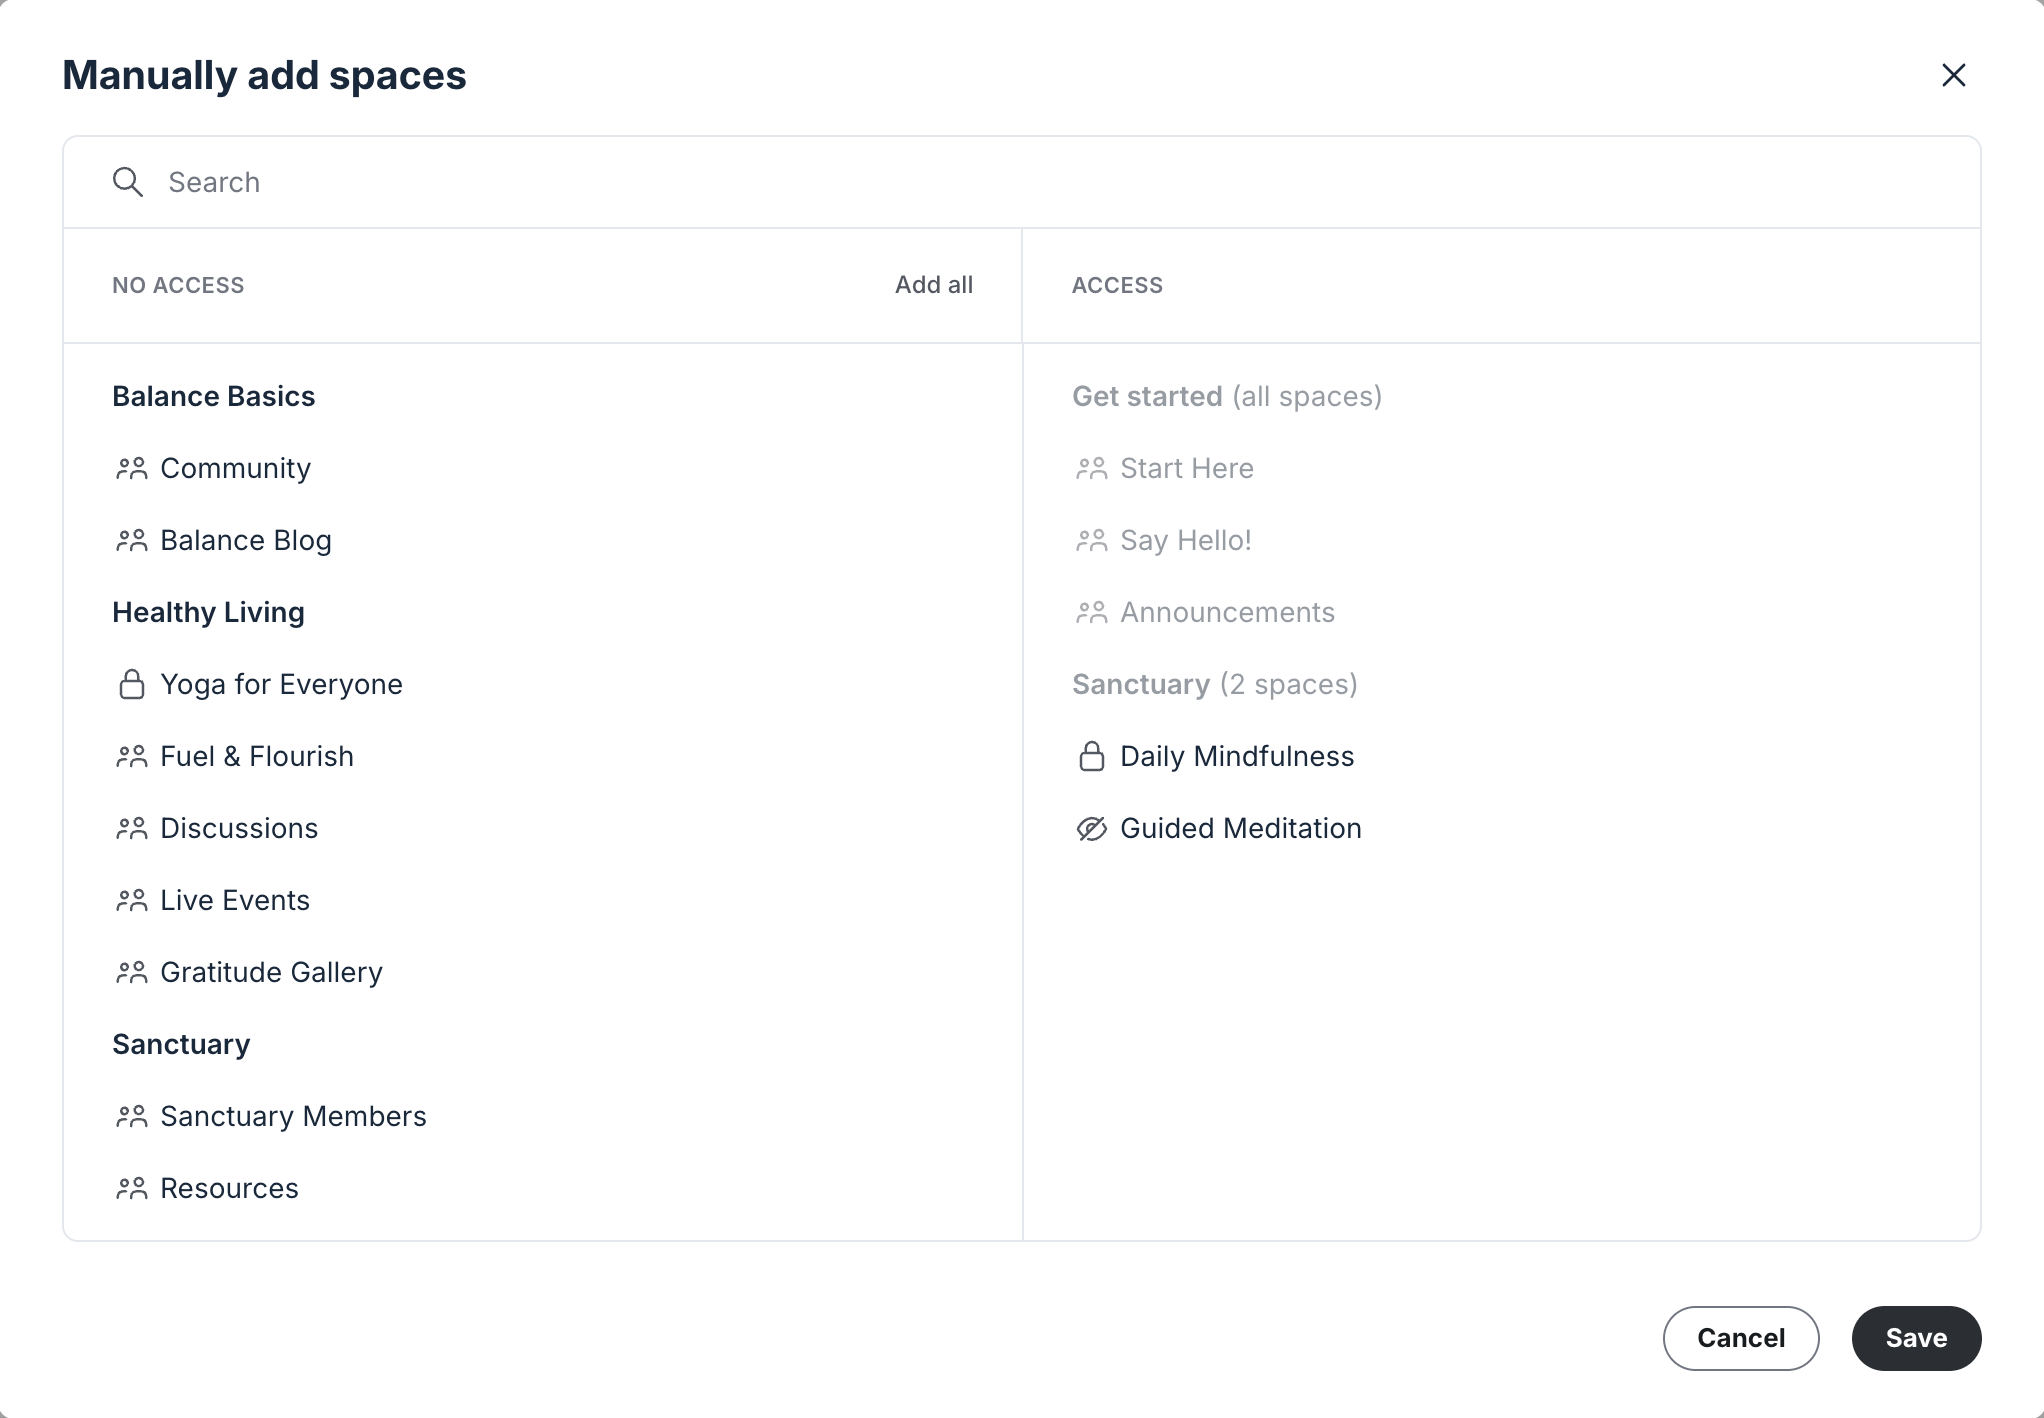
The access form allows you to add or remove spaces and space groups and consists of two columns:
-
Access column: Lists all spaces and space groups the member currently has access to. This includes spaces granted manually and those assigned through access groups.
❗Important: Please note that spaces granted through access groups cannot be removed from this form. These spaces will appear greyed out and, when hovered over, will display a message indicating that access is managed by an access group.
If you would like to remove member’s access from an individual space, that is part of the access they received through their access group, you can do so by navigating to that space directly and removing the member or using bulk action workflows to run space removal action for the member.
No access column: Displays spaces and space groups the member does not currently have access to.
Each space within the form is represented by an icon indicating its access type:
👥 People icon – Open space.
🔒 Lock icon – Private space.
👁️ Crossed-eye icon – Secret space.
Grant access
In the No access column, hover over the name of the space group or space and click Add to move it to the Access column.
(Optional) If you wish to provide access to all current spaces in your community, click Add all located next to the No access column header.
-
ℹ️ Notes:
If you select a space group with a setting (Automatically add members to new spaces within group) that add members to new spaces, it will also apply when you add the space group.
When you manually grant access to spaces and space groups, please note that members will receive invite-type access. This means they will have forever free access until they leave or are removed from the spaces and space groups.
Remove access
In the Access column, hover over the space or space group and click Remove.
(Optional) If you wish to remove access to all current spaces in your community, click Remove all next to the Access column header.
ℹ️ Note: You can only remove spaces or space groups that were manually granted. Spaces assigned through access groups cannot be removed individually from this form.
Once you have reviewed the changes, click Save.