Understanding the geo-coded location field
Last updated: September, 2026
Geolocations make it easier to connect and engage with community members and non-members based on their location.
About geo-coded location
Geolocation is a powerful feature that enhances the default location field in profiles with precise, real-world geographic data. It also enables advanced filtering across various community areas, including the member directory, audience management, workflows, and email broadcasts.
When a member sets their location, the system records it at multiple levels of geographic precision. For instance, a member in Brooklyn will be discoverable in the location filter searches for Brooklyn, New York, or the United States.
Availability
We support the geo-coded location field on all Circle community plans.
For existing communities, we’ve upgraded the default location field from freeform text to a structured, geo-coded format. We’ve also retroactively populated location data for existing member profiles where possible. To learn how this change may affect your current members, see the FAQ section in the article below.
If you're on the Professional plan with the Custom profile fields add-on or the Business plan or higher, you can further customize the location field and its visibility settings.
How members set their location
Members can easily provide or update their location within their community account, depending on the visibility you have set for the location field. Here’s how it works:
During sign up: New members can add their location while completing their profile.
Via profile page: Members can update their location anytime by visiting the Edit profile page in their account.
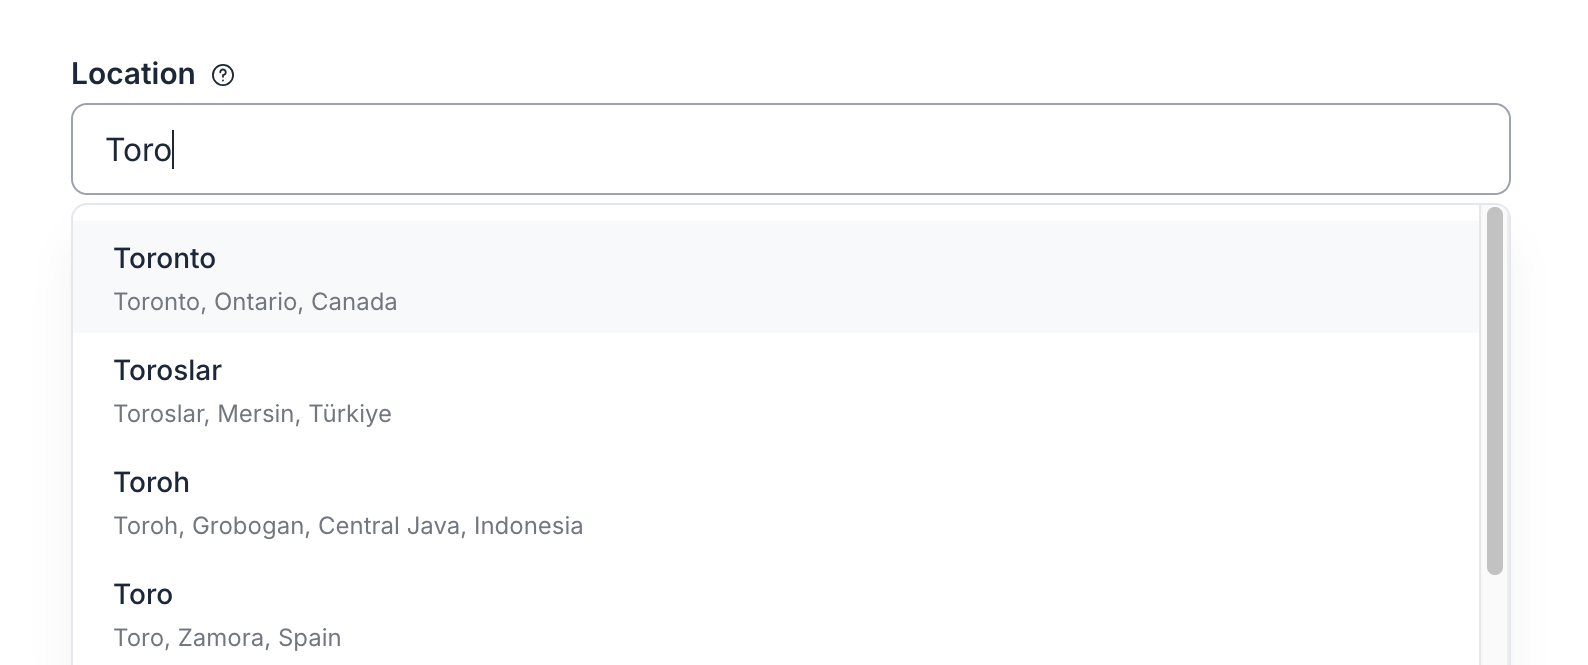
As members begin typing their location, a dropdown list of relevant location suggestions will automatically appear, making it simple to select the correct place (e.g., typing “Toro” might suggest “Toronto, Ontario, Canada”).
Using the location field
Geo-coded location unlocks a variety of ways to enhance community engagement and management. Here’s how you, as an admin, and your members can make the most of it:
Member directory: Members can filter the directory to find people by location, such as a city or country. The Near me filter allows members to discover others in their immediate area, based on the location set in their profile.
Member spaces: Members can use the location field to filter member spaces by location, fostering local connections. Member spaces also allow members to utilize the Near me filter to find others in the same location.
Manage audience: Use the location filter on the Manage audience page to filter members and non-members. You can also combine the location filter with other criteria (e.g., membership status or interests) to create precise audience segments for targeted campaigns or actions.
Workflows: You can utilize the location audience filter in the bulk action and scheduled workflows to perform actions based on locations.
Email broadcasts: Send targeted marketing emails to specific geographic audiences. For instance, promote a local event to members in "Chicago" or share region-specific updates to members in "United States.”
Search for members using a location radius
When you enter a city in the location filter, you can set a radius to define how far from that city members can be and still appear in your results.
Location radius search is available anywhere you can filter by location, including:
Audience management page
Member directory
Connections page
Workflows (audience rules and filters)
Broadcast (recipient custom filters)
To search for members within a radius:
-
Select the Location filter and enter a city.
-
Drag the slider to set the radius.💡 Tip: To change the unit of measurement click the dropdown beside the distance and select Kilometres or Miles.
Click Done.
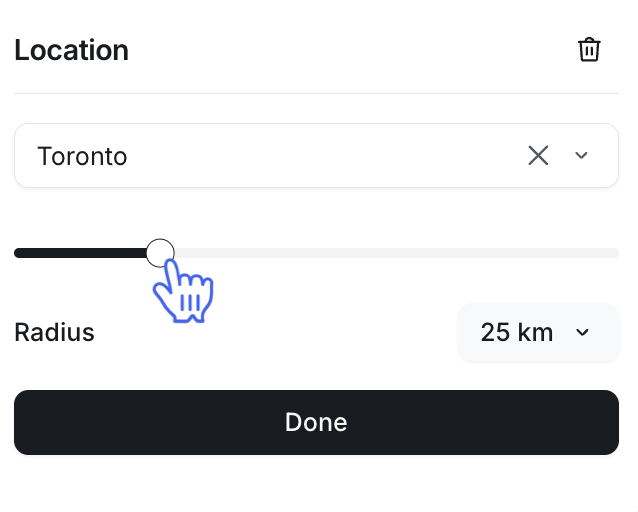
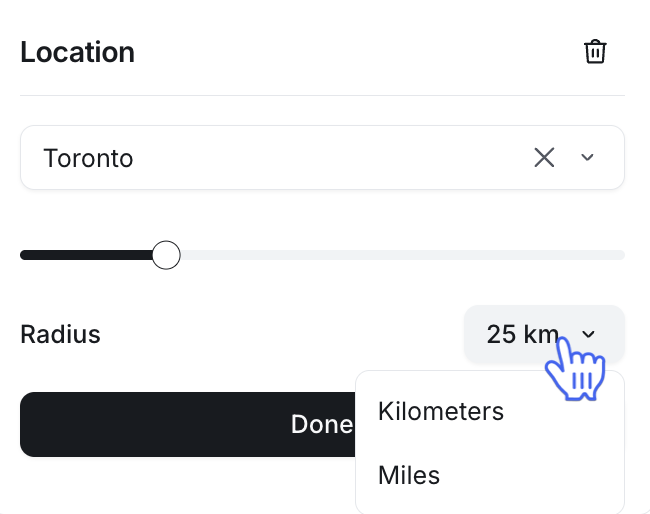
The member list will refresh and show members within the set distance.
Frequently asked questions
What happens to existing location data within my community?
We have backfilled the majority of previously entered locations with accurate geolocation data, provided the system could detect a valid location. Affected members will see a banner notice on the Edit profile page reflecting this update.
Members who did not previously provide a location or entered invalid data will be prompted to add their location when using the Edit profile page or the Near me filter in the member directory.
Can I remove the location field from my community?
The location field is a system field and cannot be permanently removed. However, you can change its visibility or restrict it to admins only.
To modify the location field:
Click Audience in the left sidebar, then select Profile fields.
Click Manage in the top-right corner.
Navigate to the tab you wish to remove the location field from and find the location field.
-
Click the location field name to open the setup. From the location field setup, you can:
Adjust visibility settings: Control where members can edit the location field (sign up form and/or edit profile form) and whether it appears on their profiles.
Mark it as internal: Enable the Internal field toggle to restrict the location field to admins only. As a result, this field will be hidden from the members, and they won’t be able to edit or manage it. Only admins can view and update the location field for members and use it in various community areas.
Click Save changes.
ℹ️ Note: If you want to keep the location field short and text-based, you can create a new custom field separate from the system location field.
Can I use the location field for non-members?
Yes, the location field can be used for non-members, just like any other profile field. However, since non-members cannot edit their profiles in the audience CRM, admins must manage their location data.
Can I add or update location fields for members and non-members?
Yes. As an admin, you can update the geo-coded location field for both members and non-members directly in the community.
You can do so individually by updating their profile:
Click Audience in the left sidebar, then select Audience.
Find the member or non-member you want to edit, then click their name in the list.
On the Info tab, go to the Profile fields section and update the Location field.
Click Save in the top-right corner.
❗ Important: If you import non-member contacts or members with location data in your import file, that data will be saved as plain text in their profile; it won’t automatically be geo-coded at the moment. To use the geo-coded version of the location field, you’ll need to manually edit each profile in the community.