Integrate Circle with Teachable SSO
Circle supports single sign-on (SSO), and now you can now integrate Circle with Teachable, making it a seamless experience for your Teachable students to log in to your community!
These members won't have to sign up or log in with their Circle account — instead, they'll use Teachable credentials and access Circle from your log-in page.
If you already have members with Circle accounts, we'll automatically link their Teachable credentials to their existing profiles when they sign in via SSO.
🚨 If you plan to use a custom domain, set that up first as this will change your Callback URL. Not doing this first can potentially lead to being locked out of your account.
🚨 We recommend keeping the Allow members with a Circle account to sign in toggle enabled to avoid getting locked out of your account while setting up your SSO integration. In the case this happens, you can easily sign in again with your Circle credentials.
Step 1: Set up Circle integration in Teachable
Within Teachable, navigate to Settings → Integrations → Circle, where you'll then be presented with a field asking for the Callback URL.
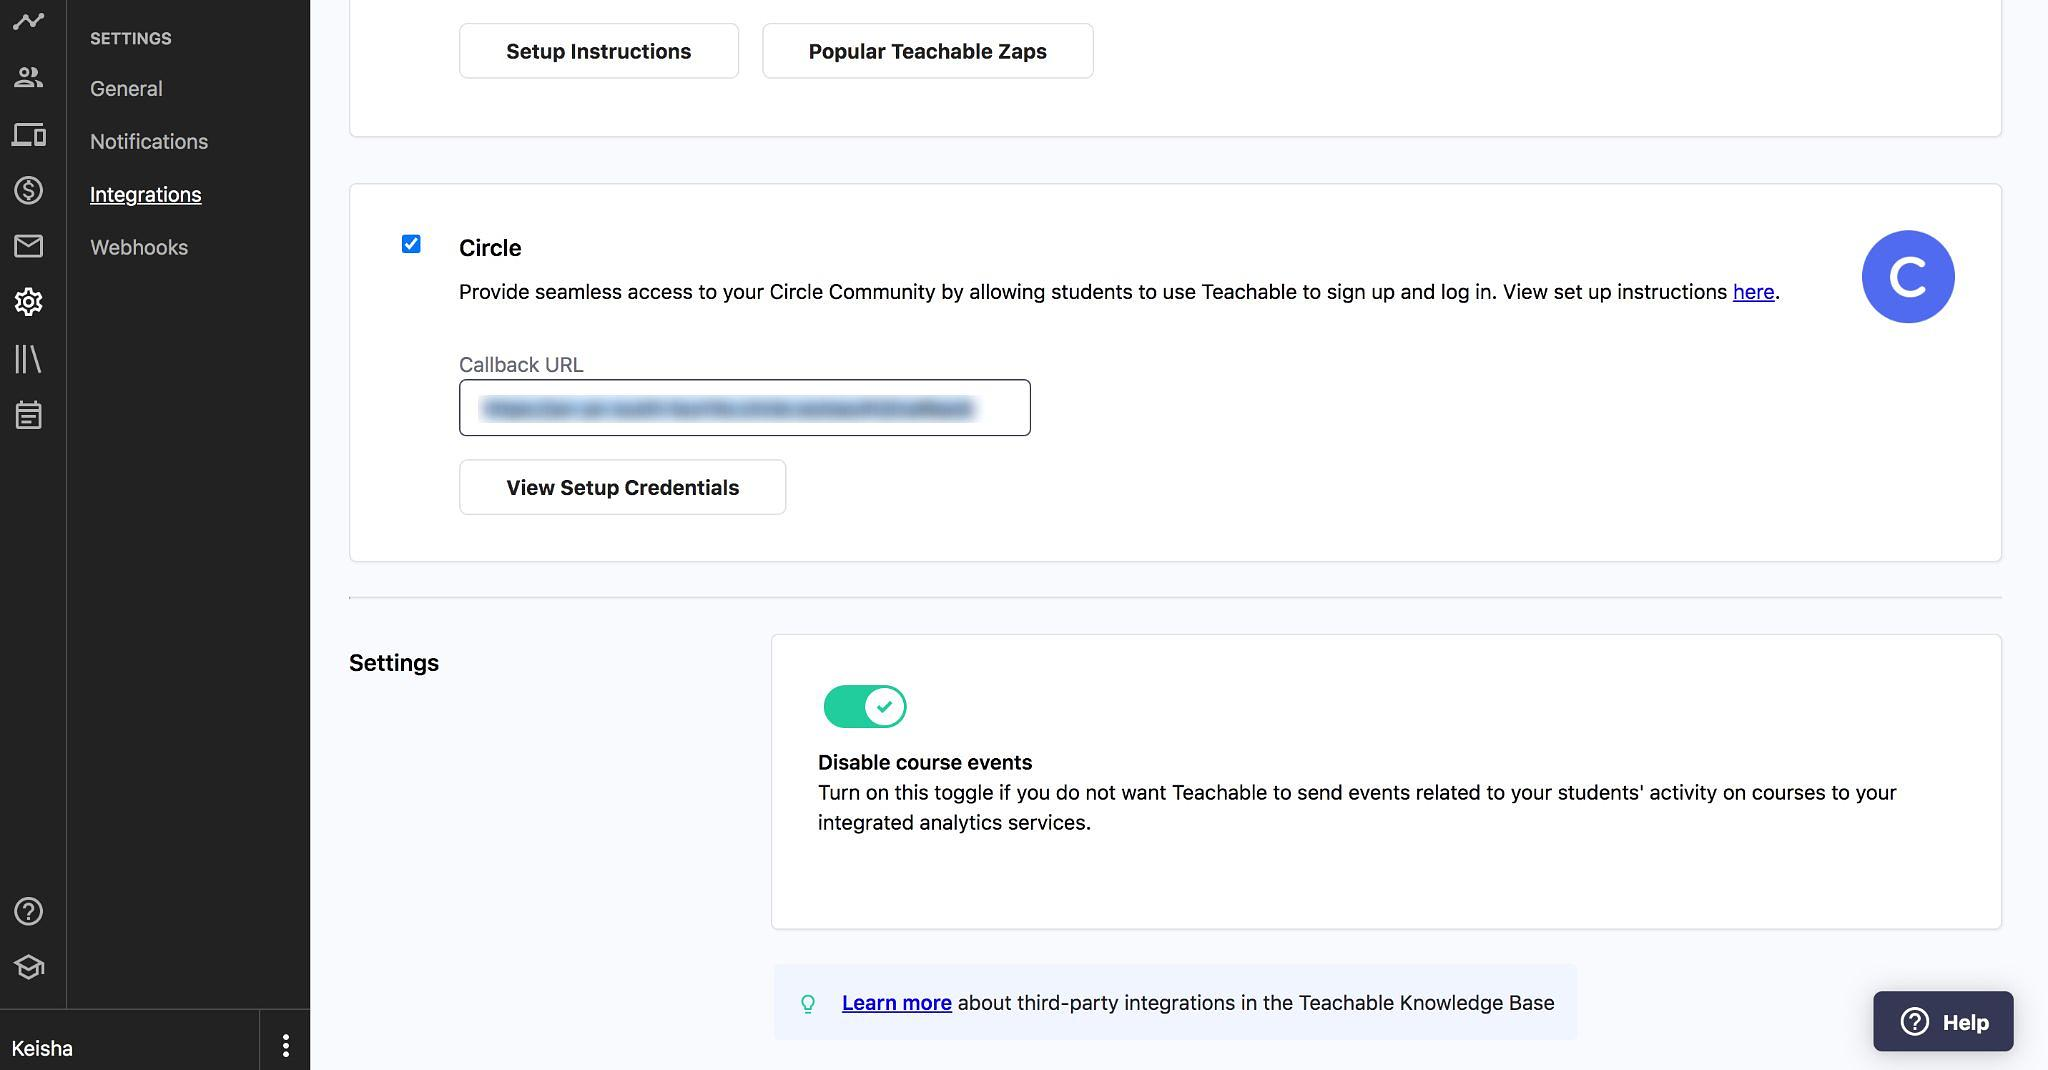
Navigate back to Circle to locate your Callback URL. To navigate to the SSO settings page:
Click the community name or logo (or the dropdown icon next to it) in the top-left corner and select Settings.
Scroll down to the Community section and select Single sign-on.
You'll then be provided with your setup credentials containing the Client ID, Secret Key, and Teachable URL.
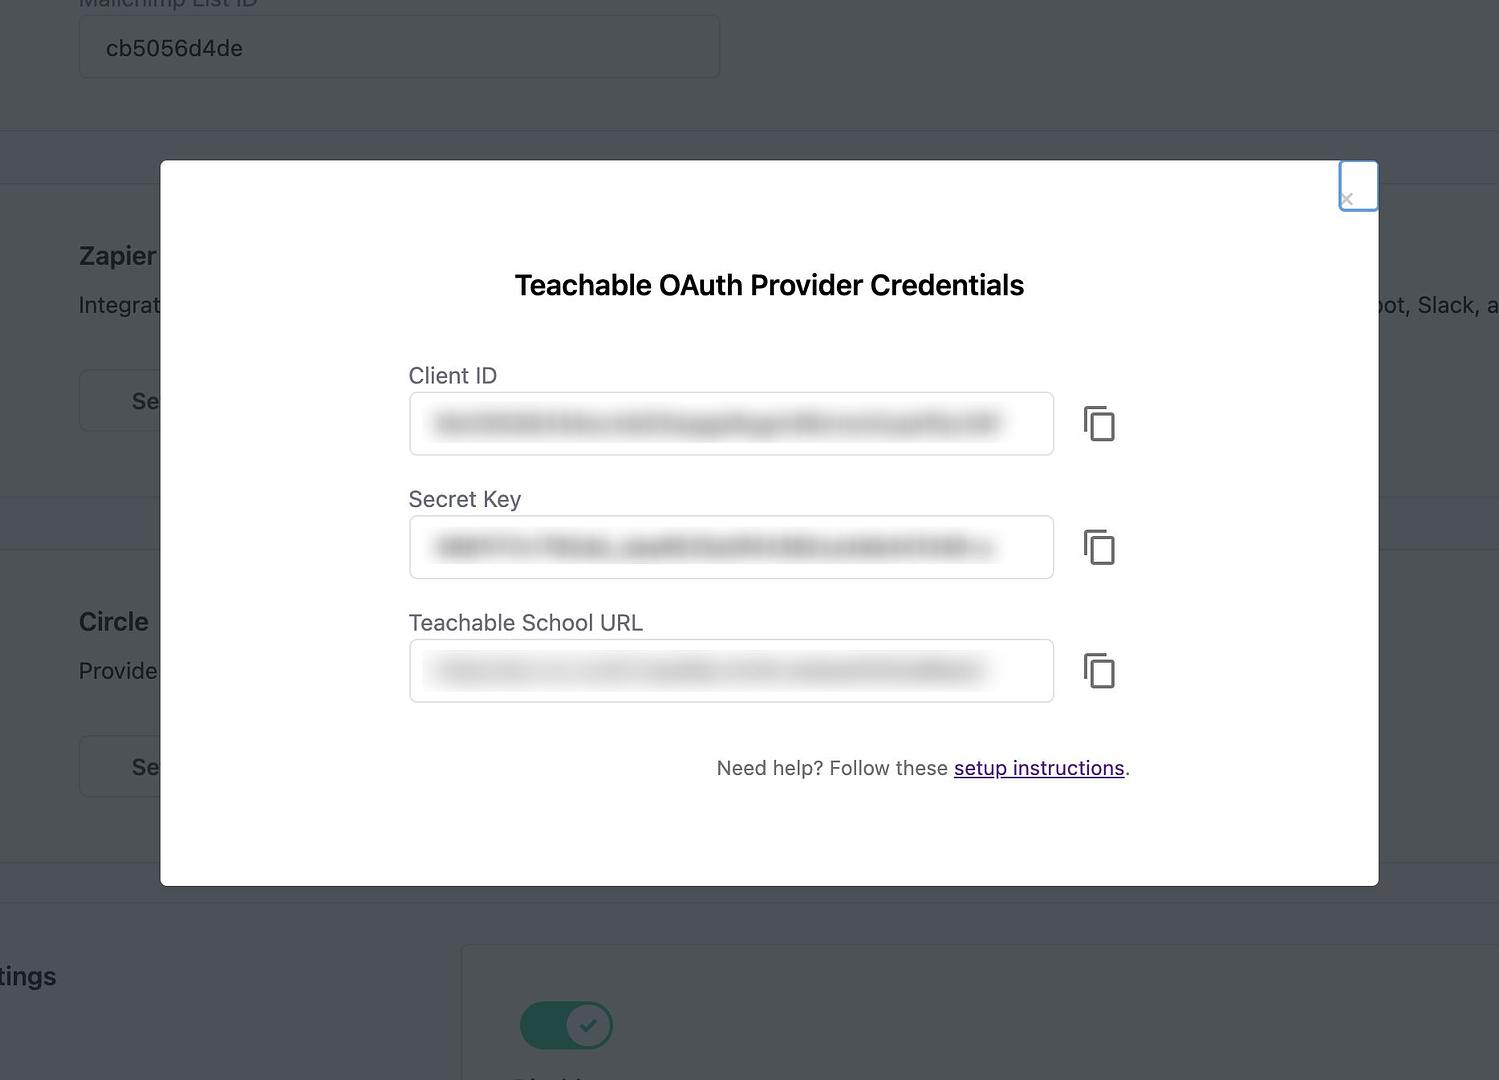
Step 2: Copy over Teachable SSO information to Circle
Navigate back to the SSO settings page and select Teachable as the OAuth provider. Enter your provider name, then paste the Client ID, Secret Key, and Teachable URL.
💡 Your Teachable URL can be your Teachable domain (https://YOUR_SCHOOL_URL.teacahble.com) or the custom domain used for your Teachable course. If you change this domain at any time, you'll want to update this in Circle first.
Once you are done, click Save changes.
Step 3: Enable SSO with Teachable
On the settings page, set up these basic settings as per your preference:
Allow members with a Circle account to sign in: If you have members that have already registered their email with Circle, they can still sign in with those credentials using a separate sign-in button.
💡 What happens to Circle member accounts?If this is toggled ON, Circle members can continue to login using the Sign in with Circle button. We will create accounts for Teachable members automatically on our backend if the email doesn't exist within Circle.
If this is toggled OFF, members with Circle accounts will no longer be able to sign in with those credentials unless the email of their Circle account matches the email of their Teachable account, in which case we'll link the two automatically going forward.
💡 What happens to my admin account?If the email you use to log in to Teachable is different from Circle, we recommend toggling this ON to ensure you don't get locked out of your admin account. Once you grant admin rights to both accounts you can always toggle this off later.
If this is toggled OFF, you will only be able to log in under your email that is registered within Teachable.
Allow members to sign up via a custom URL: After enabling SSO, members won't be able to sign up via Circle. However, you can keep the signup button visible and point it to a custom URL.
Skip profile confirmation step: If enabled, members with a preset name will not need to confirm their profile information when they sign in via SSO for the first time.
Enable state param: Enabling the state parameter enhances security by storing information in the session, adding it to the authorization URL, and verifying that the OAuth provider sends back the correct state parameter in the callback.
Once you've saved your settings, turn on the Enable SSO toggle within Circle and click Save changes.
🏁 If the setup was successful, you will now see the Login via Teachable single sign-on option when trying to sign in under your community!
Verify SSO connection
Once you have enabled SSO for your community, you can also verify the SSO connection at any time using our verification feature! To do this, click Verify SSO connection on the header of the SSO settings page and log in through your SSO provider.

The tool will then verify your connection and provide logs for each verification step.
📚 For more information, see Verify your SSO connection.