Create AI Agents
Last updated: September, 2026
Create AI Agents that harness your knowledge engine to answer questions, spark conversations, and coach members around the clock.
Getting started
You can create up to 10 agents per community, each with a unique purpose, assigned knowledge, name, and personality to suit your needs.
To start creating an AI Agent:
Click Agents in the left sidebar, then select Agents.
Click New agent on the top right.
An AI Agent will be created and assigned a default name, such as [Your Community Name] Agent.
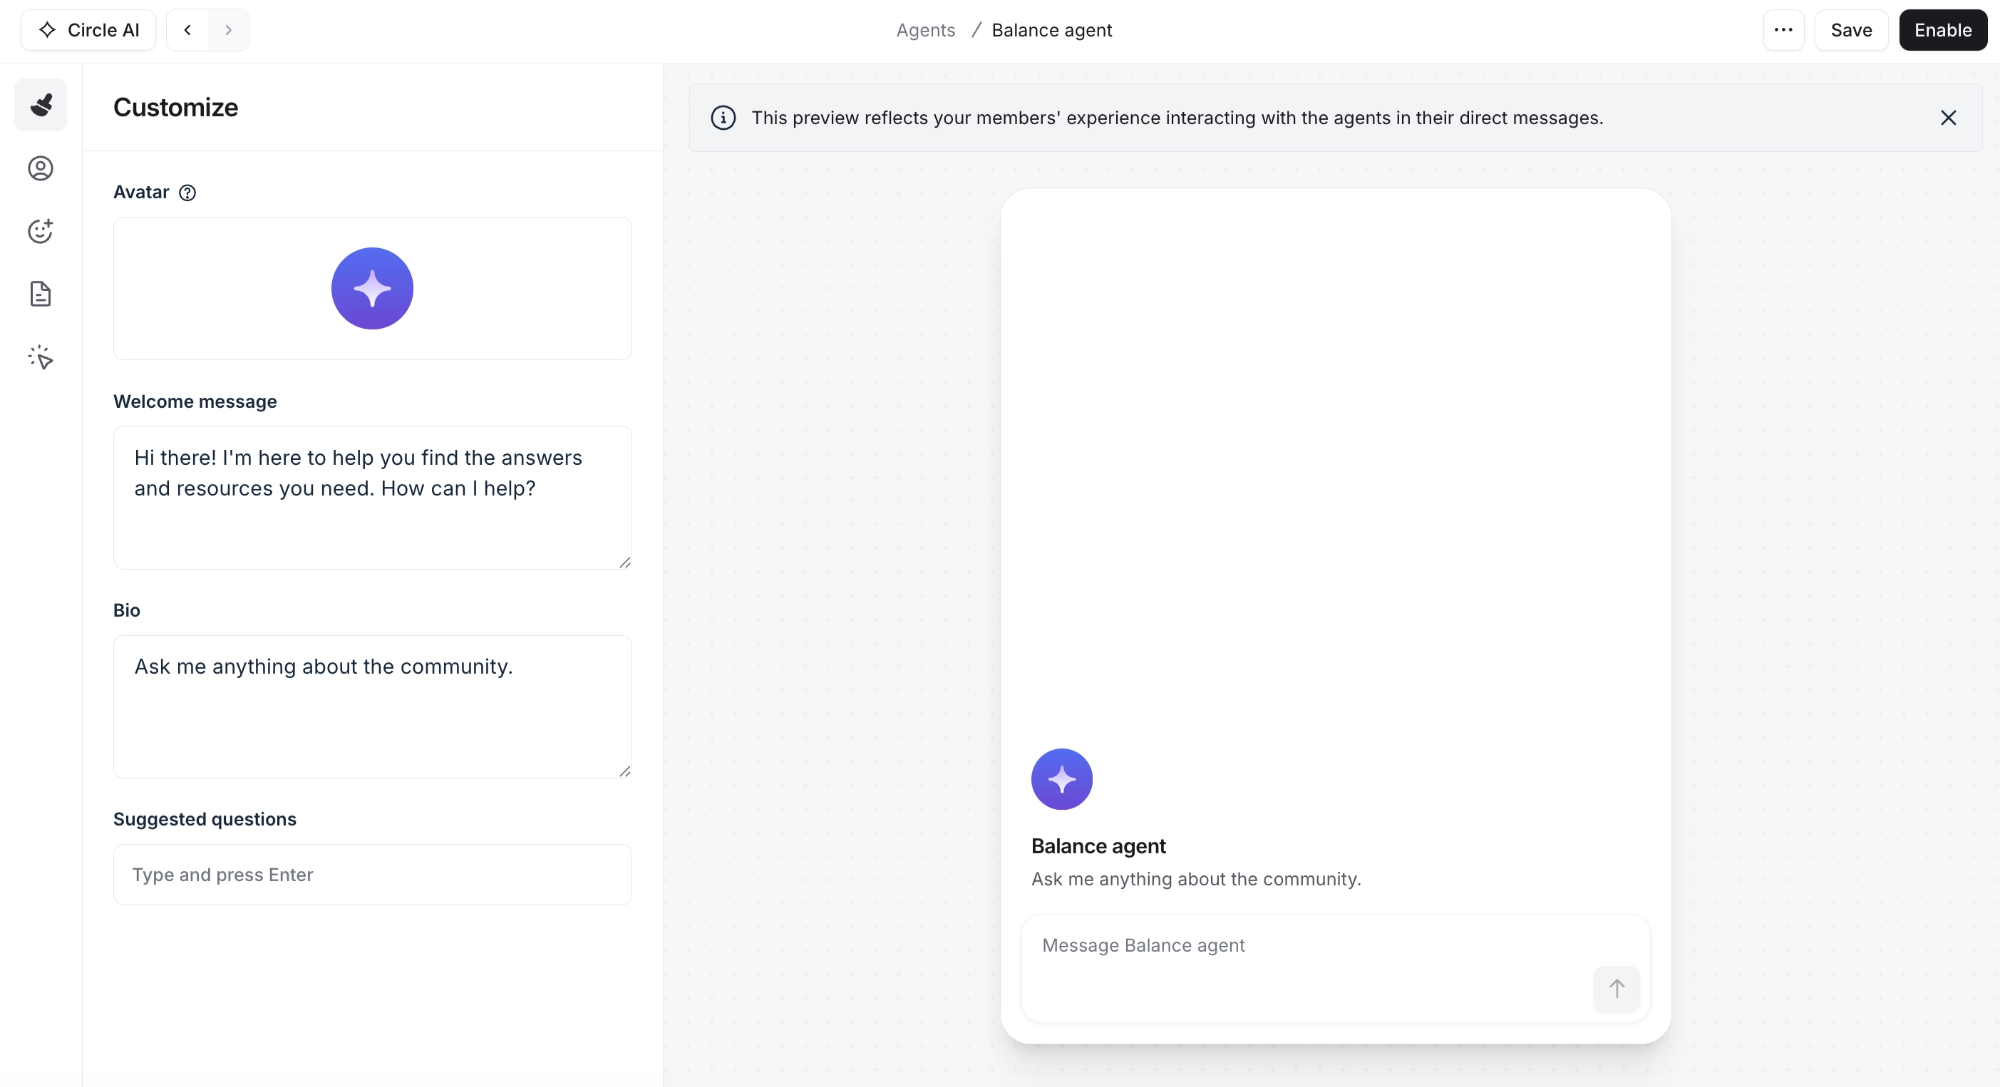
The editor interface is divided into two parts:
Left sidebar: Tabs for configuring settings like audience, behavior, and knowledge.
-
Right preview pane: This is a live preview of your agent’s appearance. You can chat with the agent to test its responses without leaving the builder.
You can send test messages here to see how it behaves. If you want to test it thoroughly, including pause AI, we suggest using it with a limited audience (e.g., only you or admins) before adding everyone to the audience.
💡 Tip: Click Save in the top right corner to avoid losing your progress, especially if you’re stepping away and plan to finish later.
Renaming the agent
A clear, descriptive name helps community members instantly understand your agent’s purpose.
To rename it, click More actions (three dots) in the top-right corner of the editor and click Rename, then enter your preferred name.
Customizing your agent
Personalize your agent to make it welcoming and aligned with your community’s vibe. Configure the following options in the Customize tab:
Avatar
You can upload an image to represent your agent (recommended size: 120x120 pixels). A friendly, recognizable avatar makes your agent more approachable.
When you create an agent, a default avatar is added. To replace it, click the current avatar and select an image from your device.
Welcome message
Write a welcome message that the agent can send to audience members, if you choose to, from the Audience tab.
This sets a welcoming tone and encourages engagement. See the Audience section for details on sending this message.
Bio
Add a brief description for the agent’s profile, like “Your friendly guide to the Balance community.” Keep it concise yet clear so members can tell what the agent does at a glance. You can enter up to 500 characters.
To format the text, highlight it and use the formatting toolbar that appears. You can apply bold, italic, underline, strikethrough, or add a link to your text. To access more options like emojis or lists, type a forward-slash (/) anywhere in the field.
Suggested questions
Suggested questions are a powerful way to kickstart interactions between your members and AI Agents, making it easy for members to dive into conversations and explore the agent’s capabilities.
You can add up to five concise and relevant questions by typing each question in the field and pressing Enter to add it.
Your suggested questions are prominently displayed in two key areas:
Chat interface: When a member starts a new conversation with the AI Agent, the questions appear as clickable prompts to spark instant engagement.
Agent profile: Members can view the questions on the AI Agent’s profile page and select one to ask it within the conversation.
Defining the audience
In the Audience tab, decide who can interact with your agent, its availability, and whether to send them a welcome message.
Touchpoints
In the Touchpoints section, you control whether your selected audience can communicate with agents via direct messages.
❗ Important: For Circle workflows, all enabled agents are available for setting up various AI actions. AI actions are performed for members who enter the workflow based on triggers. The audience you have chosen in the Targeting section of the agent builder won’t be applicable in workflows.
To allow interaction with agents, enable the Talk to agents in direct messages toggle. When this toggle is enabled, you can configure the following options:
Start new conversations with agents from search: Turn this toggle on to allow the eligible audience to start a conversation with the agent from search. When the member enters their keyword in the search, the agent will appear in the results. They can select the agent to start a conversation.
Send a welcome message: To send a welcome message to every eligible audience member, enable this toggle. For more information, see the section below.
About the welcome message
You can set your agent to automatically send the welcome message you created in the Customize tab to eligible members. This is a great way to introduce your agent and invite people to start chatting.
Here are key things to know about the welcome message:
-
Activating the welcome message
First time setup: When you enable your AI Agent and check the Send a welcome message option, the agent will start to automatically send the message to all eligible members. It may take a few hours for everyone to receive it as the system processes the audience gradually.
Activating the welcome message later: If your AI Agent is already active and you later enable the welcome message, it will only be sent to members who haven’t yet interacted with the agent. You can expect a short delay (up to a few hours) as the system rolls out the message.
-
Handling new or updated audience members:
If you modify the audience (e.g., by adding or removing filters) or new members become eligible (e.g., by receiving a specific tag), the welcome message won’t be sent immediately. The system automatically checks for newly eligible members several times a day, so it may take a few hours for them to receive the message.
-
Notifications: Currently, members won’t get a notification or see an unread message indicator when they receive the welcome message.
When members click the Direct messages icon in their account, it will simply appear under the Inbox and Agents tab.
Choose the eligible audience
In the Targeting section, you can use filters to select the eligible audience that can interact with the agent in the community via direct messages.
By default, when you create a new agent, no audience filters are applied, so all members, including admins, will be part of the audience.
If you want only certain people in your community to access the agent, you can add one or more filters:
-
Click Filter.
To define eligible members, select one of the available filters, such as tags, segments, role, or profile fields.
Enter the criteria and apply the filter.
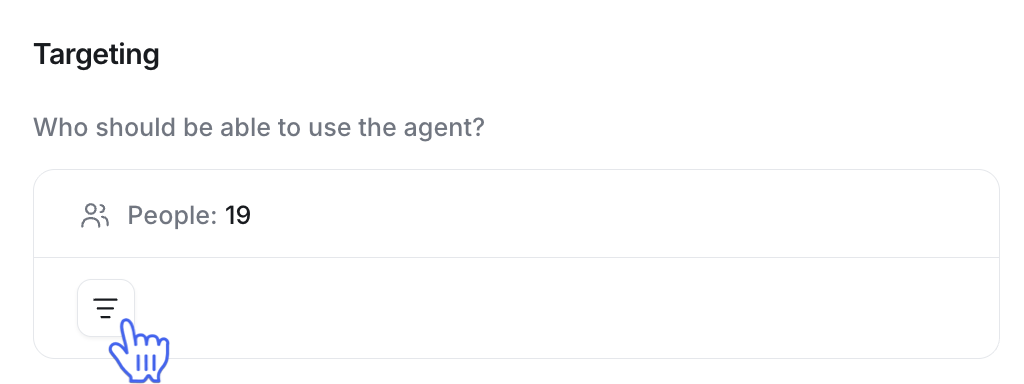
Once applied, you’ll see the updated number of people in the audience above the filters.
ℹ️ Note: While admins can see all agents within the AI Agents builder and AI Inbox. But if they aren’t part of the audience you defined, they won’t see or interact with the agent in direct messages or through search.
Setting up agent behavior
The Behavior tab is where you define how your agent interacts with members. This includes its instructions, communication style, and Pause AI settings.
Instructions (one of the most important settings)
Agent instructions are the cornerstone of your AI Agent’s behavior, shaping its role, tone, and approach to interactions.
With up to 1,500 characters, craft a clear, detailed statement to guide how the agent responds to members. A well-defined agent purpose ensures your AI Agent provides relevant, on-brand answers powered by the knowledge engine. Consider these key aspects when writing the instructions:
Role: Define the agent’s core function and its relationship to members (e.g., guide, coach). Specify tasks to align with your goal and community needs.
Response style: Specify tone, voice, or methods to match community culture. Clarify how the agent engages in conversations.
-
Boundaries: List topics or actions to avoid for safety and relevance.
💡 Tip: We also recommend adding keywords related to sensitive topics or conversations that you don’t want members to have with agents to the Pause AI settings.
Language: Define language, terms, or phrasing to ensure accessibility and reflect community identity. You can even specify the language it should respond in.
💡 Tip: Test the instructions across diverse queries to ensure it guides the agent effectively while aligning with community goals. You can also review the agent’s conversations within AI Inbox and adjust the instructions accordingly over time to make it most effective.
Style
Currently, agents use AI-generated responses by default, but you can choose how they sound under How should the agent sound? section:
Normal: Casual and objective.
Friendly: Enthusiastic, upbeat, and encouraging.
Short and sweet: Concise, direct, and frank.
Descriptive: Thorough, professional, and informative.
Pause AI settings
The Pause AI feature empowers you to maintain control over your AI Agent’s interactions by pausing its responses when specific keywords are used and sending a custom handoff message instead. This is great for:
Sensitive topics: Pause the agent for discussions requiring human empathy or discretion, such as complaints or personal issues.
Complex support needs: Redirect conversations that demand specialized assistance beyond the agent’s capabilities, like technical troubleshooting.
To set it up:
In the Pause AI keywords field, enter a keyword that triggers the pause (e.g., “support,” “complaint,” or “urgent”) and press Enter. You can add multiple keywords in this field.
Write a friendly handoff message, such as: “I’ve paused to connect you with an admin who can assist further. We’ll be with you soon!”
When a member uses the keyword, the agent sends the handoff message and pauses its responses. Admins can then take over the conversation directly from the AI Inbox. Once you have helped the member, you can resume the agent later if needed.
Pause AI notifications
You can enable in-app notifications for specific admins to receive timely alerts when an agent is paused due to a Pause AI keyword. This allows you to ensure that designated admins from your team are promptly informed whenever AI responses are halted automatically.
To do so:
Toggle on the Send notification when AI is paused.
-
In the admin selection field, type the name of the admin who should receive these alerts and choose them from the dropdown list.
Repeat the second step to add multiple admins, if needed.
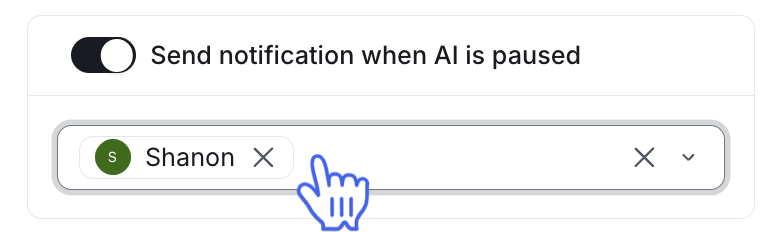
Once enabled, selected admins will receive an in-app notification in their community account whenever AI is paused. Clicking the notification takes them directly to the conversation in the AI Inbox, so they can take over and assist the member promptly.
Importing knowledge
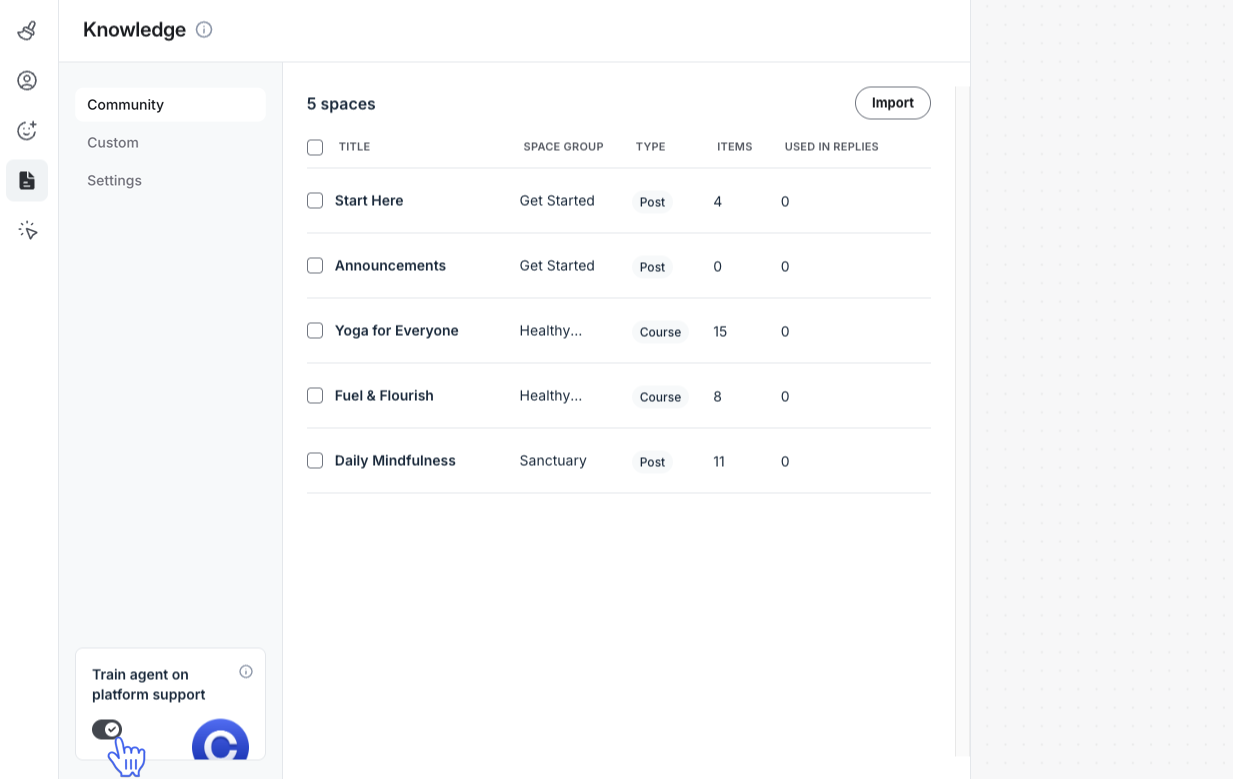
The Knowledge tab lets you choose what information your agent uses from the knowledge engine to answer questions. You’ll see two options: Community and Custom.
Import progress indicators
When you import large files, snippets, and spaces from the knowledge engine, visual indicators will appear if the content is queued and still being processed. These indicators help you monitor progress in two key areas:
A progress indicator appears next to each item’s title (e.g., file, snippet, or space).
A global progress indicator is also displayed at the top right of the builder.
This makes it easier to track large imports and know exactly when your AI Agent is ready to use the information. Once the content has finished syncing, the progress indicators will disappear, and your agent will be equipped with the imported knowledge.
Community knowledge
To let your agent pull information from your community spaces:
Go to the Community tab and click Add knowledge.
-
In the Community resources dialog, check the box next to each space you want to include.
At the top of the import window, you can utilize the Name, Type (space type), and Space group filters to refine the community resource list.
Click Import.
You can add more spaces later by returning to this tab and clicking Import in the top right corner. Similarly, if you want to remove a resource from an agent's knowledge, hover over the resource, click More actions (three dots icon), and select Remove.
Custom knowledge
To use custom content from your knowledge engine:
Go to the Custom tab and click Add knowledge.
-
In the Custom resources dialog, check the box next to the resources you want to include.
At the top of the import window, you can utilize the Name and Type (Snippet or file types) filters to refine the resource list.
Click Import.
Like with community knowledge, you can import additional custom resources or remove them from the AI Agent’s knowledge anytime.
Platform support
In addition to the knowledge you import, want your agent to answer questions about using Circle?
Turn on the Train agent on platform support toggle located at the bottom left corner of the sidebar.
This allows the agent to pull information from the Members section of our Help Center.
Configure knowledge settings
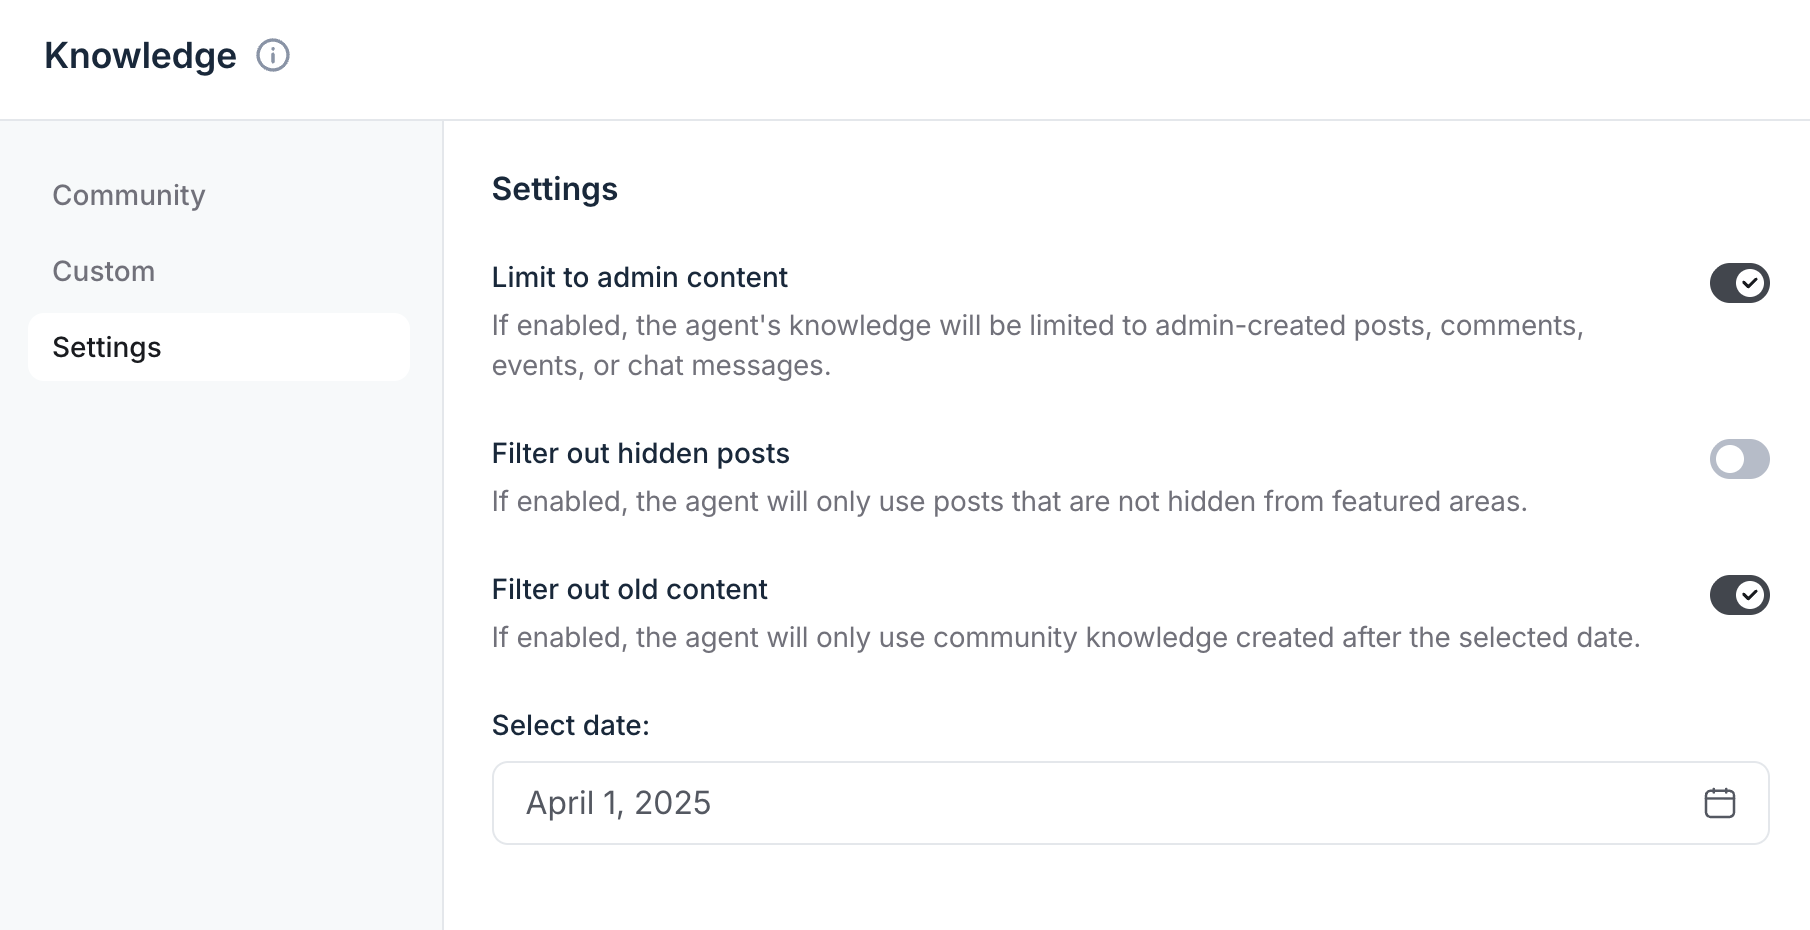
The Settings tab lets you control what content your AI Agent uses from the community knowledge when answering questions. These settings apply to the community knowledge sources you’ve already selected for the agent, giving you more control.
You have the following options:
Limit to admin content: Enable this toggle to allow the agent to use only content created by the admin within the community. Member-created content will be excluded. This is helpful when you want the agent to stick to approved or official sources.
Filter out hidden posts: Turn this on to prevent the agent from using information from posts hidden from featured areas. Posts hidden from featured areas aren’t visible in the feed and weekly digests. This allows you to exclude off-topic posts or those with unwanted content from the agent’s knowledge.
Filter out old content: Switch this on to set a cutoff date. The agent will only use community knowledge created on or after that date. This helps keep answers fresh and avoids outdated guidance, especially useful if your community updates resources frequently.
Enabling your agent
Once you have reviewed the setup, click Enable at the top right to make it live for eligible audience members.
💡 Tip: If you do not want to enable the AI Agent yet, you can simply click Save at the top right of the editor and exit the page. You can return to the AI Agents page later and enable it whenever you are ready.
Your agent is now ready to interact with members, answer questions, and scale your presence!
Workflows
When you create an agent, the Workflows tab also appears in the agent builder's sidebar.
After the agent is enabled, you can create new workflows right from this tab. If the workflow includes any AI actions assigned to this agent, you will be able to view and manage those workflows from this tab as well.
📚 To learn more about AI workflows, see Getting started with AI workflows.